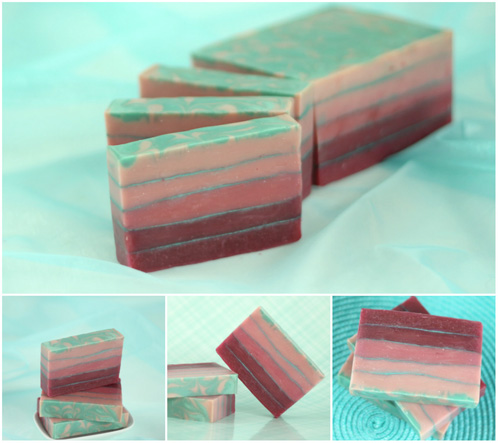
Celebrate the new year with a little berry bubbly — but not the kind served in a champagne glass! This ombre-inspired soap features a fabulous fragrance blend of Blackberry Cybilla and Champagne Fragrance Oil, which proved to be a sweet and invigorating combo. We used varying amounts of Red Lab Color for each layer separated by lines of one of my favorite micas, Aqua Pearl.

What you’ll need:
7 oz. Canola Oil
7 oz. Coconut oil
10.5 oz. Olive Oil
7 oz. Palm Oil
3.4 oz. Hazelnut Oil
4.8 oz. Sodium Hydroxide
11.5 oz. distilled water
Fragrance Oil Blend of: 1.5 oz. Blackberry Cybilla and .6 oz. Champagne Fragrance Oil
Optional: 5 Easy Pour Mixing containers and droppers
Click here to add everything you need for this project to your Bramble Berry shopping cart!
If you’ve never made Cold Process soap before, stop here! I highly recommend checking out our FREE four part SoapQueen.tv series on Cold Process Soapmaking, especially the episode on lye safety. And if you’d rather do some reading, Bramble Berry carries a wide range of books on the topic, including my newest book, Soap Crafting. You can also checkout the digital downloads for that instant gratification factor.
SAFETY FIRST: Suit up for safe handling practices! That means goggles, gloves and long sleeves. Make sure kids, pets, and other distractions and tripping hazards are out of the house or don’t have access to your soaping space. Always soap in a well-ventilated area.
COLOR PREP: To ensure that the Titanium Dioxide blends smoothly into the Lab Color, we recommend micronizing it before dispersing it in oil. To micronize colorant, simply use a coffee grinder to blend the colorant to break up any clumps of color and prevent streaks of white from showing in the final soap. We like to use a coffee grinder that has a removeable, stainless steel mixing area for easy cleaning. Then, disperse 2 teaspoons of the colorant into 2 tablespoon of Sunflower or Sweet Almond Oil (or any other liquid oil). Use a mini mixer to get clumps worked out smoothly. You’ll also need to dilute a small bottle of Red Lab Color in 8 oz. of water. If you have never diluted Lab Colors before, check out this blog post.
FRAGRANCE PREP: In a glass container, combine the Blackberry Cybilla and Champagne Fragrance Oils. Give the mixture a good stir, and then set it aside.
ONE: Slowly and carefully add the lye to the water and gently stir until the lye has fully dissolved and the liquid is clear. Set aside to cool.
TWO: Combine the Canola, Coconut, Olive, Hazelnut and Palm oils (remember to fully melt then mix your entire container of Palm Oil before portioning). Once the lye water and the oils have cooled to 130 degrees or below (and are ideally within 10 degrees of each other), add the lye water to the oils and stick blend until thin trace. If you’d like a harder bar of soap that releases faster from the mold, you can add Sodium Lactate to the cooled lye water. Use 1 teaspoon of Sodium Lactate per pound of oils in the recipe.
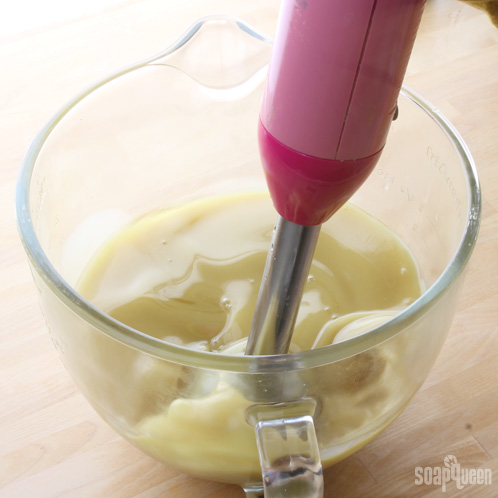
THREE: Measure 9 oz. of soap batter into the 5 additional containers. Leave the remaining 5 – 6 oz. of batter in the original container and set it aside until step 13.
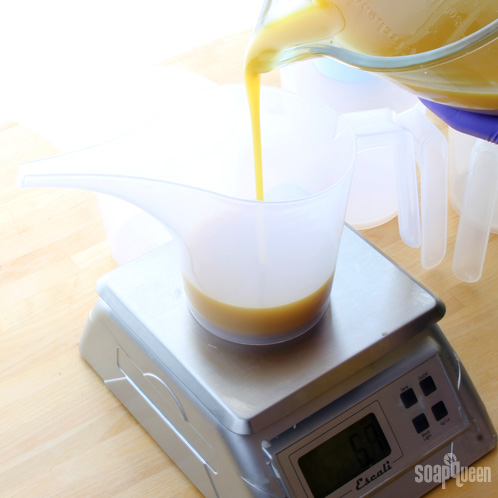
FOUR: The gradient will go from darkest to lightest, so begin by adding 15 mL of diluted Red Lab Color to one container of soap batter to form the first layer. Add roughly 1/5 of the fragrance oil blend and stir with a wire whisk or spatula. Once the colorant and fragrance have been fully incorporated into the batter, pour the soap into the mold. Tamp the mold on the table to disperse bubbles.
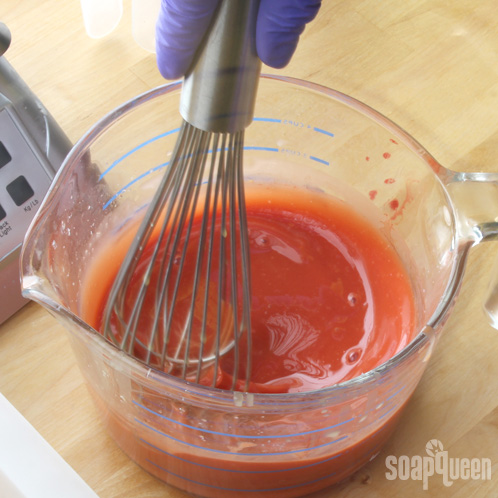
FIVE: To create the mica vein, use a powder duster to sprinkle a thin layer of Aqua Pearl Mica over the freshly poured red soap. Sprinkling too much mica can cause your layers to separate, so take extra care to achieve just a light dusting of mica. Then, still wearing your goggles, close your eyes and gently blow on the mica to lightly press it into the soap. Because mica is so fine, this part can get messy. Be sure to have paper towels and isopropyl alcohol on hand to clean up any mica that sticks to the mold or your work surface.
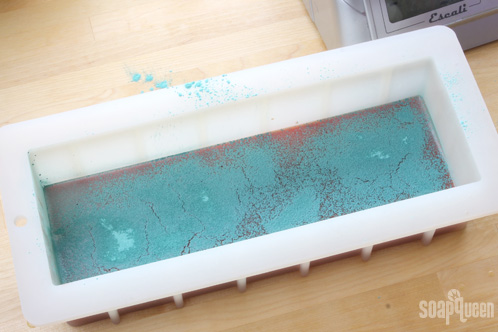
SIX: Add 9 mL of diluted Red Lab Color and roughly 1/5 of the fragrance blend to a second cup of soap batter. Blend and stir with a wire whisk or spatula. Once the colorant and fragrance have been fully incorporated into the batter, pour the soap over a spatula in the mold. Be particularly gentle when pouring this second layer of soap because you want to preserve the mica vein and (hopefully) not break through into the first layer.
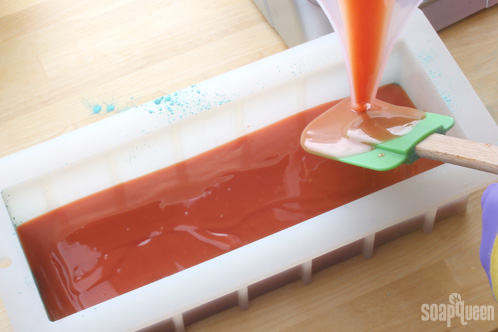
SEVEN: Use the powder duster to sprinkle a thin layer of Aqua Pearl Mica over the freshly poured soap.
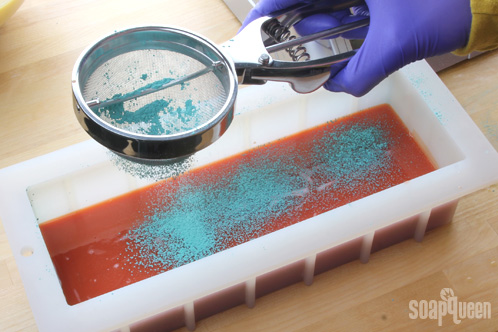
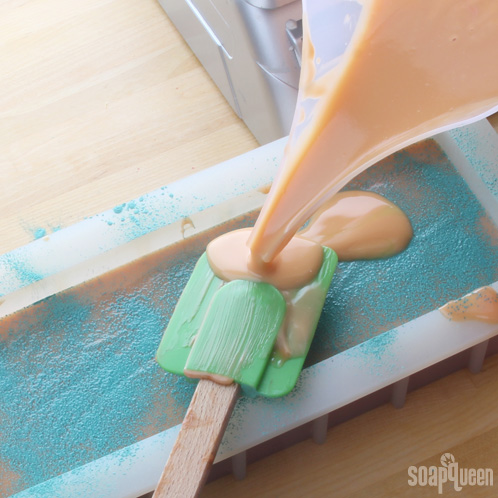
EIGHT: Add 6 mL of diluted Red Lab Color, 1 teaspoon of dispersed Titanium Dioxide and roughly 1/5 of the fragrance blend to a third cup of soap batter. Blend and stir with a wire whisk or spatula. Once the colorant and fragrance have been fully incorporated into the batter, pour the soap over a spatula into the mold.
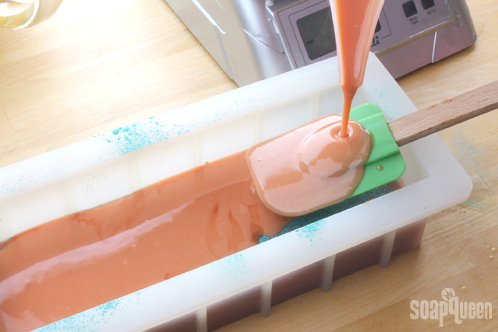
NINE: Use the powder duster to sprinkle a thin layer of Aqua Pearl Mica over the freshly poured soap.
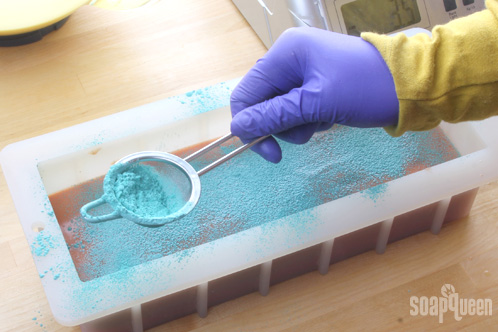
TEN: Add 4 mL of diluted Red Lab Color, 1.5 teaspoons of dispersed Titanium Dioxide and roughly 1/5 of the fragrance blend to the fourth cup of soap batter. Blend and stir with a wire whisk or spatula. Once the colorant and fragrance have been fully incorporated into the batter, pour the soap over a spatula into the mold.
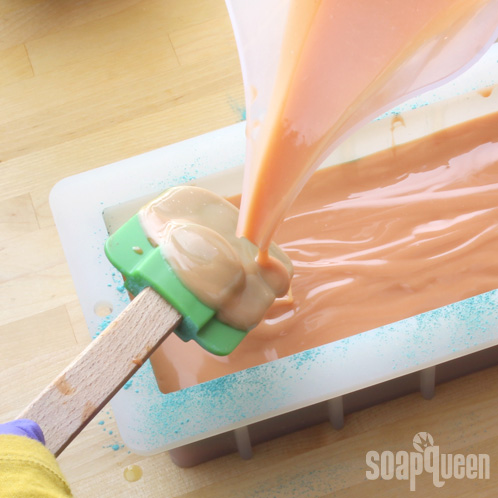
ELEVEN: Use the powder duster to sprinkle a thin layer of Aqua Pearl Mica over the freshly poured soap.
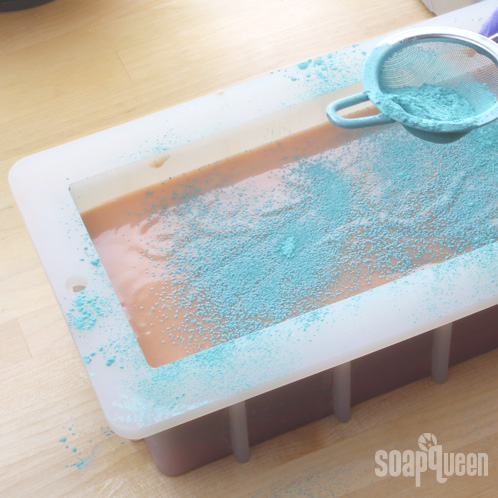
TWELVE: Add 2.5 mL of diluted Red Lab Color, 1.5 teaspoons of dispersed Titanium Dioxide and the remaining fragrance blend to a fifth cup of soap batter. Blend and stir with a wire whisk or spatula. Once the colorant and fragrance have been fully incorporated into the batter, pour the soap over a spatula into the mold.
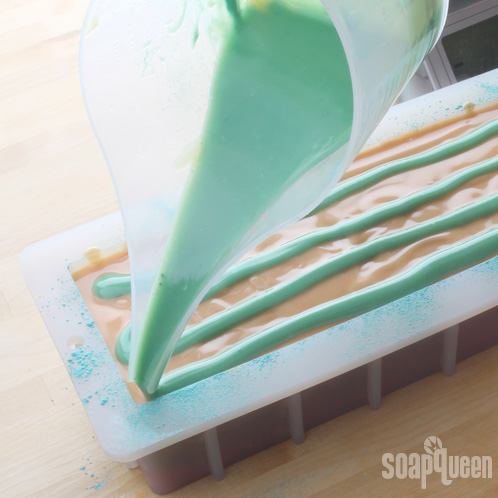
THIRTEEN: Remember that 5 – 6 oz. of batter you set aside at the beginning of the recipe? Add 1 teaspoon of undispersed Aqua Pearl Mica to it and blend with a whisk or spatula. Pour the batter in a horizontal zig-zag pattern across the top of the mold.
FOURTEEN: Starting in the bottom left-hand corner, insert a chopstick or dowel approximately 1/4 inch into the soap. Drag the tool up and down through the soap in a vertical zig-zag, working your way to the other end of the mold.
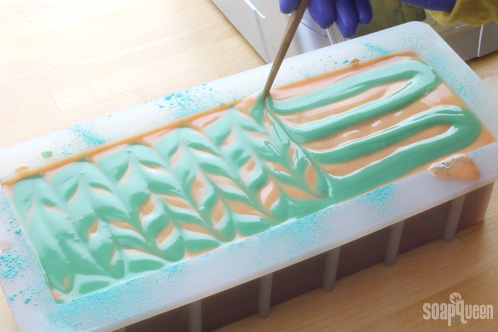
FIFTEEN: Beginning in the bottom left-hand corner again, use a chopstick or dowel to make miniature figure-8s down the length of the mold. When you reach the edge, lift the tool straight up and out of the soap and start at the top left-hand corner, repeating the pattern down the length of the mold again.
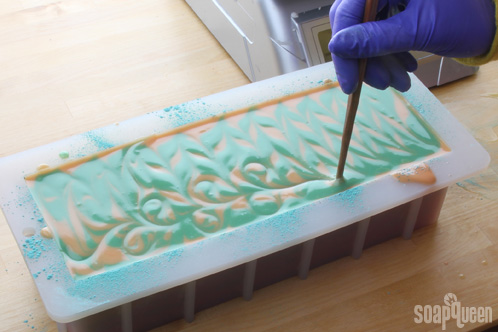
SIXTEEN: Insulate the soap and place on a heating pad for 15 – 20 minutes. Then remove from heat and let it remain covered overnight. Allow the soap to cure for 4 – 6 weeks and then enjoy!


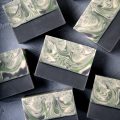
I have been soaping for over a year now and I feel ready to try some more advanced techniques. I made this blackberry champaign and I was thrilled with the colors, they look perfect. But when I cut my bars the inner layers are all white! Why? Outsides perfect, inside white?!? I can send a pic, but don’t know how to attach it here?
Hi Paige!
Hmm, that’s strange! I’d love to take a look at the picture. You can email that to me at [email protected] and I’ll help you troubleshoot. 🙂
-Kelsey with Bramble Berry
Hi Soap Queen!
I thought I’d try this technique, except I tried it with a basic olive oil recipe (a cheap recipe while I’m experimenting) and to make the line black I used charcoal powder. It looked amazing in the mould but when I cut it the black has gone all streaky and it looks nowhere near as amazing as yours. Would that be because I used charcoal instead of mica powder? I cut it after 24 hours, it was perhaps a tiny bit soft but not super soft.
Kind regards,
Amber
Hi Amber!
The trick with a mica vein soap is to not cut it from the top down. Lay the soap on its side and cut in the direction of the line. This will prevent the mica from dragging through the layers.
That should give you a nice clean bar, as seen in this Lemon Poppy Seed Cold Process Tutorial. 🙂
-Kelsey with Bramble Berry
Lemon Poppy Seed Cold Process: http://www.soapqueen.com/bath-and-body-tutorials/cold-process-soap/lemon-poppy-seed-cold-process/
Hi there! Could this be done with layers of melt and pour with the mica in-between? Will the layers stick? Or would you recommend doing super thin layers of a contrasting color soap in-between?
Thanks! Kim
Hi Kim!
I’m so glad you liked this tutorial :). Unfortunately I would not recommend this technique for melt and pour. The thin layer of mica would not allow for the layers to stick together. But, what you could do to achieve a similar look is pour a very thing layer of mica combined with melt and pour. This way you get the nice definition/pop of color between each ombre layer, but your layers would still stick! 🙂
-Amanda with Bramble Berry
Oooh! This is very pretty! I’ve been wanting to try pencil lines of mica but have been scared of having the layers separate. I may just have to make myself do it now.
Hi Margaret!
I’m so glad you like this soap as much as we do! I agree, the pencil lines of mica are such a fun technique. The best way to learn is to do, I hope you give it a try! Practice makes perfect 🙂
-Amanda with Bramble Berry
wow! saw this on instagram! I will have to try it someday 🙂
Hi Taylor!
I hope you do give this recipe a try, it results in such a fun bar of soap! There are tons of color combinations that would be fun to try as well! 🙂
-Amanda with Bramble Berry
Beautiful!
Hi LuAnn!
Thank you! I’m so glad you enjoyed this tutorial 🙂
-Amanda with Bramble Berry
Very pretty! can you use a clay like the dark red Brazilian clay instead of the lab color?
Hi Cathy!
You could use Dark Red Brazilian Clay in this recipe, although you will not end up with the intense vibrant colors that LabColors provide. Instead, you will have a more rosy colored soap, still pretty, just different 🙂
-Amanda with Bramble Berry
OOOOooooo! I LIKE this one!
Hi there!
I’m so glad you like this soap, it’s one of my recent favorites as well! 🙂 If you give it a try, be sure to share it with us on our Facebook page!
-Amanda with Bramble Berry