Bramble Berry is lucky to be situated in the Pacific Northwest. The “PNW,” as we affectionately call it, is home to gorgeous forests, thrilling hikes, and, yes, many damp fern-covered fern-covered rocks. (And by “damp,” we mean, “Yes, it always rains. I’m so sorry.”) This soap is an ode to my place and the trails I hike.
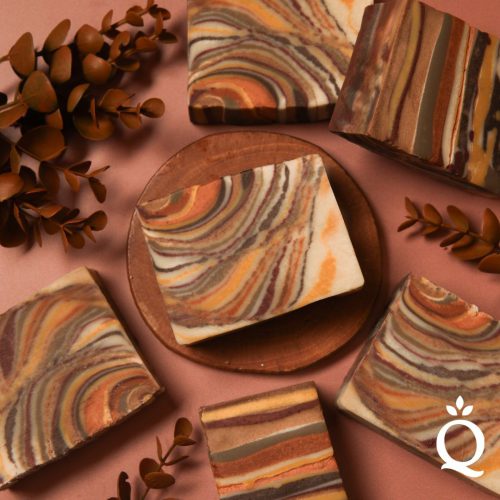
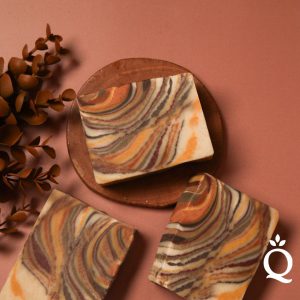
Wood Grain Soap Technique Final Bars
This project is an Advanced DIY, so if you’ve never made soap before, get a solid ten (or twenty) batches under your soapmaking belt before attempting this one. It requires a solid understanding of trace and the ability to work quickly – but if you’re looking for your next soapmaking challenge, this is it.
Let’s get started!
First, suit up for safety (and if you don’t know what this means, this video is for you … enjoy the OG Soap Queen, including the haircut).
I used the Bramble Berry Swirl Quick Mix (Not sure what the Quick Mix is? Explainer post + video here but in a nutshell, Quick Mixes are a product I developed to help short-cut the soapmaking process for soapers – they’re designed so you don’t need to measure anything but one Mix that we’ve carefully measured and calculated in our Bellingham, WA production warehouse.) If you want to go rogue and use your favorite xix of oils, know that you need a solid 10 minutes for this technique (it’s a lot of tiny little pours).
Recipe:
54 ounces Bramble Berry Swirl Quick Mix
7.61 ounces Lye (Sodium Hydroxide)
17 ounces Distilled Water
Optional but recommended: 3 teaspoons Sodium Lactate
Colorants; Pick 4-6 colorants that say “wood grain” to you; mix and match it up. I used oranges, yellows, and browns and mixed and matched them. Make sure to have titanium dioxide also mixed up for a contrast color.
Fragrance: I used Sensuous Sandalwood because it doesn’t affect trace or color, and, smells woody.
Pre:
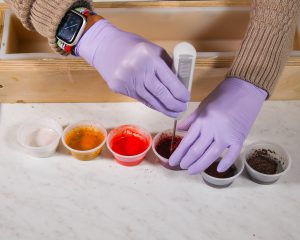
Pre Mix your colorants – 1 teaspoon of colorant into 1 Tablespoon of lightweight oil like Avocado or Sweet Almond Oil.
Lay out your containers for the individually-colored soaps that make up the wood grain. In this case, I used six different Bramble Berry Easy Pour containers to ensure I had enough.
Prop the soap mold on its side at roughly a 45-60-degree angle. I used the Bramble Berry Sliding Bottom Mold with the silicone liner. I used two hand towels to prop up so I could take one away at a time during the pouring process.
Instructions:
1) Measure your water (17 oz) and lye (7.61 oz) in two separate, chemical-resistant containers.
2) Carefully and slowly add the lye to the water (never the other way around). Ensure you are in a well-ventilated area with no kids or pets. Stir with your non-aluminum stirring utensil until the lye is dissolved. Set aside.
3) Heat your oils (or, in this case, your Quick Mix) to approximately 120 to 130 degrees.
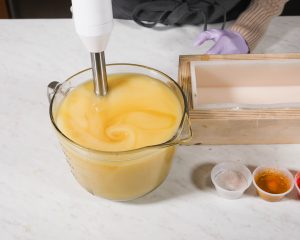
4) Check your lye water for temperatures; if it’s around 120-130, it’s ready to add to your oils. Add the lye water slowly to your warm oils, slowly mixing in with a stick blender until you reach the very lightest trace (Not sure what ‘trace’ is or what the ‘very lightest’ of trace is? Some tips here or a full video of it here).
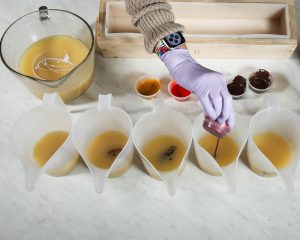
5) Separate the batter into 5 or 6 containers (or 7 or 8—however many colors you decided for your design) at the thinnest trace. Reserve the largest for your titanium dioxide-colored soap. It will provide the perfect contrast color for the wood grain colors.
6) Hand whisk in the colorants and fragrances until you reach the desired tone and hue. If any colors are not fully mixed in, stick blend in a short burst to incorporate the full color smoothly. Add the fragrances to the individual containers.
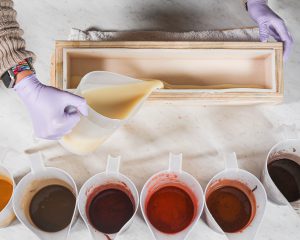
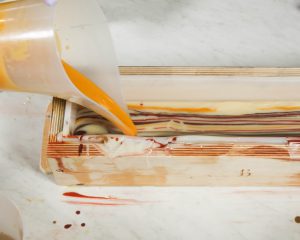
7) Arrange each layer, color by color, in the order you plan to create your woodgrain design. Carefully pour the first layer down the side of the mold, followed by each successive color in the design. Alternate each color with a thin layer of white to ensure that the woodgrain design shows up. Keep pouring down the side of the mold; it’s awkward but that’s how the ‘wood grain’ design forms.
8) Keep alternating colors until the mold needs to be rotated down to 30 or 15 degrees. Continue pouring alternating colors until the mold is filled to the side again, and then put the mold on a flat surface. Pour the rest of the colors until the remaining soap is gone.
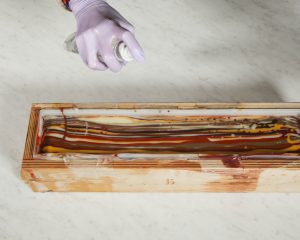
9) Spray the top of the mold with 99% rubbing alcohol to help prevent soda ash.
10) Insulate your soap or put on a heat blanket to ensure the soap goes through the full gel phase (not sure what gel phase is? Full explanation here)
11) Let soap harden and dry until it is ready to cut. Cut into bars. Once cut, put in a fully ventilated area for 4-6 weeks until soap is fully cured, dried, and ready to use.
If you make this soap, I’d love to see it. Post your version of this and hashtag it #brambleon. I can’t wait to see what you create!
.
