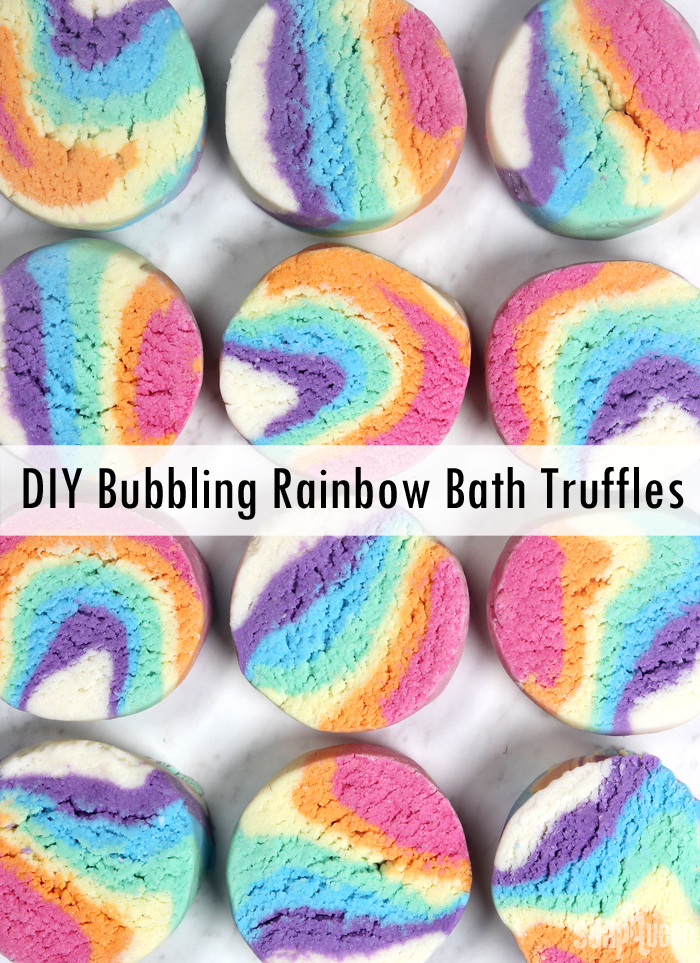
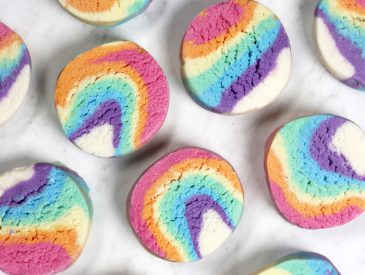
With St. Patrick’s Day a couple weeks away, I’ve been itching to make a rainbow-inspired project. Thus, Rainbow Bubbling Bath Truffles were born. The bars aren’t quite a bath bomb, bath melt, or bubble bar – they are a little bit of everything! The combination of sodium bicarbonate (baking soda) and citric acid creates a mild fizzing reaction. The addition of SLSA creates bubbles, while cocoa butter cubes and shea butter add moisture to the tub. The new Fruity Fusion Fragrance Oil gives the bath truffles a fruity scent, which smells delicious combined from the chocolatey smell from the cocoa butter. They smell a lot like chocolate covered gummies – yum!
When added to the tub, the bath truffles fall to the bottom because the butters make them quite heavy. Slowly, they start to fizz and disperse the skin-loving ingredients. If you want to activate the bubbles, hold the bar directly under the faucet once the tub is almost full. Break up small pieces of the bar in the running water. You can also place the bar into a fine mesh strainer and hold the strainer under the faucet to help activate the bubbles as well. The bubbles are modest because of the butter, but still cover the surface of the tub. If you’re looking for more bubbles, less fizz and less moisture in the tub, a more traditional solid bubble bar recipe (like the LoveSpell Solid Bubble Bath DIY) may be a better fit.
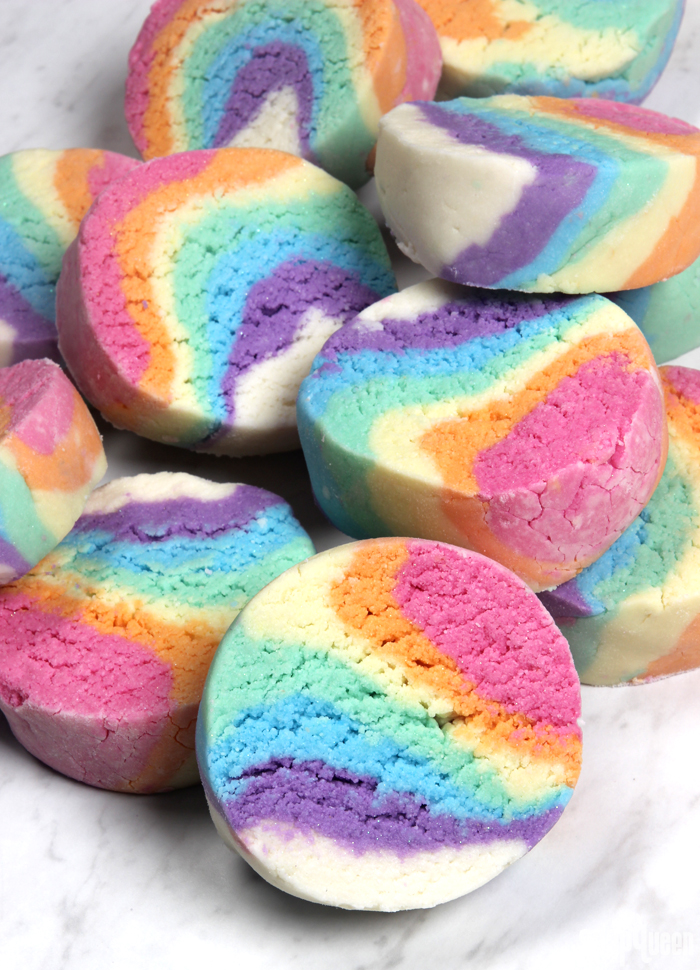
Typical solid bubble bath recipes can take a week or more to become firm. That’s because most of the moisture in solid bubble bath recipes comes from glycerin. One of the great things about this Bubbling Bath Truffle recipe is the bars harden within a few hours. The moisture in this recipe comes from shea and cocoa butter, rather than glycerin. Once the butters are completely cool, the bath truffles become firm. In our tests, this took about 3 hours. A small amount of glycerin makes the mixture slightly more moldable, and polysorbate 80 disperses the butters in the bath water.
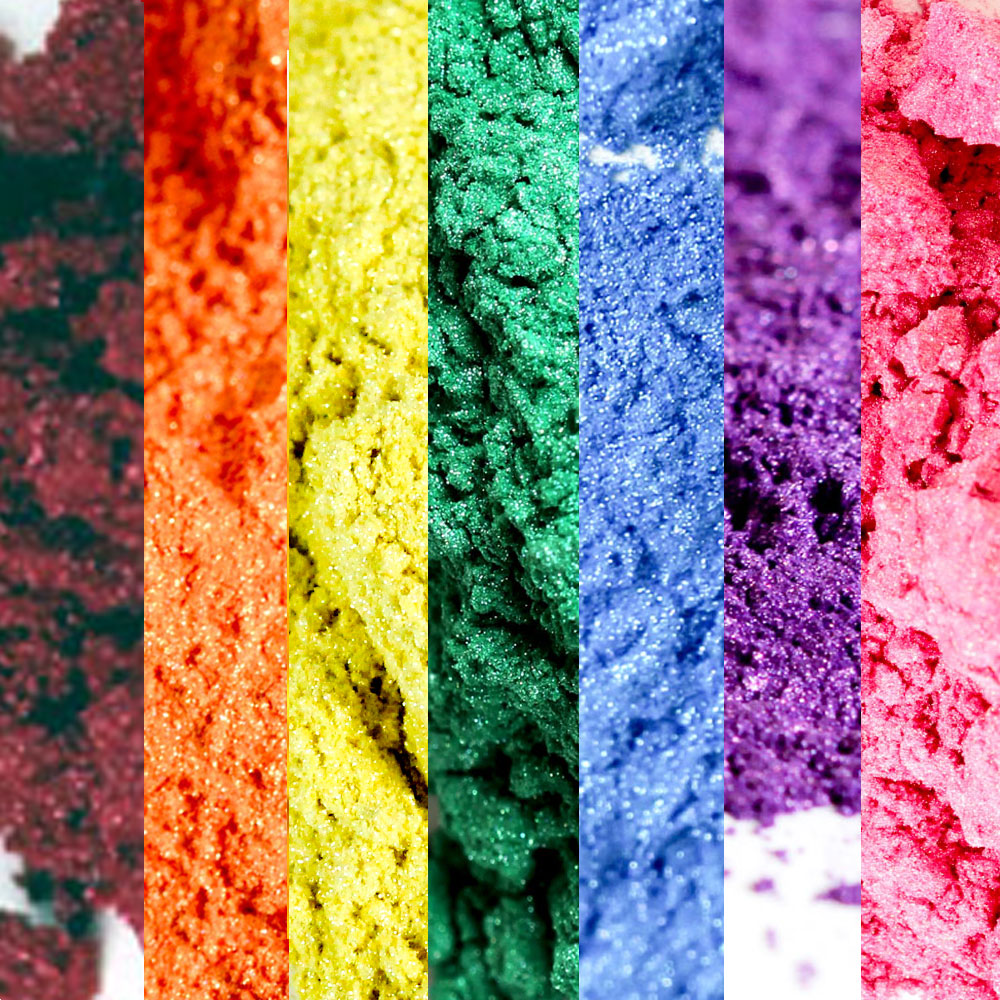
While these bars are extremely vibrant thanks to micas, we found the colors don’t transfer on the tub. Polysorbate 80 prevents the colors from clumping up in the bath water. All the colors in this project can be found in the Rainbow Mica Sampler Pack. You can also use La Bomb Colorants. Oxides and pigments are not recommended. They are larger than micas, which make them harder to mix in and could transfer color to the tub or your skin.
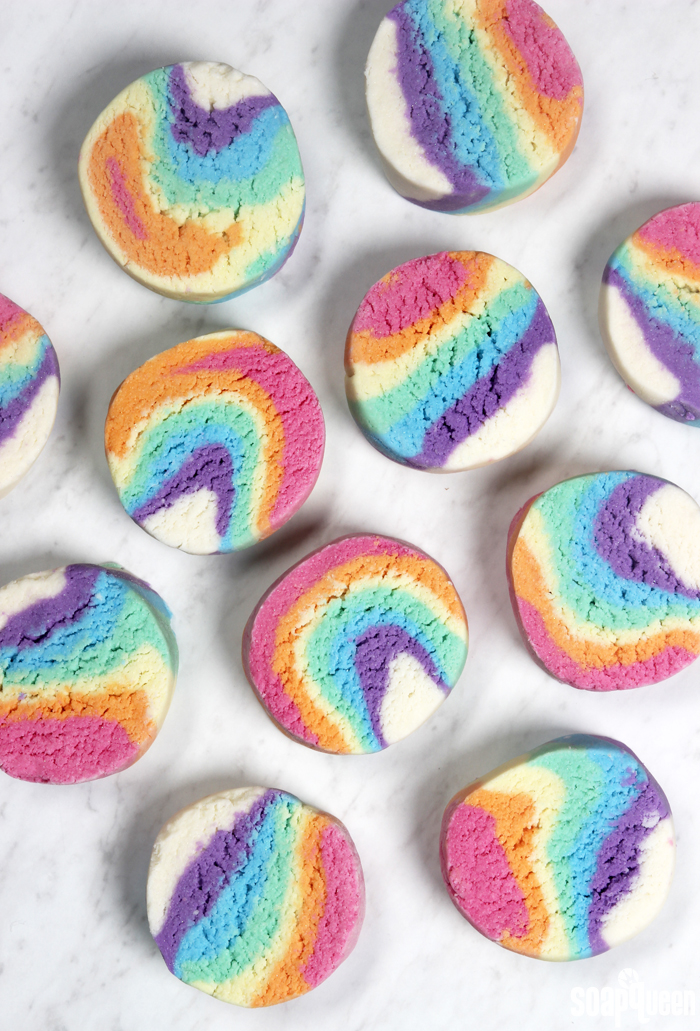
Testing and Recipe Notes –
These bath truffles took several trial and error batches – four to be exact. The first batch was placed in the Heavy Duty Column Mold and allowed to harden in the mold for a few hours. The final bars were an even circular shape; little did we know it was beginner’s luck! The problem with that batch? It was so hard to get the log out of the mold. The mixture expanded, making the liner really difficult to slide out. The bars also didn’t create many bubbles in the tub.
They looked great, but were difficult to make and didn’t behave like we wanted them to. After we tweaked the recipe to create more bubbles, we ran into the problem of the bars sticking to the liner. They were still hard to remove from the mold. You can see the sad third batch of bath truffles below. They stuck to the liner, and were also crumbly when cut. The crumbles still worked well in the tub though!
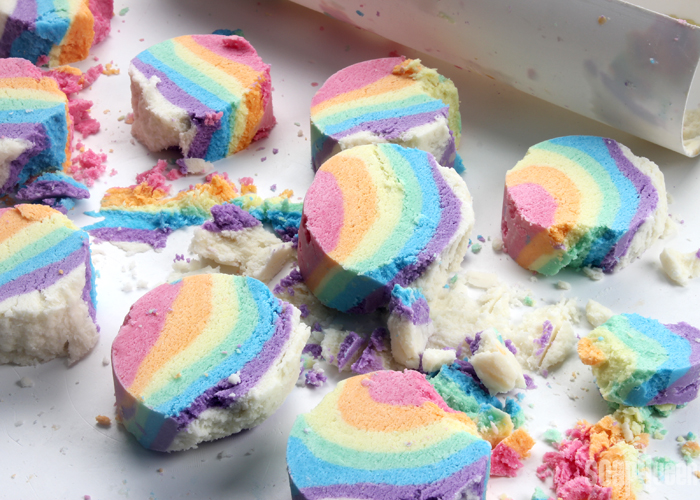 When formulating a recipe, not every batch turns out perfectly! This recipe took four trials to find a recipe and method that worked well together. This batch stuck to the mold liner.
After testing, we decided to ditch the Heavy Duty Column Mold. While it did give the first batch an even, round shape, it just wasn’t working. It was extremely difficult to unmold the bars. It was also hard to find the perfect amount of time to leave the bars in the mold. If they were removed too soon, they were soft and stuck to the mold. If you wait too long, it was harder to umold and they were crumbly to cut. The compromise shown in this tutorial is using the liner to help shape the bars. Then, they are cut immediately while still soft.
If you want to substitute any ingredients in this recipe, it will change the texture of the dough. Changes to the recipe can affect how long you have to work with the dough, how firm the bars become, how easily the bars can be rolled and cut, how it behaves in the tub, etc. In general, I don’t recommend making substitutions for the dry and wet ingredients in this recipe. If you do want to tweak the recipe, consider making a smaller batch with one color to see how the changes affect the texture of the dough and results in the tub.
What You’ll Need:
Optional: Mold Liner (for Heavy Duty Column Mold)
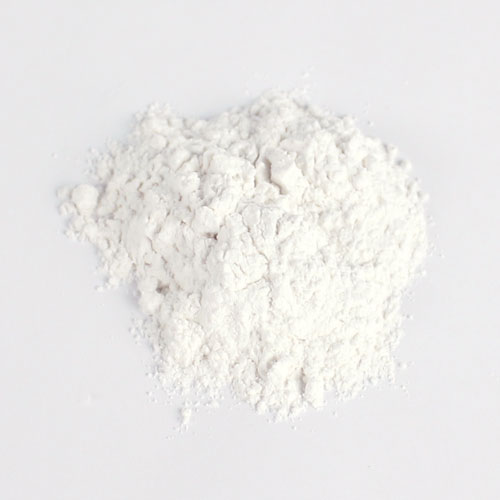
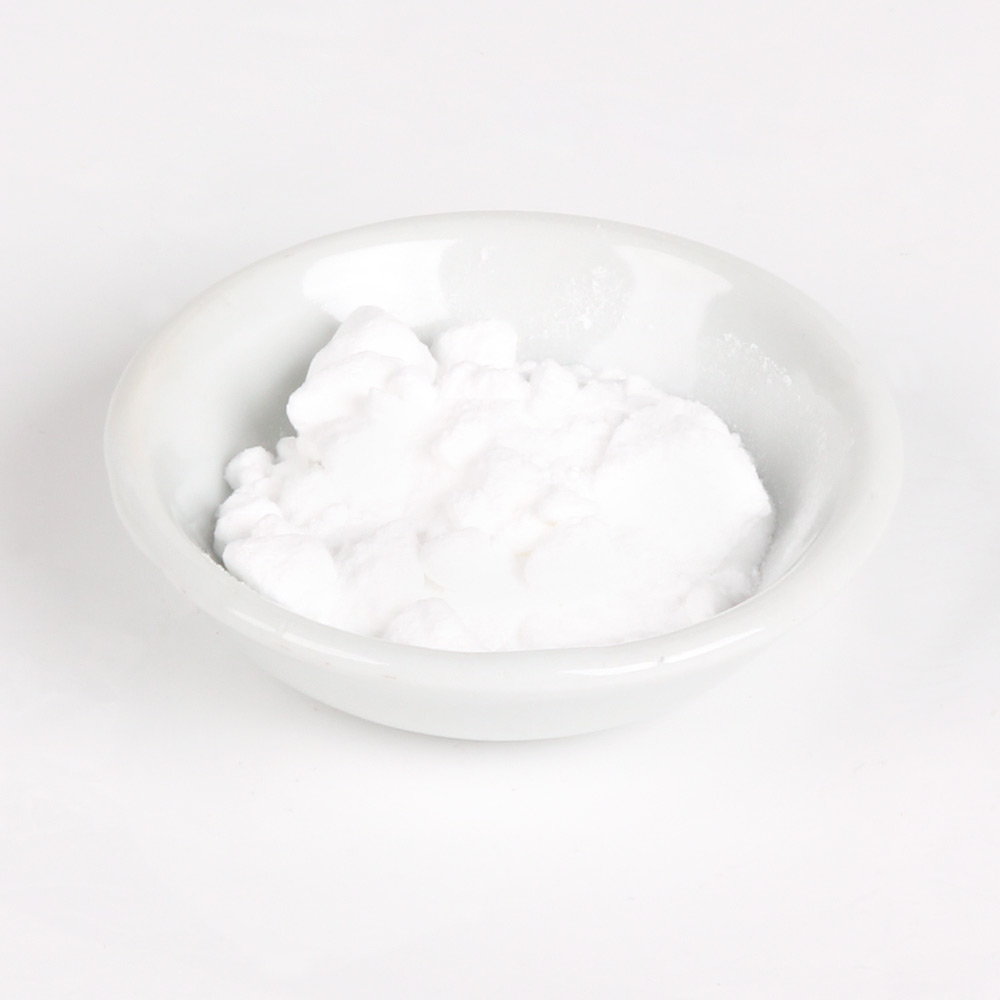
25 oz. Sodium Bicarbonate (Baking Soda) (41%)
7 oz. Citric Acid (12%)
13 oz. SLSA (21%)
2.5 oz. Cream of Tartar (4%)
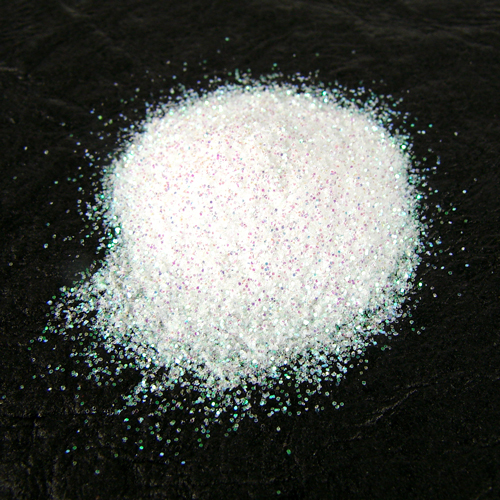
1 tsp. Fine Iridescent Glitter
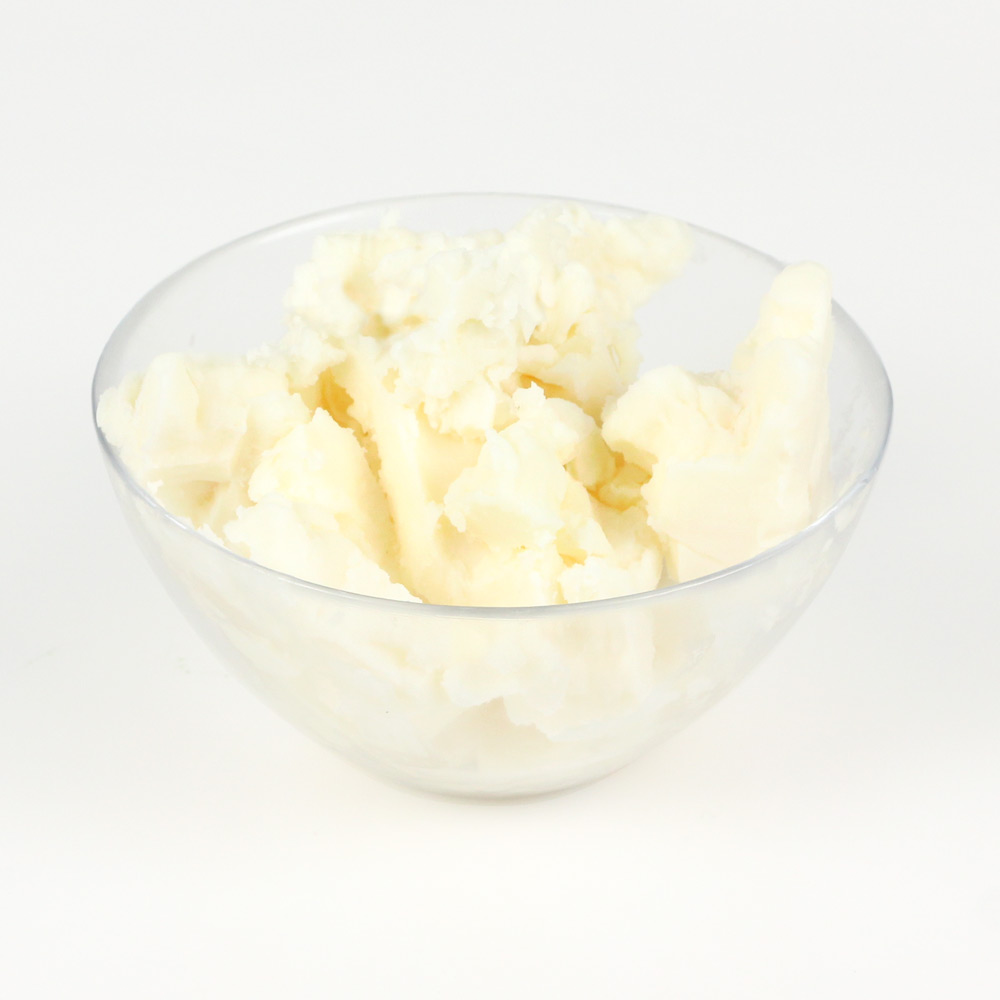
6 oz. Shea Butter (10%)
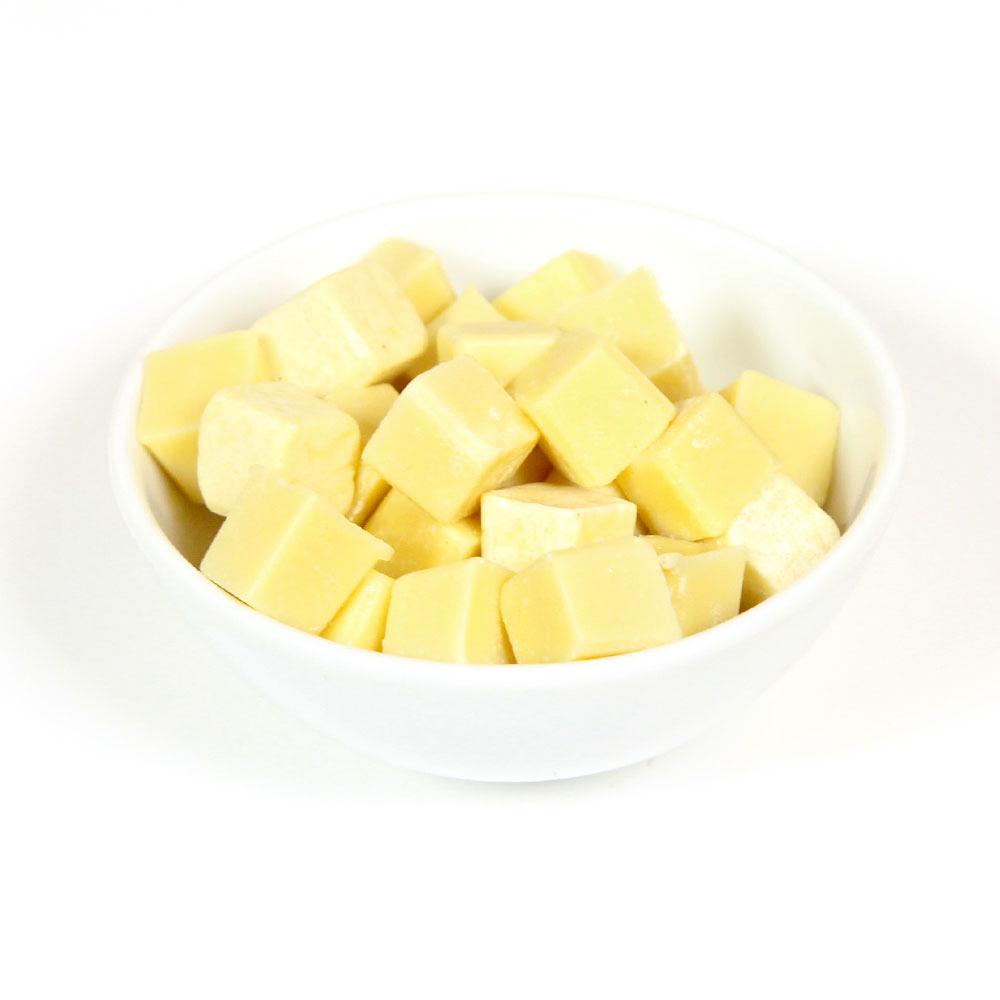
4.5 oz. Organic Cocoa Butter Cubes (7%)
1.5 oz. Liquid Glycerin (3%)
.5 oz. Polysorbate 80 (1%)
.6 oz. Fruity Fusion Fragrance Oil (1%)
Rainbow Mica Sampler Pack:
Raspberry Mica
Racing Stripe Orange Mica
Buttercup Mica
Kelly Green Mica
Caribbean Blue Mica
Queen’s Purple Mica

Click here to add everything you need for this project to your Bramble Berry shopping cart!
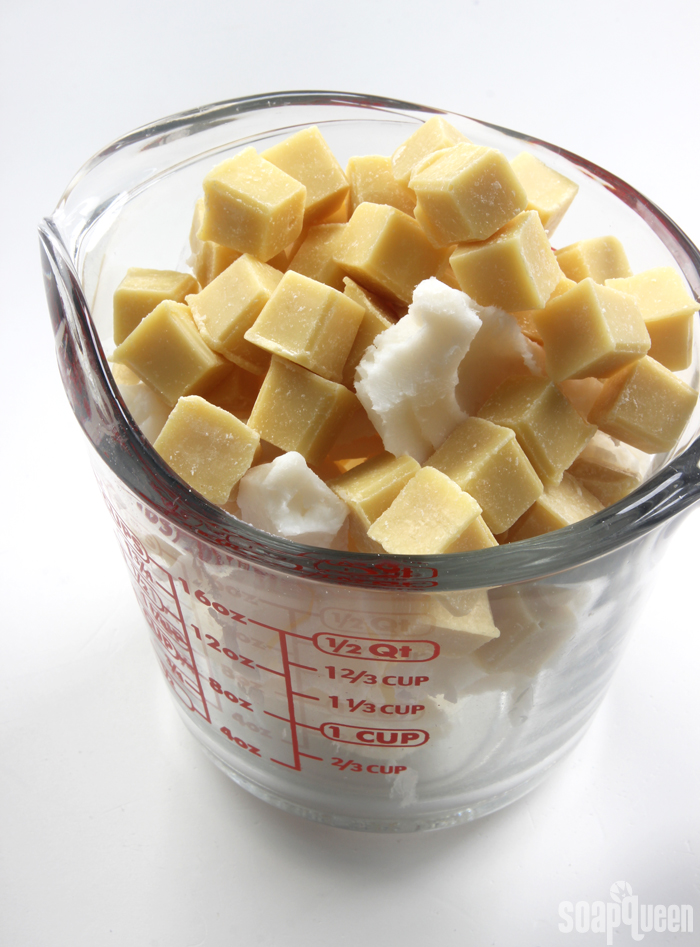
ONE: In a small heat-safe container, add the shea butter and cocoa butter cubes. Place the container in the microwave and melt the butters using 30-60 bursts. The cocoa butter takes a little while to melt. Be careful when removing it from the microwave, as it may be very hot.
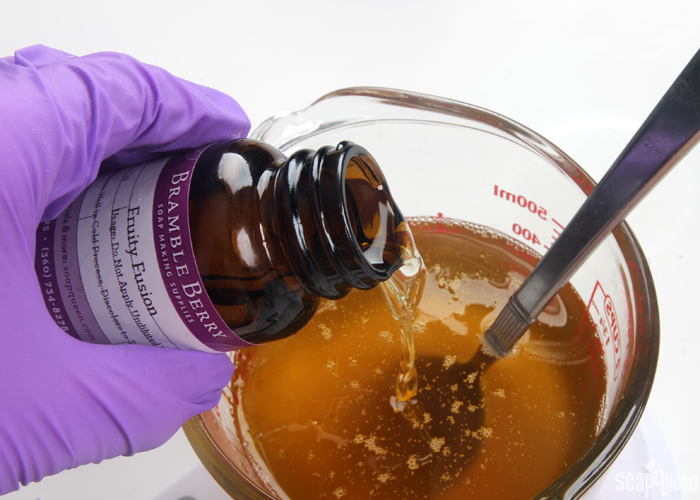
TWO: Add the Fruity Fusion Fragrance Oil, polysorbate 80 and glycerin to the melted butters. Use a spoon to thoroughly incorporate. Set aside.
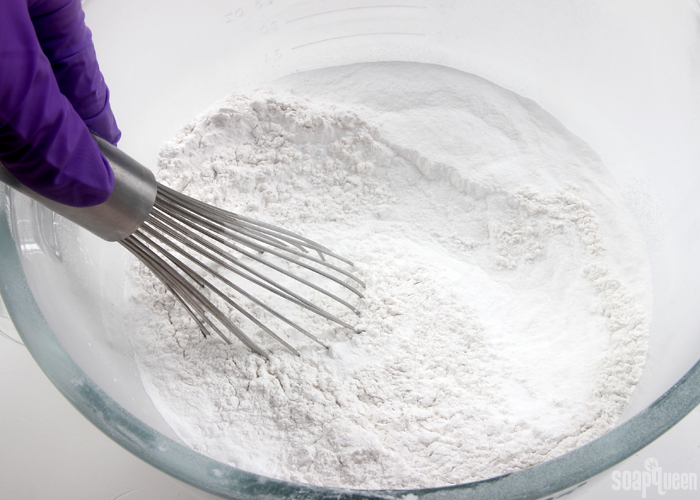
THREE: Place a fine mesh sifter over a large container. Add the baking soda, citric acid, cream of tartar and Fine Iridescent Glitter. Pour the ingredients through the sifter to get rid of chunks. Use a whisk to mix the ingredients together. Very carefully, add the SLSA to the large container (do not put it through the sifter). I recommend adding the SLSA very last. SLSA is extremely fine and powdery and can become airborne very easily. You may want to wear a mask during this step to avoid breathing in any SLSA. It is irritating if you breathe it in. Once all the ingredients have been added, slowly mix together the dry ingredients using a whisk.
FOUR: Add about 1/3 of the melted butter mixture. I recommend adding the liquid ingredients to the powder when the liquids are about 180 ° F. This is quite hot, so I recommend using gloves to mix the liquid ingredients into the powder. The hotter the liquid ingredients are when added, the softer the final “dough” will be. Adding the liquid when it’s hot reduces the need to microwave it later. Use your hands to incorporate the liquid and powder ingredients together. If you prefer, you could also use a stand or hand mixer for this step, but I prefer using my hands.
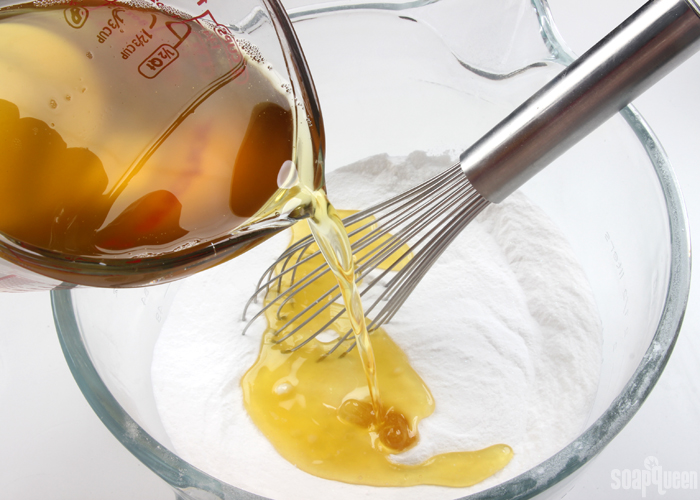
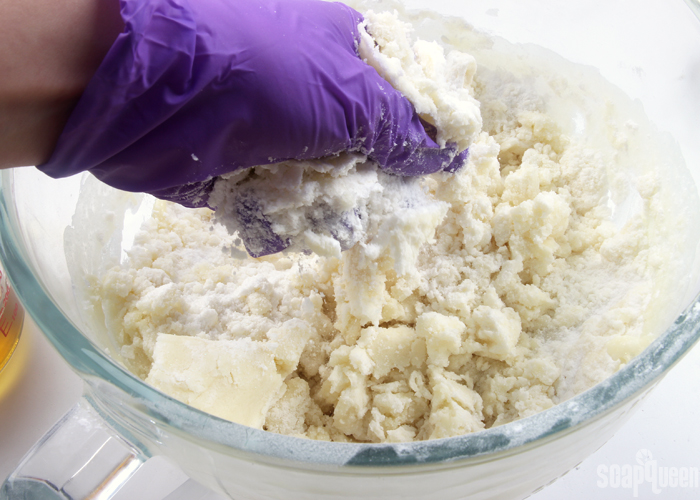
FIVE: Continue adding the liquid ingredients to the dry and mix together until fully incorporated. The final texture will be very similar to bread dough – soft, workable and slightly sticky. The texture of the mixture depends on the temperature of the butters. The warmer the dough, the softer it will be. We found a dough temperature of about 85-100 ° F is a great moldable texture. If your dough is cooler than that, place the entire mixture into the microwave for 10-20 seconds to warm it.
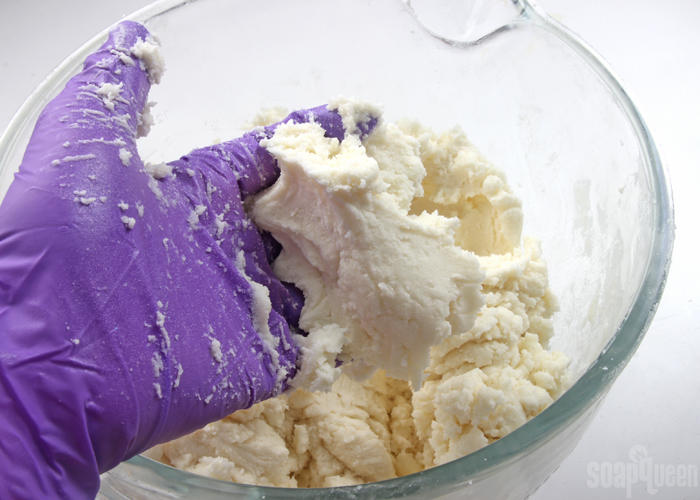
SIX: You will have about 60 ounces of mixture. Split the batch into 7 equal containers; each container should have about 8.5 ounces. I recommend weighing all the containers to make sure you have an equal amount, but you could eyeball it if you prefer.
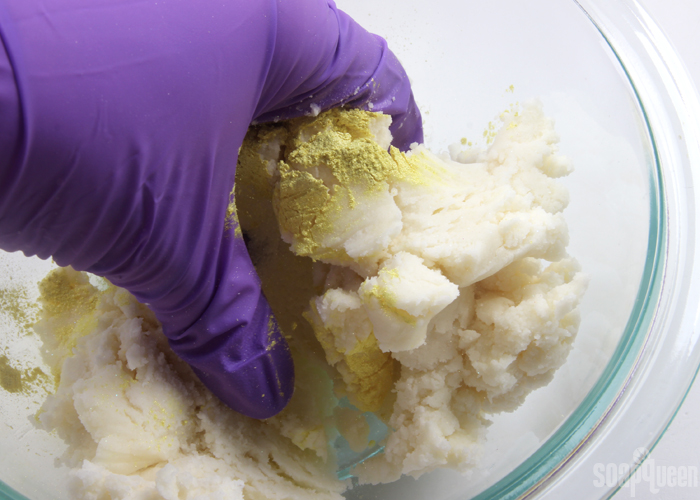
SEVEN: To each container, add the following amounts of mica. If you prefer more pastel colors, use less. Add more mica if you prefer more vibrant colors. Use your hands to mix in the mica thoroughly until there are no streaks of color. I recommend mixing from lightest to darkest to avoid muddling the colors. You may want to change gloves when moving from warm to cool colors.
- Red/Pink: 1/8 tsp. Raspberry Mica
- Orange: 1/4 tsp. Racing Stripe Orange Mica
- Yellow: 1/4 tsp. Buttercup Mica
- Green: 1/8 tsp. Kelly Green Mica
- Blue: 1/8 tsp. Caribbean Blue Mica
- Purple: 1/4 tsp. Queen’s Purple Mica
- White: No colorant
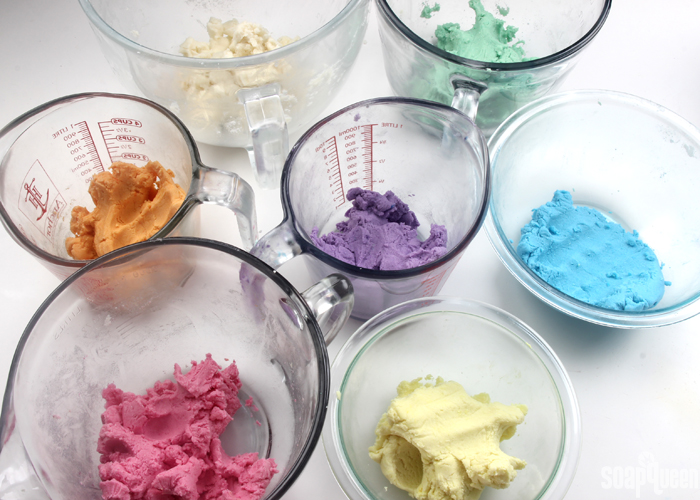
EIGHT: Once all the colors are mixed, it’s time to mold! Clean off your counter space to mold the mixture and create a log shape. Depending on your counter material, you may want to place a sheet of parchment or wax paper down to prevent the dough from sticking. Sprinkle your work surface with a bit of baking soda to prevent sticking. Working with the red/pink dough first, begin to form a long, flat dough shape. Place it on your work surface.
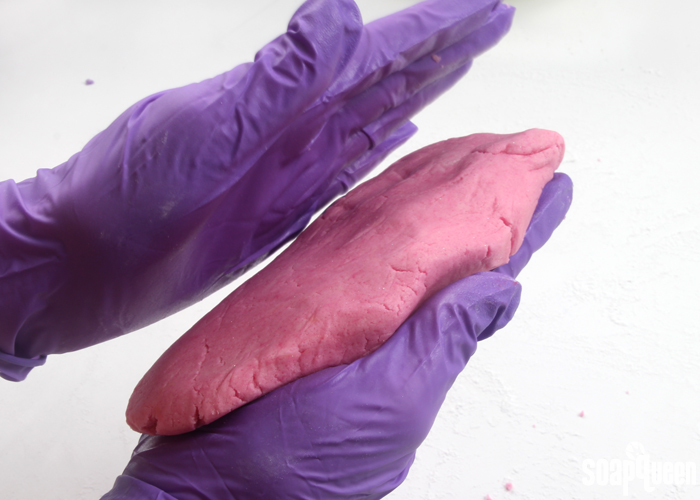
NINE: Continue making long, flat log shapes with the orange, yellow, green, blue and purple colors. Place each color on top of the last, and use your hands to gently press the colors together and form an even shape. Finally, place the uncolored portion of the mixture on top of the purple.
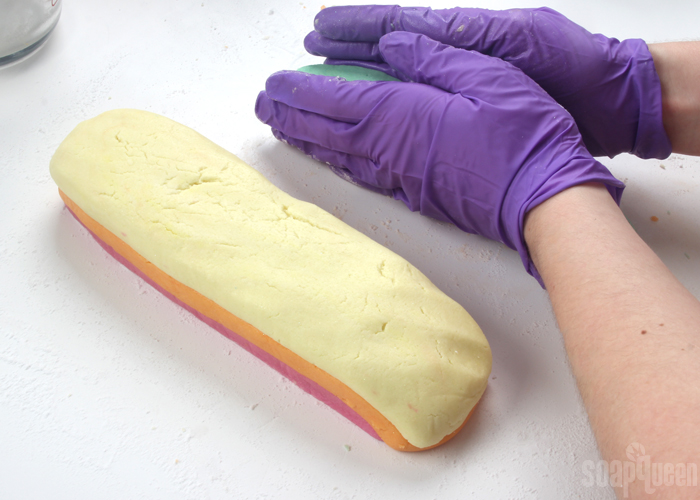
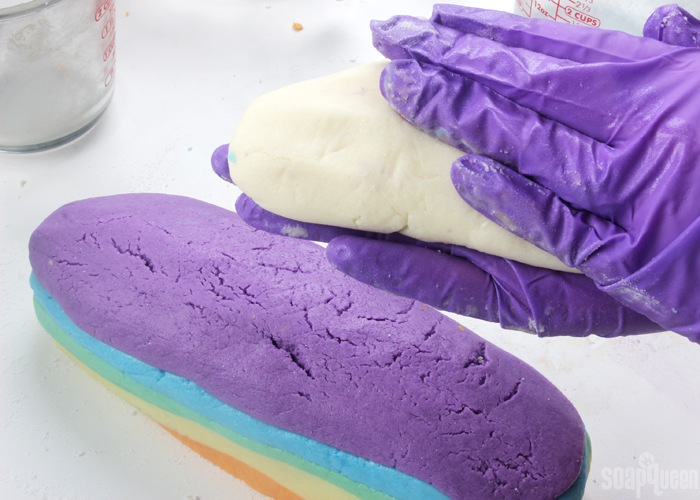
TEN: Use your hands to press the colors together into one log. The log should be about 12″. If you’d like your bars to be smaller, you can stretch the log into a longer shape, or create a shorter shape for bigger bars.
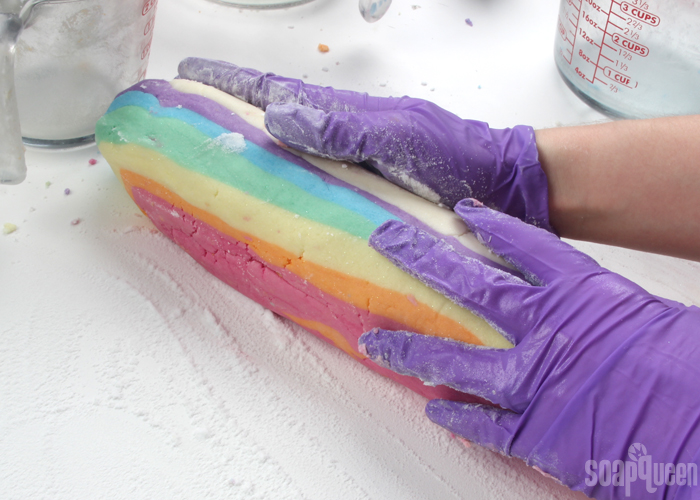 ELEVEN: If you’d like the colors to have a little more movement, very carefully twist the log. While twisting, be sure to press the log together to avoid large cracks or tears. This can be a little tricky, so feel free to skip it if you’re concerned with your log falling apart.
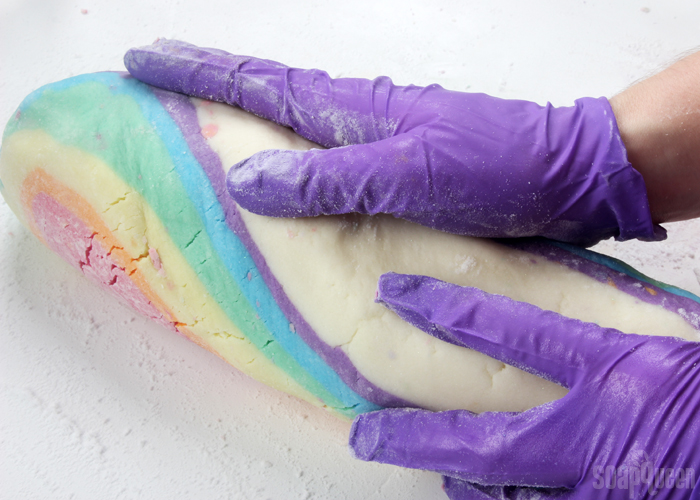
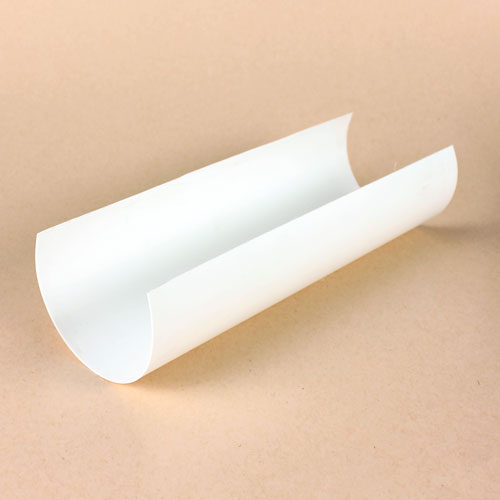
TWELVE: To help get a more even, circular shape, place the log into the liner for the Heavy Duty Column Mold. Squeeze the liner closed to create more condensed, even bars. This step can be skipped if you are happy with the shape created with rolling the log on the counter.
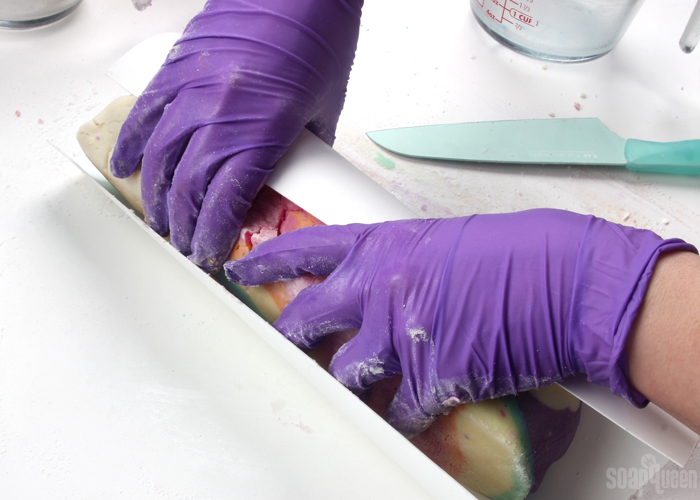
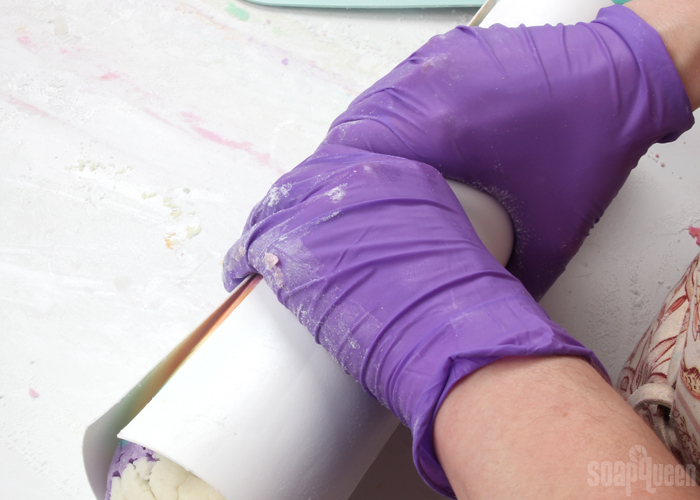
THIRTEEN: If you have not done so already, cover your surface with parchment or freezer paper. Carefully remove the log from the liner and use a sharp knife to cut the log into bars. Do so very gently, as the bottom of the bars may want to crumble a bit. If this happens, use your hands to reshape any crumbles. Rolling the log after each cut helps maintain a more even circular shape.
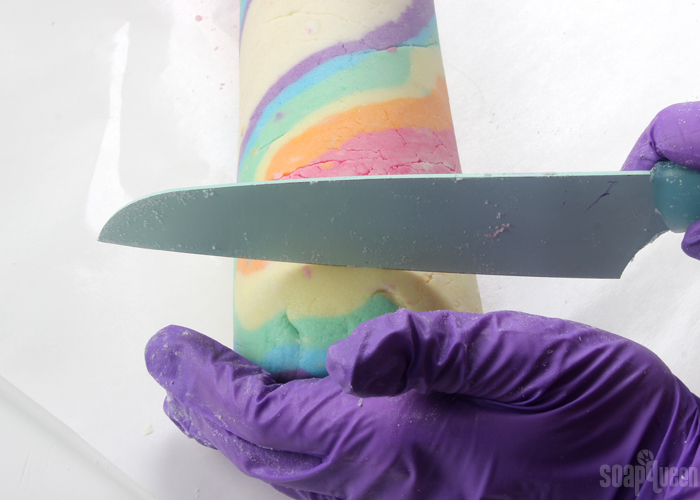
FOURTEEN: Very carefully place each bar face down on the parchment or freezer paper. Use your hands to reform any bars if needed. As the butters in the bath truffles cool, they become hard. It takes about 3-4 hours for the bars to become firm depending on your room temperature. It can be hard to wait, but be patient!
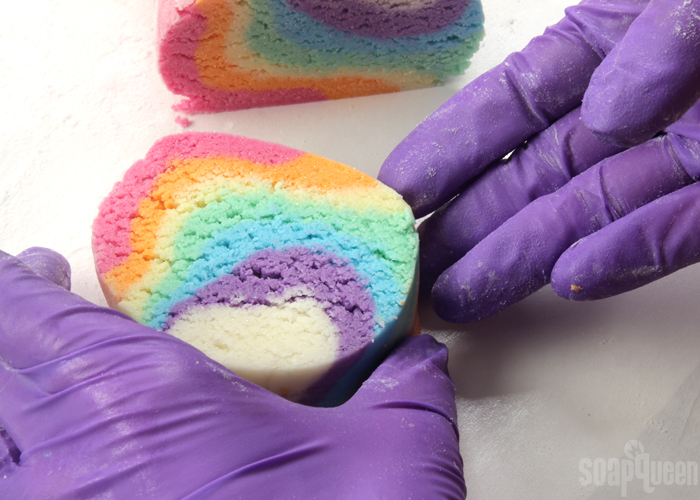
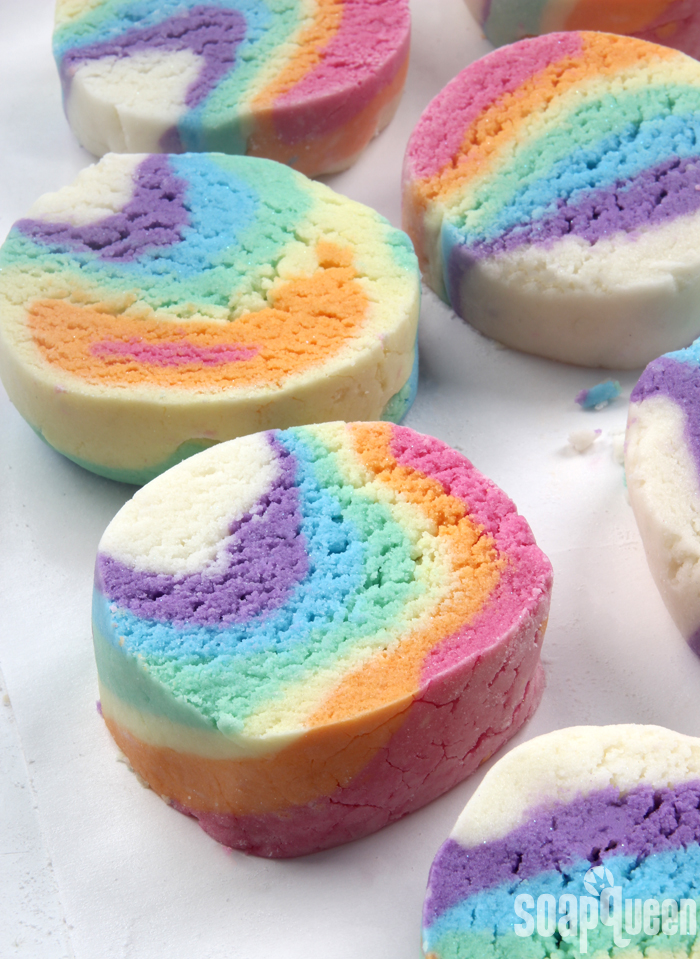
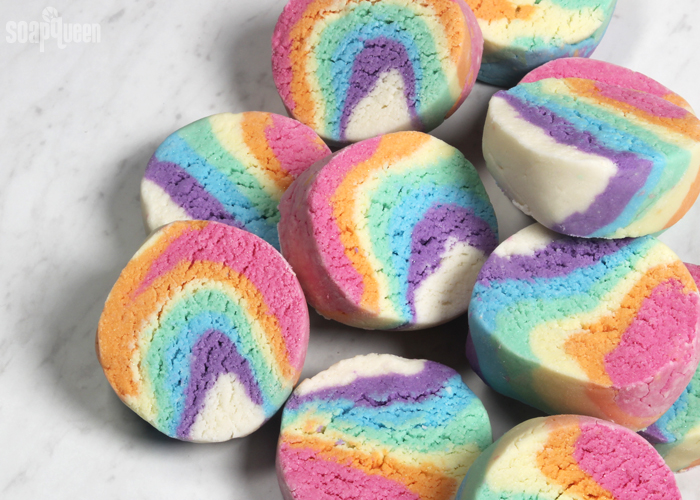
Once you’re ready to use the bath truffles, place them in the tub for a slow fizzing reaction with a small amount of foamy bubbles. If you want to “activate” more bubbles, hold the bar directly under the running bath faucet while breaking off small amounts of the bar.
- Optional: Mold Liner (for Heavy Duty Column Mold)
- 25 oz. Sodium Bicarbonate (Baking Soda) (41%)
- 7 oz. Citric Acid (12%)
- 13 oz. SLSA (21%)
- 2.5 oz. Cream of Tartar (4%)
- 1 tsp. Fine Iridescent Glitter
- 6 oz. Shea Butter (10%)
- 4.5 oz. Organic Cocoa Butter Cubes (7%)
- 1.5 oz. Liquid Glycerin (3%)
- .5 oz. Polysorbate 80 (1%)
- .6 oz. Fruity Fusion Fragrance Oil (1%)
- Rainbow Mica Sampler Pack:
- Raspberry Mica
- Racing Stripe Orange Mica
- Buttercup Mica
- Kelly Green Mica
- Caribbean Blue Mica
- Queen’s Purple Mica
- In a small heat-safe container, add the shea butter and cocoa butter cubes. Place the container in the microwave and melt the butters using 30-60 bursts. The cocoa butter takes a little while to melt. Be careful when removing it from the microwave, as it may be very hot.
- Add the Fruity Fusion Fragrance Oil, Polysorbate 80 and glycerin to the melted butters. Use a spoon to thoroughly incorporate. Set aside.
- Place a fine mesh sifter over a large container. Add the baking soda, citric acid, cream of tartar and Fine Iridescent Glitter. Pour the ingredients through the sifter to get rid of chunks. Use a whisk to mix the ingredients together. Very carefully, add the SLSA to the large container (do not put it through the sifter). I recommend adding the SLSA very last. SLSA is extremely fine and powdery and can become airborne very easily. You may want to wear a mask during this step to avoid breathing in any SLSA. It is irritating if you breathe it in. Once all the ingredients have been added, slowly mix together the dry ingredients using a whisk.
- Add about ⅓ of the melted butter mixture. I recommend adding the liquid ingredients to the powder when the liquids are about 180 ° F. This is quite hot, so I recommend using gloves to mix the liquid ingredients into the powder. The hotter the liquid ingredients are when added, the softer the final "dough" will be. Adding the liquid when it's hot reduces the need to microwave it later. Use your hands to incorporate the liquid and powder ingredients together. If you prefer, you could also use a stand or hand mixer for this step, but I prefer using my hands.
- Continue adding the liquid ingredients to the dry and mix together until fully incorporated. The final texture will be very similar to bread dough - soft, workable and slightly sticky. The texture of the mixture depends on the temperature of the butters. The warmer the dough, the softer it will be. We found a dough temperature of about 85-100 ° F is a great moldable texture. If your dough is cooler than that, place the entire mixture into the microwave for 10-20 seconds to warm it.
- You will have about 60 ounces of mixture. Split the batch into 7 equal containers; each container should have about 8.5 ounces. I recommend weighing all the containers to make sure you have an equal amount, but you could eyeball it if you prefer.
- To each container, add the following amounts of mica. If you prefer more pastel colors, use less. Add more mica if you prefer more vibrant colors. Use your hands to mix in the mica thoroughly until there are no streaks of color. I recommend mixing from lightest to darkest to avoid muddling the colors. You may want to change gloves when moving from warm to cool colors.
Red/Pink: ⅛ tsp. Raspberry Mica
Orange: ¼ tsp. Racing Stripe Orange Mica
Yellow: ¼ tsp. Buttercup Mica
Green: ⅛ tsp. Kelly Green Mica
Blue: ⅛ tsp. Caribbean Blue Mica
Purple: ¼ tsp. Queen’s Purple Mica
White: No colorant - Once all the colors are mixed, it's time to mold! Clean off your counter space to mold the mixture and create a log shape. Depending on your counter material, you may want to place a sheet of parchment or wax paper down to prevent the dough from sticking. Sprinkle your work surface with a bit of baking soda to prevent sticking. Working with the red/pink dough first, begin to form a long, flat dough shape. Place it on your work surface.
- Continue making long, flat log shapes with the orange, yellow, green, blue and purple colors. Place each color on top of the last and use your hands to gently press the colors together, and form an even shape. Finally, place the uncolored portion of the mixture on top of the purple.
- Use your hands to press the colors together into one log. The log should be about 12". If you'd like your bars to be smaller, you can stretch the log into a longer shape, or create a shorter shape for bigger bars.
- If you’d like the colors to have a little more movement, very carefully twist the log. While twisting, be sure to press the log together to avoid large cracks or tears. This can be a little tricky, so feel free to skip it if you’re concerned with your log falling apart.
- To help get a more even, circular shape, place the log into the liner for the Heavy Duty Column Mold. Squeeze the liner closed to create more condensed, even bars. This step can be skipped if you are happy with the shape created with rolling the log on the counter.
- If you have not done so already, cover your surface with parchment or freezer paper. Carefully remove the log from the liner, and use a sharp knife to cut the log into bars. Do so very gently, as the bottom of the bars may want to crumble a bit. If this happens, use your hands to reshape any crumbles. We found rolling the log after each cut helped maintain a more circular shape.
- Very carefully place each bar face down on the parchment or freezer paper. Use your hands to reform any bars if needed. As the butters in the bath truffles cool, they become hard. It takes about 3-4 hours for the bars to become firm depending on your room temperature. It can be hard to wait, but be patient!
- Once you're ready to use the bath truffles, place them in the tub for a slow fizzing reaction with a small amount of foamy bubbles. If you want to "activate" more bubbles, hold the bar directly under the running bath faucet while breaking off small amounts of the bar.

can you half the mixture
Yes, you can.
Do you have any recommendations for packaging? Im considering shrink wrapping my bath bombs. Will that work for bubble bars?
Can you also add a clay to harden the bubble bars? I have a problem with customers not being very gentle and smashing these. I make sure they are completely dry before they go into the store.
We haven’t given clay a try so I’m not sure. You may try a small test batch to see if that makes them more sturdy – 1 teaspoon of clay per pound of mixture is a good place to start. You may also try reducing the liquid slightly so they dry a bit harder.
Once they’re dry, you can shrink wrap them. That may help hold them together as well.
Do these solidify completely or are these supposed to be softer on the inside?
They do solidify completely. Are yours still soft? How long ago did you make them?
I just made these yesterday and I LOVE them! my question is – should they be shrink wrapped? I will be transporting to a fair and I am nervous! If I can shrink wrap them can it be done as soon as they are dry?
Thanks so much!!!
Christine
While we have not experimented with shrink wrapping these, I think it would be okay. The amount of glycerin is very small, so I don’t think it would cause sweating. To be on the safe side I would recommend allowing them to completely harden and dry. Then shrink wrap one and see how it does for a few days. If you could share with us how it works, we would love to know!
-Amanda with Bramble Berry
I made these and I absolutely love them. But I did have an issue and I’m praying you can help me. They melted all over the package when I mailed them out. I even shrink wrapped them and they still didn’t make the trip. What can I do so that the truffles make the trip? Any suggestions would be greatly appreciated!
There are a few things you can do when shipping packages in the summer, including packing them with ice packs and scheduling a pick up time so they’re not sitting on a hot porch. Learn more in this post: https://www.soapqueen.com/bath-and-body-tutorials/tips-and-tricks/soaping-in-the-summer-heat/
-Kelsey with Bramble Berry
Nice work looks great . Can i use gel coloer also ?
Are you wanting to use gel food coloring?
-Kelsey with Bramble Berry
Hello, I am planning on making these this week but have a question or two. Do you know about how many ounces each slice weighs? Also I want to make sure that after all the work that it is a bubble bath and not just a fizzie. Is one slice at (blank ounces) enough for a bubble bath or should more slsa be used or maybe a bigger slice? Thank you, Lynda
The bars we cut weigh about 5 ounces each, but that will vary based on how thick they’re cut. When you drop them in the water, they don’t fizz immediately like a bath bomb. Instead, they slowly start to dissolve and release creamy bubbles. One slice is fairly dense, so that should be enough for a full tub. If you like, you can add another or cut bigger slices.
-Kelsey with Bramble Berry
Thank you Kelsey
this looks cute lol
Thanks Izzy, glad you’re enjoying the post.
-Kelsey with Bramble Berry
I have tried this recipe several times and it is just not doing right. The only difference in what I was doing was using sls instead of slsa. And cocoa pebbles instead of cubes. The mixture is still mushy to the point that I can’t lift it off the table. Would the sls make it that different?
The SLS should work similarly to the SLSA, so I’m not sure why the mixture is mushy. If you live in a more humid environment, that may affect the recipe. You may try adding a bit more baking soda to see if that helps firm it up. You can start with an ounce or two and go from there.
-Kelsey with Bramble Berry
Could you mold these in the disc mold like your Orange Creamsicle Truffle?
I’m not entirely sure. When we put this recipe in a liner, it stuck to the sides a bit. It may do that in the disk molds as well. I would recommend trying a small test truffle to see if it sticks at all. 🙂
-Kelsey with Bramble Berry
Orange Creamsicle Bath Truffle: https://www.soapqueen.com/bath-and-body-tutorials/bath-fizzies/orange-creamsicle-bath-truffle/
Disk Mold and Package: https://www.brambleberry.com/Disk-Mold-Package-Plastic-P5914.aspx
what is the purpose of the cream of tartar? I don’t have it and it’s a pretty expensive item. Can it be subbed out for any other powder such as milk powder or kaolin clay?
The cream of tartar helps the truffles hold their shape and also gives them a nice fluffy texture. We recommend using it in this recipe. Changes to the recipe can affect how long you have to work with the dough, how firm the bars become, how easily the bars can be rolled and cut, how it behaves in the tub, etc. In general, we don’t recommend making substitutions for the dry and wet ingredients in this recipe. If you do want to tweak the recipe, consider making a smaller batch with one color to see how the changes affect the texture of the dough and results in the tub. 🙂
-Kelsey with Bramble Berry
I have everything but glycerin. Is there a way to make this using melt and pour or something other than glycerin?
If you want to substitute any ingredients in this recipe, it will change the texture of the dough. Changes to the recipe can affect how long you have to work with the dough, how firm the bars become, how easily the bars can be rolled and cut, how it behaves in the tub, etc. In general, we don’t recommend making substitutions for the dry and wet ingredients in this recipe. If you do want to tweak the recipe, consider making a smaller batch with one color to see how the changes affect the texture of the dough and results in the tub. I would definitely recommend glycerin over melt and pour, as the soap base will harden and can form clumps in the dough. Glycerin keeps it smooth and workable. 🙂
-Kelsey with Bramble Berry
Just tried this recipe and they bars turned out great. This is one I will be adding to my product line. Thank you Bramble berry.
You’re very welcome Deborah! So glad the bars turned out great. 🙂
-Kelsey with Bramble Berry
Can polysorbate 20 & polysorbate 80 be used interchangeably?
What are the differences and when should I not substitute one for the other?
Polysorbate 80 is used to emulsify heavier oils and butters, while Polysorbate 20 is usually used to emulsify just fragrance oils. I would recommend Polysorbate 80 in this recipe because of the heavier butters. 🙂
-Kelsey with Bramble Berry
Thank you for the quick response.
Just added it to my cart 🙂
Could I use FD&C colors instead of the micas?
Using FD&C colors may be tricky. Because they’re water based, they may cause the recipe to fizz. That can make them expand and not fizz as much in the tub. If you do use them, you’ll want to use a very small amount. I would also recommend a small test batch to see how they affect the truffles. 🙂
-Kelsey with Bramble Berry
Hi Kelsey, thanks for the reply! I have the powder form of the FD&C colors, would that help? And if so would I just add them in the same way I would the micas? Also are these meant to be used in the tub the same way a bath bomb would? I’m dying to try these!!
We haven’t given those a try so I’m not entirely sure. I would recommend making a small test batch and add them just like the micas. Then, give them a try in the tub to see how they do. Also, these are meant to be used in the tub just like bath bombs! I like to break them up under the running faucet for the best bubbles. 🙂
-Kelsey with Bramble Berry
How many batches could I get out of what is added to cart when I add it from this page? Also, is it super bubbly or just a light bubbly? THANKS! 😀
If you remove the cream of tartar and swap it for 1lb and swap both baking sodas for 5lbs you will get 2 full batches. As is you will get one with lots of left overs.
The ingredients you get will make one full batch of truffles, with a few ingredients leftover. You can get more batches if you buy more baking soda and cream of tartar. 🙂
-Kelsey with Bramble Berry
I like this recipe very much! I used it to revamp my mocha latte truffles and used coffee butter instead of Shea, chocolate instead of fruity, and did 2 layers each of the 3 colors I picked (a dark gold, brown, and white). It was easy to work with and when it did get too hard in some spots I used my heat gun to make it workable. I can’t wait to see how they do!
That’s awesome, glad you like the recipe Krista! Have fun giving them a try. 🙂
-Kelsey with Bramble Berry
How do you think subbing oils/butters in the same amounts would work? I am thinking shea and coconut, or shea and sweet almond, or shea and avocado because I have lots more of them than cocoa butter and want to save what I have for my bomb orders. Thoughts?
I would think the cocoa butter or another hard butter would be needed because they would be too soft and crumbly without.
If you want to substitute any ingredients in this recipe, it will change the texture of the dough. Changes to the recipe can affect how long you have to work with the dough, how firm the bars become, how easily the bars can be rolled and cut, how it behaves in the tub, etc. In general, we don’t recommend making substitutions for the dry and wet ingredients in this recipe. If you do want to tweak the recipe, consider making a smaller batch with one color to see how the changes affect the texture of the dough and results in the tub. 🙂
-Kelsey with Bramble Berry
wahou superbe je garde la formule quand j’aurais ma baignoire
Whaou super I keep the formula when I have my bath
Enjoy Violette! 🙂
-Kelsey with Bramble Berry
I like this recipe, thank You! While the colours are great they (luckily) aren’t vital to my enjoyment of a lovely bubble bath. Therefore, I have two questions. If you are willing to skip the beautiful rainbow is there some other way to mold these that would let you avoid slicing? I know my limitations and I can’t cut nice slices, I tried with your other recipe and we’re not going to discuss the results. (I knew better, tried anyway.) Could it maybe be hand rolled into coils or little balls? Or perhaps made using an ice cube tray?
And would substituting glitter for the micas work? (The ONLY substitution I’m interested in, … glitter is so much easier to list on labels so its what I have in bulk.)
Thank you very much for your help,
Sincerely,
Grey Dove
You can definitely roll them into balls, that would look really cute! People also like to use ice cream scoops to make really adorable shapes. As for the ice cube tray, we had a bit of trouble getting this dough out without sticking. You may want to make a few test batches to see if it works. Also, you can definitely use glitter and leave the truffles uncolored! 🙂
-Kelsey with Bramble berry
Have you tried using a 1/2 batch for slicing? Maybe a smaller log will be easier to work with for you. I did a 1/2 test batch and it still made lots of truffles, I don’t have the mold I just put everything on parchment lifted it in the air and moved it from side to side till gravity made the log nice and round. The dry truffles are still a touch fragile so I would recommend sclicone molds that you can chill and remove them easily if you go that way, balls would have a flat spot but sprinkled in glitter would be cute.
I tried this recipe last night. For some reason I only added 3 oz of shea butter. Guess I read the recipe wrong. It didn’t turn out dough like so I ended up putting the mixtures into molds and they molded up ok overnight! I used a dry one last night in the bath and they were very nice. Bubbled up nicely. It is nice to actually have a bubble bath item that actually moisturizes the skin!
Oh that’s awesome, glad the bars turned out well Natalie! 🙂
-Kelsey with Bramble Berry
Personally, I would melt the cocoa butter first and then put the shea butter in. I’ve never made bubble bars but will have to give this one a try.
Have fun Michael! 🙂
-Kelsey with Bramble Berry
I tried these last night but halved the recipe, substituted the liquid glycerin with the same weight of melt and pour basem (just to experiment!), used SLS instead of SLSA, and didn’t have Polysorbate 80 so omitted it.
After adding all of the oils it was absolute mush so I continued to add a mixture of baking soda and citric acid until I got the consistency of dough. The mixture was still a bit difficult to work with to layer the colors. They seemed to mush into each other a bit when trying to spread on top rather than the previous layer holding firm (was my dough still too soft??). I let them solidify a bit before cutting (no way I could have done it while they were soft) but it seemed to separate at the layers a bit and crumble off around the edges of the half-moon shape I used. I waited until it was even more solid and it did hold together a bit better. Anything that began to crack or crumble off I was able to gently re-form back into place with my hands.
So my question is..is there any way to improve the consistency (more dry ingredients/less oil?) or was lack of liquid glycerin definitely my problem here? And what is the hardness of your final bars when they are completely dry? I would love to tweak the recipe to continue to use my melt and pour if I could!
We didn’t try this recipe with melt and pour soap, so I’m not entirely sure why that happened! The melt and pour tends to cool really quickly and can do odd things in this recipe. It also has a fairly high water content, which can cause the baking soda and citric acid to react. I would recommend using liquid glycerin instead. We were able to form our bars easily with it, and they dried to pretty hard texture after a few hours. 🙂
-Kelsey with Bramble Berry
I know you said not to substitute but I have cocoa butter chips from BBerry different fragrance, and different micas – would that be okay?
You can use the cocoa butter pastilles! They will work just fine in this recipe. Also, you can definitely use a different fragrance and micas. Just start off with a small amount of mica and add from there until you get a color you like.
The fragrance may also have a different usage rate. You can use the Fragrance Calculator to find out how much to add: https://www.brambleberry.com/Pages/Fragrance-Calculator.aspx
Just select “Salts” from the drop down menu. 🙂
-Kelsey with Bramble Berry
Can’t wait to try these, thanks!!
Will they turn brown if I use a fragrance with a high amount of vanilla in it?
There is a chance they may turn brown. Vanilla discoloration is a bit more inconsistent in bath truffles, sometimes they brown, sometimes they don’t. If they do discolor, it may not be as dark as usual. To be extra careful, you may want to use a vanilla-free fragrance. 🙂
Clear and vanilla free fragrances: https://www.brambleberry.com/Clear-Vanilla-Free-C491.aspx
-Kelsey with Bramble Berry
Would love to see a video of one dropped in water! 🙂
Just to see how it fizzes. 🙂
Thanks so much for the suggestion Patti, I’ll see if we can make that happen. 🙂
-Kelsey with Bramble Berry
Is there any substitute for SLSA?
Thank you..
You can use SLS as well: https://www.brambleberry.com/Sodium-Lauryl-Sulfate-P3562.aspx
If you don’t want to use SLS or SLSA, you can leave it out. The truffles will just fizz and not bubble, as the SLSA is what makes them bubble. You’ll also need to adjust the liquid ingredients. Because you’re leaving out 13 oz. of SLSA, the butter it calls for now will make the bars too wet. I would recommend a small test batch to see how much butter you need!
-Kelsey with Bramble Berry
Thank you.. I guess I should leave the idea of doing bubble bath. 🙂
The good news is you can still get some nice fizzing! 🙂
-Kelsey with Bramble Berry
What about using powdered milk instead? It would make a very moisturizing truffle indeed.
You can add powdered milk to your fizzy! It feels really nice. We did that in the Pumpkin Spice Latte Bubble Bath Bombs: https://www.soapqueen.com/bath-and-body-tutorials/bath-fizzies/pumpkin-spice-latte-bubble-bath-bomb/
-Kelsey with Bramble Berry
I have been waiting for this recipe since the first peek of these beauties!
I am so going to try them this weekend!!! Thank you!
You’re welcome Adi, have fun!
-Kelsey with Bramble Berry
What’s the purpose of the polysorbate 80 in this?
It’s an emulsifier, so it would help the oils in this recipe disperse evenly through the tub as cloudy water, instead of sitting on top like an oil slick.
So the mica doesn’t stick to the side of tub and the butters don’t lay on top of water
Natalie and Paul are correct (thank you)! It’s an emulsifier that helps the oil and color mix into the bath water rather than pooling on top. 🙂
-Kelsey with Bramble Berry
I have everything to make these! Even fruity fusion! Yay!!!
They turned out great! 🙂
-Kelsey with Bramble Berry