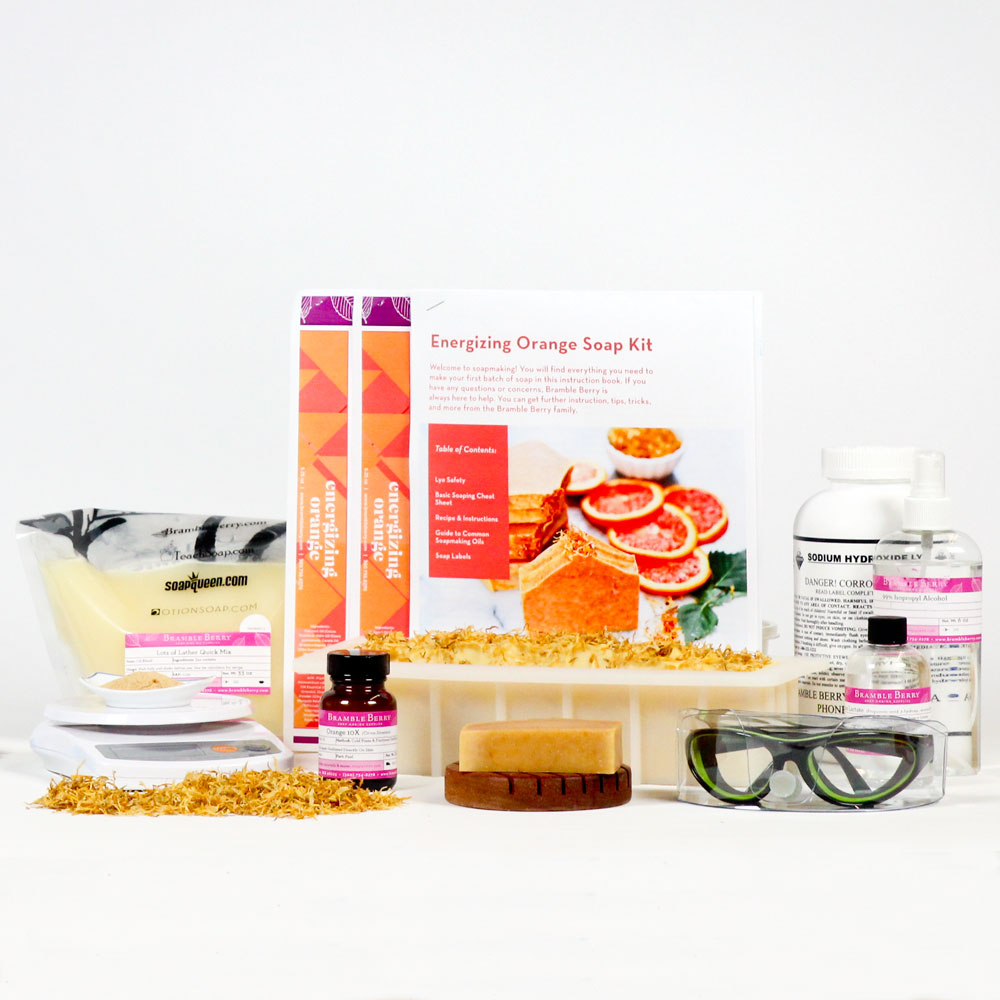
Making cold process soap for the first time can be intimidating. To make the process as easy as possible, we designed the Natural Soap Kit for Beginners with the first-time soaper in mind. The kit comes in three color and fragrance options (orange, lavender and lemongrass) and includes 100% pure essential oils, botanicals, lye, soaping oils, a reusable mold and safety gear. All you really need to provide is distilled water, soaping containers and a stick blender. Plus, it ships for free to anywhere in the lower 48 United States! It’s the perfect gift for that crafty person in your life.
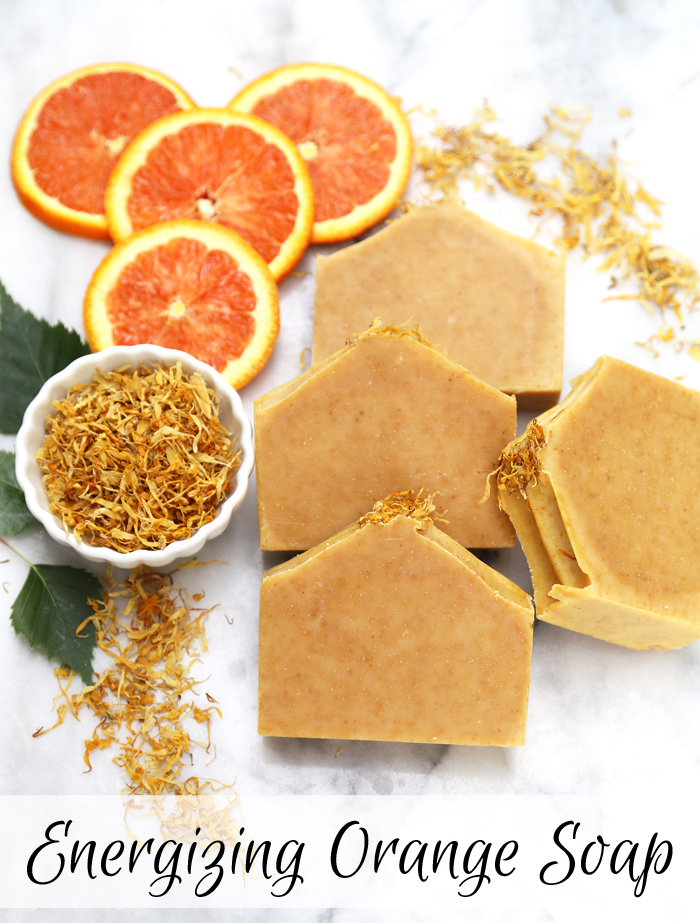
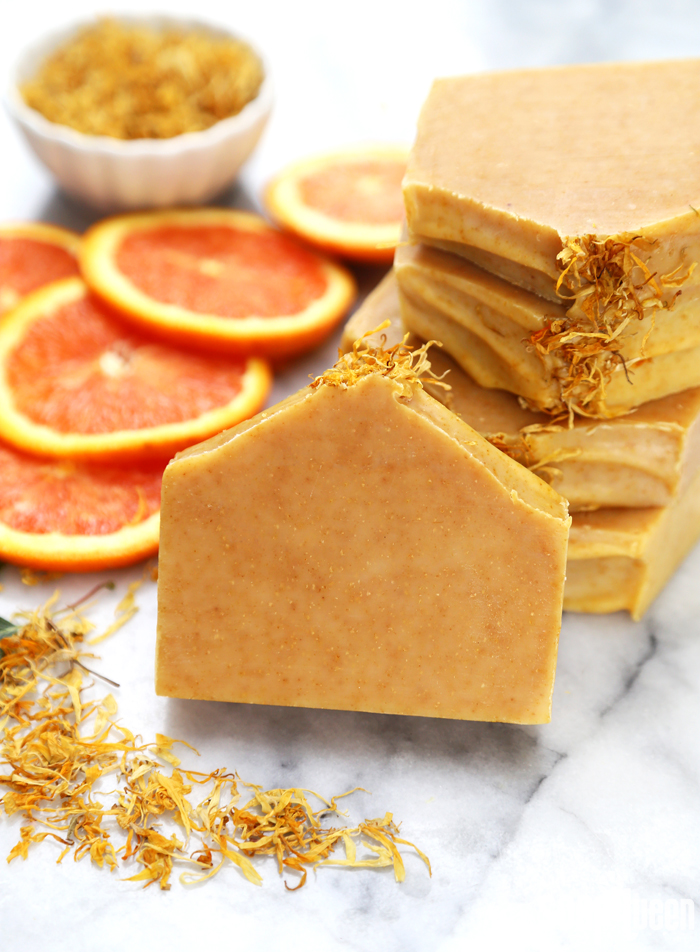
This Energizing Orange soap may be my favorite of the three Natural Soap Kit for Beginners color and fragrance options. The soap is scented with 10X Orange Essential Oil, which gives the bars a bright orange color. Orange peel powder adds extra color and a touch of exfoliation. Marigold petals are added to the top for a finishing touch. The bars smell amazing, and look so bright and cheery. I have yet to meet somebody who didn’t enjoy orange soap. =)
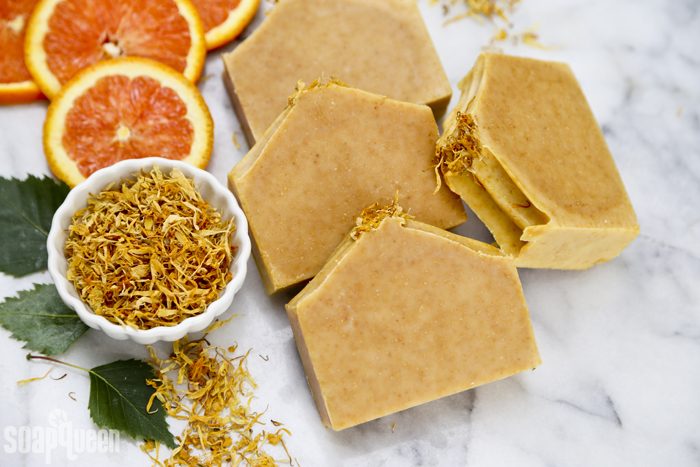
Part of what makes this project so easy is that it requires a nice thick trace. The orange peel powder can be added directly to the soaping oils prior to adding the lye, or it can be added at trace and stick blended. To create the texture on top, continue to stick blend until you achieve a texture of thick pudding. You really don’t need to worry about stick blending this project too much!
Soap Recipe:
Most of the items below (everything but the water!) are supplied in the Natural Beginner Soap Kit. See all contents of the kit here.
10″ Silicone Loaf Mold
33 oz. Lots of Lather Quick Mix
10 oz. Distilled Water
4.7 oz. Sodium Hydroxide Lye
2 tsp. Sodium Lactate
1.7 oz. 10X Orange Essential Oil
3 tsp. Orange Peel Powder
Marigold Petals
99% Isopropyl Alcohol in Spray Bottle

Click here to add everything you need for this project to your Bramble Berry shopping cart and get *free shipping* on this kit!
If you’ve never made cold process soap before, stop here! I highly recommend checking out our FREE four part SoapQueen.tv series on Cold Process Soapmaking, especially the episode on lye safety. And if you’d rather do some reading, Bramble Berry carries a wide range of books on the topic, including my newest book, Pure Soapmaking. You can also checkout the digital downloads for that instant gratification factor.
SAFETY FIRST: Suit up for safe handling practices! That means goggles, gloves and long sleeves. Make sure kids, pets, and other distractions and tripping hazards are out of the house or don’t have access to your soaping space. Always soap in a well-ventilated area.
ESSENTIAL OIL PREP: In a glass fragrance oil safe container, measure 1.7 ounces of 10X Orange Essential Oil. Set aside.
LYE PREP: In a durable, heat-safe, non-metal container, measure out 4.7 ounces of sodium hydroxide lye flakes. In a separate durable, heat-safe, non-metal container, measure out 10 ounces of room temperature distilled water. Slowly and carefully add the lye to the water and gently stir until the lye has fully dissolved. Do not add the water to th?”e lye. As you stir, the mixture will emit fumes; do not breathe them in. The lye mixture will heat to about 180-190 ° F. Label the container “DANGER: LYE” and place in a safe space to cool until about 120-130 ° F. This takes about an hour.
OIL PREP: While the lye solution cools, prep the oils. Fully melt the entire bag of Lots of Lather Quick Mix in the microwave or in a double boiler until there are no chunks or cloudiness. If melting the oils in a double boiler, do not let the bag touch the sides or bottom of the pot, or the plastic bag can melt. Once the oils are completely melted, give the bag a good shake. Measure 33 oz. of oils into a large, non-aluminum bowl capable of holding at least 50 ounces. Set aside.
The ingredients are now prepped! Check the temperature of your lye solution and oils. To soap, the oils and lye should be 110-130 ° F. If you took off your safety goggles and gloves, place them back on. Once your oils and lye are in that temperature range, carefully add 2 teaspoons of sodium lactate to the lye solution and use a spoon to gently stir in. Wash off spoon immediately. Now, let’s soap!
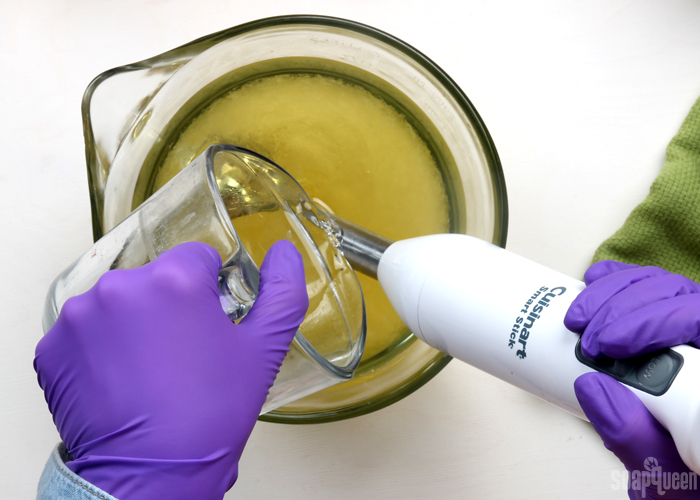
ONE: Slowly and carefully add the lye solution to the oils. Pulse the stick blender on and off to begin emulsifying the oils and lye together. Continue to pulse the stick blender for 15-20 seconds and then use it to stir the mixture.
NOTE: In the instructions for the Natural Beginner Soap Kit, the orange peel powder is added directly to the soaping oils prior to adding lye. Adding the orange peel powder to the oils “disperses” it, which avoids clumps. I forgot to do that in this batch (whoops!) and added the orange peel powder later at trace. Either way works just fine!
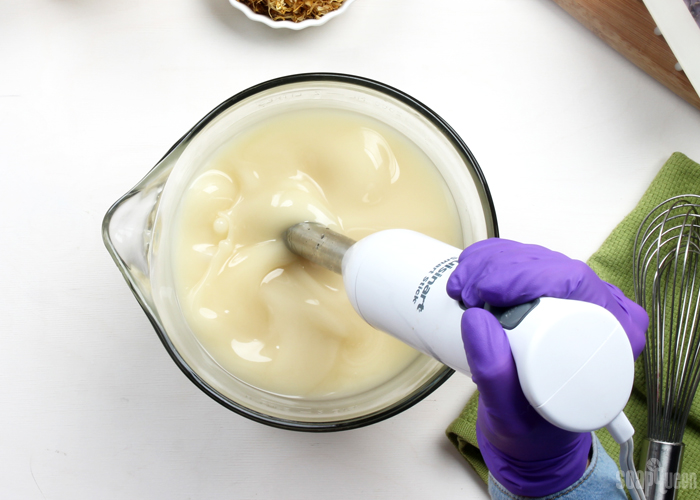
Once you start blending, the mixture will begin to look creamy. After about 1 minute of blending and stirring, the oils and lye will be combined and the soap will be the texture of thin pudding. This is thin trace!
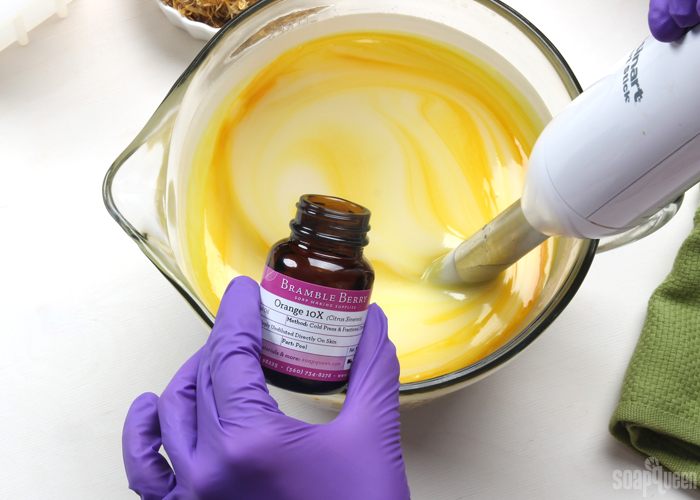
 TWO: Add the 10X Orange Essential Oil into the soap. Use the stick blender to completely blend in the essential oil.
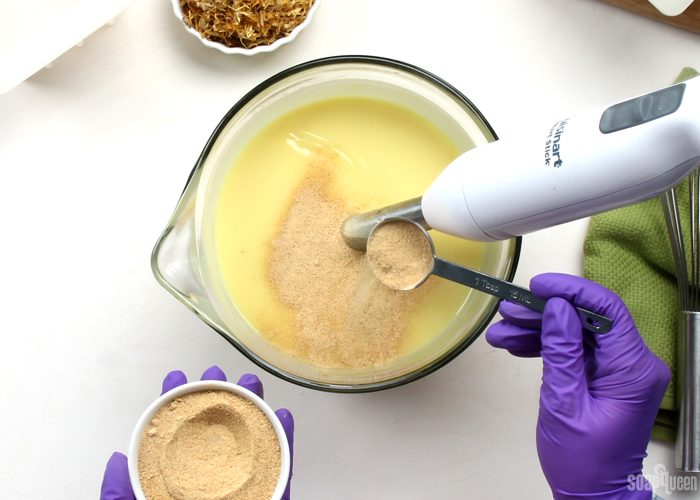
 THREE: Add the orange peel powder and stick blend to fully incorporate until there are no clumps.
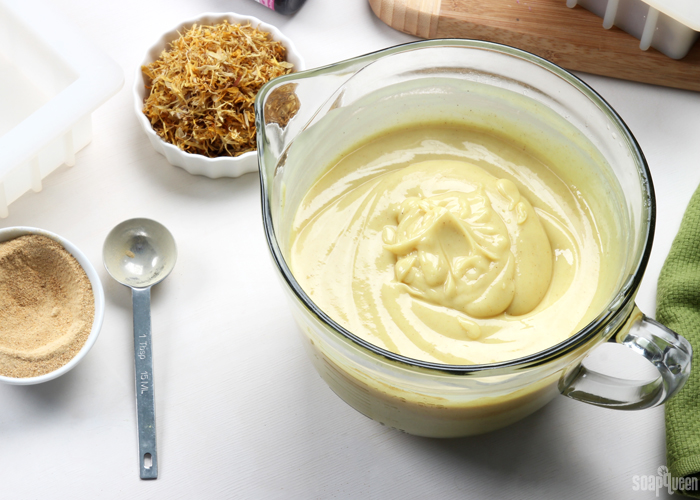
 FOUR: At this point, the soap batter will have thickened slightly. As you continue to stick blend, it will become thicker. Continue to stick blend the soap batter until it is the texture of thick pudding and is able to form peaks.
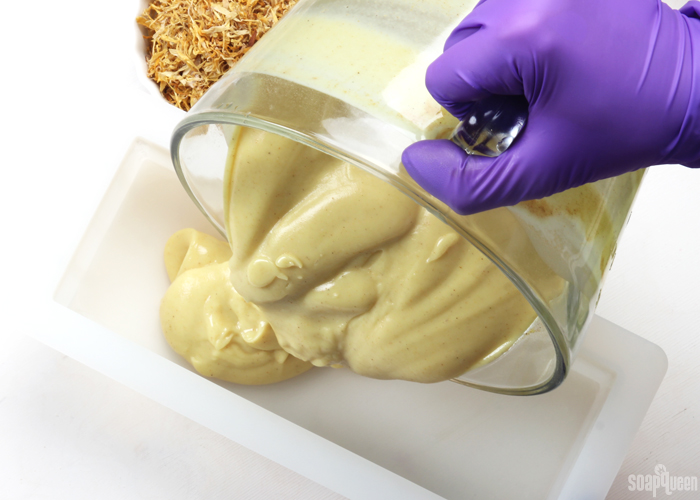
 FIVE: Once the soap has thickened, pour the batter into the 10” Silicone Loaf Mold. Tap the mold firmly on the counter to release bubbles. Use a spoon to mound the soap in the center of the mold, forming a peak in the center. If the soap is not holding its shape, allow the soap to sit in the mold for 2-3 minutes, then continue mounding in the center. There is no right or wrong way to create texture on the top of soap, have fun with it!
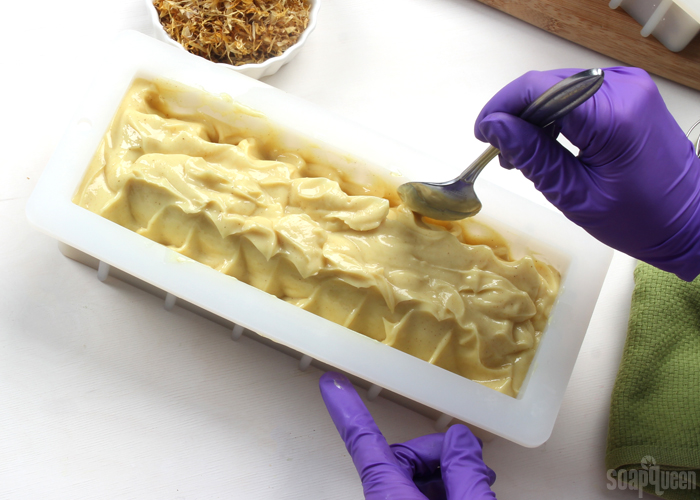 SIX: Once you’re happy with the top of the soap, sprinkle marigold petals on the top of the soap. Spritz the top of the soap with 99% isopropyl alcohol.
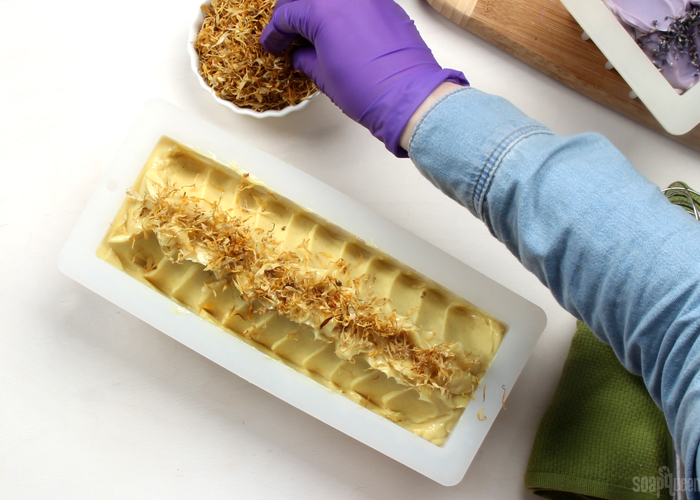 SEVEN: The soap needs to sit and harden in the mold for 2-3 days. It can be hard to wait, but it’s worth it! After two days, pull the sides of the mold away from the soap. If it releases easily, pull the other two sides away from the soap and gently press from the bottom to release the airlock. Gently and carefully, remove the soap and place on a cutting board. If the sides of the mold do not easily release, give the soap another day to harden in the mold.
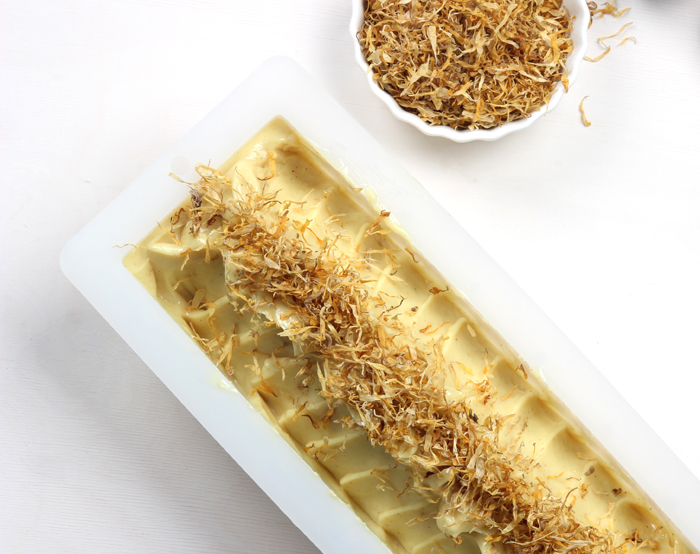
Using a sharp, non-serrated knife, cut the soap into bars. To prevent the marigold petals from creating drag marks, lay the soap on its side and cut the bars. Once the loaf is cut into bars, they need to cure for 4-6 weeks. During this time water evaporates from the bar, which creates a firmer and longer lasting bar of soap. Enjoy!
- 10″ Silicone Loaf Mold
- 33 oz. Lots of Lather Quick Mix
- 10 oz. Distilled Water
- 4.7 oz. Sodium Hydroxide Lye
- 2 tsp. Sodium Lactate
- 1.7 oz. 10X Orange Essential Oil
- 3 tsp. Orange Peel Powder
- Marigold Petals
- 99% Isopropyl Alcohol in Spray Bottle
- In a durable, heat-safe, non-metal container, measure out 4.7 ounces of sodium hydroxide lye flakes. In a separate durable, heat-safe, non-metal container, measure out 10 ounces of room temperature distilled water. Slowly and carefully add the lye to the water and gently stir until the lye has fully dissolved. Do not add the water to the lye. As you stir, the mixture will emit fumes; do not breathe them in. The lye mixture will heat to about 180-190 ° F. Label the container “DANGER: LYE” and place in a safe space to cool until about 120-130 ° F. This takes about an hour.
- While the lye solution cools, prep the oils. Fully melt the entire bag of Lots of Lather Quick Mix in the microwave or in a double boiler until there are no chunks or cloudiness. If melting the oils in a double boiler, do not let the bag touch the sides or bottom of the pot, or the plastic bag can melt. Once the oils are completely melted, give the bag a good shake. Measure 33 oz. of oils into a large, non-aluminum bowl capable of holding at least 50 ounces. Set aside.
- Measure 1.7 ounces of the 10X Orange Essential Oil into a glass, fragrance oil safe container. Set aside.
- The ingredients are now prepped! Check the temperature of your lye solution and oils. To soap, the oils and lye should be 110-130 ° F. If you took off your safety goggles and gloves, place them back on. Once your oils and lye are in that temperature range, carefully add 2 teaspoons of sodium lactate to the lye solution and use a spoon to gently stir in. Wash off spoon immediately. Now, let’s soap!
- Slowly and carefully add the lye solution to the oils. Pulse the stick blender on and off to begin emulsifying the oils and lye together. Continue to pulse the stick blender for 15-20 seconds and then use it to stir the mixture. Once you start blending, the mixture will begin to look creamy. After about 1 minute of blending and stirring, the oils and lye will be combined and the soap will be the texture of thin pudding. This is thin trace!
- Add the 10X Orange Essential Oil into the soap. Use the stick blender to completely blend in the essential oil.
- Add the orange peel powder and stick blend to fully incorporate until there are no clumps.
- At this point, the soap batter will have thickened slightly. As you continue to stick blend, it will become thicker. Continue to stick blend the soap batter until it is the texture of thick pudding and is able to form peaks.
- Once the soap has thickened, pour the batter into the 10” Silicone Loaf Mold. Tap the mold firmly on the counter to release bubbles. Use a spoon to mound the soap in the center of the mold, forming a peak in the center. If the soap is not holding its shape, allow the soap to sit in the mold for 2-3 minutes, then continue mounding in the center. There is no right or wrong way to create texture on the top of soap, have fun with it!
- Once you’re happy with the top of the soap, sprinkle marigold petals on the top of the soap. Spritz the top of the soap with 99% isopropyl alcohol.
- The soap needs to sit and harden in the mold for 2-3 days. It can be hard to wait, but it’s worth it! After two days, pull the sides of the mold away from the soap. If it releases easily, pull the other two sides away from the soap and gently press from the bottom to release the airlock. Gently and carefully, remove the soap and place on a cutting board. If the sides of the mold do not easily release, give the soap another day to harden in the mold.
- Using a sharp, non-serrated knife, cut the soap into bars. To prevent the marigold petals from creating drag marks, lay the soap on its side and cut the bars. Once the loaf is cut into bars, they need to cure for 4-6 weeks. During this time water evaporates from the bar, which creates a firmer and longer lasting bar of soap. Enjoy!


Is it only 3 teaspoons or tablespoons of the orange peel powder?
We used 3 teaspoons of orange peel powder in this recipe.
Can I make this soap in the 6 or 12 bar silicone molds instead of cutting them….would that be easier to do?
Yes, you can use cavity molds for this recipe so you don’t have to cut the bars. You may need to resize the recipe depending on how much the mold holds. This post shows you how: https://www.soapqueen.com/bath-and-body-tutorials/tips-and-tricks/how-to-resize-cold-process-soap-recipes/
Molds: https://www.brambleberry.com/Molds-C184.aspx
I just made this soap and the loaf looks SO beautiful and smells amazing. It looks perfect on the outside and it’s firm. I used the 2lb wooden mold with a silicon insert. I attempted to cut into it on it’s side right after unmolding (I waited about 5 days to unmold) and the cut is dragged/unclean because of the large circle inside that’s a bit too soft (gel phase). Should I have unmolded sooner and/or should I wait a while before attempting to cut the loaf more to make the cuts look nice?
Yes, give the soap a few more days to harden up before cutting it. That will help prevent those drag marks.
Is there a calculator for breaking down the Lots of Lather Quick mix in Oz? ex. 33% Coconut, 33% Palm, 16% Canola, 14.9%, 3% Castor Oil, 0.1% Vit. E. Oil? Thank you for your response.
Tammy
Absolutely, you can find the oil percentages for the Quick Mixes in this post: https://www.soapqueen.com/bath-and-body-tutorials/tips-and-tricks/sunday-night-spotlight-quick-mixes/
thank you, I decided to use my brain and research! lol
Can this also be incorporated into HP soaping method?
It can! The main difference is you add the essential oil when the soap is finished cooking, rather than at trace. 🙂
-Kelsey with Bramble Berry
Can preserved orange peel from the grocery store be used instead of the orange peel powder? If so, how much peel?
Is that orange peel dried or is it fresh?
-Kelsey with Bramble Berry
It’s dried orange peel used for baking found in the spice aisle.
Re the orange peel, sodium sulfite is added as a preservative. Would that affect the soap?
I’m not entirely sure, we haven’t worked with that sodium sulfite. You may try a small test batch to see how it works. If all goes well, you can add it to a larger batch.
-Kelsey with Bramble Berry
Whew! Just finished making this, my first CP soap! Smells lovely. I was so nervous and gained a new respect for all the experienced soapers and their willingness to share and teach. Right down the middle of my loaf it looks kind of like vaseline now. Is that “gel”? Is that supposed to be happening? Thanks for this kit and all the information.
Yay, so exciting! Congrats on your first batch Sherrene. Also, the Vaseline look is gel phase. That’s normal! That happens when the soap gets pretty warm. It’s just an aesthetic issue and won’t affect the final bar. Some soapers actually prefer it because it makes the colors in the soap pop. Learn more about gel phase here: http://www.soapqueen.com/bath-and-body-tutorials/tips-and-tricks/gel-phase/
Are you hooked on soapmaking now? 🙂
-Kelsey with Bramble Berry
I received this kit and made it immediately. However, I noticed a sort-of “play-doh” smell that only slightly went away when I added the essential oil. One cured will the smell go away, and if not what did I do wrong?! I was so excited for this to come out perfect.
The oils do have a natural smell that can compete with the scent. However, that scent does tend to fade a little bit as the soap cures. Let us know how that soap smells after 4 weeks! 🙂
-Kelsey with Bramble Berry
Hi. Do I need to cover it while waiting to harden in the mold?
Covering the soap does tend to heat it up and force gel phase. If the soap gets pretty hot, the texture on top can fall. We recommend leaving it uncovered at room temperature. 🙂
Read more about gel phase here: http://www.soapqueen.com/bath-and-body-tutorials/tips-and-tricks/gel-phase/
-Kelsey with Bramble Berry
My son has anxiety and keeps orange peels after lunch at school so he can smell them when he feels nervous and they calm him . Do you think I could use 10x orange essential oil mixed with some oil and put it in like a fragrance roller ball applicator so he could put that on his wrist and smell it. If so, how much 10 x could I use per .25ounces of say sweet almond oil? Thanks for your response in advance!
I wouldn’t recommend using 10X Orange on the skin. It is a photosensitizer and can cause irritation. He can keep it in a roller ball and just use it to smell! You can also use an orange fragrance oil. Because it’s synthetic it’s not a photosensitizer. Orange Peel Cybilla Fragrance Oil works well: https://www.brambleberry.com/Orange-Peel-Cybilla-Fragrance-Oil-P3391.aspx
You can add it to cyclomethicone or isopropyl myristate like a perfume and apply that way. 🙂
Learn how here: https://www.soapqueen.com/bath-and-body-tutorials/diy-moonlight-essence-spray-perfume/
-Kelsey with Bramble Berry
I want to do this recipe but HP do I need to do anything different?
The main difference is that you’ll add the essential oil and color at the end of the cooking process, rather than at trace. Other than that the process is very similar! 🙂
Learn more about hot process soap in this video: https://www.youtube.com/watch?v=mxTXwxbpzLM
-Kelsey with Bramble Berry
I’ve Made The Melt And Pour Orange Shea Butter Soap I Just Love It❤The Color And Fragrance In Your Picture And The Orange Peel I Love It❤
So glad to hear that Clarice! I imagine it smells and feels fantastic. 🙂
-Kelsey with Bramble Berry
I was wondering about the fragrance oil. Do you just add the whole bottle?
The bottle has 1.75 oz. of essential oil, so you can just add the whole thing! 🙂
-Kelsey with Bramble Berry
Hi, i am trying to get to know as much as i can about soap making, before i start to practice. i have been searching for tutorials, articles, recipes and ingredients all over the net for a couple of month already, it seems that i made a research 🙂 , i have been comparing quality of tutorials and instructions, and also prices for everything you need ti make MP or CP soap, i can definitely say that your website is the best for beginners, your videos on youtube are very clear, very optimistic, full of energy, your videos can inspire even somebody who never planned making soap. Prices on BB, especially for bases and fixed oils are the lowest that could be found in online shops. I Hope i will start taking my practice soon, now i am picking MP and CP recipes, that i would like to try first, the ones that don’t seem very difficult for me. This orange soap recipe is one of my favorites, and my first question on this website is, can you recommend how can i replace 33 oz “lots of lather quick mix” in this recipe? i would like to use the same oils that are used in this mix but don’t know the proportions, can you advise for the quantities of each oil separately, to make 33 oz of oils altogether. i understand that this quick mix recipe and exact proportions may be a secret, so i would be happy if you just give me your ideas for the alternative mix of oils for this recipe.
Thank you for your sweet message Kate! It really means a lot to us. We really enjoy helping people who are just getting started making soap. 🙂
You can find the exact proportions for the Quick Mixes here: https://www.soapqueen.com/bath-and-body-tutorials/tips-and-tricks/sunday-night-spotlight-quick-mixes/
We include the percentages so you can recreate the recipe using oils you have at home!
-Kelsey with Bramble Berry
This is a great recipe. I made a batch when it first posted. Everyone loves the scent and the mildness of the soap. Thanks for all the wonderful information.
You’re very welcome Maryl, so glad your soap turned out well! 🙂
-Kelsey with Bramble Berry
My holiday crafting is already far behind me. But I love orange – I only use the Orange Peel fragrance oil, its the only thing I’ve found that I like and that lasts in soap.
Oh I love that fragrance, it’s so nice and fresh! 🙂
-Kelsey with Bramble Berry
Orange Peel Cybilla Fragrance Oil: https://www.brambleberry.com/Orange-Peel-Cybilla-Fragrance-Oil-P3391.aspx
Wow Beautiful! Wish we could have a lot more options with your products in Australia ,I know we lucky to get some I’ve bought 8 of your molds and Beautiful fragrance from Aussie soap suppliers,we are lucky to have them but even more happier if we could hit the button and get all the ingredients in one hit that you have here… Have both your books well two of one as had a ebook but had to get the hard cover ..you are all a inspiration well done 😀
Oh thanks for your sweet comment Bronwyn! It means a lot to all of us, including Anne-Marie. 🙂
-Kelsey with Bramble Berry
Super excited here! I’m moving and have to return the scale I borrowed, I hate my goggles, and I’ve been dying to get a silicone mold. This great deal takes care of all those things and now my mother can get this for me for Christmas (I just ordered it!). And this past weekend I sold 50 bars of soap at my first craft show! Your website is the best and I look forward to reading it everyday. Love you guys!
Oh that’s awesome! Enjoy Laura. Let us know how your first batch goes! 🙂
-Kelsey with Bramble Berry
I so wish I had known about this site when I first started soaping several years ago. I had no clue about fragrances and other oils and colors and lye calculators. I thought all soap batter HAD to be super thick and had to be kept hot while it saponified. Let’s not talk about what I did not know about saponification. Thanks so much to all of you for your instructions. If you could see the people who receive my soaps as gifts and how much they enjoy the soap, you would know how much I appreciate everybody at brambleberry.com and soapqueen.com
Eric
Oh thank you so much Eric! We try our best to help soapers of all skill levels, so your comment really means a lot to us. Also, you have some lucky friends – handmade soap is the best gift. 🙂
-Kelsey with Bramble Berry
I’m not a newbie, but this is gorgeous and would make a wonderful gift. I’m so behind in my holiday crafting…most of my soaps are going to have “Ready By” tags on them. So ashamed…lol.
I think we’ve all been there before! I’ve given a few gifts that had to be cured a bit more. This soap will make a fantastic gift. 🙂
-Kelsey with Bramble Berry