Click here for Day One of Container Candle Making – set up and melting instructions.
Step Three: This is where you will center and place your wick. You can purchase specialty glue dots to hold your wick in place and buy wick centering devices (such as the EZ Wick Setter here). If you’re not making candles for a business production line, you do not need a special glue to hold the wick down or a wick centering device. Use our cost-effective method below for setting your wick.
To glue down the wick, draw up some warm wax into a disposable plastic dropper. Use this hot wax as your glue to place and hold your wick. You can eyeball the wick into the center of your container without too much trouble. Work quickly. The wax will set up in a matter of seconds.
Fragrancing: Fragrancing is important in candlemaking. A recent survey done by the National Candle Association found that 75% of consumers purchasing candles considered fragrance to be “extremely important.” With over 10,000 candle fragrance options and an array of fragrance companies to choose from, candlemakers are lucky to have such a wide variety of choices to ensure they get the best scent for their budget and market demographics.
Some basic caveats when choosing a fragrance for your candle:
Throw is an issue. “Throw” refers to how well a candle wafts the scent over and throughout a room. Most candle fragrances are specifically designed to throw extremely well.
Flashpoint is something to consider. “Flashpoint” is the temperature at which an undiluted fragrance will combust when exposed to a flame or spark. Since candles are 5-10% fragrance and are diluted with 90% wax, combustion is not an issue. However, the lower the flashpoint, the higher the chance of fragrance note evaporation is. For example, if the fragrance flashpoint is 130, with a normal paraffin, soy or beeswax candle, evaporation or flash-off is a factor.
One important safety note is that if you are making gel candles, you must not use a fragrance with a flashpoint of 180 or below. Gel candles make large oil based pools. The entire pool of liquid could catch on fire with a sub-180 degree fragrance.
Test your fragrance. Different waxes, wicks and fragrance variables will make one fragrance smell great in a certain wax and wick combination but under perform with a different combination. A single Dixie cup with an appropriately sized wick, in a small room (bathroom anyone?) is an ideal test. It just takes two ounces of wax and .2 oz. of fragrance to test and potentially save you large batches of poorly scented candles.
The usage rate for fragrance in candles is surprisingly high. We recommend a full 1 ounce of fragrance (weight) per pound of wax. Candles scent entire rooms. To scent a such a large volume of space, 1 ounce of fragrance is a small investment.
You can the Bramble Berry candle line to scent your candles or the regular soap line. If you use the regular soap line, be sure to test the fragrance in a small test candle to ensure you’re thrilled with the throw.
Step Four: Once you have carefully transferred your hot wax to the pour container, add the candle fragrance while stirring the entire time. Since the candle fragrance will be cooler than the hot wax, the fragrance may congeal at the bottom of your pouring container. Simply stir it gently until the cooler portions are fully mixed in.
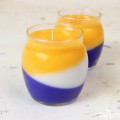
Step Five: This is where you add color. Remember to only use candle safe colorants as some colors may release toxins into the air if not approved for burning. In the photo below, I have dipped a Q-Tip into liquid candle color and painted designs on the inside of the container for a wacky, tie-dyed effect.
Step Six: Pour the melted, fragranced and colored wax into your heat safe container with a steady hand and evenly flowing pour.
Check back tomorrow for Day Three of container candlemaking.
Your tutorials are really helpful!! Easy to get..wonderful to make. You’re so talented. I’m your fan. 😀
Cheers from India! 🙂
Thank you for stopping by Hemali! You can also stop by Bramble Berry’s Facebook page and share your soapy creations, we’d love to see them. =)
https://www.facebook.com/BrambleBerry
-Becky with Bramble Berry
Hi there,
I’ve used the method detailed above to secure the wick onto the bottom of the container, but I find that when I pour the hot wax in to make the candle, the wax I’ve used to stick the wick, just melts away and the wick falls over. Am I doing something wrong?
Thanks so much for this post, it’s brilliant – keep up the good work.
Marzipants x
If you pour the candle wax a little cooler, it shouldn’t melt the base…but I’ve totally had that happen to be too. Check out this tutorial for the “pencil trick”. This combined with the centering technique works for me every time http://www.soapqueen.com/personal-ramblings/eco-chic-candles-2/
Courtney from Bramble Berry
What a great tutorial! I will definitely need to try this one day, because I just LOVE candles!
Thanks!
Marisa
Hi Michelle –
info (at) brambleberry.com will get to me.
Thanks for being a fan of the blog!
=) Anne-Marie
hi anne-marie! i have a personal question i’d like to as you. is there any way i can contact you? possibly through email? thank you! i do enjoy reading your blog 🙂