Real flowers are beautiful, but sadly they can’t last forever. These coffee filter flowers (yes, those are coffee filters) not only look like the real thing, but they also have a much longer shelf life! These filter “flowers” are incredibly easy to make, and you can dye them an infinite number of colors using a wide array of LabColors. Make a dozen of them for a bouquet, place setting or cute garland.

What You’ll Need:
Coffee Filters
Note: Because LabColors are highly concentrated and will stain the skin, gloves are recommended for this project. For information on how to dilute LabColors, check out this blog post.

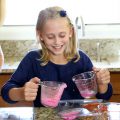
ONE: In a small container, pour a small amount of dilute one part Pinkberry Sherbet LabColor to two parts distilled water. In a small separate container, dilute one part Impatient Pink LabColor to three parts water. For an explanation of working in parts, see this blog post.

TWO: Grab the coffee filter by the center, and gently fold up to create a cone-like shape.

THREE: Gently place the ends of the coffee filter into the Impatient Pink LabColor, flip up, and allow the color to drip down and saturate the filter. Set aside on a paper towel. The color will continue to absorb and color the entire coffee filter. If you’d like more color, simply dip into the LabColor again.


FOUR: Repeat this process with all coffee filters. Once the Impatient Pink has saturated the filter, dip the very ends into the PinkBerry LabColor and set aside on the paper towel.

FIVE: If you’d like to make some darker petals as well (this color is shown on the right in the above photo), dip the coffee filter into the Pinkberry LabColor and let the color saturate the entire filter Set aside on a paper towel, and let dry.

SIX: Once the filters are fully dried, lay two filters on top of the other, grab from the center to make a cone shape, and wrap the tape around to create a “stem” and hold the two layers together. We used decorative washi tape for an extra splash of fun.

Have fun crafting – and if you make something fun, we want to see it on our Facebook page or just tag us on Instagram! =)


This is the first time that I have ever seen this website and as I was reading this directions it sounds pretty easy and I hope I will make this work out as best as I can thank-you for the directions and we will see what will turn out with I might tell my friend about the website as well she has a daughter that is going to get married pretty soon and her mother is the one that is going to help her daughter with the wedding and these directions with the flower making ingredients sound cheap and easy all in one thanks again.
Hi Karen!
I’m so glad you are enjoying the blog! This project is a lot of fun, and it’s super easy :). I hope you give it a try!
-Amanda with Bramble Berry
Those are really beautiful! They look a bit like peonies. Floral supply houses carry little green-painted wooden sticks that have a wire attached to one end with which you use to wrap around the base of your flower to create about a 6 – 8-inch stem. The other end has been sharpened so it’s easy to stab some floral foam to create an arrangement. You could probably do something similar with some bamboo skewers and a fine floral wire.
Very pretty, A-M!
Hi Patricia!
I’m glad you liked this project! You’re right, they do look like peonies (one of my favorite flowers). That’s a really great idea! We will have to try that 🙂
-Amanda with Bramble Berry