Pants! I was excited to do a fun sewing project that the kids could actually wear. I’ve been trying to learn how to sew all year and sharing those projects with you as I (slowly) learn (see: A Givember Sewing Project, Soothing Eye Pillow Sewing Tutorial, Handmade Pin Cushion with Walnut Seeds).
Pants seemed intimidating, but your basic pant for the littles actually come together pretty quickly when you have a good pattern and a few hours. A great (and free!) pattern for newborn pants can be found here and a pattern for older kids can be found here. Etsy also has a good selection of pants patterns that are available both pre-printed and as digital downloads that you print yourself.
Typically the patterns will come with their own instructions, but here’s a (very!) basic pant-making tutorial from a beginner’s perspective. I made pants for both Lily and Jamisen, so you’ll see two different colors of fabric in the pictures.
What You’ll Need:
Fabric (Note: your pattern will tell you the amount of fabric needed and the type of fabric that is recommended; I used a cotton seersucker but a quilting-weight cotton or even flannel would work! Can you say cozy flannel jammies?)
Elastic (Note: again, your pattern will tell you the type, width and amount needed.)
Pattern
Scissors or Rotary Cutter and Cutting Mat
Sewing Machine
Straight Pins
Chalk in a contrasting color
Iron and Ironing Board
Optional: Pattern Weights
Fabric Prep: If needed (if you are working with a cotton fabric), pre-shrink your fabric by washing on a normal cycle and drying. Iron the fabric once it’s dry. This will prevent your perfect pants from becoming capris before their time. (Note: there is no pre-shrinking cycle for kidlet growth spurts!)
ONE: If using a digital pattern, print the pattern and assemble according to the pattern’s instructions. Lay out your fabric folded down the center parallel to the selvedge with the rights sides together (so the side of the fabric that will be on the inside of the pants is facing out). Note: the selvedge is the machine-treated edge of the fabric. The fabric is cut from the bolt perpendicular to the selvedge.
TWO: Lay out your pattern in a way that fits the folded fabric. Many patterns have a layout diagram to help you fit everything on the fabric. Pay attention to any pieces that need to be placed on the fold. Use pattern weights or other heavy objects to anchor the pattern and trace the pattern with chalk. Carefully remove the patterns and weights, and pin the fabric just inside your traced line with the pin perpendicular to the traced line at sporadic points in order to keep the two layers together. If it’s helpful, label each pattern piece with it’s name written on a piece of tape.

THREE: Let’s take a second to talk about the pattern pieces. Pants patterns look pretty weird, huh? And depending on where you got your pattern, they may vary in the amount of actual pieces that they come in. The basic anatomy of a pants pattern:
-The center or crotch seam is the shorter of the two odd, curved seams that can vary in shape from a slight curve to almost half of a letter U, depending on the fit of the pant. The center seam starts at the waist and ends at the top of the inseam. The more drastic the curve at the center seam, the more fitted the pant. There is a difference between the pants front curve and the pants back curve. I’m sure you can guess why. Most patterns will be labeled as “front” and “back”, but if you’re unsure, the back curve is more pronounced than the front. Baby got back! (There are always exceptions – especially with baby patterns where fit isn’t as body-conscious, there may be just one piece that acts as both front and back.)
-The inseam is the longer of the two curved seams, and is the seam that runs along the inside of the leg. The inseam starts at the end of the center seam and ends at the hem. The more drastic the curve at the center seam, the more the inseam has to curve to meet it. The inseam ends at the hem of the pant, and depending on the pant either ends at a square (for a straight leg), tapers in (for a skinny or tapered leg), or curves out (for a boot cut leg).
-The outseam is the straight (mostly) seam on the pattern. This will be the seam that runs on the outside of the leg, where pockets typically are. The outseam starts at the waist and ends at the hem. The outseam can be curved at the hip to help with the fit of the pant, and can have the same leg shape variations as the inseam depending on the type of pant. Not every pant pattern has an outseam – if there is no need for shaping or curving, then your pattern may have directed you to place this edge on the fold. One less seam to stitch – yay!
FOUR: Whew, let’s start sewing! First, start with the center seam. Match the front center seams, with the right side of the fabric together, and sew using your pattern’s seam allowance. Repeat with the back center seams. Finish the raw edges with a serger or a zig-zag stitch in the seam allowance. Press the seam as you sewed it, then with the seam allowance to the left.


FIVE: Open up the pieces along the seams, and match the front to the back at the inseam. Sew the inseam using your pattern’s seam allowance,matching the center seam. Finish the raw edges with a serger or a zig-zag stitch in the seam allowance. Press the seam as you sewed it.
SIX: Match up your outseams and sew according to your pattern’s seam allowance. Finish the raw edges with a serger or a zig-zag stitch in the seam allowance. Press the seam as you sewed it. If your outseam was cut on the fold, skip this step!
SEVEN: At this point, you’ll want to create an enclosed casing for the waistband elastic. “Casing” is a fancy term for the tunnel that will house the elastic. The width of the waistband is determined by the width of the elastic that your pattern calls for, but a good rule of thumb is the elastic width + 1/2 inch. Fold down the fabric at the waist toward the inside of the pant by 1/4 inch and press, then fold again by the width of your elastic + 1/4 inch and press. Stitch along the double-folded edge (not the top of the waistband), back-tacking at the beginning and end of the seam and leaving a 1 inch hole.
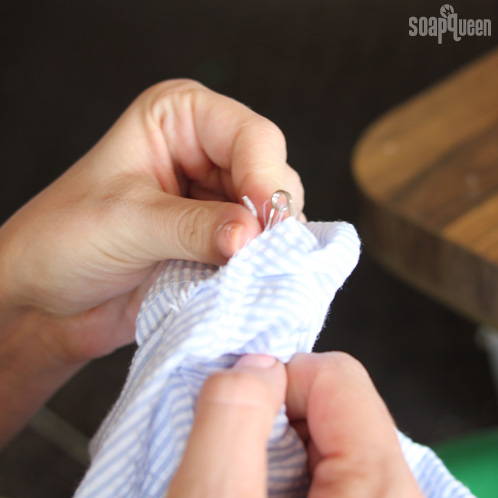
EIGHT: Get a rough measurement around your youngster’s waist. The elastic should be about 25% less than a loose waist measurement. Cut your elastic to size and attach a safety pin to one side. Insert the safety pin into the hole in your waistband and use it to feed the elastic through to the other side. Be sure not to lose the tail in the casing! Remove the safety pin. Give yourself some slack by pulling out about 2 or so inches of either end of the elastic, and sew the elastic along the short side to create an enclosed circle. Allow the elastic to retreat back into the casing and close the hole with a topstitch.
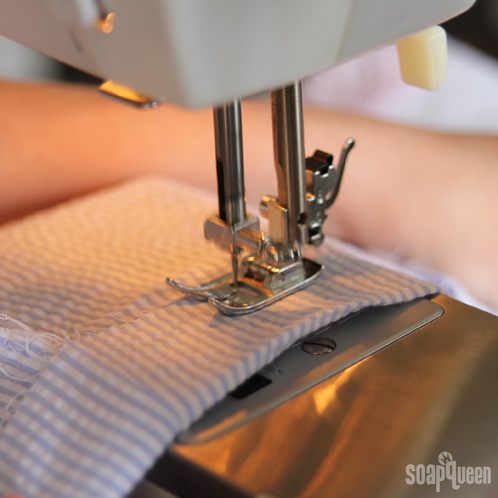
NINE: Try the pants on their recipient and mark the hem length with chalk (it will brush off easily enough!). Measure 1.5 inches from the mark toward the raw edge of the fabric, and cut off the excess. Fold each of the hems 1/2 inch toward the inside of the pant and press. Fold the hem again, 1 inch toward the inside of the pant and press. Stitch along the folded edge inside the pant (not at the bottom of the hem). Ta-da! Pants! Note: your pattern may have a designated amount of hem allowance. This is a general hemming technique; follow your pattern if it specifies.

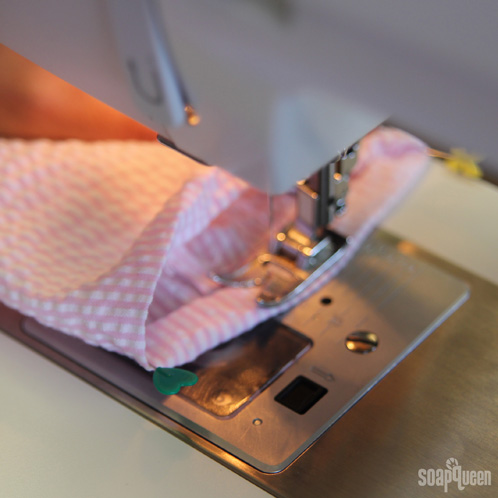
OPTIONAL FLAIR: For Miss Lily, I made a simple embellishment for her little onesie. I free-cut a few circles out of the pink seersucker and, leaving the edges raw, I freestyle-sewed all around until they were in place. Super cute, and quick!


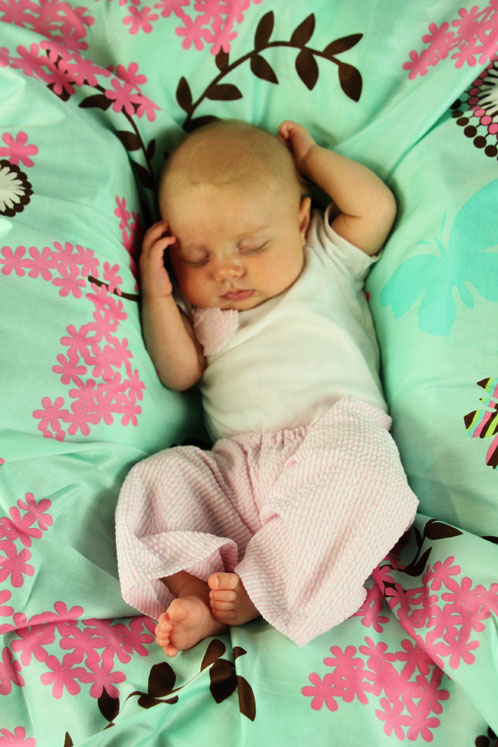
And there you have it! Cute pants to match a very cute kid =)


I would love to see you do the Maxi Dress skirt!!! I hear it is pretty easy, you have very nice detailed instructions.
Hi Kirstie!
That’s a great idea! I bet a maxi skirt is pretty easy, and Lily would look so cute in it :). I will pass your suggestion along!
-Amanda with Bramble Berry
You did an amazing job! I too want to learn to sew! I would love to make my Daughter’s wedding dress! I love the rosette you sewed on her shirt that was the same material as the pants! Simple, elegant and beautiful! Great Job!
Hi Cassandra!
Thanks for the kind words! Sewing is a skill that I personally want to improve on as well. Making your daughters wedding dress would be really special 🙂 I hope you give this project a try!
-Amanda with Bramble Berry
Great job on sewing.
Here’s a safety idea for you:
http://www.amazon.com/gp/product/B004ZKPX8A/ref=wms_ohs_product?ie=UTF8&psc=1
No more pins. Important, especially with little hands (and, OUCH, feet) in the home.
These clips also come in a jumbo size.
I’ve been sewing for 44 years and these are wonderful!! They really hold the fabric firmly and NO pin holes or worries about “OMG, where is that pin??). I can’t recommend them enough.
The small are bright red and the jumbo are bright green. Hard to miss if one drops on the floor. The small even come in their own box.
The jumbo have markings on them, so you can make sure your stitching is right where you want it!
BUY THESE NOW!
My first garment sewing project was a lined wool skirt and a Vogue pattern. I was 12 and it was lovely. A couple of months later, I made a matching lined vest. I was stylin’ !!!
I made lots of polar fleece coveralls for our son when he was tiny. Double-layered knees helped on our hardwood floors. I love sewing with polar fleece (no fray and WARM).
Hi Leslie!
Thanks so much for the tip and the link for the pins, they look really helpful and you’re right, pins can be quite painful!
I bet your skirt and vest looked really cute! And to make all that at 12 years old? That’s awesome! 🙂
Again, thanks for the tip!
-Amanda with Bramble Berry