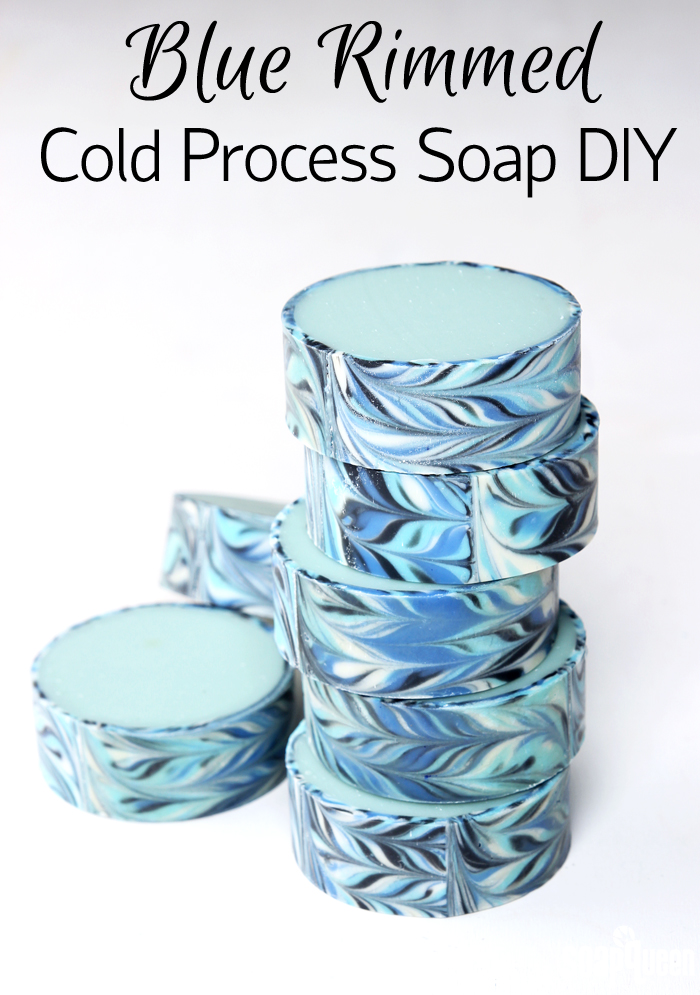
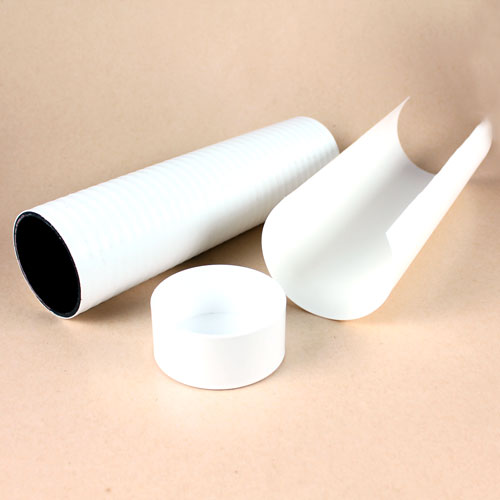
The rimmed soap technique is a project I have been meaning to try for months. It was made popular earlier this year when Amy Warden and Tatsiana Serko hosted a Rimmed Soap Challenge for the Soap Challenge Club. Typically, the technique is made in a column mold for a round shape. For this tutorial, I used the Heavy Duty Column Mold with Reusable Liner. Rimmed soap is an advanced technique that involves several steps. First, a thin layer of swirled soap is created in a loaf or slab mold. After the soap has hardened but is still soft (about one day), the soap is sliced horizontally into thin strips and carefully molded on the rim of the Heavy Duty Column Mold. Finally, soap is poured in the center.
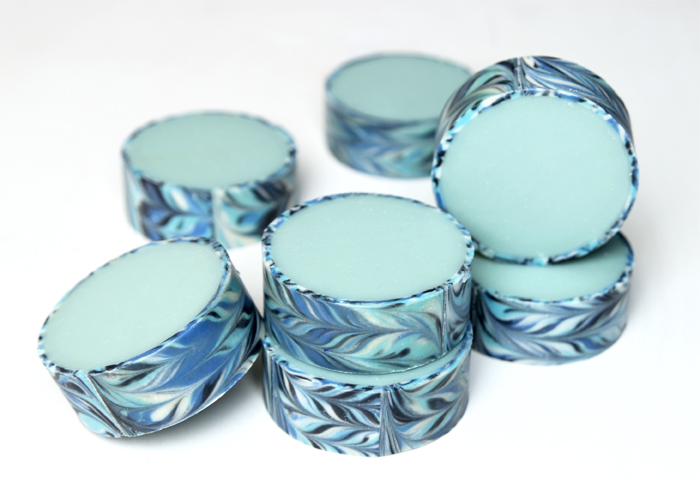
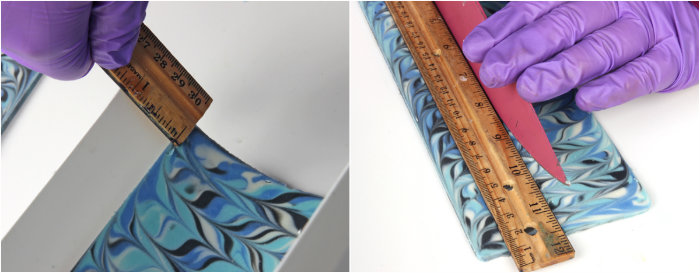
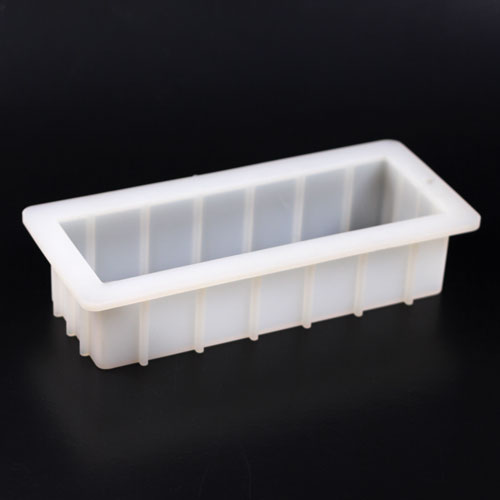
To create the soap for the rim, I poured a small amount of soap into the 10″ Silicone Loaf Mold. Then, I sliced the soap into thin strips using the Wire Soap Slicer. The Wire Soap Slicer is specifically designed to slice soap horizontally. It’s fantastic for cutting designs like the Taiwan Swirl, and really came in handy for this technique. The wire can be moved up or down to adjust the thickness of the soap layers. I found the thinner the soap layers, the easier they are to bend into a circular shape. Thicker slices of soap are more likely to crack. If you don’t have a slicer, Alaiyana B. Bath and Body has a great tutorial for rimmed soap that demonstrates creating a very thin layer in a large slab mold. Alaiyna B. Bath and Body is a master of the rimmed soap technique – check out some of her beautiful creations here.
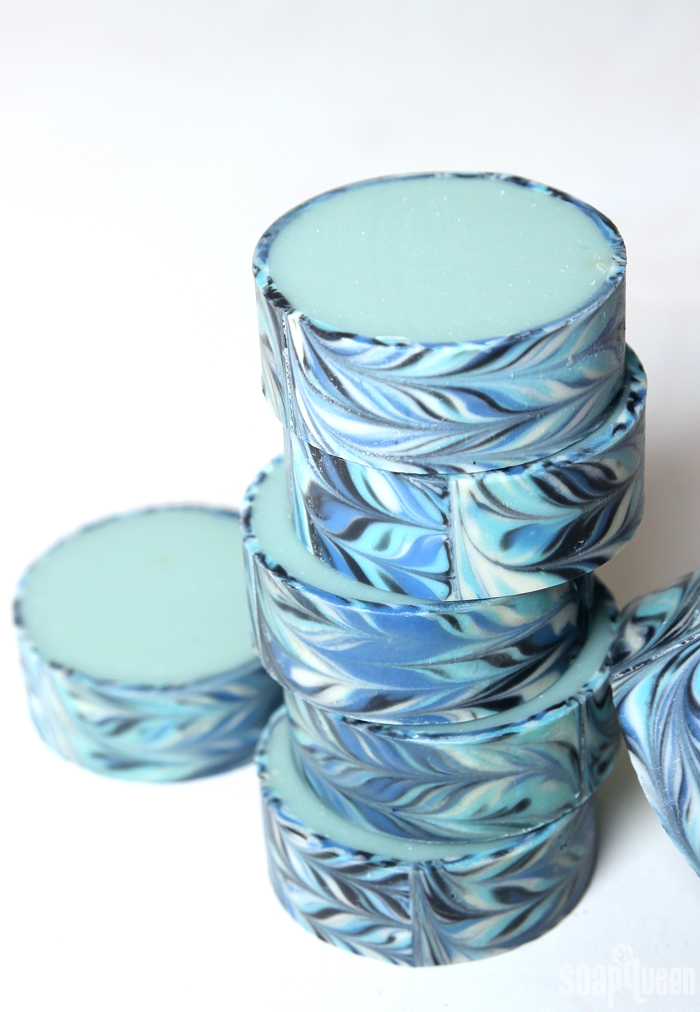
I decided on a blue color palette for this project to coincide with blue week of #SoaptheRainbow. I have been loving all your gorgeous blue photos; keep ’em coming! If you’re unfamiliar with #SoaptheRainbow, I’m choosing my favorite photos tagged with #SoaptheRainbow on Instagram, Twitter and Facebook. The winners will be featured on Instagram and win a $10 Bramble Berry Gift Certificate.
What You’ll Need:
Rimmed Layer:
10″ Silicone Loaf Mold
Wire Soap Slicer
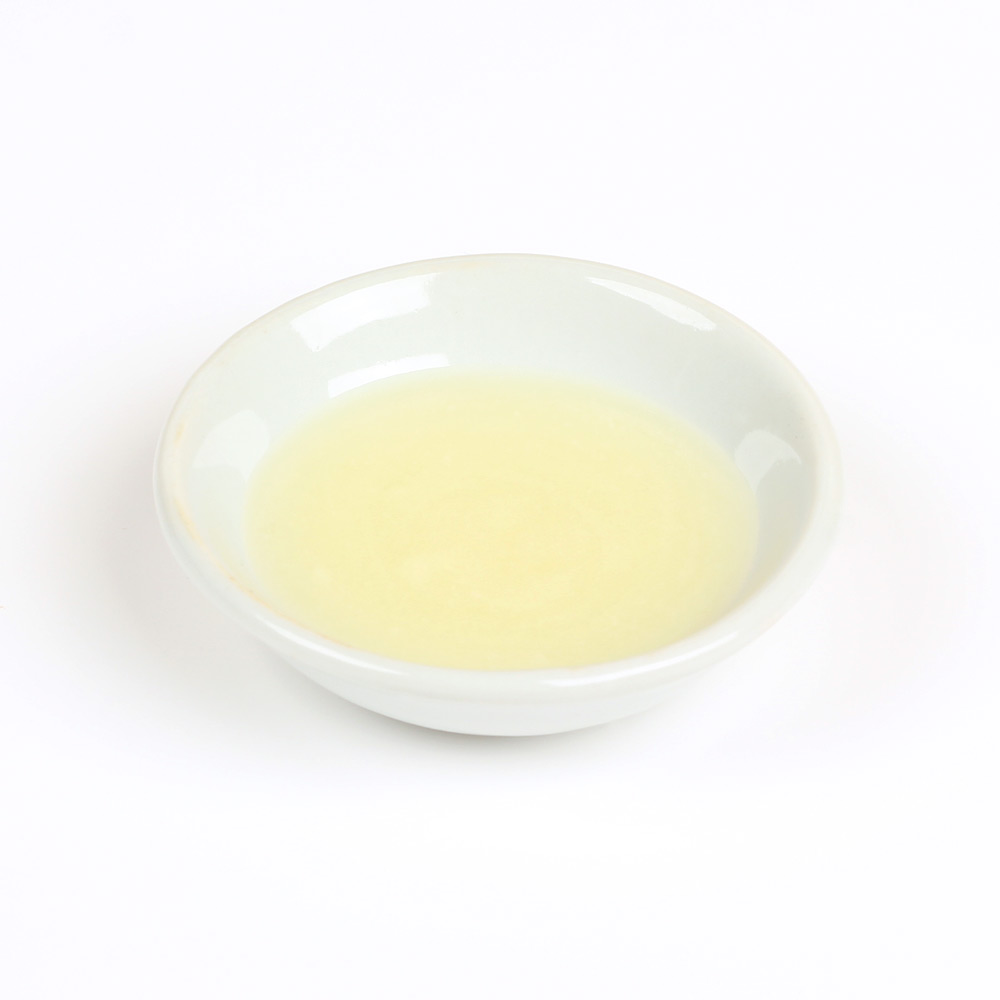
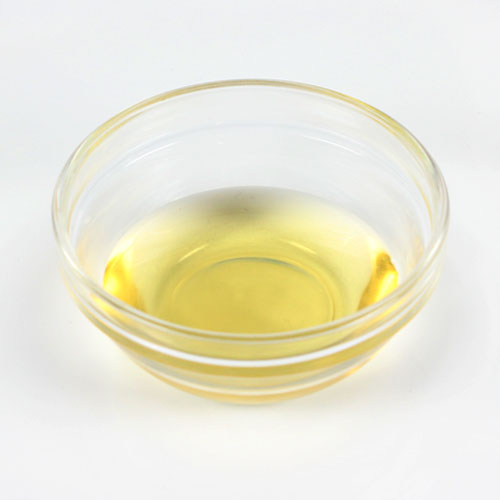
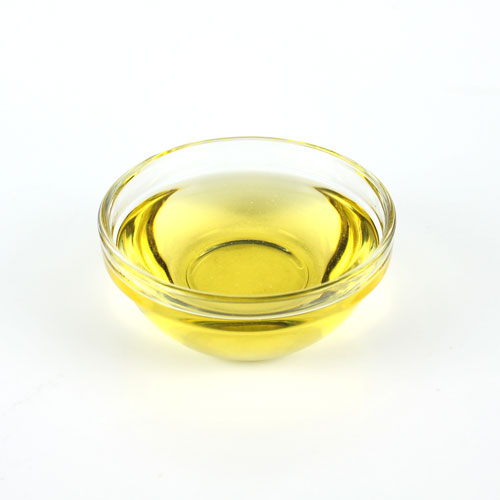
3 oz. Canola Oil
3 oz. Coconut Oil
3 oz. Palm Oil
3 oz. Rice Bran Oil
1.7 oz. Sodium Hydroxide Lye
4 oz. Distilled Water
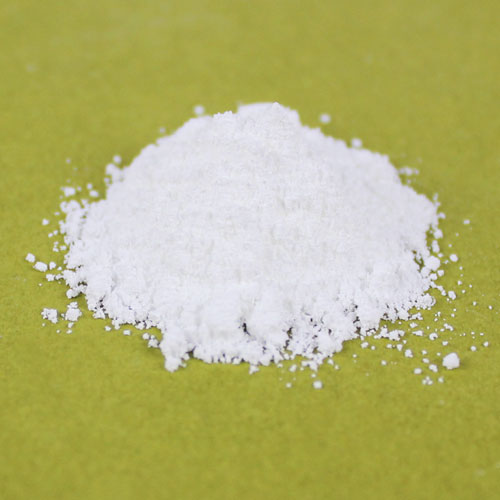
Titanium Dioxide
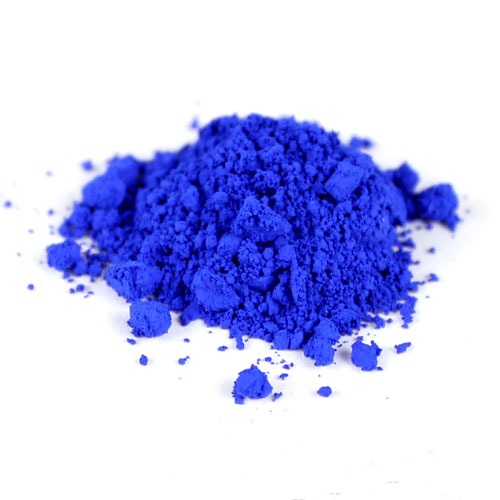
Ultramarine Blue Pigment
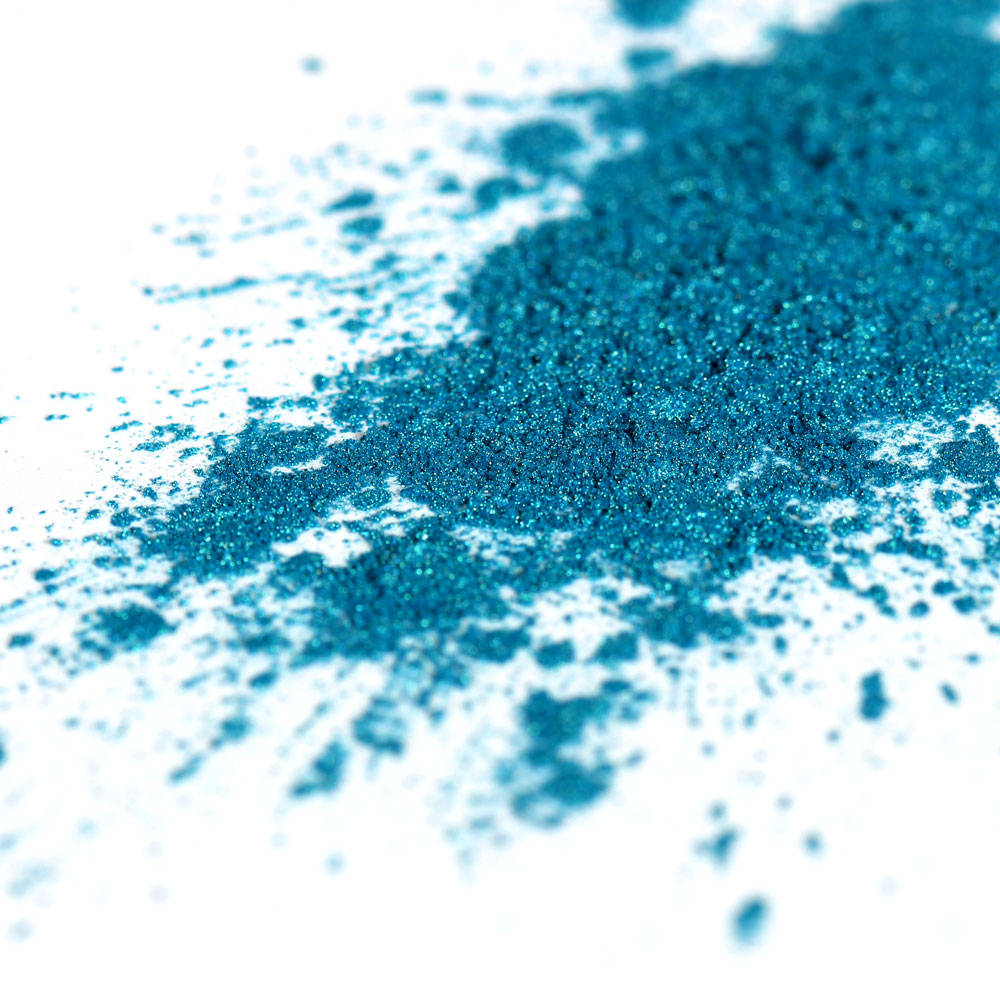
Mermaid Blue Mica
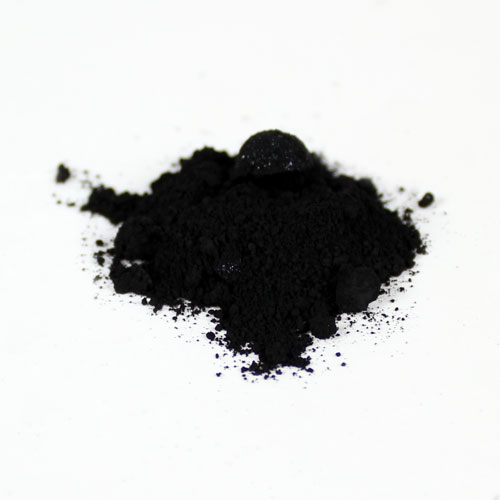
Black Oxide Pigment
0.8 oz. Island Escape Fragrance Oil
Optional: 4 Squeeze Bottles
Sodium Lactate
Main Soap
Heavy Duty Column Mold with Reusable Liner
5.5 oz. Canola Oil
5.5 oz. Coconut Oil
5.5 oz. Palm Oil
5.5 oz. Rice Bran Oil
3.1 oz. Sodium Hydroxide Lye
7.3 oz. Distilled Water
Titanium Dioxide
Mermaid Blue Mica
1.4 oz. Island Escape Fragrance Oil
Click here to add everything you need for this project to your Bramble Berry shopping cart!
�
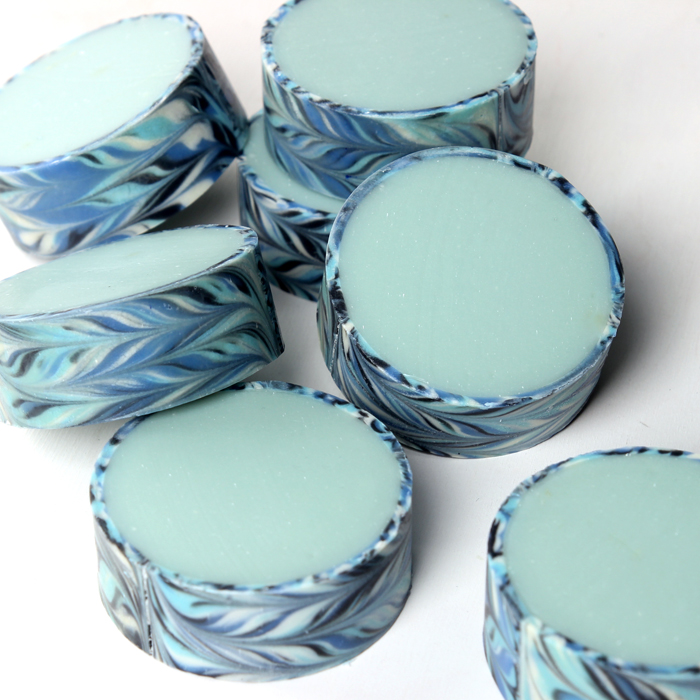
MAKE THE OUTER RIM
If you’ve never made Cold Process soap before, stop here! I highly recommend checking out our FREE four part SoapQueen.tv series on Cold Process Soapmaking, especially the episode on lye safety. And if you’d rather do some reading, Bramble Berry carries a wide range of books on the topic, including my newest book, Pure Soapmaking. You can also checkout the digital downloads for that instant gratification factor.
SAFETY FIRST: Suit up for safe handling practices! That means goggles, gloves and long sleeves. Make sure kids, pets, and other distractions and tripping hazards are out of the house or don’t have access to your soaping space. Always soap in a well-ventilated area.
COLOR PREP: To ensure that the Titanium Dioxide blends smoothly into the soap batter, we recommend micronizing it before dispersing it in oil. Please note this is an optional tip but it does help with the titanium dioxide clumping in the soap. =) To micronize colorant, simply use a coffee grinder to blend the colorant to break up any clumps of color and prevent streaks of white from showing in the final soap. We like to use a coffee grinder that has a removable, stainless steel mixing area for easy cleaning. Then, disperse 1/2 teaspoon of the colorant into 1/2 tablespoon of sunflower or sweet almond oil (or any other liquid oil). Then in separate containers disperse 1/2 teaspoons of Black Oxide, Mermaid Mica and Ultramarine Blue Pigment into 1/2 tablespoon lightweight liquid oil. Use a mini mixer to help get rid of any chunks.
FRAGRANCE PREP: Measure out 0.8 oz. of Island Escape Fragrance Oil into a glass, fragrance oil safe container. Set aside.
TOOL PREP: To create thin and wispy swirls, I like to use squeeze bottles to layer thin strips of color. You can use containers with a fine pour spout, but the swirl may be larger. If you’re using squirt bottles for this step, have them nearby and ready.
ONE: Slowly and carefully add the lye to the water and gently stir until the lye has fully dissolved and the liquid is clear. Set aside to cool.
TWO: Fully melt the coconut oil, canola oil, rice bran oil and palm oil (remember to fully melt then mix your entire container of palm oil before portioning). Once the lye water and the oils have cooled to 110-120 F degrees or below (and are ideally within 10 degrees of each other), add the lye water to the oils and stick blend until very thin trace. For this project, I highly recommend using sodium lactate in the lye water for the rim part of the soap. Sodium lactate helps soap harden in the mold faster. For this project, it allows you to remove the soap after 24 hours of pouring the soap into the mold. During this point, the soap is still soft enough to bend into a circle shape, and the sodium lactate helps it release cleanly from the mold.
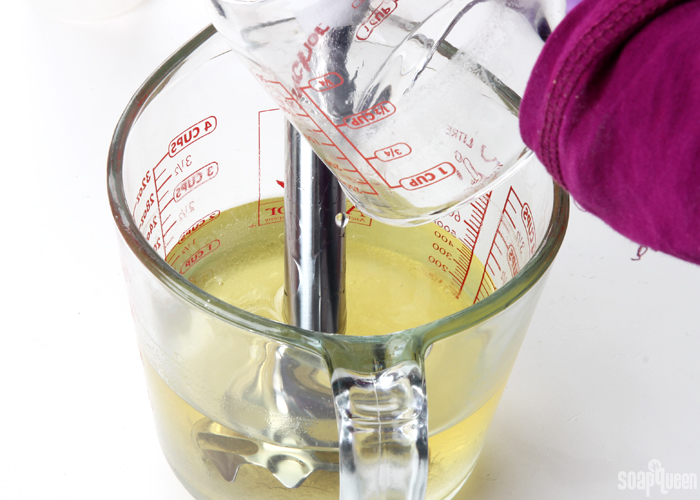 THREE: Add the measured 0.8 ounces of Island Escape Fragrance Oil into the soap, and use a whisk or spoon to thoroughly mix in.
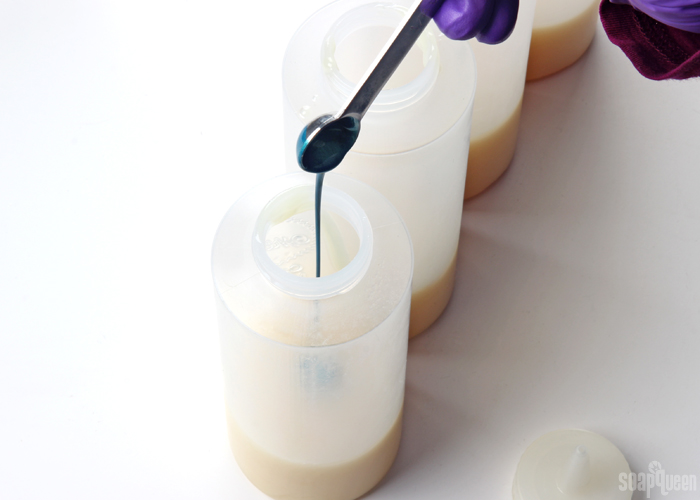
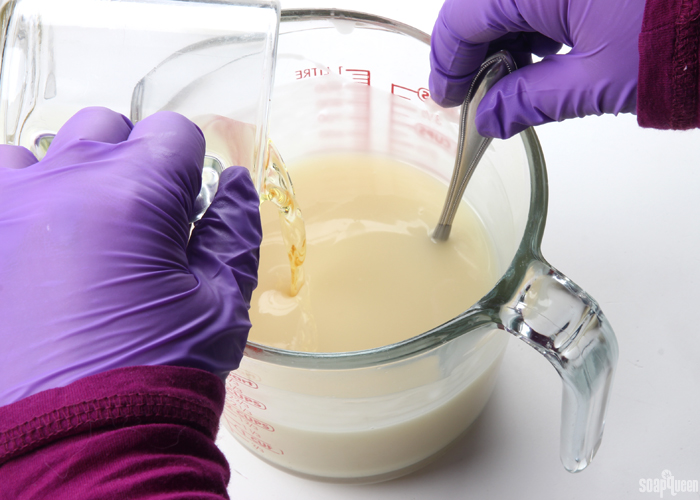 FOUR: Split the batter evenly into four separate squeeze bottles. You could use containers with a very fine pour spout, but squirt bottles are the best way to create thin, wispy swirls. Add the following amounts of dispersed colorants into each bottle/container:
- A (White): 1/2 tsp. dispersed Titanium Dioxide
- B (Black): 1/4 tsp. dispersed Black Oxide
- C (Dark Blue): 1/4 tsp. dispersed Ultramarine Blue Pigment
- D (Light Blue): 1/4 tsp. dispersed Mermaid Mica + 1/4 tsp. Titanium Dioxide
 FIVE: Twist the tap on tightly and shake each bottle thoroughly to fully mix in the colorants. Once the soap is completely mixed with the colorants, begin squirting it into the 10″ Silicone Loaf Mold lengthwise. Squirt several “strips” of color into the mold lengthwise, then switch colors. Don’t worry too much about the placement of the colors at first; work quickly to prevent the soap from getting to thick. If you’re not using squirt bottles, try to pour extremely thin lines of soap. Continue this process until you have used up all the soap. During the last pour of each color, try to layer the colors so a portion of each is showing. This will help the swirl feature each shade. Tap the mold firmly on the counter to help get rid of air bubbles.
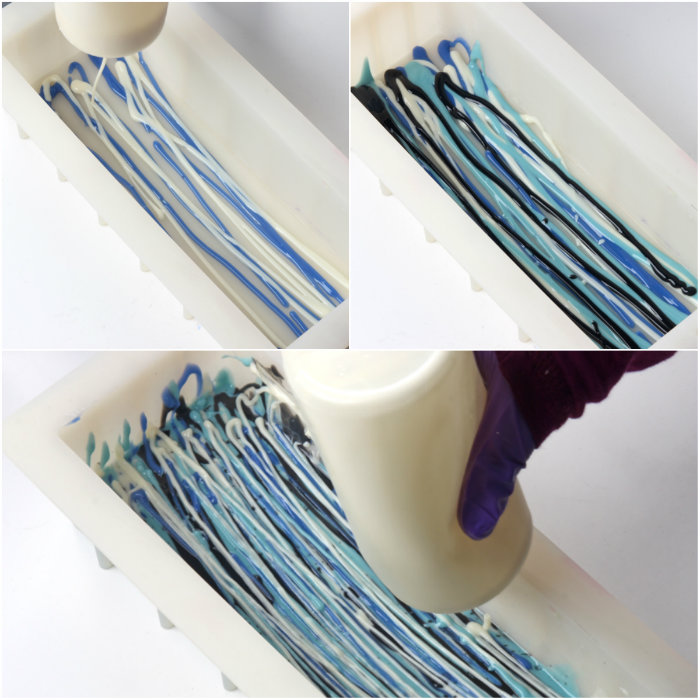 SIX: Insert a thin skewer or chopstick into the soap all the way to the bottom of the mold. Begin swirling the soap back and forth widthwise down the entire length of the mold.
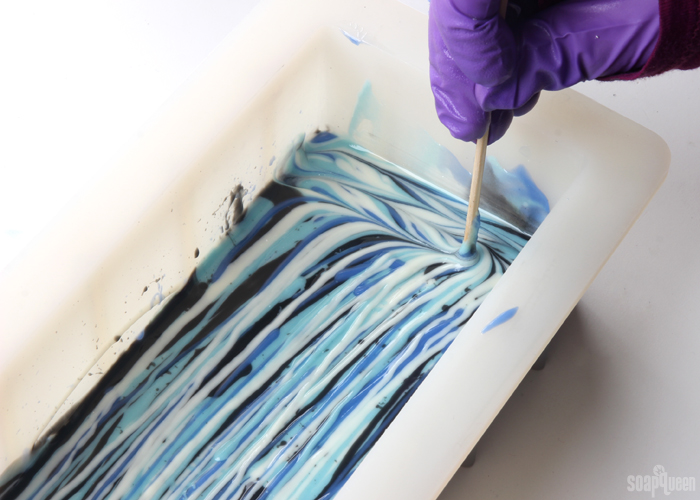
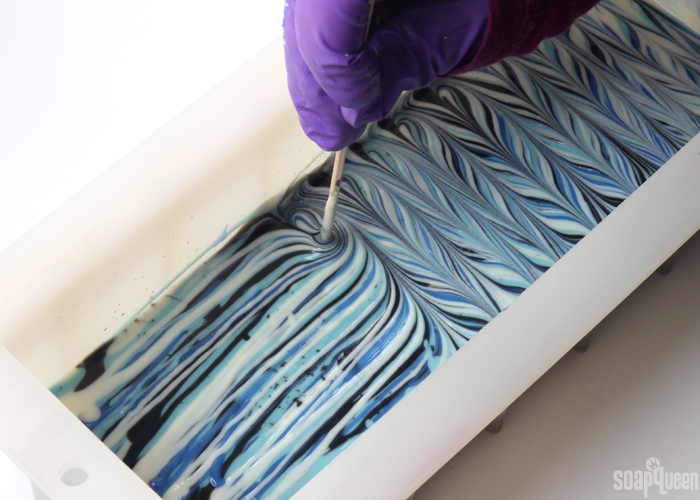 SEVEN: Once you reach the other side of the mold, use the chopstick/skewer to circle around the outside of the mold. This gives the outside a bit of a curve, and is a nice finishing touch. Spritz the top of the soap with 99% isopropyl alcohol to help prevent soda ash. It’s important that the soap stays warm and goes through gel phase. I did not insulate the soap to promote gel phase, but it was left in a warm room of about 75 ° F. If your room is cool, place the soap on a heating pad and insulate to help it stay warm. Allow the soap to harden in the mold for 24 hours.
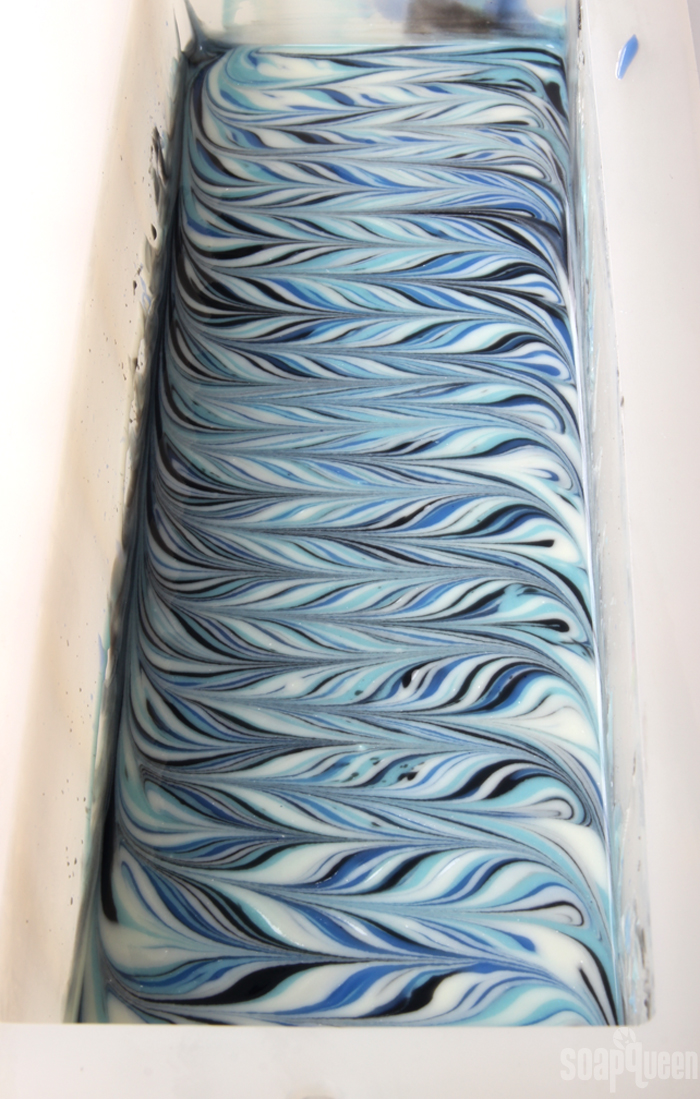 EIGHT: After 24 hours, carefully remove the soap from the mold. I don’t recommend waiting to unmold any longer than 24 hours. If the soap hardens in the mold for too long, it will lose the flexibility that is crucial for creating a circle shape. Once it has been removed, it’s time to use the Wire Soap Slicer to create very thin slices of the soap. Place the Wire Soap Slicer on the counter. Allow the end of the slicer to hang over the edge of the counter; the “lip” of the slicer will press against the edge of the counter to hold the slicer in place while pushing the soap through.
NOTE: Some tutorials do not slice the soap into thinner strips. If you created a very thin layer of soap (thinner than the recipe above) you may not need to use the slicer to make thin pieces of soap. But, the thinner the soap the more flexible it will be. The more flexible the soap, the less likely it will be to crack when placed in the column mold.
NINE: For this project, you need three strips of swirled soap to create the rim. In general, thinner strips of soap are more flexible and are less likely to crack when placed inside the Heavy Duty Column Mold. I managed to make 5 very thin strips out of the swirled soap. The top “slice” of soap will have a slight texture, so I recommend using the pieces in the center to create the rim. The center pieces will also be more flexible. Place the soap on the plastic piece of the Wire Soap Slicer and adjust the wire to take off a very thin slice off the top. Slowly push the soap across the wire to begin slicing. The soap may curl up as it goes over the wire; keep it straight by gently placing your hand on the top as it runs across the wire.
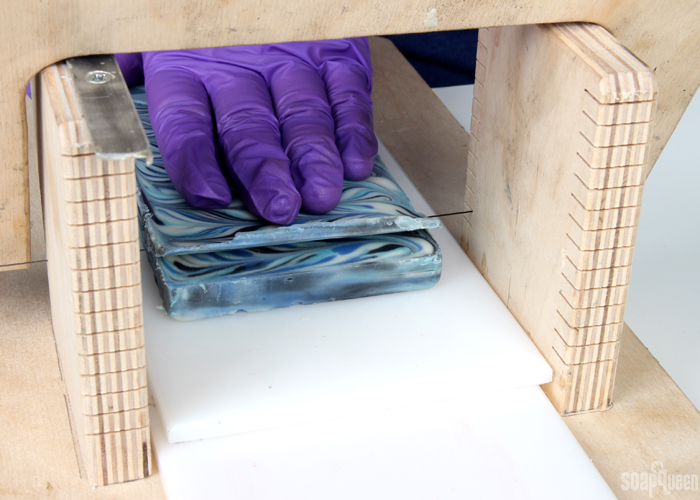 TEN: Continue adjusting the wire (you will need to use both sides of the slicer) to create thin slices of soap. Handle each layer with care as they are very delicate. The exact depth of each slice may vary depending on how tall your swirled soap ended up being. For this project I used squirt bottles, so some of the soap didn’t make it into the mold. If you did not use squeeze bottles, your soap may be larger and you may be able to create more slices. For the first slice I used the 2nd notch on the “higher” side of the slicer. Then, I flipped the slicer around and used the 2nd notch on the “lower” side of the slicer. Then, I flipped it back to use the 1st notch. Keep adjusting the wire to go lower and lower to create the thin slices.
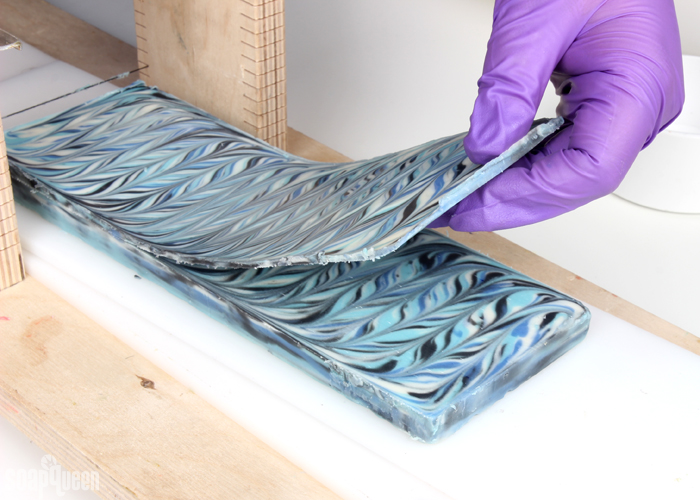
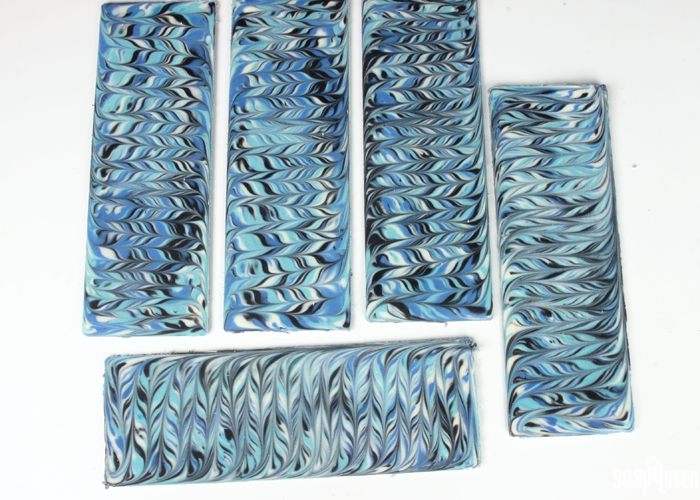 ELEVEN: Once you’re done slicing the soap, lay one of the slices onto the reusable liner of the Heavy Duty Column Mold. Then, lay another slice next to it.
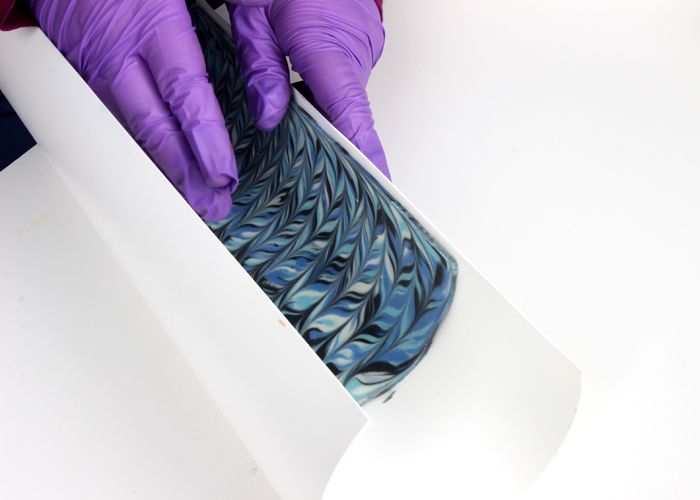
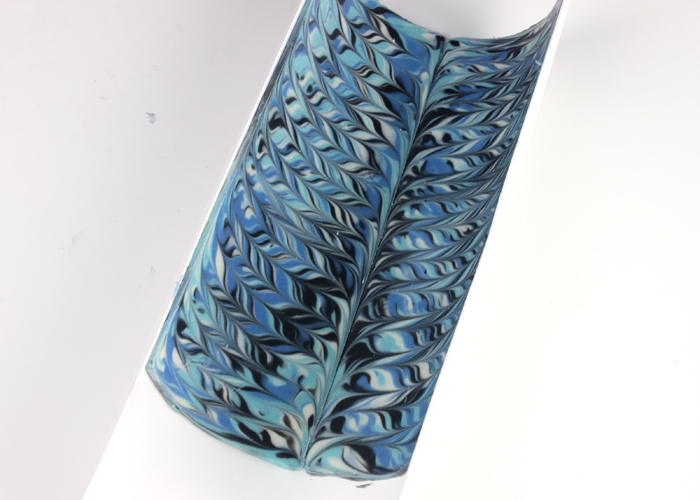 TWELVE: There will be a small portion of the liner not covered in soap. Measure the width of the gap on the liner, and cut a strip of the same width from a soap slice. Place the strip on the liner. Gently press each strip of soap onto the reusable liner to help it “stick” once it’s rolled up. Then, gently press the area where the pieces of soap touch to help them stick together a little better.
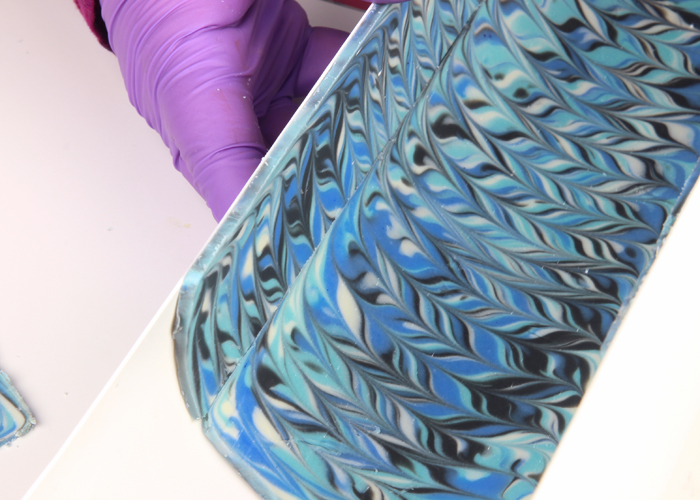 THIRTEEN: Carefully roll the liner up and insert the liner into the Heavy Duty Column Mold. It’s nice to have a friend help with this step to keep both ends curled up, and to avoid over bending the liner. That can cause the slices of soap to crack. If a soap slice cracks, don’t panic! One of my slices actually cracked on me. You can use one of the other slices, or use your fingers to press and mend the crack. I recommend removing your gloves for this, as the warmth of your hands make the soap more pliable.
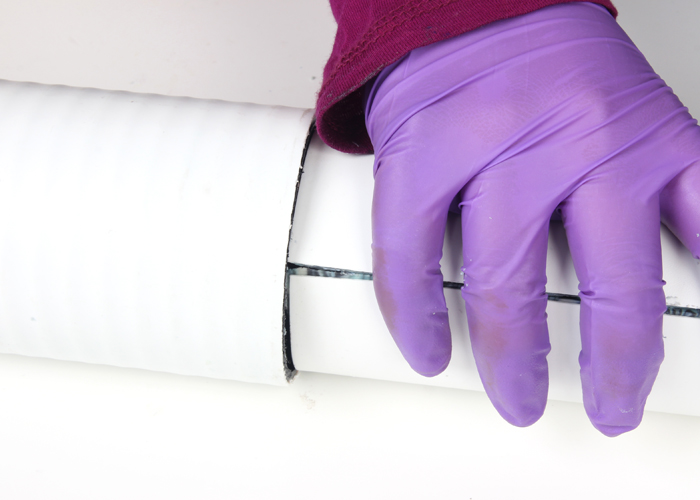
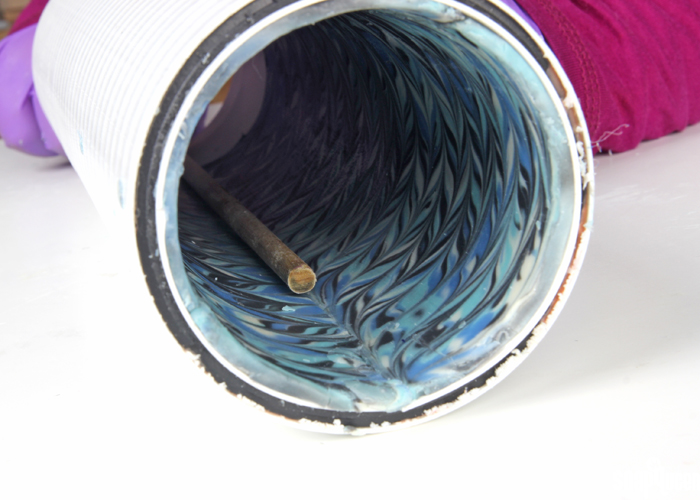
Once the liner is inserted, it’s time to prep the base! Don’t wait to make the base. As the strips of soap stay in the liner, they will begin to dry and shrink. The base soap will also be less likely to stick to the outer rim the longer you wait.
TIP: Once the liner was inserted, I used a dowel to roll the edges of the slices to create a smoother look.
MAKE THE BASE
If you’ve never made Cold Process soap before, stop here! I highly recommend checking out our FREE four part SoapQueen.tv series on Cold Process Soapmaking, especially the episode on lye safety. And if you’d rather do some reading, Bramble Berry carries a wide range of books on the topic, including my newest book, Pure Soapmaking. You can also checkout the digital downloads for that instant gratification factor.
SAFETY FIRST: Suit up for safe handling practices! That means goggles, gloves and long sleeves. Make sure kids, pets, and other distractions and tripping hazards are out of the house or don’t have access to your soaping space. Always soap in a well-ventilated area.
COLOR PREP: To ensure that the Titanium Dioxide blends smoothly into the soap batter, we recommend micronizing it before dispersing it in oil. Please note this is an optional tip but it does help with the titanium dioxide clumping in the soap. =) To micronize colorant, simply use a coffee grinder to blend the colorant to break up any clumps of color and prevent streaks of white from showing in the final soap. We like to use a coffee grinder that has a removable, stainless steel mixing area for easy cleaning. Then, disperse 1 teaspoon of the colorant into 1 tablespoon of sunflower or sweet almond oil (or any other liquid oil). Then, disperse 1/2 teaspoon of Mermaid Mica into 1/2 tablespoon lightweight liquid oil. Use a mini mixer to help break up any clumps.
FRAGRANCE PREP: Measure out 1.4 oz. of Island Escape Fragrance Oil into a glass, fragrance oil safe container. Set aside.
ONE: Slowly and carefully add the lye to the water and gently stir until the lye has fully dissolved and the liquid is clear. Set aside to cool.
TWO: Fully melt the coconut oil, canola oil, rice bran oil and palm oil (remember to fully melt then mix your entire container of palm oil before portioning). Once the lye water and the oils have cooled to 110-120 F degrees or below (and are ideally within 10 degrees of each other), add the lye water to the oils and stick blend until a thin trace. If you’d like a harder bar of soap that releases faster from the mold, you can add sodium lactate to the cooled lye water. Use 1 teaspoon of sodium lactate per pound of oils in the recipe. For this recipe, you’d add about 1.5 tsp. sodium lactate.
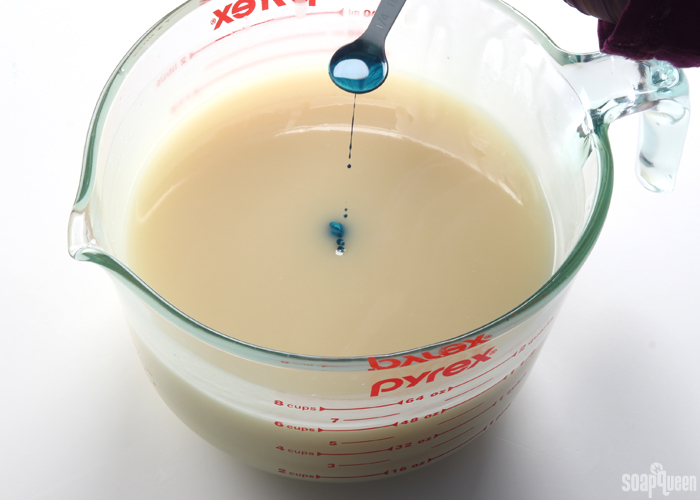
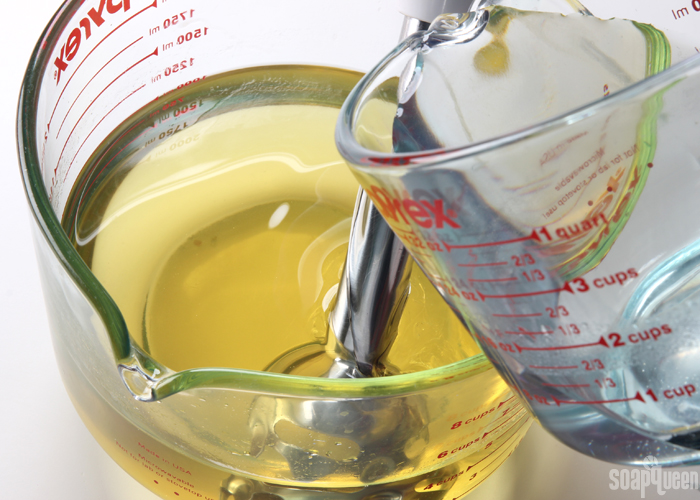 THREE: Once you reach a thin trace, add the 1.4 ounces of Island Escape Fragrance Oil into the soap and use a whisk to mix in. Then add 1/2 tsp. dispersed Mermaid Mica and all of the dispersed Titanium Dioxide. If the soap is still extremely thin, use a the stick blender to pulse and thicken the batter to a medium trace.
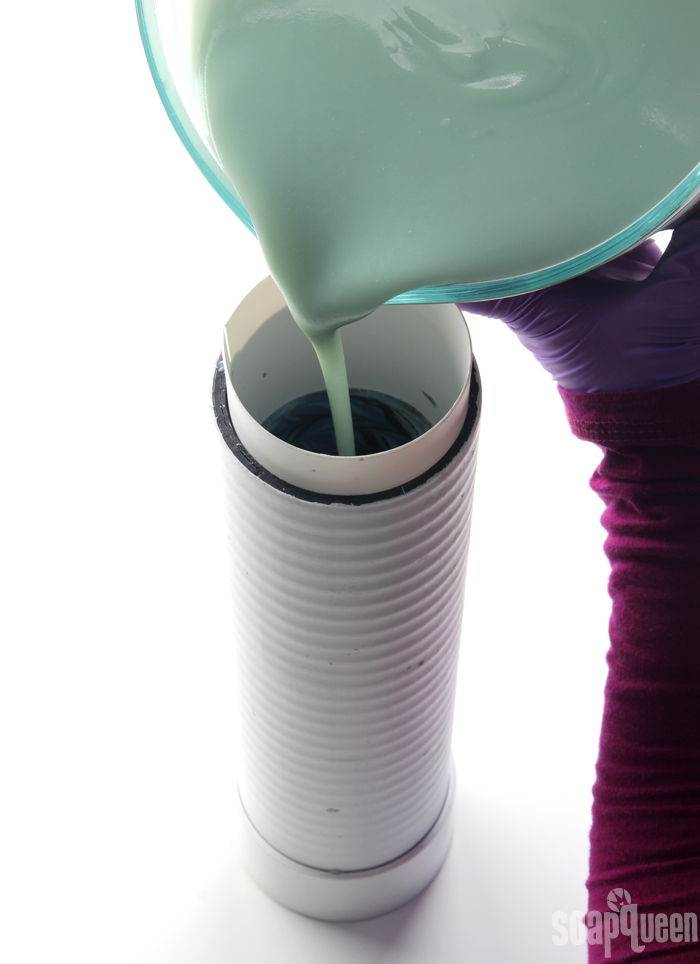
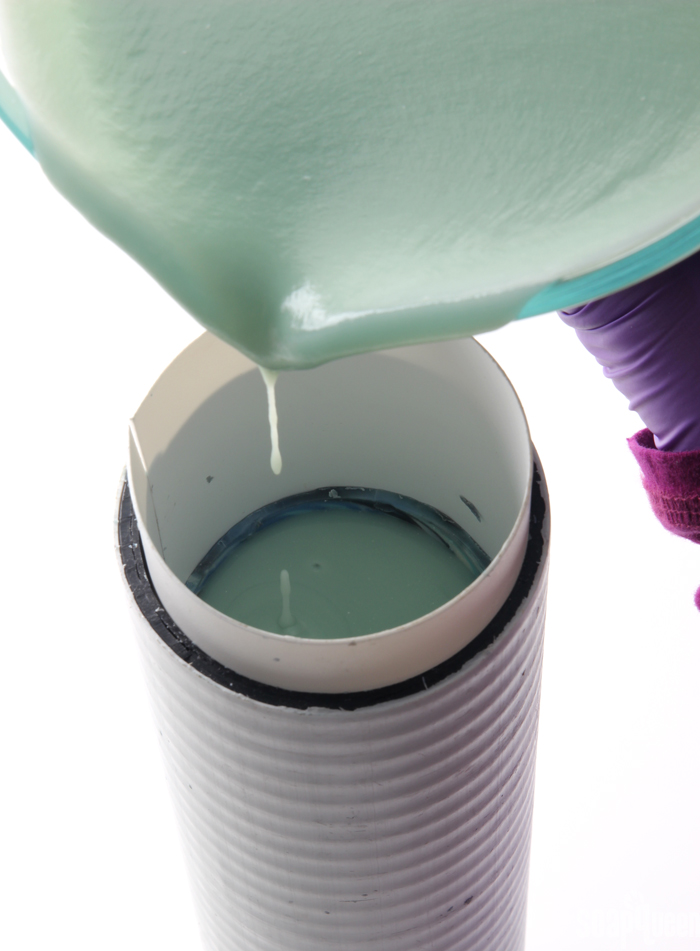
 FOUR: Place the end cap very firmly on the bottom of the Heavy Duty Column Mold. Place the mold upright on a flat surface, and carefully pour the blue soap into the mold. Once full, spritz the top with 99% isopropyl alcohol and allow to harden in the mold for about 2 days.
Remove the liner from the mold and peel away. Then, cut the soap into bars and allow them to cure for 4-6 weeks. Enjoy!
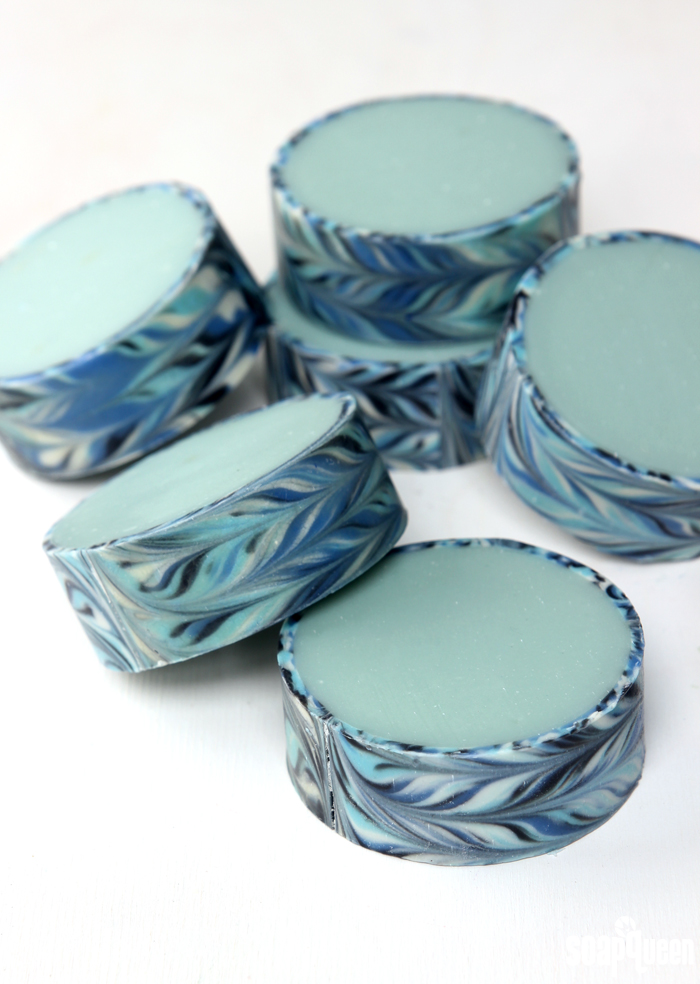
Have you tried this technique yet? It’s a little tricky, but the bars do end up looking beautiful!
Click to View the Recipe
- 10″ Silicone Loaf Mold
- Wire Soap Slicer
- 3 oz. Canola Oil
- 3 oz. Coconut Oil
- 3 oz. Palm Oil
- 3 oz. Rice Bran Oil
- 1.7 oz. Sodium Hydroxide Lye
- 4 oz. Distilled Water
- Titanium Dioxide
- Ultramarine Blue Pigment
- Mermaid Blue Mica
- Black Oxide Pigment
- 0.8 oz. Island Escape Fragrance Oil
- Optional: 4 Squeeze Bottles
- Heavy Duty Column Mold with Reusable Liner
- 5.5 oz. Canola Oil
- 5.5 oz. Coconut Oil
- 5.5 oz. Palm Oil
- 5.5 oz. Rice Bran Oil
- 3.1 oz. Sodium Hydroxide Lye
- 7.3 oz. Distilled Water
- Titanium Dioxide
- Mermaid Blue Mica
- 1.4 oz. Island Escape Fragrance Oil
- Slowly and carefully add the lye to the water and gently stir until the lye has fully dissolved and the liquid is clear. Set aside to cool.
- Fully melt the coconut oil, canola oil, rice bran oil and palm oil (remember to fully melt then mix your entire container of palm oil before portioning). Once the lye water and the oils have cooled to 110-120 F degrees or below (and are ideally within 10 degrees of each other), add the lye water to the oils and stick blend until very thin trace. For this project, I highly recommend using sodium lactate in the lye water for the rim part of the soap. Sodium lactate helps soap harden in the mold faster. For this project, it allows you to remove the soap after 24 hours of pouring the soap into the mold. During this point, the soap is still soft enough to bend into a circle shape, and the sodium lactate helps it release cleanly from the mold.
- Add the measured 0.8 ounces of Island Escape Fragrance Oil into the soap, and use a whisk or spoon to thoroughly mix in.
- Split the batter evenly into four separate squeeze bottles. You could use containers with a very fine pour spout, but squirt bottles are the best way to create thin, wispy swirls. Add the following amounts of dispersed colorants into each bottle/container:
A (White): ½ tsp. dispersed Titanium Dioxide
B (Black): ¼ tsp. dispersed Black Oxide
C (Dark Blue): ¼ tsp. dispersed Ultramarine Blue Pigment
D (Light Blue): ¼ tsp. dispersed Mermaid Mica + ¼ tsp. Titanium Dioxide - Twist the tap on tightly and shake each bottle thoroughly to fully mix in the colorants. Once the soap is completely mixed with the colorants, begin squirting it into the 10" Silicone Loaf Mold lengthwise. Squirt several "strips" of color into the mold lengthwise, then switch colors. Don't worry too much about the placement of the colors at first; work quickly to prevent the soap from getting to thick. If you're not using squirt bottles, try to pour extremely thin lines of soap. Continue this process until you have used up all the soap. During the last pour of each color, try to layer the colors so a portion of each is showing. This will help the swirl feature each shade. Tap the mold firmly on the counter to help get rid of air bubbles.
- Insert a thin skewer or chopstick into the soap all the way to the bottom of the mold. Begin swirling the soap back and forth widthwise down the entire length of the mold.
- Once you reach the other side of the mold, use the chopstick/skewer to circle around the outside of the mold. This gives the outside a bit of a curve, and is a nice finishing touch. Spritz the top of the soap with 99% isopropyl alcohol to help prevent soda ash. It's important that the soap stays warm and goes through gel phase. I did not insulate the soap to promote gel phase, but it was left in a warm room of about 75 ° F. If your room is cool, place the soap on a heating pad and insulate to help it stay warm. Allow the soap to harden in the mold for 24 hours.
- After 24 hours, carefully remove the soap from the mold. I don’t recommend waiting to unmold any longer than 24 hours. If the soap hardens in the mold for too long, it will lose the flexibility that is crucial for creating a circle shape. Once it has been removed, it’s time to use the Wire Soap Slicer to create very thin slices of the soap. Place the Wire Soap Slicer on the counter. Allow the end of the slicer to hang over the edge of the counter; the “lip” of the slicer will press against the edge of the counter to hold the slicer in place while pushing the soap through.
NOTE: Some tutorials do not slice the soap into thinner strips. If you created a very thin layer of soap (thinner than the recipe above) you may not need to use the slicer to make thin pieces of soap. But, the thinner the soap the more flexible it will be. The more flexible the soap, the less likely it will be to crack when placed in the column mold. - For this project, you need three strips of swirled soap to create the rim. In general, thinner strips of soap are more flexible and are less likely to crack when placed inside the Heavy Duty Column Mold. I managed to make 5 very thin strips out of the swirled soap. The top “slice” of soap will have a slight texture, so I recommend using the pieces in the center to create the rim. The center pieces will also be more flexible. Place the soap on the plastic piece of the Wire Soap Slicer and adjust the wire to take off a very thin slice off the top. Slowly push the soap across the wire to begin slicing. The soap may tend to curl up as it goes over the wire; keep it straight by gently placing your hand on the top as it runs across the wire.
- Continue adjusting the wire (you will need to use both sides of the slicer) to create thin slices of soap. Handle each layer with care, as they are very delicate. The exact depth of each slice may vary depending on how tall your swirled soap ended up being. For this project I used squirt bottles, so some of the soap didn’t make it into the mold. If you did not use squeeze bottles, your soap may be larger and you may be able to create more slices. For the first slice I used the 2nd notch on the “higher” side of the slicer. Then, I flipped the slicer around and used the 2nd notch on the “lower” side of the slicer. Then, I flipped it back to use the 1st notch. Keep adjusting the wire to go lower and lower to create the thin slices.
- Once you’re done slicing the soap, lay one of the slices onto the reusable liner of the Heavy Duty Column Mold. Then, lay another slice next to it.
- There will be a small portion of the liner not covered in soap. Measure the width of the gap on the liner, and cut a strip of the same width from a soap slice. Place the strip on the liner. Gently press each strip of soap onto the reusable liner to help it “stick” once it’s rolled up. Then, gently press the area where the pieces of soap touch to help them stick together a little better.
- Carefully roll the liner up and insert the liner into the Heavy Duty Column Mold. It's nice to have a friend help with this step to keep both ends curled up, and to avoid over bending the liner. That can cause the slices of soap to crack. If a soap slice cracks, don't panic! One of my slices actually cracked on me. You can use one of the other slices, or use your fingers to press and mend the crack. I recommend removing your gloves for this, as the warmth of your hands make the soap more pliable.
- Once the liner is inserted, it’s time to prep the base! Don’t wait to make the base. As the strips of soap stay in the liner, they will begin to dry and shrink. The base soap will also be less likely to stick to the outer rim the longer you wait.
- Slowly and carefully add the lye to the water and gently stir until the lye has fully dissolved and the liquid is clear. Set aside to cool.
- Fully melt the coconut oil, canola oil, rice bran oil and palm oil (remember to fully melt then mix your entire container of palm oil before portioning). Once the lye water and the oils have cooled to 110-120 F degrees or below (and are ideally within 10 degrees of each other), add the lye water to the oils and stick blend until a thin trace. If you’d like a harder bar of soap that releases faster from the mold, you can add sodium lactate to the cooled lye water. Use 1 teaspoon of sodium lactate per pound of oils in the recipe. For this recipe, you’d add about 1.5 tsp. sodium lactate.
- Once you reach a thin trace, add the 1.4 ounces of Island Escape Fragrance Oil into the soap, and use a whisk to mix in. Then add ½ tsp. dispersed Mermaid Mica and all of the dispersed Titanium Dioxide. If the soap is still extremely thin, use a the stick blender to pulse and thicken the batter to a medium trace.
- Place the end cap very firmly on the bottom of the Heavy Duty Column Mold. Place the mold upright on a flat surface, and carefully pour the blue soap into the mold. Once full, spritz the top with 99% isopropyl alcohol and allow to harden in the mold for about 2 days.Remove the liner from the mold, and peel away. Then, cut the soap into bars and allow them to cure for 4-6 weeks. Enjoy!






I know it’s been a couple years since this tutorial went up but is there a tutorial for rimming a loaf as opposed to a column?
There is one video but her camera unfortunately shut off just at the point “before” she laid it into the loaf mold, so I have no idea how it behaved and so not sure what to expect.
TYIA
We don’t have a tutorial, but we’ll keep it in mind for future blog posts. Thanks for your suggestion.
Hi There!
I own a small soap manufacturing company and would like to know if there is a melt and pour alternative.
I am only 13 and my mother doesn’t want me to handle lye.
These need to be sellable.
I will attempt this with melt and pour but a recipe would be great too.
For those who don’t wish to handle lye.
Thanks, Hanna
You may like rebatch soap! It’s grated cold process soap that’s heated and customized with fragrance, color and additives. Because the soap is already made, you’re not handling lye. 🙂
Learn how to make rebatch soap here: http://www.soapqueen.com/bath-and-body-tutorials/cold-process-soap/soap-queen-tv-presents-how-to-make-rebatch-soap-2/
Find our rebatch bases here: https://www.brambleberry.com/Rebatch-Bases-C14.aspx
-Kelsey with Bramble Berry
This is cool! It reminds me of something similar I did with MP soap back in 2011. 😀
We love the cool look of this technique!
-Kelsey with Bramble Berry
Second time making this and it keeps cracking..argh…and the only question I have is when do you start to slice the rim part? 24 hrs was too long and the soap was too hard. I’m guessing the secret here is the sweet spot is right after the soap slab has gone through gel and no longer. Ive read this two part soap should be completed in 10-12 hrs. Also why isn’t this posted on brambleberry’s website or soapqueen? Very difficult to find. Looks like it was posted then taken down. I can’t believe I found this.
We found right around 24 hours works well! What part of the soap did you use? The first layer that’s sliced off can be brittle, while the middle layer hasn’t been exposed to as much air so it’s more flexible and less likely to crack. Let me know and I’ll help you troubleshoot. 🙂
Also, I’m a bit confused about the last part of your comment. This post is still up on SoapQueen.com! Are you wanting a kit for the ingredients, or did you see it on another website?
-Kelsey with Bramble Berry
The same thing happened to me, every slice I made cracked and crumbled… I’m on several face book groups for soapers and posted the results, link and recipe asking what could have possibly happened, they all suggest it’s the sodium lactate causing the problem, since sodium lactate hardens a bar they think that’s what’s causing it from being able to bend easily. I’m going to try again but omit the sodium lactate.
I wish this video had not been removed. Any chance you’ll repost it?
We didn’t have a video on this technique posted that I know of. We can definitely keep that in mind for future Soap Queen TV videos though! This one by Kapia Mera is really helpful as well: https://www.youtube.com/watch?v=VMQAkuN1N-8
-Kelsey with Bramble Berry
I’m almost positive I saw it on youtube. But if you say there wasn’t I have to believe you. Thank you for the link. I’ve watched this video many times. It’s beautiful soap.
You’re welcome Shalonda! 🙂
-Kelsey with Bramble Berry
So beautiful, love your work. You are an inspiration.
Thanks so much Dimitra, glad you love the blog! 🙂
-Kelsey with Bramble Berry
I made my first attempt of rimmed soap and it came out well for the first time. Question why did my rim crack when putting into the mold? I made the rim out of 47% hard oils, 53% soft oils and my rim was 7mm thick. What can I do to stop or decrease the cracking?
Thanks for all you do,
Cindy
The soap can sometimes crack if it gets too hard. How long did you wait before placing it in the mold? I’ll help you troubleshoot. 🙂
-Kelsey with Bramble Berry
I let it set about 24 hours, then put it right into the mold. Would it help if I used softer hard oils like shea butter or cocco butter?
Do you know if it went through gel phase? Also, did you use a slice from the middle of the rim? The top layer is exposed to air and can be more brittle. It helps to use the second layer, which is softer and hasn’t oxidized yet. 🙂
-Kelsey with Bramble Berry
Great tutorial!
I had a question regarding the rim of the soap… would it work to put two rims on top of each other (so there are two layers of rims) and then fill the middle? I have an idea for a soap but I am new to soap making and don’t know a whole lot about soaps with rims.
Thanks!
Hi Alli!
We haven’t given that a try, so I’m not entirely sure! My worry is that the two layers wouldn’t stick together. With one layer, the fresh soap sticks to the rim. However, the two layers wouldn’t have anything to grab onto. If you do give it a try you may want to make a small test batch to see if they stick. If not, one layer would be best. 🙂
You can also use our Silicone Column Molds to get a similar effect! The Mini Round Silicone Column Mold creates a nice shape: https://www.brambleberry.com/Mini-Round-Silicone-Column-Mold-P5810.aspx
You can pour soap into that mold, take it out and then embed it into fresh soap for a thicker outer layer!
-Kelsey with Bramble Berry
Wow! What beautiful soap! I take my hat off to all of you that have the patience to do these intricate pouring techniques. I’m kind of a minimalist but I think these are gorgeous and envy those that are able to create such works of art in soaping. I’m curious, do you sell the soaps that are so labor intensive for a higher price? It certainly seems like you should.
Thank you so much for your sweet comment Virginia, it means a lot to us! Labor costs definitely factor into the cost of your soap. For a design that takes more time and effort, you may consider increasing the price, especially because it takes longer to do. 🙂
Read more about pricing your products here: https://www.soapqueen.com/business/much-charge-products/
-Kelsey with Bramble Berry
I recently tried a rim soap after seeing this tutorial. It was very inspiring.
However I ran into a huge problem and I have no idea how to fix it. I am pretty new to soap making and I wanted to make a honey, oat and milk soap with an outer rim of Melt and Pour.
My main problem is I doubled the recipe (oils) but forgot to double the lye and water/milk!
After my oils reached the correct temperature, I poured in a lye mix of 1:1. I added the extra part of the liquids as fresh milk into the oils. I used the same amount of water for the milk, so the lye solution would have ended up being 1:2.
Now after mixing it, I realised I hadn’t doubled the lye. There wouldn’t be enough. Gosh, I must’ve been so focused on making the rim soap correctly, that I forgot I had to double the liquid amount as well, otherwise I would have just poured in the extra lye into some water and waited for it to cool.
I freaked out, and instead added the lye to the soap batter and began stirring with my large spoon, using the stick blender etc. Nothing dangerous happened, but the lye wouldn’t dissolve.
I strained the soap batter through a very fine mesh sieve and then poured it into my Pringles can (what I used for the rim soap), but the soap is so soft now. It can out of the mold fine, but it hasn’t set up, which to me means that it needed that extra lye.
I ran through the amounts I used of everything into Soap Calc to try and see what the superfat would be (not including the fats from the milk itself). Well the water % to oils ended up being 13% and the superfat ended up as 55%.
My main question is can I fix this soap or do I bin it? I know next time to choose a very simple recipe without milk, or too many variations, because so much of my concentration was taking with getting the rim looking nice.
Thank you for any help.
Hi Naomi!
I’m sorry about that! I have definitely forgotten a few things when soaping. It’s all part of the learning process. 🙂
Without that lye, the soap may never fully set up. I would recommend rebatching it with twice as much soap. The soap you add to it should be a nice and firm recipe with lots of hard oils. This Basic Rebatch is a good option: https://www.brambleberry.com/Grated-Rebatch-Soap-Base-Basic-P4540.aspx
Learn how to rebatch soap here: http://www.soapqueen.com/bath-and-body-tutorials/cold-process-soap/soap-queen-tv-presents-how-to-make-rebatch-soap-2/
The soap won’t be very firm, but the added soap should help make it a bit harder!
-Kelsey with Bramble Berry
Thanks so much for your reply, Kelsey.
I’m sorry, but I don’t understand what you mean by rebatching it with “twice” as much soap. How does twice as much soap help with the lye amounts?
Wouldn’t adding twice as much soap, even with butters, mean I was still short on lye from the original recipe? So if I was to add a nice hard recipe, that had lye of its own, I would still be short on the original lye amount . . . is that right?
And just to clarify, when you say twice as much, do you mean a ratio of 1:2? So I would do double the amount of the batter weight I made originally? I just being cautious and asking questions, because if I get it wrong that a lot of oil to waste.
Thanks again for all your help. I will read through the links 🙂
Sorry about the confusion! If you have 1 pound of soap, I would recommend adding 2 pounds of a hard soap for a ratio of 1:2.
Your original recipe will still be short on lye. Because the recipe has already saponified, we don’t recommend adding more lye to it. The lye won’t mix in fully and there will be pockets of it in the soap. Instead, you can mix your softer batch with a harder soap. You won’t get a firm bar, but it will be more firm than you started with because it’s been mixed with that firm rebatch. Let me know if that makes sense!
-Kelsey with Bramble Berry
That makes perfect sense. Thanks, Kelsey!
You’re welcome! 🙂
What a great soap! Thank you. An unrelated question: How can I use whey left over from making yogurt in soap making? I have so much, it feels a shame to throw it out.
Thank you
You’re welcome, glad you like the soap! We haven’t done a lot of testing with whey, but I did find a few tutorials online. They say to treat whey like milk and using it in place of water. That includes freezing it into cubes before adding the lye, then popping it in the fridge or freezer for 5-24 hours after it’s made. 🙂
Learn more about working with milk here: http://www.soapqueen.com/bath-and-body-tutorials/tips-and-tricks/how-to-add-lye-to-milk-for-cold-process-soap/
And this post has more on working with whey: http://curious-soapmaker.com/oatmeal-whey-honey-soap.html
We haven’t tested it out, so I would definitely recommend a small test batch to see how it works in soap!
-Kelsey with Bramble Berry
Thank you. Will let you know if i ever try it. I did freeze the whey already. 😊
You’re welcome Emel! 🙂
-Kelsey with Bramble Berry
I use whey allllll the time! I find it makes a wonderful feeling soap!!! =) I usually freeze it, but have occasionally been too lazy, and it just darkens the soap quite a bit.
My favourite soap of all time is 80%olive, 10%castor, 10%coconut oil, with a water discount and using 100%whey instead of water. it’s amazing. haha
That’s awesome Kea, thanks for sharing your recipe! 🙂
-Kelsey with Bramble Berry
Thank you for another great tutorial but I have to say, this is so much more difficult and time consuming than the way I do rimmed soap. I do the outer rim in a slab mold and use a hand-held wire cutter to slice thin sheets. Then you can cut the sheets to the exact size of your column mold or Pringles can or whatever you may be using. Just so much easier than splicing loaf mold slices together.
That’s an awesome tip Irene, thank you so much for sharing! We’ll definitely have to give that method a try. 🙂
-Kelsey with Bramble Berry
This is how I made rimmed soap for the Great Cakes soap challenge. My secret is out! Lol
I love the Great Cakes challenges, you can learn so many great tips and techniques! 🙂
-Kelsey with Bramble Berry
Love this soap!
Thanks so much Dana, glad you love it! 🙂
-Kelsey with Bramble Berry
I have done it a few times, and I find it all around easier to just put my strip rims into individual shaped molds rather than a column. That way I can also use varying fragrance and colors for the inside.
Oh that’s a great idea as well! Thanks for sharing Michael. 🙂
-Kelsey with Bramble Berry
Beautiful soap, exquisitely crafted! I’ve wanted to try this for a long time, but I don’t have the cutter and I don’t want to invest in one since my soaping is a hobby, not a business. I’m also not that good at cutting with a knife. I have sort of done this, however. I have the Brambleberry silicone column mold, which I love. I insert a wide tube into the center and pour contrasting soaps into the inner and outer rings for a sort of rimmed soap, but certainly not the same. I can’t rate it since I’ve not tried it, but I’m sure it’s nothing short of 5 stars. Thanks everybody!
Thank you Eric! Also, I love the idea of using a tube to get this look. We’ll have to check that out!
-Kelsey with Bramble Berry
Eric,
I too am a hobby-soaper and not a business soaper, but I like trying a bunch of different techniques for the challenge. I bought an “old-school” hand held Oxo brand cheese slicer and slice off the layers of my loaf mold. You can even vary the thickness a bit by changing the angle of how you hold the slicer. It’s also how I make curls to in-bed. Just another option.
I love that tip LeighAnne, thanks so much for sharing! 🙂
-Kelsey with Bramble Berry
Thank you for the great tutorial making rimmed soap! :-D. It’s on my to make list! lol! 😀
It’s a fun one! It took us a few practice runs to get this technique down but we are super happy with the end result. 🙂
-Kelsey with Bramble Berry
Thanks for the clear and easy to follow tutorial. Def need to try this!
Absolutely, have fun giving this a try Anna! 🙂
-Kelsey with Bramble Berry
Beautiful soap, thank you for the step by step tutorial
You’re welcome Sally, glad you like the soap! 🙂
-Kelsey with Bramble Berry