 Click here to be taken to Part A of these instructions.
1. Pull out a piece of saran wrap long enough to hold all of your citrus slices. Carefully position your “rind” soap on the saran wrap. Pull the wrap tight to make sure there are no wrinkles under the “rind”. Do the best you can – the wrap never quite gets straightened or perfect.
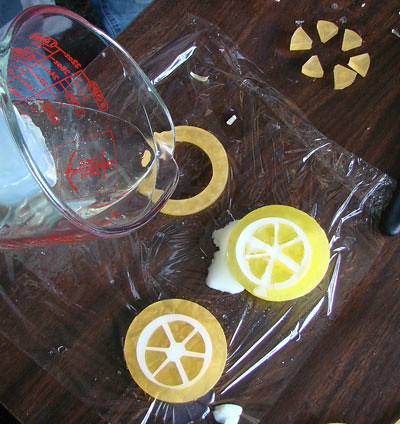
2. Spritz the “rind” and inside of the rind (onto the plastic wrap) with rubbing alcohol. Pour a thin layer of clear soap into the rind.
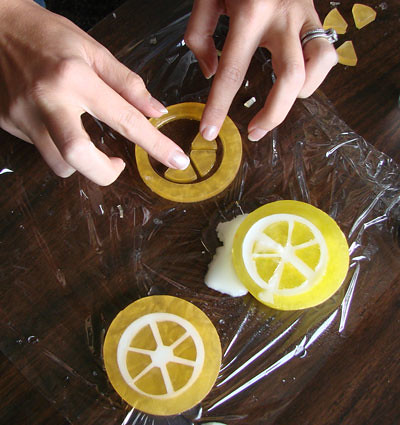
3. Spritz the thin layer of clear soap with rubbing alcohol. Place the “slices” into the clear layer of soap, before it hardens. Wiggle them into the perfect positioning. Have your paring knife handy just in case you need to slice off a too-large slice piece to ensure evenly spaced out soap.
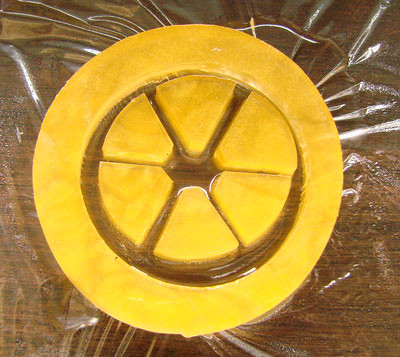
4. Spray the entire set up with alcohol. Alcohol is your friend in this case. It helps with adhesion of the soap pieces.
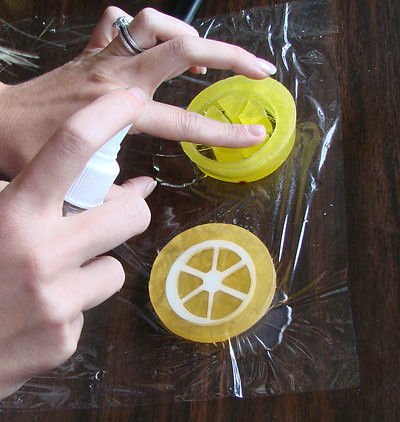 5. Allow this clear layer to harden up prior to the next step. This usually takes 3 to 5 minutes at the most. If you do not allow your clear layer to harden up, the Lemon Slice below is a good example of what happens – the white soap will leak out the sides of the slice.
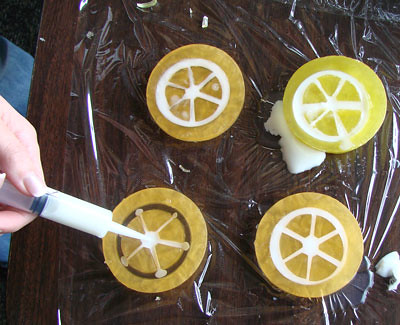
6. Melt White melt and pour soap in the microwave, double boiler or whatever method you prefer. Make sure the white soap is not steaming or else it will melt your slices. For the Bramble Berry House Bases, 120 to 130 degrees is the best option for the overpour.
7. Spritz with alcohol. Using either a steady hand, you can pour directly into the middle of the soap slices from your heat safe container. The Melt & Pour Injector Tool is fabulous for this because it allows precision targeting with the white soap base. Using the Injector is my preferred method for this soap. It has less mess and trimming to work with after the soap hardens.
8. Give one final spritz and you’re all done. Allow the soap to harden. Peel the soap off the plastic, cut into slices or wrap whole.
Voila – you’re done! Realistic Citrus Slices that are easy and fun to make.
Hi Dad,
The reason the saran wrap works so well is that saran wrap “grabs” and seals the soap really well. I’ve never seen another medium do this with melt and pour – though I do challenge you to prove me wrong about the flexible cutting board. =) Perhaps it would equally grab with impressive strength and allow for a seal to not have the soap leak out.
Rather than pouring onto plastic wrap in final stages, I suspect a flexible plastic cutting board (sold 2 or 3 in a pack at the dollar store) would be easier to handle. Dear Old Dad who adores the Queen.
The results are stunning. Thanks for the step-by-steps, I’ve always wondered how this was done!
Have a safe and super successful trip. I am praying for y’all.
Jury duty is great – I had the day off today which was really helpful and they were kind enough to give me an exemption for Monday, Tuesday, Wednesday of next week as well so I feel lucky to be able to go to Washington DC without worrying about a bench warrant.
As for the simple, you’re so right. You’d think I would have figured it out sooner than the 10 or so hours it took me to do it to start with! =)
Well, isn’t that simple. Now, Anne-Marie, why didn’t you think of that before?
Hope jury duty is treating you well.
I now have a new project to play with this weekend. Thank you. Very cool soaps.