Day Two – Making Daisy Cut Outs
Day Three – Marbeling Option
Embedding soaps is best done with fresh soap. The more moist and glycerin laden that the soap is, the easier the embedded soap sticks in the soap without separating.
Embedding the Daisies
Step One: Melt clear melt and pour soap in the microwave on short bursts. Stir to ensure all the pieces are evenly melted.
Step Two: Fragrance the soap. Remember, yellow or orange fragrances are fine to use but may make greens and blue colors not show up as clearly as you want.

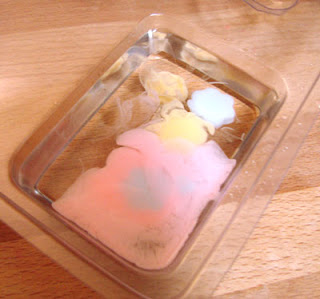
Step Three: Pour a thin layer of soap into the bottom of your basic shape mold. Make sure that the soap is not steaming. If you cannot easily put your finger in the soap without burning your finger, it’s not ready to be poured for embedding. This is what happens if you pour the clear soap too warm.
Step Four: Spray the surface of the clear soap with alcohol. Insert the daisy flower at an angle. If you place your flower down flat, air bubbles can easily be caught under the flower, marring the beautiful look of the soap. The angle allows the air bubbles to flow up the side of the flower.
Step Five: You can pour clear soap over the back of the embedded daisies and have a clear, see-through bar. Or, you can wait for the clear soap to harden (about 10 minutes) and move onto Step Six.
Step Six: After the clear soap layer is thick enough to support a second layer, spritz the clear soap with rubbing alcohol. Then, pour a contrasting color. Opaque soap backs are particularly nice to show contrasting spring colors.

Step Seven: Finish your second layer off with a final spritz of alcohol.
Check back tomorrow for final photos showing color and option variations.


![winningphoto[2]](https://www.soapqueen.com/wp-content/uploads/2014/04/winningphoto2-120x120.jpg)
The “Don’t” portions of the projects are sometimes my fave things to show because in the end, they save people money. After all, why make the same stupid mistake I did!? =))
Trisha, let me know how your project works out. =) I have your soaps curing on my desk right now.
I’ve ordered some M&P base to give these a shot (I think my niece will enjoy them). They are just so cute.
I really like these. I just ordered a bunch of mini cookie cutters from Amazon.com. Hope I can do as great of a job as you have. If not, guess I’ll be making lots of teeny tiny cookies (grin). Thanks for showing the “don’t do this” too.
Adorable. Love this project. I like that it takes advantage of really basic molds and you just have to provide the cookie cutter.