If you missed Day 1 of our embedding project, catch up by clicking here.
Step 5:Spray your embedding object with alcohol and place your object where you want it to be in the mold (usually centered). A note about choices for embedding objects: hard objects may pop out of the soap in an uneven fashion when washing, potentially scratching enthusiastic children. Use common sense and age appropriate toys when making Embedding Toy soaps, please.
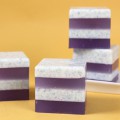
Step 6:Continue alternating layers of Super Pearly White and Clear Soap Base to get your desired cloud effect. Remember to let each layer cool slightly and spritz each layer with rubbling alcohol.
Step 7:After the mold is filled to the top let the mold sit for a few hours before unmolding. The longer you wait the easier it will be.
Look how cute this bar turned out! This is a fun project to include the kids on. It’s also a sneaky way to get your children to love their baths. The more scrubbing they do, the sooner they can claim their prize!
I’ll post a photo later, taken in our light box, that really showcases the cuteness of this soap. My skills at lighting and photography at home are minimal at best.
Love the Blog A-M… And your FOs are just YUM!!! 🙂
Great project. My 10 yr old daughter is getting into making soap. It has been fun doing soap with her.
I’m so glad that you like the project =)
And as for being tagged, ack! I’ll check it out. Thanks. =)
You’ve been tagged in the Indie Beauty Blog Tag Party!
http://www.aromaticsinternational.com/blog/2009/01/23/indie-beauty-blog-tag-party-ten-things-i-love-about-being-indie/
That is so clever!
That is fun.
That’s adorable!
Aww, it’s so cute!