Adding cornstarch to Melt and Pour soap turns your soap into a play dough fantasy land! Let your kids sculpt soap into any shape and let it air dry. These hardened shapes can be used in the bath or embedded for a unique soap look.
Clear Melt and Pour soap base
Corn Starch
Soap Mold (optional, if embedding)
Microwave safe container
Saran Wrap [plastic cling wrap]
Spritzer bottle filled w/ rubbing alcohol
Liquid Pigment soap colorant
Fragrance oil
1. Cut melt and pour into 1” cubes and put into microwave safe container (6oz of soap should be plenty), cover with saran wrap and microwave for 30 second intervals until soap is melted. Add your fragrance oil to the soap and stir.
2. Add the Corn starch to the soap, about 4 tablespoons for 6oz of soap and stir, stir, stir! The cornstarch may not be very willing to mix in, just keep stirring and it will eventually mix in for you. You can scoop out any floating clumps with a spoon if they just refuse to cooperate.
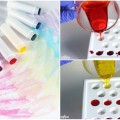
3. Decide how many colors you want and pour the cornstarched soap into individual containers, one per color then add your colorants.
4. Let the soap cool, it is easiest to work with if it is still soft and warm. We have found that pouring a thin layer of the soap out into a mold (not the one you plan on using), or even on your counter is the quickest and easiest way to do this. Once the soap has stiffened it will peel off easily. (For this example we poured little pools of soap onto the counter)
5. Knead the soap in your hand, depending on how cold it is it may take a minute to be moldable – then do this with all of your colors.
6. Start sculpting! Let your sculpted soap sit for about an hour to fully harden
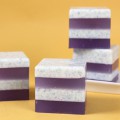
You can use your soap as it is just like this – or you can embed your masterpiece in clear soap to make it last a little longer.
To Embed:
1. Follow step 1 and use clear soap. then pour a thin layer of the soap into the mold and spray with alcohol to pop any bubbles.
2. Let this layer sit until there is a stiff skin on top, spray with alcohol – this helps the next layer stick
3. Get your sculpted soap and spray it on all sides with alcohol then set onto the first layer of soap
4. Fill the mold the rest of the way full with the clear soap and spray with alcohol
5. Let this sit for a few hours before removing (the longer you wait the easier it will be to remove from the mold)
Voila! A crafty, handmade soap with your own molded creation inside!
We originally authored this article for crafty blog, Whip Up.


Have you gotten your moldable, sculptable CP recipe delightfully wonderful yet? 🙂
Hi Linda!
We are still working on it, but in the meantime, you can check out these super fun molding M&P tutorials:
Soap Queen Short- Rolling Soap!: http://www.soapqueen.com/bath-and-body-tutorials/melt-and-pour-soap/soap-queen-short-rolling-soap/
Strawberry Shortcake Soaps: http://www.soapqueen.com/bath-and-body-tutorials/melt-and-pour-soap/strawberry-shortcake-soaps-2/
Soapy Nesting: http://www.soapqueen.com/bath-and-body-tutorials/melt-and-pour-soap/soapy-nesting-easter-soaps-part-2-2/
Lump of Coal Soap: http://www.soapqueen.com/bath-and-body-tutorials/melt-and-pour-soap/lump-of-coal-soap/
Making Sushi Soap: http://www.soapqueen.com/bath-and-body-tutorials/melt-and-pour-soap/making-sushi-soap-the-rice-secret-2/
You Will Come Into a Fortune: http://www.soapqueen.com/bath-and-body-tutorials/melt-and-pour-soap/you-will-come-into-a-fortune-2/
Graduation Party Favors Tutorial: http://www.soapqueen.com/bath-and-body-tutorials/melt-and-pour-soap/graduation-party-favors-tutorial-2/
-Becky with Bramble Berry
Hi Bramble Berry!
Do you have a similar recipe for moldable, sculptable cold process soap? I often see others using decorative embellishments on top their soaps and they say their embellishments are cold process, so I’m very curious as to how that’s done.
Thanks!
I don’t have a perfect recipe for it yet but I tinker with it and when I get it delightfully wonderful, I will share =)
How cool is that?! What a neat technique and the embed looks great. My nephew is staying with us this upcoming weekend and that would be a perfect introduction for him to my soapfilled world…lol!
OK, this is too cute! Must give this one a whirl. DD is babysitting a young girl and I was looking for a project we could work on tomorrow morning.
This is a fabulous idea! I am going to have to try this with the kiddos. 🙂
that is too cute. Looks like a great project for kids. Thanks for sharing.
That is too fun!
Awesome! This looks like so much fun! I’m feeling some sculptural possibilities coming on! 🙂
That is so cool! Some of the teens and tweens from church spoke to me about doing a soap craft over the summer. I was thinking about m&p, but this would be cool too.
What a cute idea! I keep looking for ways to involve my little sister and this seems right up her alley.
How very cool! I’ve been wondering how to do it…I’ve seen it before. 😀
Thanks for sharing!!
What a great idea! Thanks for sharing. I’m a huge fan of Whip Up. Love that Blog.