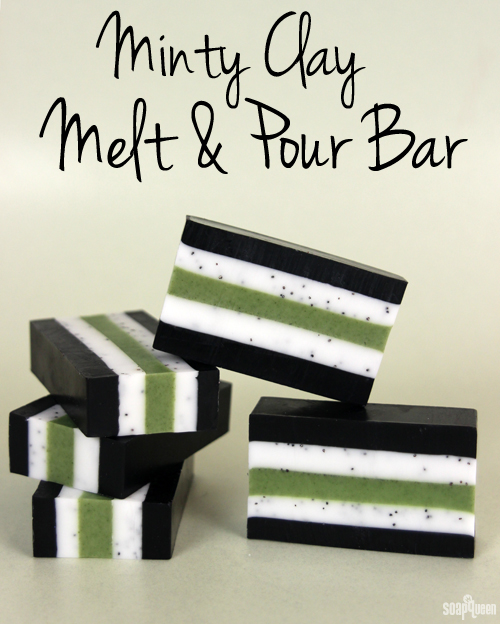
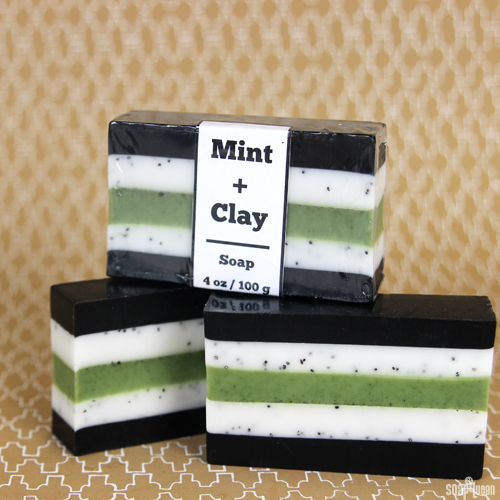
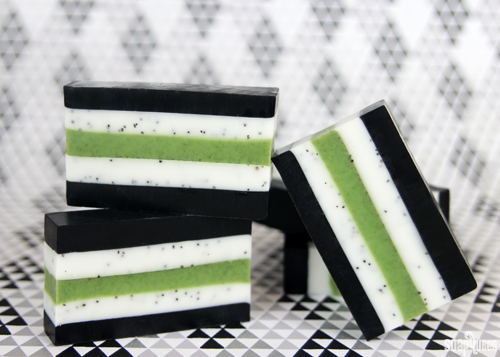
This melt and pour project is full of contrasting layers, texture and refreshing essential oils. With natural colorants such as activated charcoal, green zeolite clay and spirulina powder, this is a great project for soapers who prefer to use natural ingredients. The combination of peppermint and rosemary essential oils is incredibly refreshing and invigorating.The poppy seeds add a subtle amount of scrub, leaving the skin feeling smooth. Both activated charcoal and green zeolite clay are known for their oil absorption properties, making this bar a skin-loving powerhouse!
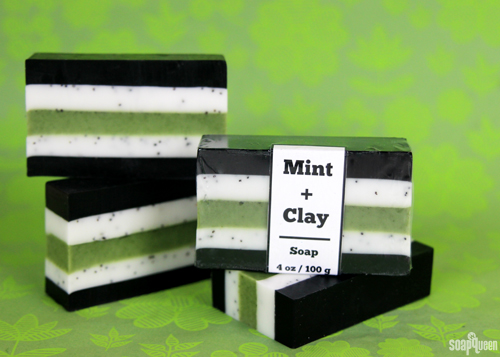
The key to this project is 99% isopropyl alcohol; spraying the soap with isopropyl or rubbing alcohol before pouring each layer helps the layers adhere to each other. Without this step, you may find yourself with five separate pieces of soap…no fun! We recommend pouring the alcohol into a spray bottle (such as the 8 oz. bottles with spray top) with a fine mist spray for ease of use. For more information on how to create melt and pour layers, check out this Soap Queen TV video.
Love the adorable packaging in the photo above? The label for this project, along with several upcoming tutorials are available for download here. Simply download the PDF, print on sturdy paper, and seal with shrink wrap.
What You’ll Need:
25 oz. Clear Melt and Pour
25 oz. Shea Melt and Pour
3 mL Peppermint Essential Oil, 1st Distill.
3 mL Rosemary Essential Oil
1.5 tsp. Poppy Seeds
Green Zeolite Clay
Activated Charcoal
Spirulina Powder
10″ Silicone Loaf Mold
99% Isopropyl Alcohol in Spray Bottle
 Click here to add everything you need for this project to your Bramble Berry shopping cart!
COLOR PREP: Disperse .5 teaspoon activated charcoal in .5 tablespoon 99% isopropyl alcohol. In a separate container, disperse 1 teaspoon green zeolite clay in 1 tablespoon 99% isopropyl alcohol. In another container, disperse 1 teaspoon spirulina powder in 1 tablespoon 99% isopropyl alcohol. Use a mini mixer to get clumps worked out smoothly.
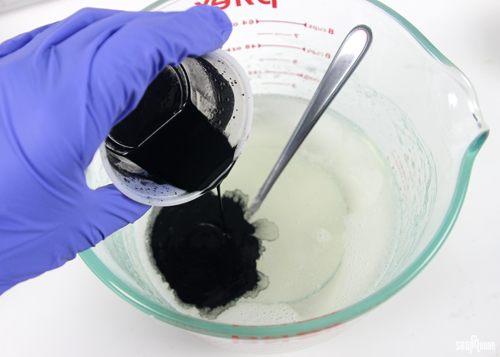
ONE: Cut and melt 20 oz. clear melt and pour base in the microwave using 20 second bursts. Once thoroughly melted, add the dispersed activated charcoal and mix thoroughly with a spoon to combine.
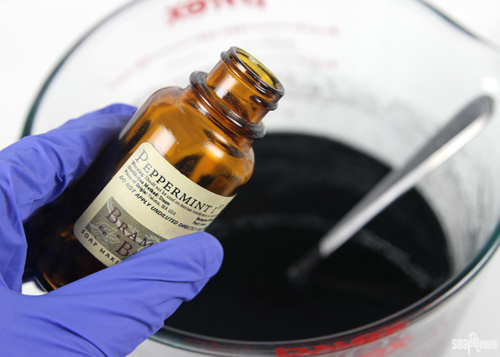
 TWO: Add 3 mL Peppermint 1st Distill. into the black soap, and stir to completely incorporate.
 THREE: Pour half of the black soap (10 oz.) into the mold. To keep the layers extremely even, place the mold on a scale first and hit the “tare” button. Then pour exactly 10 oz. of black soap into the mold. Spray with 99% isopropyl alcohol to disperse any bubbles. Set remaining soap aside, and allow the soap in the mold to cool and harden.
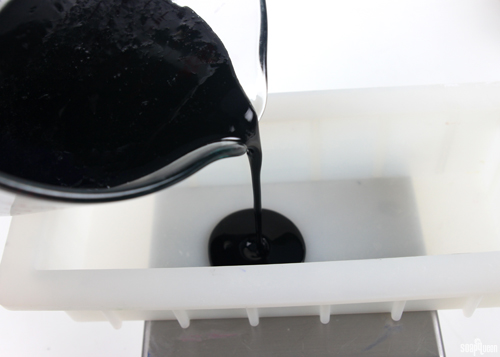
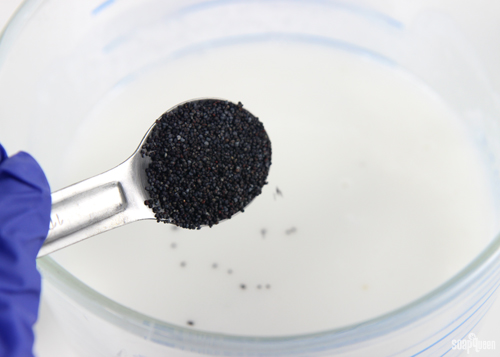
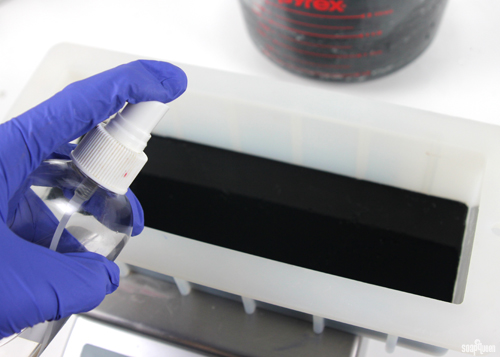 FOUR: Once the first layer is nearly hardened, cut and melt 20 oz. shea melt and pour base in the microwave using 20 second bursts. Once fully melted, add poppy seeds and stir to incorporate.
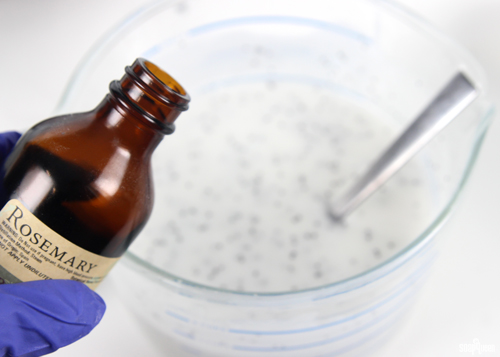
 FIVE: Add 3 mL Rosemary Essential Oil, and stir to fully combine.
 SIX: Once the white soap is no hotter than 125° F, spray the first layer of black soap with 99% isopropyl alcohol to help the layers adhere. Pour half of the white soap (10 oz.) into the mold and spray with alcohol to disperse any bubbles. If you’d like to be exact, place the mold on a scale first. Set the remaining white soap aside, and allow white layer to cool and harden.
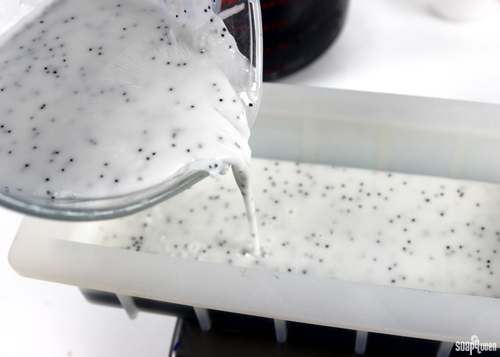 SEVEN: Cut and melt 5 oz. shea melt and pour and 5 oz. clear melt and pour in the microwave using 20 second bursts. Add the dispersed green zeolite clay and spirulina powder, and stir to completely combine. Allow the soap to cool slightly.
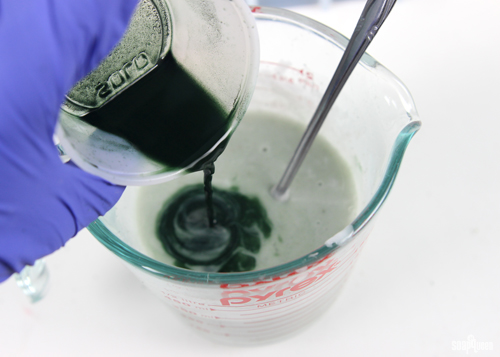 EIGHT: Once the soap is no hotter than 120° F, spray the white layer with 99% isopropyl alcohol and pour the green soap into the mold. Pouring the green soap while at a cooler temperature helps ensure it does not melt the layer below, and helps the clay and spirulina powder to evenly suspend within the layer. Spray the green soap with alcohol to disperse any bubbles.
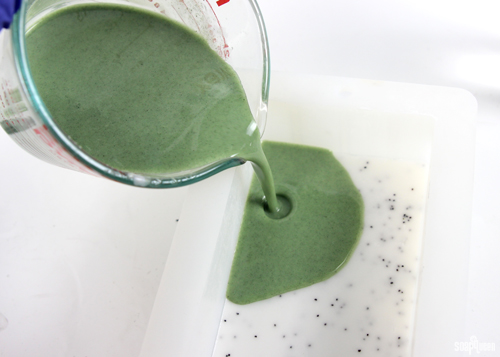 NINE: Remelt the remaining white soap in the microwave using 15 second bursts, stirring in between each burst. Spray the green layer with 99% isopropyl alcohol, and pour the remaining white soap into the mold and spray with alcohol to disperse any bubbles. Allow the white layer to cool and harden.
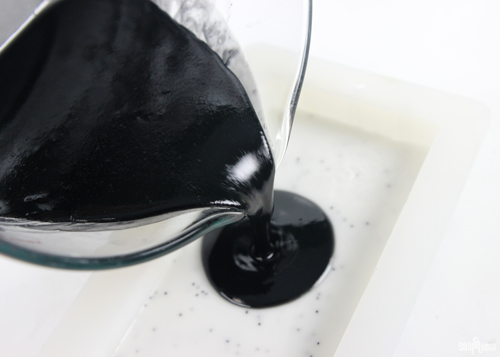
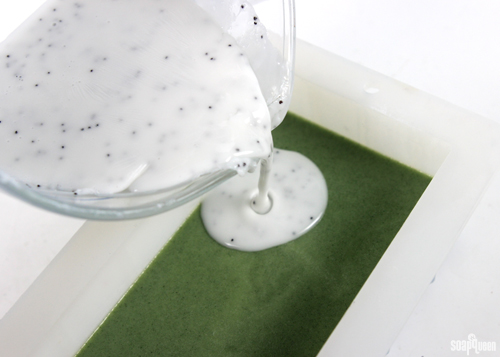 TEN: Remelt the remaining black soap in the microwave using 15 second bursts, stirring in between each burst. Spray the white layer with 99% isopropyl alcohol, and pour the remaining black soap into the mold. Spray with alcohol to disperse any bubbles, and allow the soap to fully cool and harden. Cutting into the bar before it has completely cooled increases the risk of layers separating, so patience is important!
 What are your favorite natural colorants? I love the rich black that activated charcoal gives, but be careful to not use to much or it can stain washcloths!
- 25 oz. Clear Melt and Pour
- 25 oz. Shea Melt and Pour
- 3 mL Peppermint Essential Oil, 1st Distill.
- 3 mL Rosemary Essential Oil
- 1.5 tsp. Poppy Seeds
- Green Zeolite Clay
- Activated Charcoal
- Spirulina Powder
- 10″ Silicone Loaf Mold
- Optional: 99% Isopropyl Alcohol
- COLOR PREP: Disperse .5 teaspoon activated charcoal in .5 tablespoon 99% isopropyl alcohol. In a separate container, disperse 1 teaspoon green zeolite clay in 1 tablsepoon 99% isopropyl alcohol. In another container, disperse 1 teaspoon spirulina powder in 1 tablespoon 99% isopropyl alcohol. Use a mini mixer to get clumps worked out smoothly.
- Cut and melt 20 oz. clear melt and pour base in the microwave using 20 second bursts. Once thoroughly melted, add the dispersed activated charcoal and mix thoroughly with a spoon to combine.
- Add 3 mL Peppermint 1st Distill. into the black soap, and stir to completely incorporate.
- Pour half of the black soap (10 oz.) into the mold. To keep the layers extremely even, place the mold on a scale first and hit the “tare” button. Then pour exactly 10 oz. of black soap into the mold. Spray with 99% isopropyl alcohol to disperse any bubbles. Set remaining soap aside, and allow the soap in the mold to cool and harden.
- Once the first layer is nearly hardened, cut and melt 20 oz. shea melt and pour base in the microwave using 20 second bursts. Once fully melted, add poppy seeds and stir to incorporate.
- Add 3 mL Rosemary Essential Oil, and stir to fully combine.
- Once the white soap is no hotter than 125° F, spray the first layer of black soap with 99% isopropyl alcohol to help the layers adhere. Pour half of the white soap (10 oz.) into the mold and spray with alcohol to disperse any bubbles. If you’d like to be exact, place the mold on a scale first. Set the remaining white soap aside, and allow white layer to cool and harden.
- Cut and melt 5 oz. shea melt and pour and 5 oz. clear melt and pour in the microwave using 20 second bursts. Add the dispersed green zeolite clay and spirulina powder, and stir to completely combine. Allow the soap to cool slightly.
- Once the soap is no hotter than 120° F, spray the white layer with 99% isopropyl alcohol and pour the green soap into the mold. Pouring the green soap while at a cooler temperature helps ensure it does not melt the layer below, and helps the clay and spirulina powder to evenly suspend within the layer. Spray the green soap with alcohol to disperse any bubbles.
- Remelt the remaining white soap in the microwave using 15 second bursts, stirring in between each burst. Spray the green layer with 99% isopropyl alcohol, and pour the remaining white soap into the mold and spray with alcohol to disperse any bubbles. Allow the white layer to cool and harden.
- Remelt the remaining black soap in the microwave using 15 second bursts, stirring in between each burst. Spray the white layer with 99% isopropyl alcohol, and pour the remaining black soap into the mold. Spray with alcohol to disperse any bubbles, and allow the soap to fully cool and harden. Cutting into the bar before it has completely cooled increases the risk of layers separating, so patience is important!



I love this soap! One little problem I ran into though. I was waiting to pour my second layer, but it seemed to be getting quite thick at 130F. At 128, I started to pour and it literally started to harden while I poured! needless to say my white layer turned out very uneven and a bit clumpy. the middle layer I paired at 130 because I was nervous it would happen again. That layer is fine and didn’t bleed into the layer underneath. the forth and fifth layer I poured at 130 and 129 and again it started to harden as I poured. I have tested my infrared thermometer on various areas of the house and in the refrigerator and it seems to be accurate. I did use the white base rather than the shea. would that make a difference?
The Poppy seeds are not allowed in Dubai, what else can I use please? Chia seeds?
You can use cranberry seeds, loofah strawberry seeds or coffee grounds! Any large exfoliant will work. 🙂
Read more about exfoliants here: https://www.soapqueen.com/bath-and-body-tutorials/tips-and-tricks/all-about-exfoliants/
-Kelsey with Bramble Berry
Cranberry seeds: https://www.brambleberry.com/Cranberry-Seeds-P4089.aspx
Strawberry seeds: https://www.brambleberry.com/Strawberry-Seeds-P4091.aspx
Shredded loofah: https://www.brambleberry.com/Shredded-Loofah-P3252.aspx
Thank you so much for the recipe! This is really fun to make and everyone just loved it. The poppy seeds are beautiful in the white soap and I like the extra scrubbiness it gives. Your recipes are always so easy to follow and turn out so well… thank you!!
Oh yay, I’m glad everyone loved it! Nothing better than a nice scrubby bar. Thanks Michelle! 🙂
-Kelsey with Bramble Berry
I tried these this weekend and my layers separated. I spritzed with alcohol and used the recommended temps. Any ideas?
Hi Marilyn!
I’m sorry those layers separated on you! There are a couple tricks that can help them adhere nicely.
We recommend spritzing with 99% isopropyl alcohol right before the second layer is poured. If the alcohol is spritzed too early, it can evaporate. You want your layer covered with alcohol, but not completely soaked. Learn more about working with layers in this video: https://www.youtube.com/watch?v=5oyh1Bf3Gxo
Read more about 99% isopropyl alcohol here: http://www.soapqueen.com/bramble-berry-news/sunday-night-spotlight-99-isopropyl-alcohol/
Another way to help the layers stick is a nice sharp knife. I’ve found my layers separated on me when I used a dull knife, even with alcohol. I like using a sharp kitchen knife with a smooth blade.
For the soap now, you can “glue” those layers back together with melt and pour! To do so, melt 1-2 ounces of soap on 5 second bursts. When it’s melted, brush a light layer on and gently press the separated soap on top. Let that harden for 1-2 hours. That should help your soap stick together. 🙂
-Kelsey with Bramble Berry
This soap was fun to make! You guys are wonderful teachers! I am a newbie and absolutely addicted/obsessed with this craft!
I would like to provide a tip to others:
The green clay/spirulina layer sets up much more slowly than the other two. I got some swirling because of it, but stopped pouring right away so the swirl effect was resigned to one end of the loaf.
Because of this, I made a notation in my log book to either give 2x more curing time for that layer, or next time I think I have enough time to do batches for the layers. Mind you the swirled pieces are pretty!
The first two and a half layers are crisp, but pouring the second poppy seed layer, even after waiting awhile, resulted in some break through.
Love love love this soap! Wish I could share some pictures here.
I don’t know whether to thank soap queen or curse you for this new obsession! :@}
Thank you so much Verica, glad you had fun making this soap! Thanks for the tips as well. We would love to see pictures of it on our Facebook page. 🙂
Bramble Berry Facebook: https://www.facebook.com/BrambleBerry/
-Kelsey with Bramble Berry
Second batch tips:
Mixing by batches for layers works great!
Regardless of temps, my spirulina layer was 97 and my next poppy layer at 120, there is a tiny tiny bleed through of the spirulina color. ?
Again regardless of temp, my final charcoal layer was 140, but was starting to form a skin, which I stirred in….by the time it got down to 135 it poured “glommy”. So my tip is if it is forming any skin between stirs, pour it! Pouring into corners and over a upside down spoon absolutely helps to not experience “breakthrough “.
Love this soap!
Hi Kelsey,
Can I make this using your LCP Clear & LCP White base? I read the LCP base firms faster, so are there tips working with these particular base. Thank you for your help!
Hi Sarah!
You can use the LCP Clear and White bases for this! Because they have less glycerin, they will have little to no sweating. They’re a great option for more humid climates. 🙂
Less glycerin does also mean they can firm up a bit faster. Because of that, I would recommend using a double boiler. A double boiler allows this soap to melt gently and stay warm as you’re working with the layers. That way you can pull off some of the soap, mix in color and pour it into the mold. Then, repeat with the next layer.
If you don’t have a double boiler, you can place a bowl over a pot of simmering water. Just make sure the water doesn’t touch the bottom of the ball. You can also use this handy dandy double boiler maker: https://www.brambleberry.com/Double-Boiler-Maker-Double-Boiler-Maker-P3796.aspx
-Kelsey with Bramble Berry
LCP White Melt and Pour: https://www.brambleberry.com/SFIC-LCP-White-Melt-And-Pour-Soap-P3190.aspx
LCP Clear Melt and Pour: https://www.brambleberry.com/SFIC-LCP-Clear-Melt-And-Pour-Soap-P4383.aspx
Thank you so much Kelsey! I’ll try the double boiler method. You, the BB team, and your products are awesome! 🤗
You’re welcome Sarah! Happy to help. 🙂
-Kelsey with Bramble Berry
I made my first batch and it turned out wonferful !! I absolutely love it! I have really dry skin and the soap leaves it a little dry. I wanted to increase the moisture level in the soap . Can you please tell me how can do this ?
So glad the batch turned out wonderfully Pat! 🙂
For some more moisture, you can replace the Clear Melt and Pour Soap with more Shea Melt and Pour, or Goat Milk Melt and Pour. Goat Milk and Shea Melt and Pour are creamy and moisturizing. Because they are both white, the colors will be a bit more pastel. For instance, the bottom and top layers will be gray instead of black. It will still look great, just a bit different than the first batch. It will also feel wonderful!
Shea Melt and Pour: https://www.brambleberry.com/SFIC-Shea-Melt-and-Pour-P3192.aspx
Goat Milk Melt and Pour: https://www.brambleberry.com/SFIC-Goat-Milk-Melt-And-Pour-P3184.aspx
-Kelsey with Bramble Berry
Is it possible to make this only a Shea melt? I think making a clear melt is too difficult for my level. Will the fragrances and layers work if I just make the three layers only out of the Shea melt?
Hi Elder!
You can definitely do just the shea layers if you like! Having fewer layers will make the project easier for sure. Just make sure to spritz each layer with alcohol before pouring to help the layers stick, and pour when the soap is 130F or below. 🙂
-Kelsey with Bramble Berry
I made this this evening, but had an issue with “residual”. Even using a spatula to try to scrape out the bowl, I ended up with 1.2 oz of black and .65 oz of white left in the bowl (I scraped it out with a knife). This resulted in my top layer being noticeably thin. Also, when I “Let the soap cool” before pouring it, it formed a film (even when I tried to stir it to keep it from forming a film). This left weird shapes in my layers. Any suggestions?
Also, when I mixed the colorants with alcohol, they didn’t stay suspended very long (read, hardly at all). I stirred them for at least a minute, but by the time I got the soap melted the powder had settled into a sludge at the bottom of the alcohol. I even purchased the little mixer that is recommended. All that did was splatter the liquid everywhere. I now know that activated charcoal does not come off my table very easily.
Hi J!
I’m sorry about the mess, and that those layers weren’t even! The good news is the soap will still feel and look amazing. 🙂
When working with melt and pour soap, it can harden on the sides of the bowl and leave some behind. If that is happening to you, you can pop the container back in the microwave on 5 second bursts. That will help the soap melt and slide out of the bowl more easily. You can also prepare a bit of extra soap, then at the end pour the leftovers into a separate mold. That will give you nice even layers without having to worry about heating up as you’re pouring.
Also, when the soap is cooler, it will form a skin. You can see that skin in the photos above. In our tests and recipes, we found that skin wasn’t noticeable in the final bars! Also, keeping the soap cooler will help keep your layers nice and crisp. 🙂
Learn more about working with melt and pour layers in this video: https://www.youtube.com/watch?v=5oyh1Bf3Gxo
When working with clays, they can settle. They are on the heavier side, and alcohol is quite thin. To distribute them evenly, give them a good mix right before pouring. That will help them distribute evenly and prevent splattering. Also, the mini mixer is quite strong, especially when dispersing in a lighter liquid like alcohol. I’ve definitely made some messes before. What I like to do is place the mixer at the bottom of the container so it’s fully submerged before turning it on. Then, turn it off before removing, otherwise the colors can splatter.
Hope that helps! If you have any other questions or concerns, please let me know.
-Kelsey with Bramble Berry
This project is our first layered project where the layers did not stick – and we sprayed liberally with 91 percent alcohol. The local drug store did not have the one you carry. Is there any way to salvage it??
Hi Marissa!
Oh no, I’m sorry those layers separated! The good news is there is a trick that can help them stay together. Melt a small amount (1-2 ounces) of melt and pour soap in the microwave on 5 second bursts. When it’s melted, brush it on between the layers and press them together. Then, let that dry for 2 hours or so. That melt and pour acts like glue, and can help them stay together. 🙂
We do recommend 99% isopropyl alcohol, but 91% does work fine for melt and pour! When spraying alcohol, you want the bottom layer completely covered, but not fully saturated. You want to spray it right before pouring the next layer. If you spray too early, it can evaporate. Learn more about using alcohol in this Basic Layers video: https://www.youtube.com/watch?v=5oyh1Bf3Gxo
-Kelsey with Bramble Berry
Thank you!! That worked – it’s a bit sloppy even after using the clean up too but presentable/giftable. I will try 99% and spray more liberally if we make this one again. (Thumbs my daughter who helped to make it and her dad loved it )
You’re welcome, so glad to hear that worked! Sounds like your daughter has the crafting bug early. Let me know how your next batch goes. 🙂
-Kelsey with Bramble Berry
I want to make something similar to the Biore charcoal facial cleansing bar that my daughter LOVES (http://www.ulta.com/ulta/browse/productDetail.jsp?productId=xlsImpprod12001091) and this is the closest recipe that I have found. I would rather do a CP soap and one that is not layered (all charcoal colored). Do you have another recipe that is close to this bar?
Hi Lee Ann!
We have some awesome cold process soaps made with charcoal, including this Gold Mine Cold Process Soap: http://www.soapqueen.com/bath-and-body-tutorials/gold-mine-cold-process-soap-tutorial/
It has a sweet and woodsy smell, and skin-loving oils like cocoa butter and olive oil. If you like, you can leave the embeds and mica line out and just make a black bar of soap. 🙂
This Natural Colorant Taiwan Swirl features activated charcoal as well: http://www.soapqueen.com/bath-and-body-tutorials/cold-process-soap/taiwan-swirl/
-Kelsey with Bramble Berry
I am going to make this for my dad for Father’s day and had a couple of questions. I have lots of ingredients from other projects and would rather use them (if they would work) instead of buying new ones.
1. Instead of the Spirulina Powder, could I use the Green Chrome Oxide? I understand that it would give a different color.
2. Can I add dried lemon peel to one of the layers, or will that change the recipe too much? If I can use it, how much would you suggest?
Hi there!
That’s awesome, what a great Father’s Day gift! 🙂
You can definitely use Green Chrome Oxide if you like. I would recommend mixing 1 tsp. of colorant with 1 Tbsp. of alcohol beforehand. That will help it blend smoothly and avoid any clumps. Read more about coloring your soap in the Talk It Out Tuesday: Colorants post: http://www.soapqueen.com/bath-and-body-tutorials/tips-and-tricks/talk-it-out-tuesday-colorants/
You can also add lemon peel! It adds a touch of exfoliation and color. For that, you can add 1.5 tsp. of lemon peel powder to 1 Tbsp. of alcohol before adding it to your soap. We added lemon peel powder to these Lemon Goat Milk Melt and Pour Bars: http://www.soapqueen.com/bath-and-body-tutorials/melt-and-pour-soap/lemon-goat-milk-melt-pour-bars/
-Kelsey with Bramble Berry
Green Chrome Oxide: https://www.brambleberry.com/Green-Chrome-oxide-Pigment-P4042.aspx
Hello !! My daughter Barbara and I are making this recipe right now… and we’re wondering how long does it take for every layer to harden? we prepared everything in advance and now we’re just waiting for the pouring ; )
Hi Rosy!
Yay, that sounds like so much fun! It takes each layer about 30 minutes to a couple hours to harden, depending on how hot the soap is, the temperature of your house, etc. A great way to tell if the bottom layer can support another is to blow on it. If you see it rippling, let that soap sit a little longer. 🙂
You can see that in the Basic Layers episode of Soap Queen TV: https://www.youtube.com/watch?v=5oyh1Bf3Gxo
-Kelsey with Bramble Berry
Thank you Kelsey !! we were so antsy, we just waited around 10 minutes between each layer : O so I’m not sure it’s going to turn out so neat XD
Now we know that we need to be more patient next time : )
You’re welcome! It is a small amount of melt and pour, so it does harden up faster. And, even if your layers aren’t perfectly even it’s going to look great. 🙂
-Kelsey with Bramble Berry
What can I use instead of shea butter . because it is too expensive.
Hi Dilara!
You may also like our White Melt and Pour Base. That would work nicely in this recipe! 🙂
White Melt and Pour Base: https://www.brambleberry.com/White-Melt-And-Pour-Soap-Base-P3191.aspx
-Kelsey with Bramble Berry
Thank you for this awesome recipe. I made the mint clay soap and my clients love them, it is a lengthy process but worth it.
I have a question can you do swirls with melt and pour or only cold press.
Thank you.
Hi Dahlia!
So glad you like the recipe! Also, that’s so awesome that your clients love them. 🙂
You can swirl melt and pour too! The key is to have the soap around 130-135F. Learn more in the Faux Swirl Melt and Pour Cubes Tutorial: http://www.soapqueen.com/bath-and-body-tutorials/melt-and-pour-soap/faux-swirl-melt-and-pour-cubes/
-Kelsey with Bramble Berry
I want to try making this again but adapting to cold process. I’m thinking I’ll use the “Black and White” recipe from Soap Crafting as a model but I have a few questions on how to adapt it:
1. Can I use activated charcoal instead of the black oxide in that recipe to create the black? And at the same concentration (1tsp/23oz oil)? Or will it come out more grey?
2. I’m going to use the green zeolite at the same concentration as used in the “Clay Spoon-Plop” recipe of 2tsp/7oz oil. Should I omit the spirulina?
Thanks!
Hi Tony!
You can definitely get a similar look in cold process soap! Also, you can use activated charcoal in cold process to get the black.
The way you add color and the amounts will be a bit different. With the activated charcoal, we recommend mixing 1 tsp. of colorant with 1 Tbsp. of a light carrier oil, like sweet almond oil. Then, add the dispersed colorant to your soap. It may take a bit more colorant to get a nice black color. Also, keep in mind adding to much can cause your soap to lather gray or black.
Prepare Your Colorants for Cold Process Soap: http://www.soapqueen.com/bath-and-body-tutorials/tips-and-tricks/learn-prepare-colorants-cold-process-soap-making/
For the clays, we recommend mixing 1 tsp. of each clay with 1 Tbsp. of distilled water, then adding that to your soap. You can leave the spirulina out if you like. We love it because it brightens up the green color a bit! This Sunday Night Spotlight: Brazilian Clay post has more information on adding clay to your soap: http://www.soapqueen.com/bramble-berry-news/sunday-night-spotlight-brazilian-clay/
Because the colorants are going to look different in cold process soap, I would recommend making a small test batch. That will help you determine how much color to add, and if the soap lathers gray or not. 🙂
-Kelsey with Bramble Berry
Could you use french green clay instead of green zeolite clay?
Hi Marissa!
You can! We didn’t test this recipe with French Green Clay, so it may be helpful to make a small test batch to see if you like the color. Also, I would recommend preparing the clay the same way by mixing it with alcohol before adding it to your soap. 🙂
-Kelsey with Bramble Berry
I made this yesterday and it turned out pretty great, although the white shea layer seems to be too gummy and clumpy to pour at the suggested temperature of 125F – I poured it at 135F instead. My main problem now is that when I go to cut it, as I get through one of the layers the pressure from the cutter causes the layer to shear and separate. Any suggestions?
Also is there any way to salvage the three bars I’ve cut already that have separated?
Hi Tony!
Oh no, I’m sorry about that! Alcohol is the best way to get those layers to stick together. Before pouring the next layer, spritz the first one with 99% isopropyl alcohol. Make sure the entire surface is covered, but not completely soaked.
Sunday Night Spotlight: 99% Isopropyl Alcohol: http://www.soapqueen.com/bramble-berry-news/sunday-night-spotlight-99-isopropyl-alcohol/
To get those layers to stick together now, I would recommend melting a small amount of melt and pour and brushing a thin amount between the layers. Then, press them together and let them sit overnight. That may help them stay together. 🙂
-Kelsey with Bramble Berry
Hmm… I sprayed each layer with the 99% alcohol but I guess it didn’t work. I’m going to try cutting it with some guitar string to see if that is thin enough to not shear them.
Hi Tony!
It may also help to cut them with a sharp knife. That’s what we use to cut melt and pour in the Soap Lab, and we’ve had great results. 🙂
You may also like our soap cutter. It works great with melt and pour: https://www.brambleberry.com/Scrapercutter-Soap-Cutter-P3793.aspx
-Kelsey with Bramble Berry
Hi,
I am a beginner who resides in India. I wanted to know a little about the iso propyl alcohol that is used to pop air bubbles in soap layers. When i made inquiries about it here in India, I was told that this alcohol has a distinctive smell. Then wont it render the fragrance added to the soap useless or is the alcohol used by you odorless ? Please advice in the absence of availability of rubbing alcohol as to how do I work with layering soap ?
Thanks in advance
~ Sameera 🙂 ~
Hi Sameera!
That’s a great question! Isopropyl alcohol has a distinct smell that can be surprising if you’ve never smelled it before. However, the alcohol evaporates quickly. That means there is no alcohol smell in the final product. 🙂
Also, we’ve found isopropyl alcohol is the best ingredient for popping air bubbles and helping your layers stick together. We haven’t found any substitutes that work for us the way alcohol does. You can read more in the Sunday Night Spotlight: 99% Isopropyl Alcohol: http://www.soapqueen.com/bramble-berry-news/sunday-night-spotlight-99-isopropyl-alcohol/
-Kelsey with Bramble Berry
love the looks of these…Would you anything printed with this recipe that might detail the benefits of using this soap for the skin? Also,I purchased the kit so would you have any idea how much these bars might sell for a piece since the cost of ingredients is pretty steep? Thanks for the awesome recipe.
My head is smoking but I got it down to about $12 a loaf! Whew!
Hi there!
Thanks so much for your suggestion! This soap is great for moisturizing and cleansing the skin. You can read more about that in the Free Beginner’s Guide to Soapmaking: Melt and Pour: http://www.soapqueen.com/bath-and-body-tutorials/melt-and-pour-soap/free-beginners-guide-to-soapmaking-melt-and-pour/
Also, how much you sell your soap for depends on a number of factors, such as the labor, cost of materials, etc. We have a great post on how to price your melt and pour soap that may be helpful for you!
Pricing Your Melt and Pour Soaps: http://teachsoap.com/2012/03/06/pricing-your-melt-and-pour-soaps/
-Kelsey with Bramble Berry
I have one question: Can other percentages of alcohol be used? 70% or 90%. 70% is most widely available.
Hi CarolineH!
You can use 70% isopropyl alcohol to help adhere those layers! We use 99% because we’ve had great consistent results with it. 🙂
-Kelsey with Bramble Berry
Sunday Night Spotlight: 99% Isopropyl Alcohol: http://www.soapqueen.com/bramble-berry-news/sunday-night-spotlight-99-isopropyl-alcohol/
ow I just love love love this color combination!
Hi Esther!
So happy you like the soap! 🙂
-Kelsey with Bramble Berry
It looks great! I have a few questions though.
1. How come you only used that amount of EOs? Seems very little for that amount of soap.
2. Does Spirulina fade in M&P? I know all natural stuff fades in CP, but not sure about this one.
3. How long would you say it takes for the whole thing to set? Approximately? 1-2 hours?
4. Will the bubbles still be blackish or greenish? I find that a lot of my soaps still have some color in the bubbles, even though I use correct amounts per pound. They don’t stain or anything, but you can see some color in foam. Does that happen to you too?
5. Do you need to air them at all after cutting? Or do you wrap them immediately?
Thanks!!!
Hi Martina!
So glad you like the soap! Also, that’s a great question. Peppermint and Rosemary Essential Oils are fairly strong, so a little bit goes a long way. That’s why we only used a couple mL of each. If you want it a little stronger, you can definitely add more! To find out how much to add, you can use our Fragrance Calculator: https://www.brambleberry.com/Pages/Fragrance-Calculator.aspx
We haven’t experienced any fading with spirulina in melt and pour. It may fade a bit as it’s used, but should stay fairly green. 🙂
It takes about three hours for the soap to harden and cool. It may take a little shorter or longer for you depending on your climate and the temperature of your soap.
The bubbles were clear. Activated charcoal can cause greyish bubbles if too much is used, but we tested this recipe to ensure the colors won’t discolor the lather. 🙂
Also, these bars are ready to use right away! We recommend wrapping them immediately to help prevent glycerin dew. You can read more about glycerin dew in the Augh! What’s THAT All Over My Soap post: http://www.soapqueen.com/personal-ramblings/augh-whats-that-all-over-my-soap-2/
-Kelsey with Bramble Berry
This looks awesome! I will have to try 🙂
Hi Michele!
So glad you like it! Have fun soaping. 🙂
-Kelsey with Bramble Berry