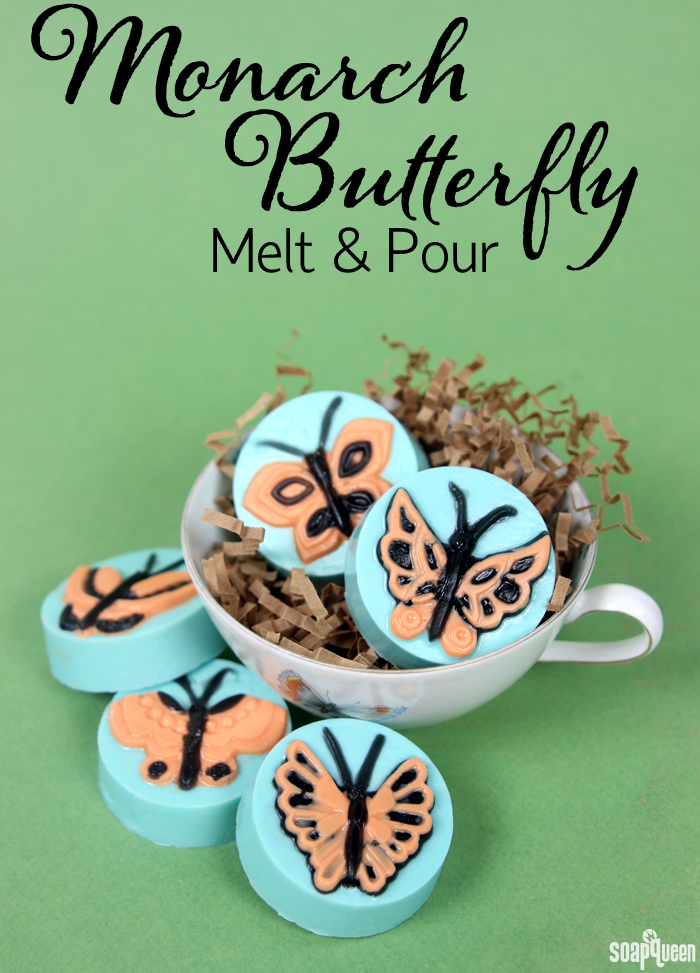
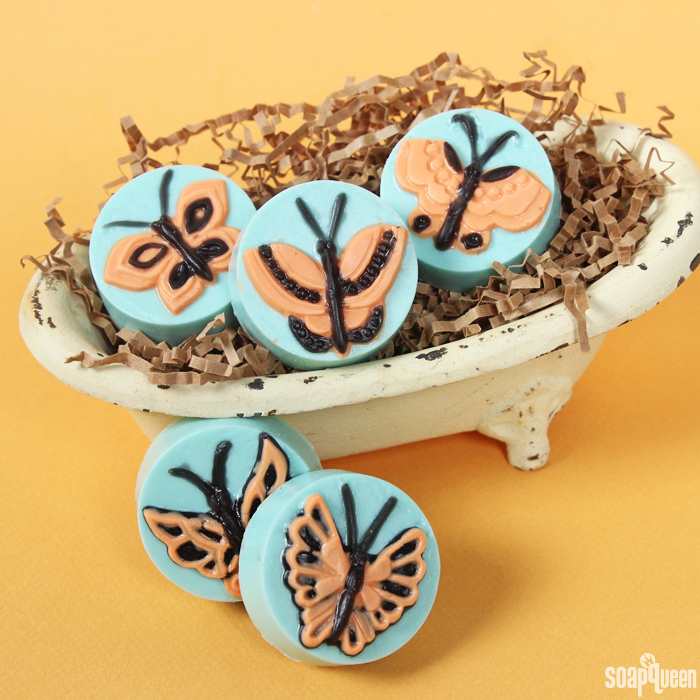
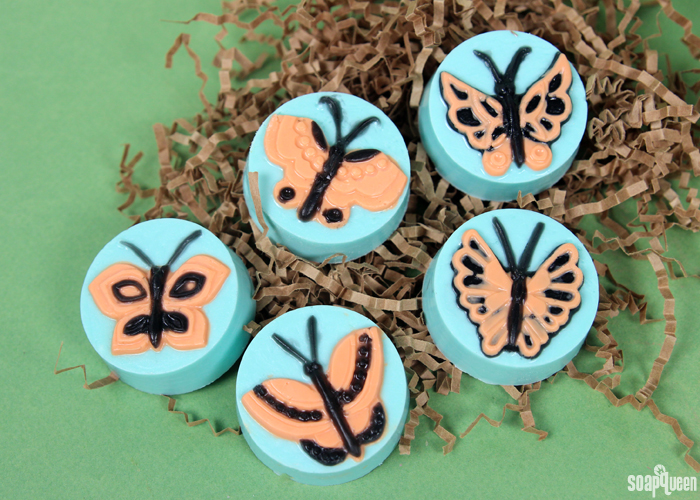
With spring comes warmer temperatures, blooming flowers and ripe produce. The influx of flowers brings forth honeybees and butterflies. These Monarch Butterfly Melt and Pour soaps were inspired by the classic monarch butterfly colors, orange and black. These guest-sized soap are great for visitors or traveling. The scent of Pure Honey Fragrance Oil is luxuriously warm and sweet.
Due to the small details in this soap, this project is for advanced melt and pour soap makers. The injector tool works great for filling in the small details, but be sure to have a cup of extra hot water nearby to unclog the tool after each color. Temperature is also important in this project. Because the details are so small, they can melt easily if layers on top are poured hotter than 125 °F. Patience is key!
What You’ll Need:
Guest 5 Butterfly Mold
2 oz. Honey Melt and Pour Base
9.5 oz. White Melt and Pour Base
Black Oxide Color Block
Perfect Orange Color Block
Tangerine Wow! Color Block
Hydrated Chrome Green Color Block
Super Pearly White Color Block
6 mL Pure Honey Fragrance Oil
Optional: Droppers, Injector Tool, 99% Isopropyl Alcohol, Clean Up Tool
 Click here to add everything you need for this project to your Bramble Berry shopping cart!
ONE: Chop and melt 2 oz. of Honey Melt and Pour base in the microwave using 5 second bursts. Because you are melting such a small amount of soap, using short bursts prevents the soap from scorching. Read more about burnt melt and pour and how to prevent it here. Add shavings of the Black Oxide Color Block until a rich black color is achieved.
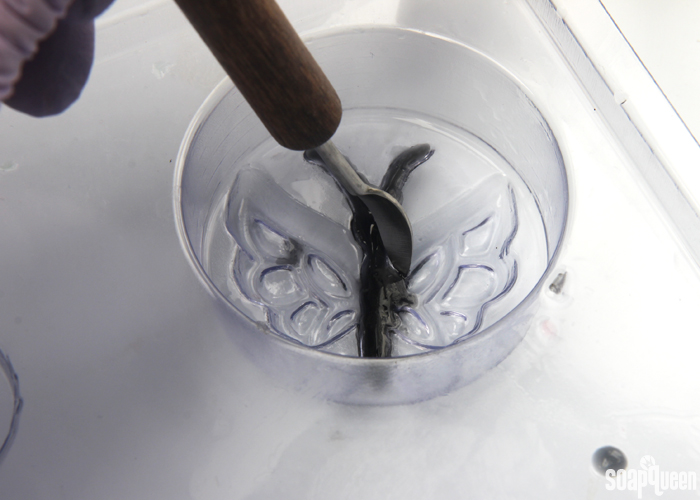
TWO: Using the Injector Tool, fill in the bodies and antennas of each butterfly with the black soap. Spraying the mold beforehand with 99% isopropyl alcohol can help the soap to spread into the small details.
TIP: When using the injector tool, have a cup of hot soapy water nearby! This allows you to quickly clear out the soap in the injector tool between colors. If you don’t, the soap may harden in the injector tool and clog it.
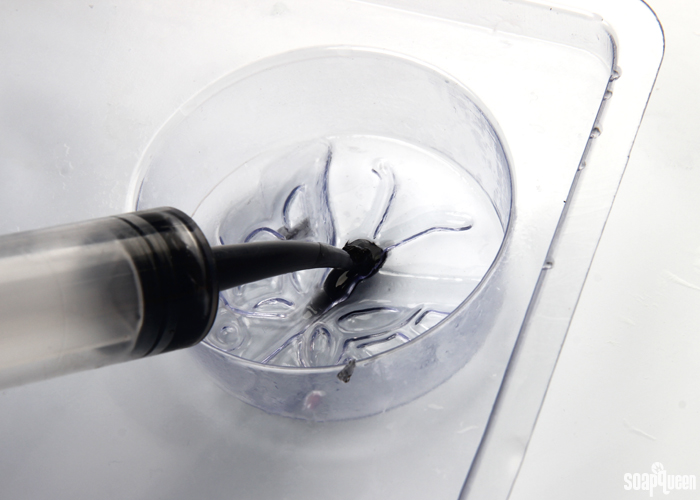 THREE: Allow the soap to cool and harden. Use the Clean Up Tool to remove any soap that may have spilled into other areas of the mold.
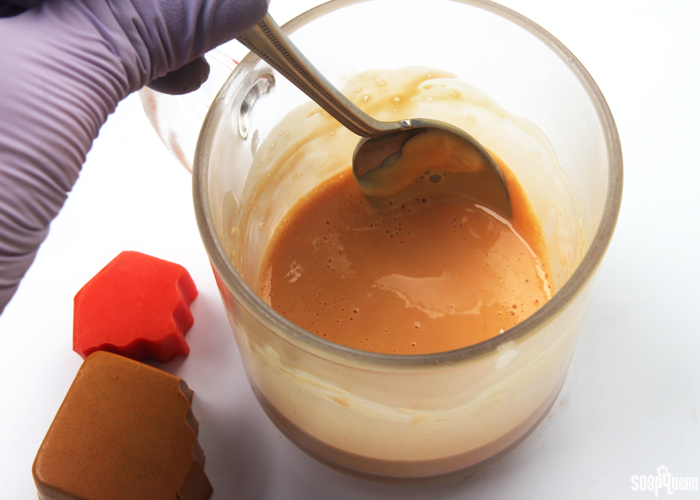
FOUR: Cut and melt 2 oz. of White Melt and Pour base in the microwave using 5 second bursts. Because you are melting such a small amount of soap, using short bursts prevents the soap from scorching. Add shavings of the Perfect Orange and Tangerine Wow Color Blocks until you achieve a bright orange color.
FIVE: Spray the cavities with rubbing alcohol. Using the Injector Tool, slowly and carefully fill in the areas of the wings that you would like to be orange. Two of the more complex butterfly designs (shown below) will have black soap poured on them later to fill in the small details with black.
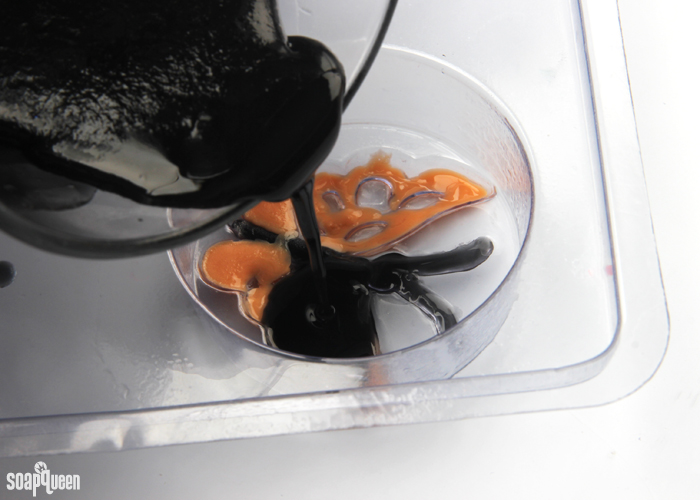
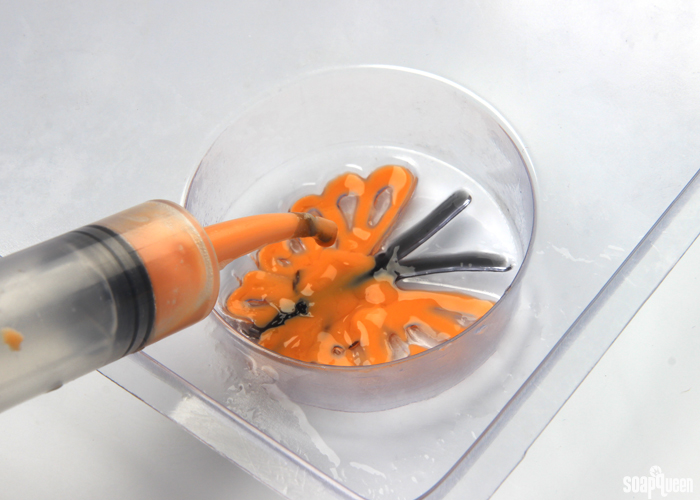 SIX: Allow the orange soap to cool and harden. Reheat the black soap in the microwave using 3-5 second bursts. Once the soap has melted but is no hotter than 130 ° F, spritz the orange layers with alcohol and carefully pour the black soap on top. Do not pour the soap if it is hotter than 130 ° F, as it could melt the layers below. Be careful to only pour the black soap into the butterfly design. Spritz with 99% isopropyl alcohol to get rid of any bubbles. Allow to fully cool and dry.
SEVEN: For some of the butterfly designs, small black detailing should be filled in first and orange soap will be poured on top. Fill in the details using the black soap and Injector Tool and allow to fully cool and harden. If needed, remelt the orange soap using 3-5 second bursts, spritz the black details with alcohol and carefully pour the orange soap onto the black details once the soap is no hotter than 130 ° F. Do not pour the soap if it is hotter than 130 ° F, as it could melt the layers below. Spritz with alcohol to disperse any bubbles and allow to fully cool.
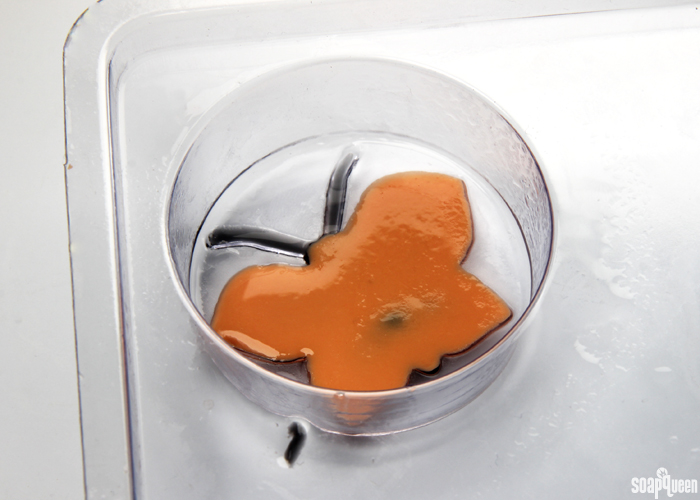
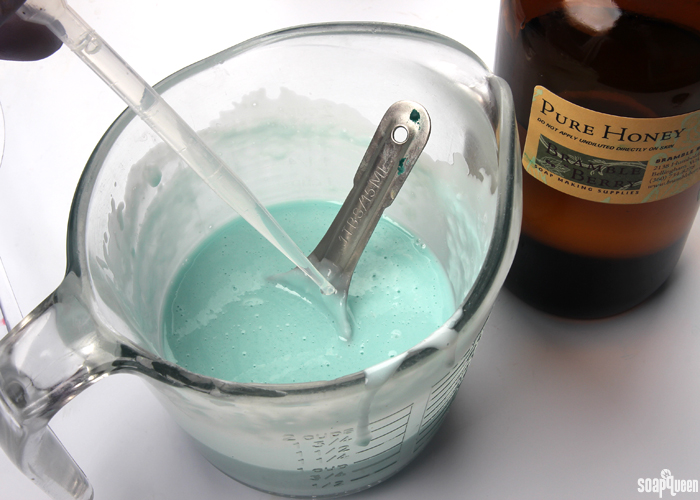
EIGHT: Once the butterfly details are fully cool, chop and melt 7.5 oz of the White Melt and Pour base in the microwave using 15 second bursts. Once fully melted, add shavings of the Super Pearly White and Hydrated Chrome Green Color Blocks until you achieve a light and sparkly blueish-green hue. Add the Pure Honey Fragrance Oil and stir to combine.
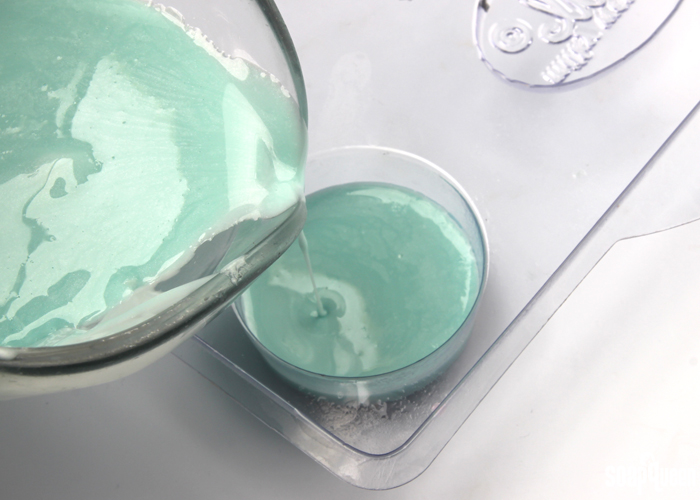
NINE: Once the soap is no hotter than 130 ° F, spritz the butterfly details with alcohol and pour the blue soap into each cavity. The alcohol allows the butterfly details to stick to the blue soap. Once the blue soap is poured, spritz with alcohol to disperse any bubbles. Be sure to not pour the soap if it is over 130 ° F, or it could melt the butterfly details. Allow to fully cool and harden. To remove, press the back of each cavity with your palm to release the air lock. Enjoy!
How has spring inspired your soapy projects? I’d love to see photos on the Bramble Berry Facebook page, or on Instagram with the hashtag #SoapShare =)
- Guest 5 Butterfly Mold
- 2 oz. Honey Melt and Pour Base
- 9.5 oz. White Melt and Pour Base
- Black Oxide Color Block
- Perfect Orange Color Block
- Tangerine Wow! Color Block
- Hydrated Chrome Green Color Block
- Super Pearly White Color Block
- 6 mL Pure Honey Fragrance Oil
- Optional: Droppers, Injector Tool, 99% Isopropyl Alcohol, Clean Up Tool
- Chop and melt 2 oz. of Honey Melt and Pour base in the microwave using 5 second bursts. Because you are melting such a small amount of soap, using short bursts prevents the soap from scorching. Add shavings of the Black Oxide Color Block until a rich black color is achieved.
- Using the Injector Tool, fill in the bodies and antennas of each butterfly with the black soap. Spraying the mold beforehand with 99% isopropyl alcohol can help the soap to move spread into the small details. When using the injector tool, have a cup of hot soapy water nearby! This allows you to quickly clear out the soap in the injector tool between colors. If you don’t, the soap may harden in the injector tool and clog it.
- Allow the soap to cool and harden. Use the Clean Up Tool to remove any soap that may have spilled into other areas of the mold.
- Cut and melt 2 oz. of White Melt and Pour base in the microwave using 5 second bursts. Because you are melting such a small amount of soap, using short bursts prevents the soap from scorching. Add shavings of the Perfect Orange and Tangerine Wow Color Blocks until you achieve a bright and true orange color.
- Spray the cavities with rubbing alcohol. Using the Injector Tool, slowly and carefully fill in the areas of the wings that you would like to be orange. Two of the more complex butterfly designs (shown below) will have black soap poured on them later to fill in the small details with black.
- Allow the orange soap to cool and harden. Reheat the black soap in the microwave using 3-5 second bursts. Once the soap has melted but is no hotter than 130 ° F, spritz the orange layers with alcohol and carefully pour the black soap on top. Do not pour the soap if it is hotter than 130 ° F, as it could melt the layers below. Be careful to only pour the black soap into the butterfly design. Spritz with 99% isopropyl alcohol to get rid of any bubbles. Allow to fully cool and dry.
- For some of the butterfly designs, small black detailing should be filled in first and orange soap will be poured on top. Fill in the details using the black soap and Injector Tool and allow to fully cool and harden. If needed, remelt the orange soap using 3-5 second bursts, spritz the black details with alcohol and carefully pour the orange soap onto the black details once the soap is no hotter than 130 ° F. Do not pour the soap if it is hotter than 130 ° F, as it could melt the layers below. Spritz with alcohol to disperse any bubbles and allow to fully cool.
- Once the butterfly details are fully cool, chop and melt 7.5 oz of the White Melt and Pour base in the microwave using 15 second bursts. Once fully melted, add shavings of the Super Pearly White and Hydrated Chrome Green Color Blocks until you achieve a light and sparkly blueish green hue. Add the Pure Honey Fragrance Oil and stir to combine.
- Once the soap is no hotter than 130 ° F, spritz the butterfly details with alcohol and pour the blue soap into each cavity. The alcohol allows the butterfly details to stick to the blue soap. Once the blue soap is poured, spritz with alcohol to disperse any bubbles. Be sure to not pour the soap if it is over 130 ° F, or it could melt the butterfly details. Allow to fully cool and harden. To remove, press the back of each cavity with your palm to release the air lock. Enjoy!


Very cute!
Are you guys going to do a post on the swap you just did? I would love to see what other people sent in!
Hi Martina!
So glad you like the soap! As for the Soap Swap, we got a little preoccupied with organizing the soap and didn’t snap a lot of pictures. That is definitely something we’re going to make sure to do next time though!
You can see the soap we made for the swap here: http://www.soapqueen.com/bath-and-body-tutorials/cold-process-soap/electric-lemonade-column-pour-tutorial/
There are also a couple pictures of the swap soap on our Instagram page: https://instagram.com/brambleberry/
-Kelsey with Bramble Berry