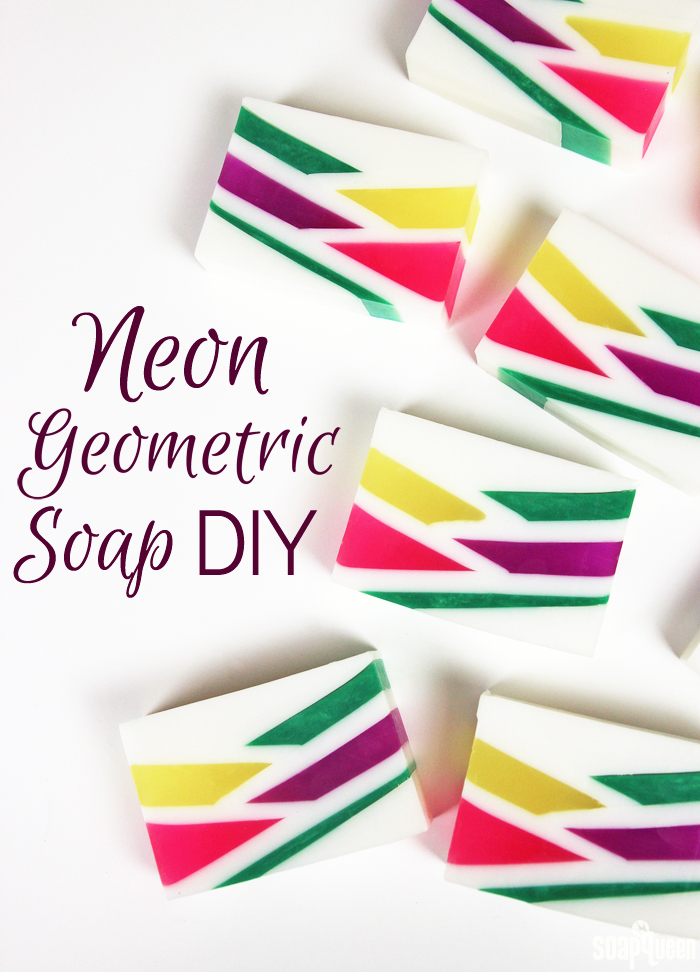
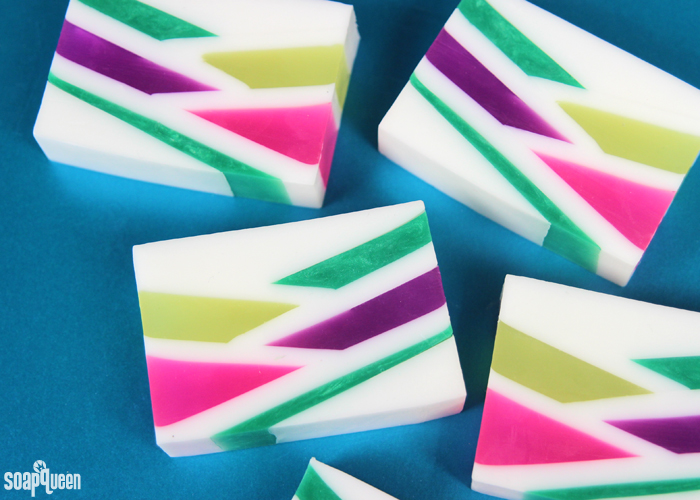
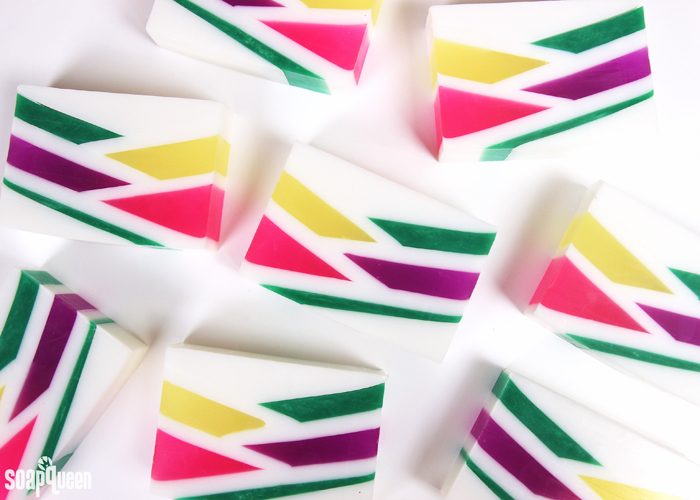
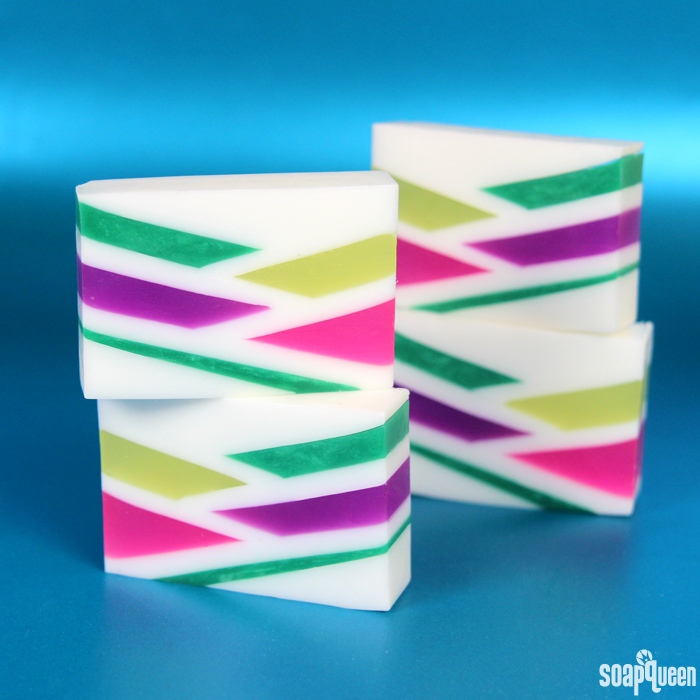
If you’re ready to celebrate spring, it may be time to break out a little neon! These Neon Geometric Melt and Pour Bars incorporate bright shades of green, pink, purple and yellow to create a complex design. The geometric shapes are created by pouring the soap while the 10″ Silicone Loaf Mold is propped at an angle. It’s scented with the Yuzu Cybilla Fragrance Oil, which smells fresh, bright and citrusy. These bars would be perfect for Easter, without being “too Easter-y.”
This melt and pour project requires some patience, but the results are well worth it. Before pouring each layer, the bottom layer needs to be cool and firm enough to support the layer on top. This project also requires a solid understanding of melt and pour temperature. It’s crucial to pour the layers while the soap is hot enough that it’s fluid, but not too hot that it melts the layers below. Make sure you have a spray bottle full of 99% isopropyl alcohol nearby to ensure the layers stick together.
This soap is a little tricky, and more suited for advanced melt and pour soapmakers. If you’ve never made melt and pour soap before, the Basic Melt and Pour Layers video on Soap Queen TV is a great place to start. I would then recommend attempting a simpler layered project to get the hang of it. Both the Ginger Patchouli Melt and Pour Bars and the Pumpkin Pie Melt and Pour Soap projects are great places to start.
What You’ll Need:
10″ Silicone Loaf Mold
40 oz. White Melt and Pour
23 oz. Clear Melt and Pour
1 oz. Yuzu Cybilla Fragrance Oil
Kelly Green Mica
Fizzy Lemonade Color Block
Radiant Plum Color Block (The Radiant Plum Color Block has been discontnued. This kit now includes the Queen’s Purple Color Block)
Electric Bubble Gum Color Block
99% Isopropyl Alcohol
Optional: 8 oz. Spray Bottle (to spray alcohol)

Click here to add everything you need for this project to your Bramble Berry shopping cart!
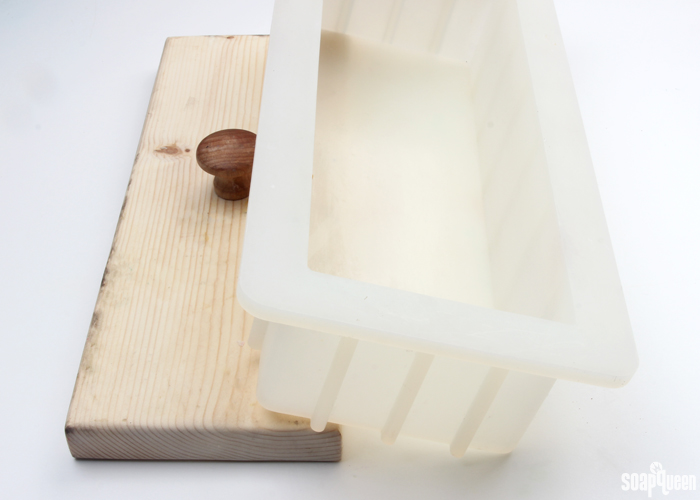
MOLD PREP: The key to creating the diagonal layers is pouring the soap while the mold is slightly tilted. To create the angle, I set one side of the mold on top of the lid for the Tall Narrow Wood Loaf Mold. You can set the mold on any tool that gives the mold a slight angle and will keep the mold steady. You want to make sure whatever the mold is set on won’t roll or move while pouring the soap!
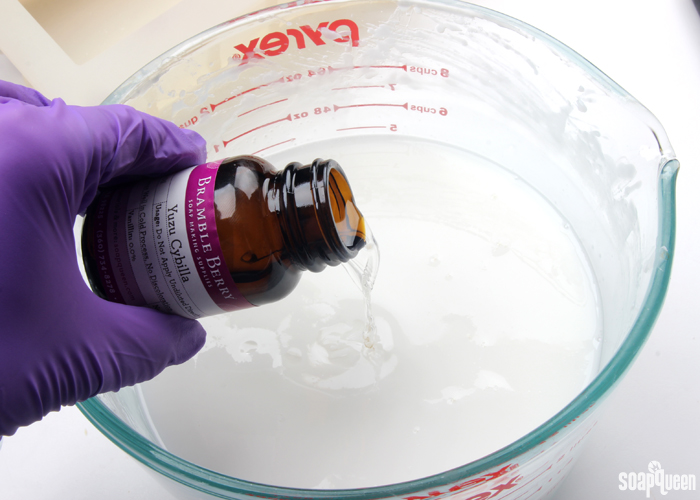
 ONE: Chop and melt 40 oz. of white melt and pour soap base in the microwave using 30-45 second bursts. Using short bursts prevents the soap from scorching. Read more about burnt melt and pour and how to prevent it here. Once completely melted, add the 1 ounce of Yuzu Cybilla Fragrance Oil. Stir to thoroughly mix in the fragrance oil.
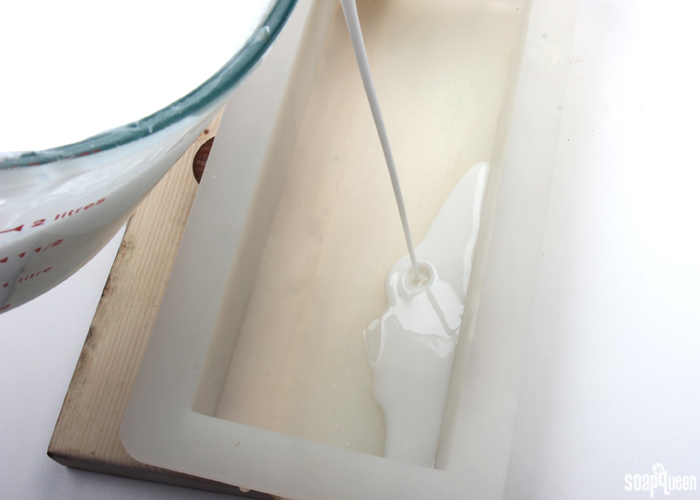
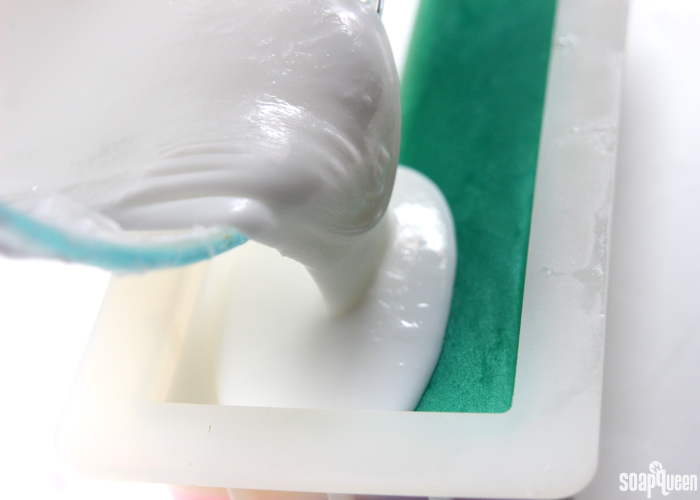
 TWO: Once melted, pour a small amount of white soap into the “bottom” corner of the mold. You want to pour enough soap to cover about 3/4 of the bottom of the mold. Immediately spritz the soap with rubbing alcohol to help disperse any bubbles. Allow the soap to cool and harden. Do not move the soap from the angle, or the layer will break.
 THREE: While the first white layer cools, disperse 1/2 tsp. Kelly Green Mica into 1/2 Tbs. 99% isopropyl alcohol. Then, chop and melt 3 ounces of clear melt and pour in a small container using 5 second bursts. Then add all the dispersed mica into the melted soap, and stir to fully combine.
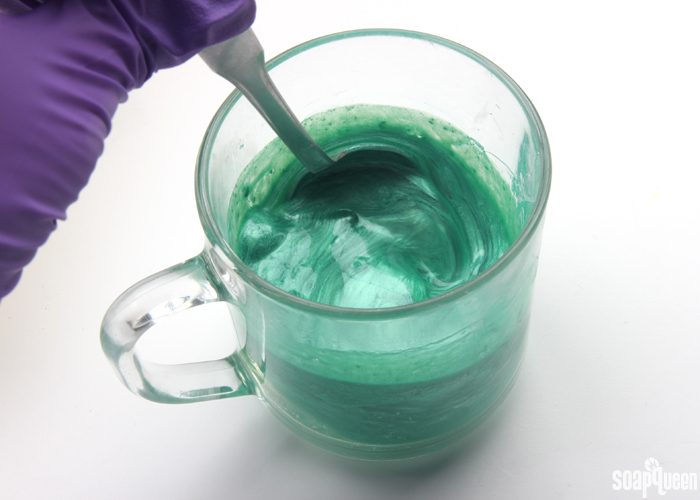 FOUR: Test the white layer to make sure it’s firm and cool enough to support the green soap without melting. Make sure the green soap is no hotter than 125 ° F, or it could melt the white layer below. Spritz the white layer of soap with a thin layer of 99% isopropyl alcohol to ensure the green soap sticks. Pour the green soap onto the white to create a thin layer of green. Spritz with more alcohol to disperse any bubbles. Allow to fully cool and harden.
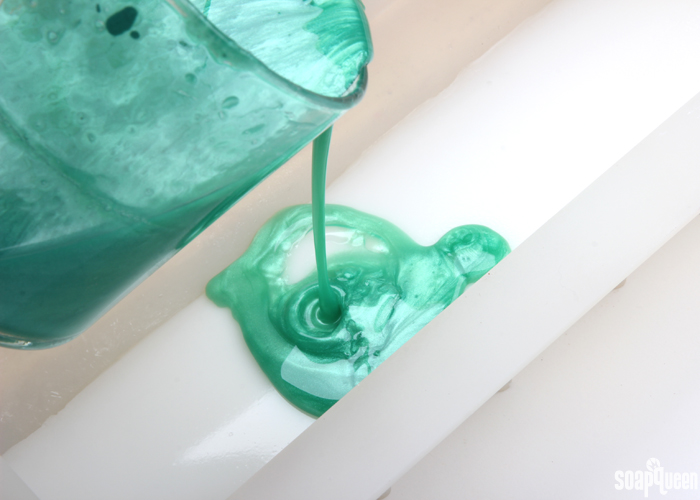
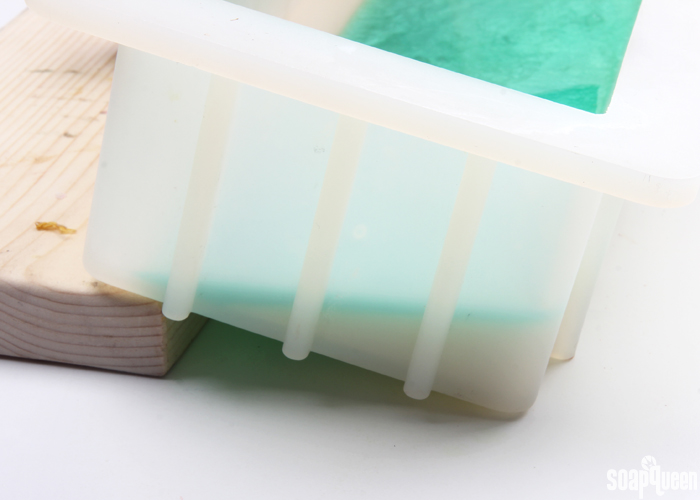 FIVE: Once the thin green layer is hard enough to support a layer on top, remelt the white soap if necessary using 20 second bursts. Pro Tip: if you cover the entire container with saran wrap during the waiting process, this helps the soap stay liquid and fluid for longer, which means less remelting! =) Make sure the white soap is no hotter than 125 ° F, then spritz the green soap with alcohol and pour a thin layer of white soap on top until covered. It helps to look at the side of the mold while pouring to see just how thick the white line will be once cut. Spritz the white soap with alcohol immediately after pouring to disperse bubbles.
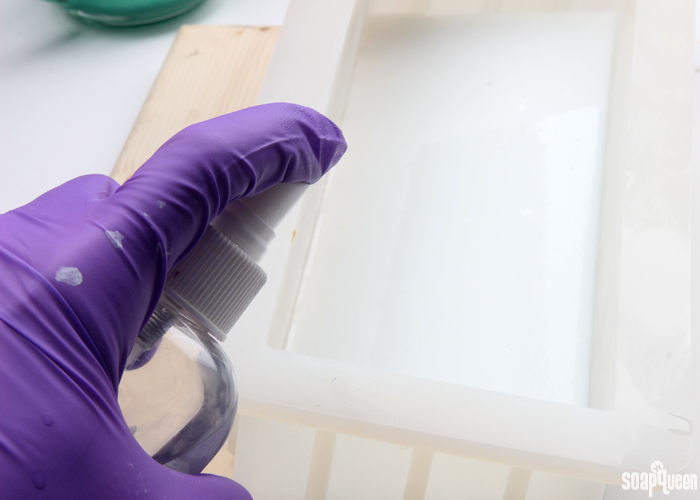 SIX: While the white layer cools, chop and melt 5 ounces of clear melt and pour soap using 5 second bursts. Once melted, add shavings of the Electric Bubble Gum Color Block until you achieve a bright and saturated pink color. Test the white layer to make sure it’s cool and firm enough to support the pink layer. If not, allow it to cool and harden longer. Patience is key for this project! Once the white soap is solid, tilt the mold up against the lid (or other tool) to angle the side of the mold in the opposite direction. You will now be pouring the pink soap into the corner of the mold and white layer. Once the pink soap is no hotter than 125 ° F, spritz the white layer with alcohol then pour all the pink soap into the corner and spritz with alcohol to disperse any bubbles.
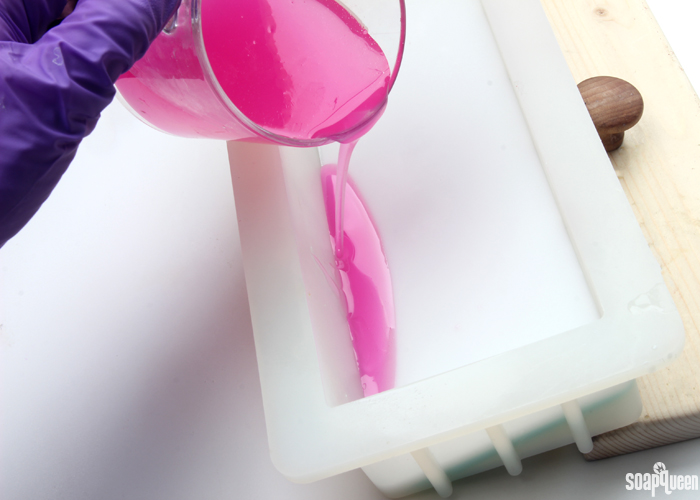 SEVEN: While the pink soap cools, remelt the big batch of white soap if necessary in the microwave using 20 second bursts. Make sure the pink soap is firm and cool enough to support a layer on top. Spritz the pink soap with a thin layer of isopropyl alcohol, then pour a thin layer of white soap on top of the pink. This layer should be big enough to cover the pink layer, but you should still be able to see a portion of the white soap below it. Spritz with alcohol immediately to disperse any bubbles. Allow to cool and harden.
EIGHT: Once the white soap is cooled and hardened, tilt the mold on the opposite side. Chop and melt 5 ounces of clear melt and pour soap in the microwave using 5 second bursts. Add shavings of the Radiant Purple Color Block until you achieve a saturated purple hue. Spritz the white soap with a thin layer of isopropyl alcohol, and pour the purple soap into the corner of the mold. Immediately spritz with isopropyl alcohol to disperse any bubbles and allow to cool and harden.
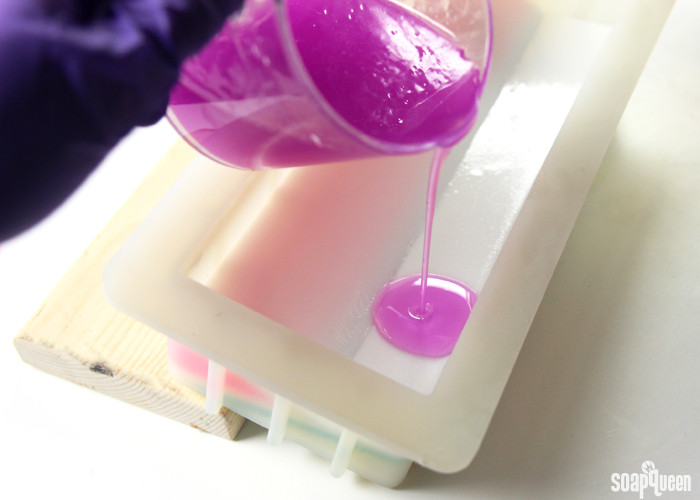 NINE: While the purple soap cools, remelt the big batch of white soap in the microwave using 20 second bursts. Make sure the purple soap is firm and cool enough to support a layer on top. Spritz the purple soap with a thin layer of isopropyl alcohol, then pour a thin layer of white soap on top of the purple. This layer should be big enough to cover the purple layer, but you should still be able to see a portion of the white soap below it. Spritz with alcohol immediately to disperse any bubbles. Allow to cool and harden.
TEN: Once the white soap is cooled and hardened, tilt the mold on the opposite side. Chop and melt 5 ounces of clear melt and pour soap in the microwave using 5 second bursts. Add shavings of the Fizzy Lemonade Color Block until you achieve a bright yellow hue. Spritz the mold with a thin layer of isopropyl alcohol, and pour the yellow soap into the corner of the mold. Immediately spritz with isopropyl alcohol to disperse any bubbles and allow to cool and harden.
ELEVEN: Remelt the big batch of white soap in the microwave using 20 second bursts. Make sure the yellow soap is firm and cool enough to support a layer on top. Spritz the yellow soap with a thin layer of isopropyl alcohol, then pour a thin layer of white soap on top of the purple. This layer should be big enough to cover the yellow layer, but you should still be able to see a portion of the white soap below it. Spritz with alcohol immediately to disperse any bubbles. Allow to cool and harden.
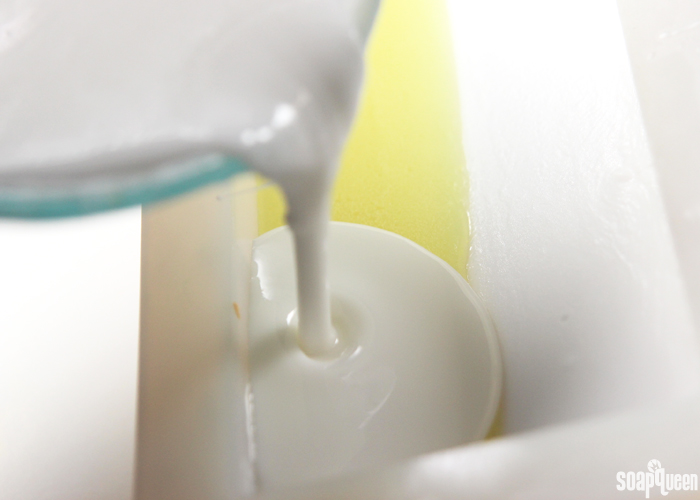 TWELVE: Once the white soap is cooled and hardened, tilt the mold on the opposite side. While the first white layer cools, disperse 1/2 tsp. Kelly Green Mica into 1/2 Tbs. 99% isopropyl alcohol. Chop and melt 5 ounces of clear melt and pour soap in the microwave using 5 second bursts. Add all the dispersed Kelly Green Mica into the melted soap and stir to combine. Spritz the white layer with a thin layer of isopropyl alcohol, and make sure the soap is no hotter than 125 ° F. Pour the green soap into the corner of the mold. Immediately spritz with isopropyl alcohol to disperse any bubbles and allow to cool and harden.
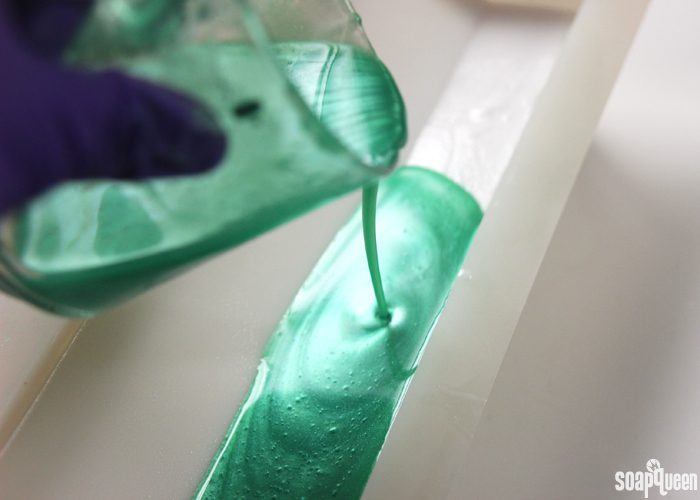 THIRTEEN: Once the green soap is completely cool and hardened, allow the mold to lay flat on the counter. Remelt the white soap in the microwave using 15 second bursts. Be careful to not burn the soap. Once completely melted and the white soap is no hotter than 125 ° F, spritz the layers below with a thin layer of isopropyl alcohol, then pour the melted soap on top. Spritz with isopropyl alcohol to disperse any bubbles. Allow to fully cool and harden for several hours.
Once the loaf is completely cool and hard, pull the sides of the mold away to release from the airlock. Then, push the soap out from the bottom. I found my layers stayed together the best when I laid the soap on its side and cut from the side rather than from the top down. Once cut into bars, wrap immediately in plastic wrap to prevent glycerin dew. Learn more about storing handmade products here.
Have you tried layering melt and pour soap? If you have any tips or tricks, I would love to hear them!
- 10″ Silicone Loaf Mold
- 40 oz. White Melt and Pour
- 23 oz. Clear Melt and Pour
- 1 oz. Yuzu Cybilla Fragrance Oil
- Kelly Green Mica
- Fizzy Lemonade Color Block
- Radiant Plum Color Block
- Electric Bubble Gum Color Block
- 99% Isopropyl Alcohol
- Optional: 8 oz. Spray Bottle (to spray alcohol)
- Chop and melt 40 oz. of white melt and pour soap base in the microwave using 30-45 second bursts. Using short bursts prevents the soap from scorching. Read more about burnt melt and pour and how to prevent it here. Once completely melted, add the 1 ounce of Yuzu Cybilla Fragrance Oil. Stir to thoroughly mix in the fragrance oil.
- Once melted, pour a small amount of white soap into the “bottom” corner of the mold. You want to pour enough soap to cover about ¾ of the bottom of the mold. Immediately spritz the soap with rubbing alcohol to help disperse any bubbles. Allow the soap to cool and harden. Do not move the soap from the angle, or the layer will break.
- While the first white layer cools, disperse ½ tsp. Kelly Green Mica into ½ Tbs. 99% isopropyl alcohol. Then, chop and melt 3 ounces of clear melt and pour in a small container using 5 second bursts. Then add all the dispersed mica into the melted soap, and stir to fully combine.
- Test the white layer to make sure it’s firm and cool enough to support the green soap without melting. Make sure the green soap is no hotter than 125 ° F, or it could melt the white layer below. Spritz the white layer of soap with a thin layer of 99% isopropyl alcohol to ensure the green soap sticks. Pour the green soap onto the white to create a thin layer of green. Spritz with more alcohol to disperse any bubbles. Allow to fully cool and harden.
- Once the thin green layer is hard enough to support a layer on top, remelt the white soap if necessary using 20 second bursts. Make sure the white soap is no hotter than 125 ° F, then spritz the green soap with alcohol and pour a thin layer of white soap on top until covered. It helps to look at the side of the mold while pouring to see just how thick the white line will be once cut. Spritz the white soap with alcohol immediately after pouring to disperse bubbles.
- While the white layer cools, chop and melt 5 ounces of clear melt and pour soap using 5 second bursts. Once melted, add shavings of the Electric Bubble Gum Color Block until you achieve a bright and saturated pink color. Test the white layer to make sure it’s cool and firm enough to support the pink layer. If not, allow it to cool and harden longer. Patience is key for this project! Once the white soap is solid, tilt the mold up against the lid (or other tool) to angle the side of the mold in the opposite direction. You will now be pouring the pink soap into the corner of the mold and white layer. Once the pink soap is no hotter than 125 ° F, spritz the white layer with alcohol then pour all the pink soap into the corner and spritz with alcohol to disperse any bubbles.
- While the pink soap cools, remelt the big batch of white soap if necessary in the microwave using 20 second bursts. Make sure the pink soap is firm and cool enough to support a layer on top. Spritz the pink soap with a thin layer of isopropyl alcohol, then pour a thin layer of white soap on top of the pink. This layer should be big enough to cover the pink layer, but you should still be able to see a portion of the white soap below it. Spritz with alcohol immediately to disperse any bubbles. Allow to cool and harden.
- Once the white soap is cooled and hardened, tilt the mold on the opposite side. Chop and melt 5 ounces of clear melt and pour soap in the microwave using 5 second bursts. Add shavings of the Radiant Purple Color Block until you achieve a saturated purple hue. Spritz the white soap with a thin layer of isopropyl alcohol, and pour the purple soap into the corner of the mold. Immediately spritz with isopropyl alcohol to disperse any bubbles and allow to cool and harden.
- While the purple soap cools, remelt the big batch of white soap in the microwave using 20 second bursts. Make sure the purple soap is firm and cool enough to support a layer on top. Spritz the purple soap with a thin layer of isopropyl alcohol, then pour a thin layer of white soap on top of the purple. This layer should be big enough to cover the purple layer, but you should still be able to see a portion of the white soap below it. Spritz with alcohol immediately to disperse any bubbles. Allow to cool and harden.
- Once the white soap is cooled and hardened, tilt the mold on the opposite side. Chop and melt 5 ounces of clear melt and pour soap in the microwave using 5 second bursts. Add shavings of the Fizzy Lemonade Color Block until you achieve a bright yellow hue. Spritz the mold with a thin layer of isopropyl alcohol, and pour the yellow soap into the corner of the mold. Immediately spritz with isopropyl alcohol to disperse any bubbles and allow to cool and harden.
- Remelt the big batch of white soap in the microwave using 20 second bursts. Make sure the yellow soap is firm and cool enough to support a layer on top. Spritz the yellow soap with a thin layer of isopropyl alcohol, then pour a thin layer of white soap on top of the purple. This layer should be big enough to cover the yellow layer, but you should still be able to see a portion of the white soap below it. Spritz with alcohol immediately to disperse any bubbles. Allow to cool and harden.
- Once the white soap is cooled and hardened, tilt the mold on the opposite side. While the first white layer cools, disperse ½ tsp. Kelly Green Mica into ½ Tbs. 99% isopropyl alcohol. Chop and melt 5 ounces of clear melt and pour soap in the microwave using 5 second bursts. Add all the dispersed Kelly Green Mica into the melted soap and stir to combine. Spritz the white layer with a thin layer of isopropyl alcohol, and make sure the soap is no hotter than 125 ° F. Pour the green soap into the corner of the mold. Immediately spritz with isopropyl alcohol to disperse any bubbles and allow to cool and harden.
- Once the green soap is completely cool and hardened, allow the mold to lay flat on the counter. Remelt the white soap in the microwave using 15 second bursts. Be careful to not burn the soap. Once completely melted and the white soap is no hotter than 125 ° F, spritz the layers below with a thin layer of isopropyl alcohol, then pour the melted soap on top. Spritz with isopropyl alcohol to disperse any bubbles. Allow to fully cool and harden for several hours.
- Once the loaf is completely cool and hard, pull the sides of the mold away to release from the airlock. Then, push the soap out from the bottom. I found my layers stayed together the best when I laid the soap on its side and cut from the side rather than from the top down. Once cut into bars, wrap immediately in plastic wrap to prevent glycerin dew.


I have been wanting to try this with cold process and I finally did. The making/cutting videos are uploading to youtube now under theorgelmeister. Although my patterns are a bit simpler, it was a pour that required patience as each color was a different batch of cold process. The thin batter got the clean lines and it was inspired by this tutorial so thanks so much for the awesome soap I just made.
Awesome, can’t wait to check it out!
-Kelsey with Bramble Berry
So glad I found your website, ive been looking for something personal to leave behind for clients as a thank you gift. What better than some home made soap! The kids will love making it aswell!
Thankyou!
You’re very welcome Dean! These bars will make an excellent thank you gift. 🙂
-Kelsey with Bramble Berry
this is a wonderful video… I just started to soap with melt and pour and am wondering with a shea butter base white melt and pour…I tried a few shavings and the soap started to harden too quick while stirring i just poured a little into another cup I poured right from the hot measuring cup which was still in the pot of hot water(double boiler) any ideas as to why it hardened before I could pour?
Hi there!
I’m sorry about that! Do you know how warm the soap was when you poured into the other cup? Typically, the soap starts to harden around 130F. Also, did you notice the soap forming a skin or steaming at all? Let me know and we’ll get this figured out. 🙂
-Kelsey with Bramble Berry
Finally made this today. Holy crow it was tedious lol. But looks very impressive. Thanks for another great recipe!
You’re welcome! It does definitely take some patience, but we just love the way it looks. Enjoy Jessica! 🙂
-Kelsey with Bramble Berry
Hi Kelsey,
Thanks for this wonderful recipe! I’ve tried it yesterday and couldn’t wait to wakeup and unmold it this morning! When I took the batch from the mold, before even cutting it, I’ve noticed that the very buttom white layer didn’t adhere properly and separates from the loaf on both ends. I don’t want to cut it before I fix it. Is there a troubleshooting tip for such thing? I was thinking using a heat gun to gently melt a thin layer of the white one to stick them back together but it might be risky to ruin the pattern…
Hi Yulia!
You can use melt and pour as “glue” to adhere the layers! I would recommend melting about 1-2 ounces of soap on 5 second bursts. Then, spread a thin layer on the separated soap and press it together. Let that dry for 1-2 hours. That can help those layers stick together nicely. Then, you can cut the bars. 🙂
-Kelsey with Bramble Berry
Do I have to use the color blocks or can I use the Fun Soap liquid colorant?
You can use a liquid colorant if you like! Anything that’s intended for soap should work. I would recommend adding just a drop at first to see how bright the color is. Then, you can add a drop and mix from there until you get a shade you like. We haven’t worked with those colorants, so I would recommend a small test batch to be sure they work well. 🙂
-Kelsey with Bramble Berry
I love the concept of this recipe! Would it be possible to downsize it in order to split it into a 12 bar silicone mold?
So glad you love the recipe! Are you wanting to make the layers in the 12 Bar Silicone Mold, or just want to use soap base and fragrance oil in that mold? Let me know and I can help you out. 🙂
-Kelsey with Bramble Berry
I was hoping to make similar layers in the 12 bar mold. I realize it would look slightly different, but I have limited M&P base and a time crunch. I was hoping that splitting the soap up would be a good option for downsizing the recipe, while still making something appealing to the eyes.
Thank you so much! It may be tricky to get the same design in the 12 Bar Silicone Mold. The molds are more shallow, so it wouldn’t have as many layers. It may also be tricky to prop the mold at an angle.
I would recommend making a two or three layered design! That would be a bit easier. You could prop up one row of the soap at an angle, pour a layer in, let it harden and then flip the soap to the other side and pour another. That would still give you a nice geometric look, it would be a bit faster and you could use less soap. 🙂
We did a similar design with the Havana Layers Melt and Pour Soap: https://www.soapqueen.com/bath-and-body-tutorials/melt-and-pour-soap/havanna-layers-melt-pour-soap/
-Kelsey with Bramble Berry
I love the design but I couldn’t get the layers to adhere to one another (even spraying with alcohol). I’ve melted and remelted the colors twice now and the loaf falls apart each time I try to cut it into bars. I will try it one more time – this time I will score the layers to see if it helps. Love the colors though! 🙂
Hi Barbara!
I’m sorry those layers fell apart on you! Can you tell me a bit more about your process, including what percentage of alcohol you’re using, when you’re spraying it, and how much? Also, how are you cutting the soap? We had a bit of separation with some of these bars until we flipped the loaf on its side and cut that way. Let me know and we’ll get this figured out. 🙂
-Kelsey with Bramble Berry
Łøvê thîš rëćîpē ❤️
Thank you so much, glad you love it! 🙂
-Kelsey with Bramble Berry
I absolutely love this recipe! I’m only 12 years old but I love making soap and selling them. This recipe was fairly easy but did require a lot of patience. Is it at all possible if you could do a spotted m&p recipe?
Thank you! Xx
So glad you love the recipe Isabel! Also, we have a few spotted melt and pour recipes you may like. I’ll include links below. 🙂
Domino Melt and Pour Soap: https://www.soapqueen.com/bath-and-body-tutorials/melt-and-pour-soap/domino-soap-video-tutorial/
Leopard Spot Melt and Pour: https://www.soapqueen.com/bath-and-body-tutorials/melt-and-pour-soap/domino-soap-video-tutorial/
Cheery Cranberry Seed Melt and Pour: https://www.soapqueen.com/bath-and-body-tutorials/melt-and-pour-soap/cranberry-chutney-melt-pour-tutorial/
Animal Print Melt and Pour Bars: https://www.soapqueen.com/bath-and-body-tutorials/melt-and-pour-soap/animal-print-melt-and-pour-bars-tutorial/
-Kelsey with Bramble Berry
How many loaves can you make with this wonderful recipe?
Hi Sherry!
This recipe makes one loaf, which weighs about 4 pounds. We typically cut our bars around 1″ thick, so we got 10 bars out of the recipe that weigh about 6 ounces each. If you like, you can double this recipe to make another loaf in a different mold. 🙂
-Kelsey with Bramble Berry
I have to admit, I’m not a big fan of melt and pour soap: I actually prefer hot/cold process soap. That being said, your imagination and creativity with ALL forms of soap are nothing less than AMAZING and thanks for sharing your talent with the world. I’ve made LOTS AND LOTS of batches of hot and cold process soap and I have gotten a lot of ideas from you and my soaps are distributed to the under resourced through a community project with local churches. Each week, I receive a lot of positive feedback from people who have used it. I’m now pondering how to make this design with cold process. I think I would have to make the various colors and cut them into the shapes and carefully place them in a thick white batter. Anyway, if I try it, I’ll let you know.
Thanks again for all the help, ideas and inspiration
Thank you so much for your sweet comment James! It really means a lot to us. 🙂
I think you could get a similar design with cold process! With melt and pour, it’s a bit easier to get the really clean lines. If you don’t mind the lines being not as crisp, you can use a technique similar to the Dragon’s Breath Cold Process Soap: https://www.soapqueen.com/bath-and-body-tutorials/cold-process-soap/how-to-make-dragons-breath-cold-process-soap/
That involves propping the soap mold at an angle and pouring the soap in slowly. You can also use a file folder to make the lines a bit cleaner. Then, you can let the soap set up slightly and switch up the angle.
If you’re a fan of those clean lines, I think your idea of using embeds is a good one! You can make a separate loaf of soap and then slice it an an angle. Then, you can layer that in between the fresh soap.
This video talks more about how to work with embeds: https://www.soapqueen.com/bath-and-body-tutorials/cold-process-soap/neon-embed-cold-process-soap-video-tbt/
-Kelsey with Bramble Berry
Are these M&P bases 100% natural? And what’s the difference with these and bulk bases? Thanks.
Hi Martina!
The bulk bases have more glycerin and contain SLS as a lathering agent, while these bases do not. You can read more about our bases and their ingredients in this Sunday Night Spotlight: https://www.soapqueen.com/bath-and-body-tutorials/tips-and-tricks/sunday-night-spotlight-melt-and-pour-bases/
The term “natural” is not regulated, so it means different things to different people! For instance, some would consider our shea butter natural because it comes from a natural source. However, others may not because our shea butter is refined. You can read more about the term natural here: http://www.soapqueen.com/bath-and-body-tutorials/tips-and-tricks/natural-vs-organic/
I can tell you our SFIC bases are made with oils, water and lye. The ingredients of the bases are on each description at BrambleBerry.com. 🙂
We also have a base made with organic oils you may like: https://www.brambleberry.com/SFIC-Organic-Melt-Pour-Base-P4382.aspx
-Kelsey with Bramble Berry
This looks like a nice spring project!!!
Beautiful spring colors!!!
I think I’ll add a little green apple to the Yuzu FO.
Thank you Robin! Also, green apple would smell amazing with the Yuzu. Really bright and fresh. 🙂
-Kelsey with Bramble Berry
I like to score my layers with a fork, toothpick, clean-up tool – whatever I have at hand, then I spray with alcohol and pour. This also makes you wait a little longer between layers, but I find that the scoring gives the soap a little something to grip and holds much better, it’s worth the extra bit of time.
That’s a great tip! We’ll have to give that a try. 🙂
-Kelsey with Bramble Berry