Click here for Day One
While waiting for the second layer to harden, use the large container and melt 16-20 oz of clear shaving soap for 55 seconds, checking, stirring and heating an additional 30 seconds until melted. Add black oxide (click here to see how to use oxides in Melt and Pour) and color soap dark enough to hide your white scraping tool up to the point where the handle starts – if you can see to the far end of the tool you need to add a little more black. You could just dump a bunch of black oxide in but this way (“the sort of opaque yet also still translucent” way) you get just enough to create a black bar while not also ending up with black suds. When you are happy with the color, add 5 or so full droppers of Sea Moss Fragrance Oil. Cover and set aside.
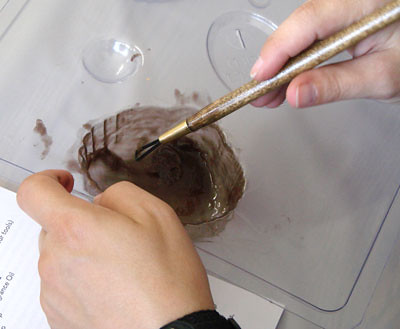
Check your layers and carve extra gloppy soap away – but don’t try to make it perfect. You just need to get an even look so that the tines of the fork go through and into all parts of the soap easily.
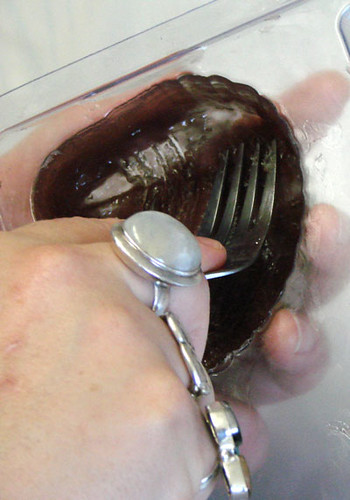
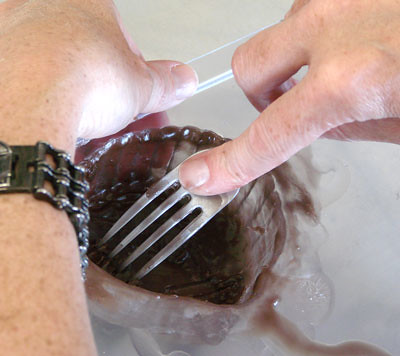
Using your fork, push the tines in at the narrow end of the mold through the first two thin layers until you are touching the bottom of the mold, slowly pulling the fork across the bottom of the shell mold (in an arching pattern across the ridges of the shell) while applying pressure.
The idea here is to create stripes/striations without pulling the actual layers up from the bottom of the mold – you just want to pull up the thin lines/stripes. Most forks will allow for two arching passes along the bottom of the mold (one smaller arch at the bottom of the shell and another above that). This is a slow process. Don’t rush it, lest you make holes in your layers.
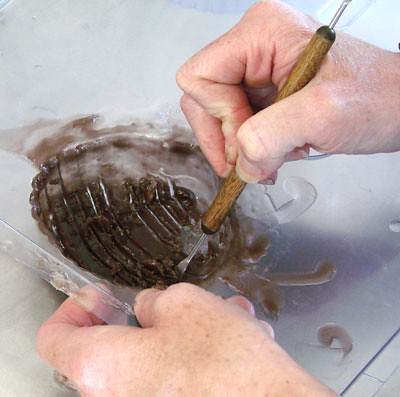
Apply this process to each cavity then when you are done with the fork, get your double sided cleanup tool and using the pointy/curved end, make sure each of the stripes go all the way to the bottom. I also usually like to widen 3 random stripes to give a more natural look to the finished soap.
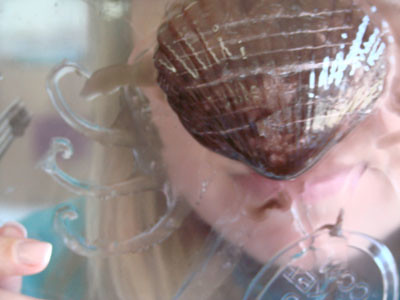
Hold up to the light to check your work. Note the variety of line widths. This helps to add to the natural final effect of the soap. Also, in the photo below, notice the large chunks of brown soap missing. This hole effect happens if you rush a bit during the forking tine process.
Tomorrow, we’ll cover striping and the black layer.


Catherine,
I’m glad you pointed out how labor intensive these look =) They are shockingly not hard at all – but you’re right, they do take a few minutes – probably 5 minutes per bar once you get the soap melted, colored and scented.
It’s mostly the “twirling” that takes a little bit of time.
Your soaps are amazing but it does look like a lot of work.
Please don’t be discouraged by the lengthy description of this process, once you have done it once or twice you can do all 3 cavities at the same time and end up with 3 amazing soaps in under an hour.