Missed the previous instructions?
Click here for Part One Instructions
Click here for Part Two Instructions
Thank you to commenter Teresa for reminding me that Cookie Cutters are entirely appropriate to use instead of the Exacto Knife. I used cookie cutters for the soap display at Otion (above or click here to view full size photo) rather than the Exacto knife idea.
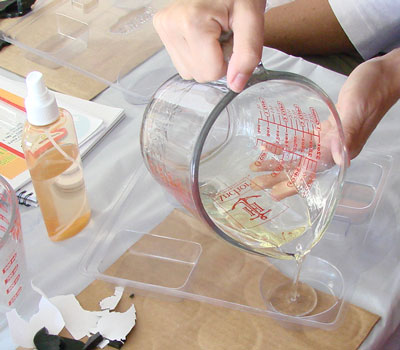
Melt clear soap (approximately 1 ounce per bar of soap). Cool this to 120 – 130 (it varies by base – Bramble Berry’s house bases are ideal for embedding soap at around 120 to 125 degrees). The key is that the soap must be cool enough to not melt your hand-cut insert. Pour this clear, cooled soap, into the mold approximately 1/8″ thick.
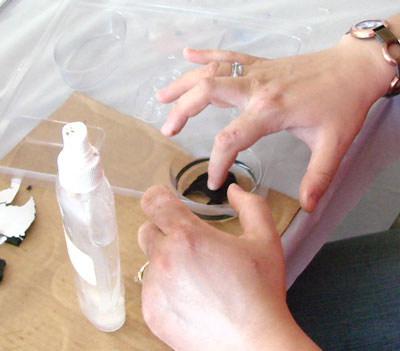 Step Seven: Carefully and quickly place your black insert soap into the clear soap. Spray liberally with alcohol to ensure a smooth clear surface. Allow to harden for approximately 10 minutes or until thick skin has formed. Be careful to not move the soap during the hardening process or you may end up with wrinkles.
 Step Eight: Melt white soap, approximately 2 ounces per bar. Allow to cool to 120-130 degrees. Add fragrance. Spritz the clear soap layer with rubbing alcohol to help the two layers adhere. Pour white soap to fill the soap mold.
Allow soap to fully harden, invert and pop your creations out! Viola! You’re done. I’ll have final reveal photos tomorrow.
So, what do you think? Will you try this at home? If not, why not? And did I miss any major steps or questions that you have about this project? Post a comment and let me know.
Purple and Yellow sound *awesome* – and as a Washington girl, I can tell ya’ that the Husky fans around here would be happy if I made those soaps.
Paula, your soaps sound great and Serahs, I would love to see your photos. =)
I love them! I have tried doing those. I’ll post pics later.
Wow, wow, wow! Those are fabulous, Paula! Now I’m really inspired!
OMG, I love the swedish horse so much!! That is so awesome.
The other ones are amazing, too. Leave it to you Paula to make them pieces of art!
Not only will I try this at home I have and still do. I use mini-cookie cutters you can get them for EVERY holiday. Like I’ll be using a bat which I could put on a orange background. I also do the very same thing but leave both sides of the soap clear (or lightly tinted). I will even paint the embeds to make them look even more cool. There is just no limit with these basic principles.
Examples: http://www.pjsoaps.com/Images/Full/HalloweenBat.jpg
http://www.pjsoaps.com/Images/Full/HalloweenWitch.jpg
http://www.pjsoaps.com/Images/Full/SwedishHorse.jpg
I’ll definitely try this (thanks to your encouragement about using cookie cutters intead). I think it’d be fun to try different colors too, but I really like the black/white effect; it’s ultra modern and chic.
Anne-Marie, I think your directions were great…granted, I’m basing my opinion on the photos instead of reading the words, but that’s how I like to learn.
For sure I’ll be doing this. And I agree with Jane from the forum — other color combinations will be fun.
Thanks for teaching me so well!
Lynn
I can see this project doing many more things than just black and white. I’ve got visions of purple butterflies sitting on yellow soap!
I saw your call for comments on the teach soap forum and came right over =)