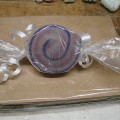
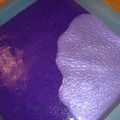
I was going through my old photos, cleaning out my sadly overstuffed Flickr account, and found these photos. While this was one soap that didn’t make the final taping for the Microsoft Small Business Summit (didn’t see this series back in 2008? Check it out here), I wanted to share the technique with you. This is a good way to embed larger photos using Water Soluble Paper.
Step One: Pour a thin layer of Clear Melt and Pour Soap down. Don’t spray alcohol. Alcohol makes the ink bleed. When the Clear Melt and Pour has slightly set up, gently set the photo down. The goal is to not allow the soap to get the water soluble paper wet. Wet paper = bleeding paper.
Optional Step: 24 hours before embedding your Water Soluble Paper page, lightly spray with a very fine drizzle of hairspray to help set the color on the paper.
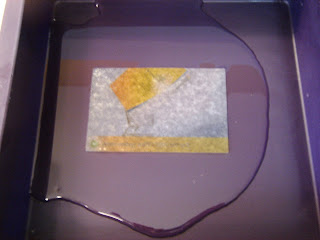 Step Two: When the Clear Layer is fully set, gently pour cool temperature opaque soap on the back of the paper. Why cool temperature? The cooler the soap, the more viscous and thick the soap is. The thicker soap doesn’t make the ink bleed as much as freshly poured, very wet soap. You don’t have to keep the soap totally straight white either! You can lightly color the soap base to make a light pastel. Blue based tones look best. Warm tones seem to enhance the natural yellow of the clear soap base and yellow out the photo.
 Step Three: When the soap has fully set up, gently peel away from the mold.
 Step Four: Use a sharp large butcher knife to cut the soap into the shape you want.
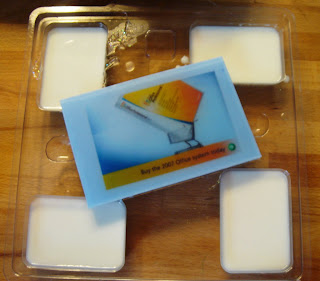 The photo I was able to embed using the Jelly Roll Pan is double the size of a standard soap mold. It’s just one more use for this amazing, versatile product.

Hi Kurt,
Great! I'm glad that the laser printer worked well.
I am not affiliated with the SoapQueen webshop in the Netherlands so have not tried her bases but yes, you want to look for the most clear soap you can. The non-sweating MP soaps are typically less clear than other soaps because they contain less liquid glycerin that helps with the clarity of the soap.
I always use Bramble Berry (www.brambleberry.com) bases when I make my projects and have great results.
Hello me again 🙂
We have had some satisfying results with the laser printer now.
The only thing that still bugs me a bit is the fact that the soap is slightly opaque.
What are the things we should pay attention for to improve the clarity.
We bought our soap from the online soapqueen webshop from the Netherlands.
We bougth the transarant non sweating type, but maybe it was better to buy the crystal clear type. Is there a big difference between those two types of transparent soap?
Kind regards,
Kurt
I know, that's why I just bought me a new laser color printer 😀
I also forgot to mention that our water soluble paper is laserjet friendly =)
Trukje- I would use "draft" or "normal", which are faster settings. "Best" uses a little more ink. If too much ink is used it could potentially bleed in the soap.
WHat are the iedeal settings to print with a inkjet printer on the water soluble paper?
How fun is that! It would be so cool to take a photo and put it on the paper and make a soap to give to that person. How individual would that be!
Michelle in NV
Catherine, You're going to love it.
Pamela, yes, face down. Here is the tutorial link for that step:
http://soap-queen.blogspot.com/2008/03/microsoft-soap-two.html
Thanks for popping in and being part of the SoapQueen community. It is awesome that you're getting something out of my posts (yippeee!).
Well how interesting! In step one I assume that you put the soluble paper photo face down, is that correct?
Once again Anne Marie, I want to thank you for all you do and for all you share with us. It is your generous nature that is the success of your business I believe. Thank you so much.
I just ordered water soluble paper for the first time and can't wait to try it!