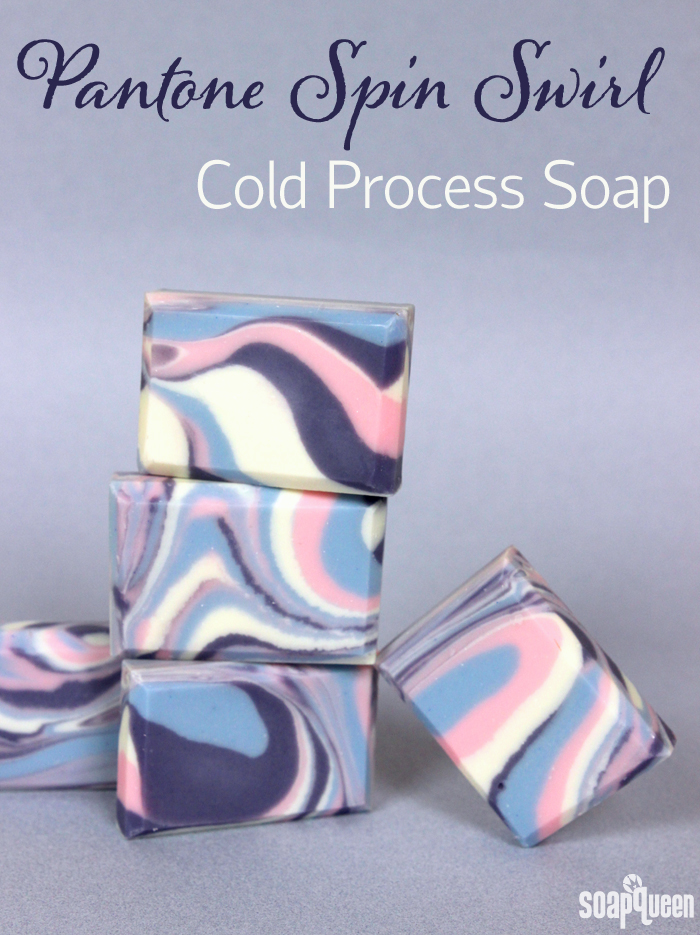
Keeping up with trends is fun, but it can also be difficult. They are constantly changing! One of my favorite ways to keep up with color trends is with the Pantone Color of the Year. This year, Pantone announced two colors for 2016, Rose Quartz and Serenity. When I first saw the color combination I immediately thought of a baby shower or cotton candy. But with time, I have started to see this color combination in more sophisticated applications and they have really grown on me. What do you think of them?
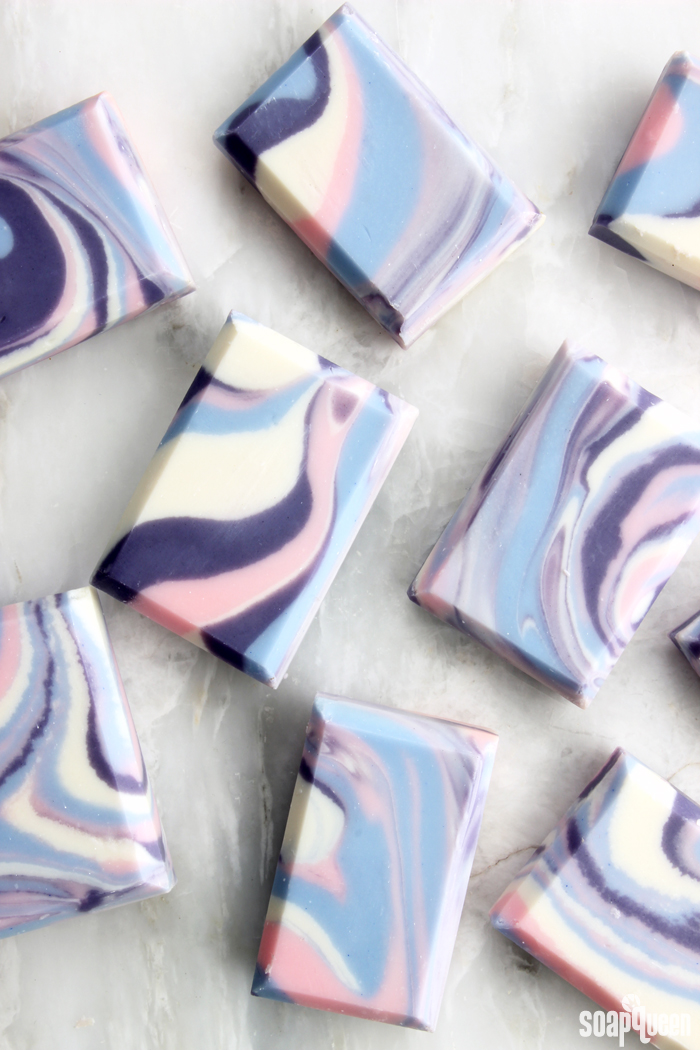
For this project, I was inspired by this photo to create a spin swirl cold process project using Rose Quartz and Serenity hues. I also added a deep purple for contrast. The spin swirl technique was made popular by Amy of Great Cakes Soapworks during a recent Soap Challenge Club. It’s a very difficult design; it requires layering multiple colors of thin trace soap, then spinning the mold to create a unique swirl effect. The key is to use a slow-moving recipe and fragrance oils that don’t accelerate.
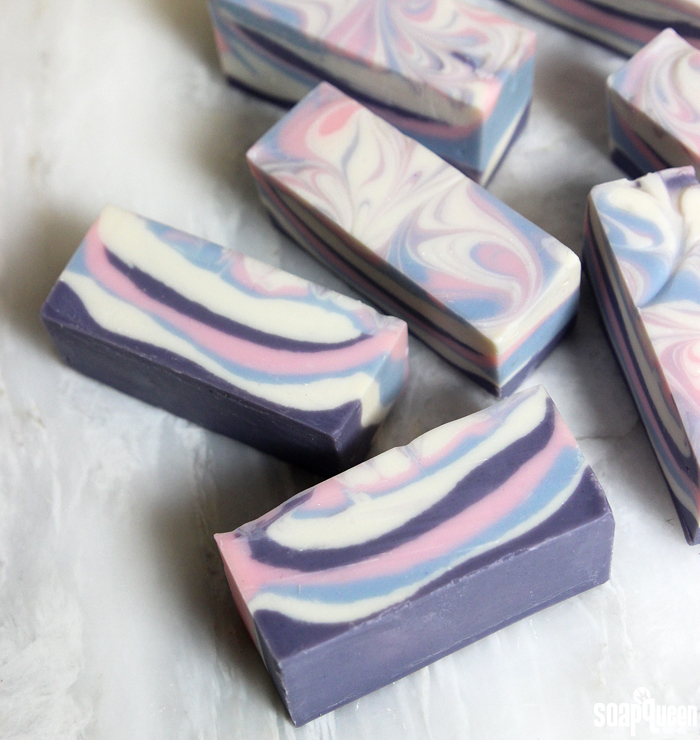
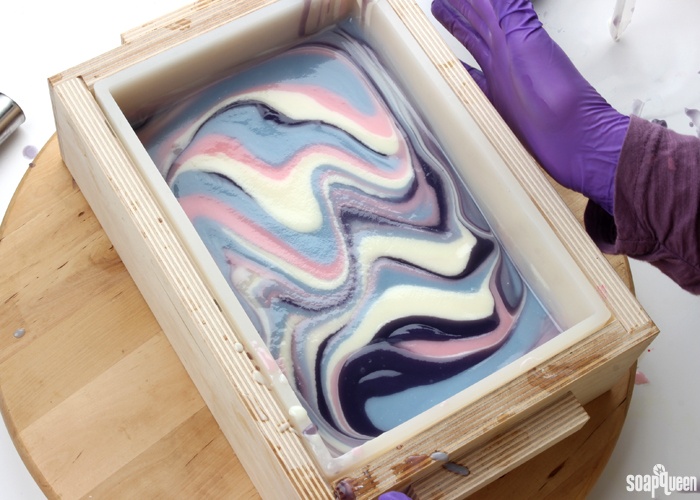
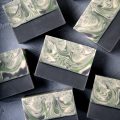
Even with these precautions, the soap can still thicken before you’re done pouring. This is exactly what happened during this soaping session. I got about halfway through pouring the soap when it became too thick to swirl properly. Rather than calling it a loss, I decided to stop pouring and swirl the soap already poured into the mold. Then I used the leftover thick soap to create a spoon plop design in the 10″ Silicone Loaf Mold. I’m so pleased with how both batches turned out!
The recipe and tutorial below is enough soap to create both batches. If you prefer to only make one or the other, you can resize the recipe below to fit the mold. The Lye Calculator makes this process easy; just add each oil amount into the calculator, select 5% superfat and hit “Calculate.” Then, enter a new oil weight and click “Resize Batch.” Continue this process until you achieve a total yield that fits into the mold. Learn more in the How to Resize Cold Process Soap Recipes post.
What You’ll Need:
9 Bar Birchwood Mold
Silicone Liner for 9 Bar Mold
Optional: 10″ Silicone Loaf Mold
1.4 oz. Avocado Butter (3.1%)
18 oz. Canola Oil (39.9%)
.9 oz. Castor Oil (2%)
9 oz. Coconut Oil (20%)
9 oz. Palm Oil (20%)
6.8 oz. Rice Bran Oil (15%)
6.1 oz. Sodium Hydroxide Lye
14.8 oz. Distilled Water
2.5 oz. Sweet Grass Fragrance Oil
.5 oz. Crisp Cotton Fragrance Oil
Bright Blue Jean Colorant
Fired Up Fuchsia Colorant
Titanium Dioxide Pigment
Orchid Mica
Activated Charcoal

Click here to add everything you need for this project to your Bramble Berry shopping cart!
If you’ve never made Cold Process soap before, stop here! I highly recommend checking out our FREE four part SoapQueen.tv series on Cold Process Soapmaking, especially the episode on lye safety. And if you’d rather do some reading, Bramble Berry carries a wide range of books on the topic, including my newest book, Soap Crafting. You can also checkout the digital downloads for that instant gratification factor.
SAFETY FIRST: Suit up for safe handling practices! That means goggles, gloves and long sleeves. Make sure kids, pets, and other distractions and tripping hazards are out of the house or don’t have access to your soaping space. Always soap in a well-ventilated area.
COLOR PREP: To ensure that the Titanium Dioxide blends smoothly into the soap batter, we recommend micronizing it before dispersing it in oil. Please note this is an optional tip but it does help with the titanium dioxide clumping in the soap. =) To micronize colorant, simply use a coffee grinder to blend the colorant to break up any clumps of color and prevent streaks of white from showing in the final soap. We like to use a coffee grinder that has a removable, stainless steel mixing area for easy cleaning. Then, disperse 2 teaspoons of the colorant into 2 tablespoons of sunflower or sweet almond oil (or any other liquid oil). Then in separate containers, disperse 1 teaspoon of the Fired Up Fuchsia, Bright Blue Jean Colorant, activated charcoal, and Orchid Mica into 1 tablespoon of lightweight liquid oil. Use a mini mixer to get rid of any clumps.
FRAGRANCE PREP: Measure 2.5 ounces of Sweet Grass Fragrance Oil and .5 ounces of Crisp Cotton Fragrance Oil into a small glass container and set aside.
ONE: Slowly and carefully add the lye to the water and gently stir until the lye has fully dissolved and the liquid is clear. Set aside to cool.
TWO: Melt and combine the coconut oil, rice bran oil, canola oil, avocado butter, castor oil and palm oils (remember to fully melt then mix your entire container of palm oil before portioning). Once the lye water and the oils have cooled to 130 degrees or below (and are ideally within 10 degrees of each other), add the lye water to the oils and stick blend until a very thin trace. If you’d like a harder bar of soap that releases faster from the mold, you can add sodium lactate to the cooled lye water. Use 1 teaspoon of sodium lactate per pound of oils in the recipe. For this recipe, you’d add about 2.5 teaspoons sodium lactate.
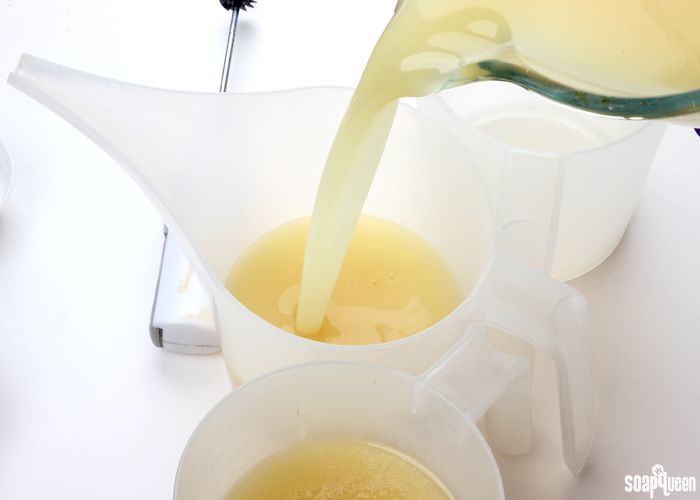
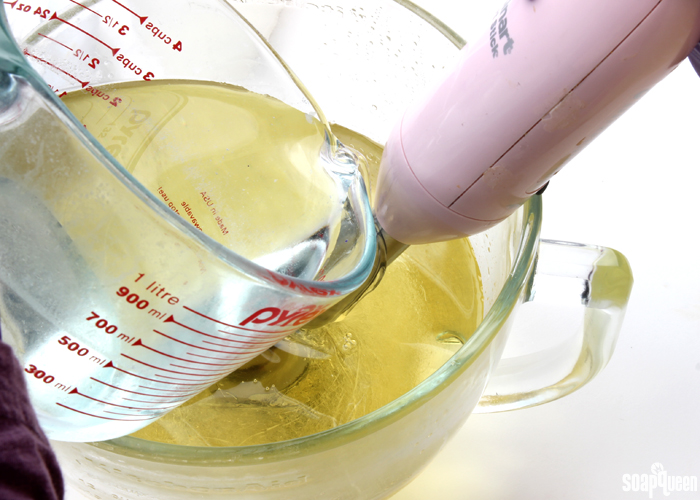 THREE: Be careful to not over emulsify the batter. The soap batter should be very thin and just emulsified. You can always stick blend more later. =) Once the batter has reached a very thin trace, split the batch into four containers. Each container will contain about 500 mL.
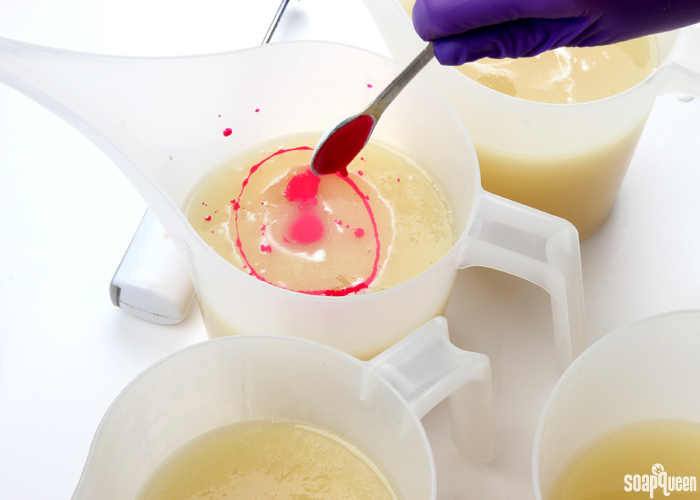
 FOUR: To each container, add the dispersed colorants in the amounts below. Mix in each colorant with a whisk until completely blended.
- A (White): 1 Tbs. dispersed Titanium Dioxide
- B (Pink): 1/2 tsp. dispersed Titanium Dioxide + 1/2 tsp. dispersed Fired Up Fuchsia
- C (Blue): 1 tsp. dispersed Bright Blue Jean Colorant + 1/2 tsp. dispersed Titanium Dioxide
- D (Purple): 1/2 tsp. dispersed activated charcoal + 1 tsp. dispersed Orchid Mica
 FIVE: Add the fragrance oil blend evenly between the four containers (it’s okay to eyeball it!). Use a whisk to thoroughly mix in the fragrance blend. The batter should still be very thin.
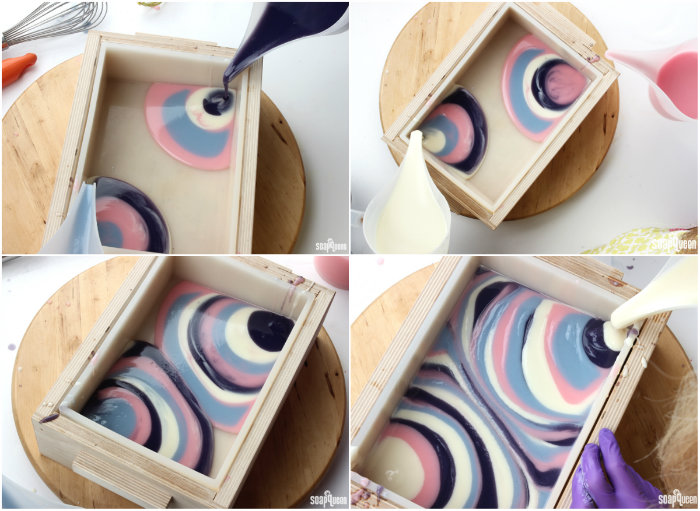
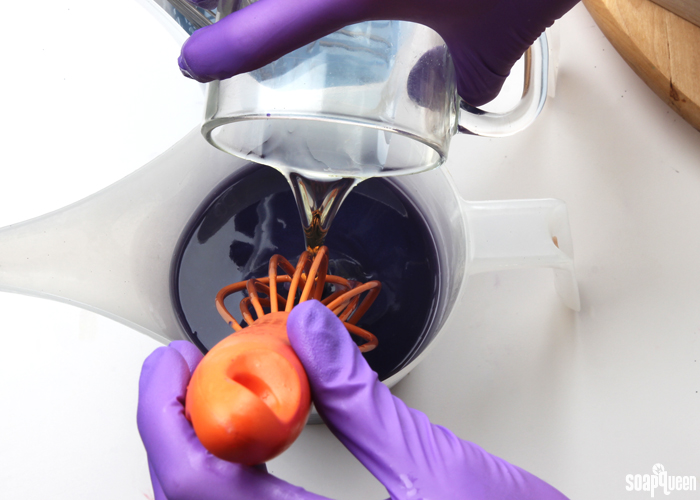 SIX: Now it’s time to pour! I like to place my mold on a Lazy Susan table to help spin the soap once I’m done pouring. The order in which you pour the colors into the mold is up to you. I just recommend choosing a color order and sticking to it throughout pouring. I chose to pour two different patterns of colors in each corner of the mold. This is optional. Pour the pink soap into one corner of the mold and count to three during the pour to help pour an even amount.
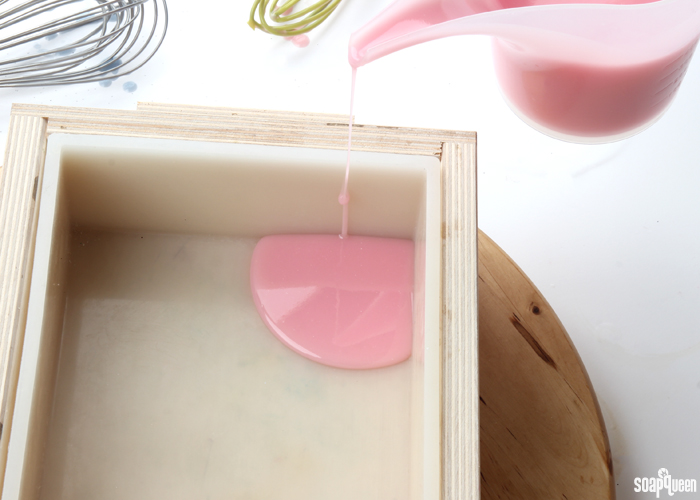 In the opposite corner, pour the white soap while counting to three. Then, pour the blue soap onto the pink while counting to three, and the purple soap onto the white while counting to three. At this point, the soap should be nice and fluid. As you layer the colors, it will push the soap towards the center of the mold and fill it up. Work as quickly as possible during this process, as the soap will continue to thicken up with time. Every now and then, give the colors a whisk to help keep them fluid.
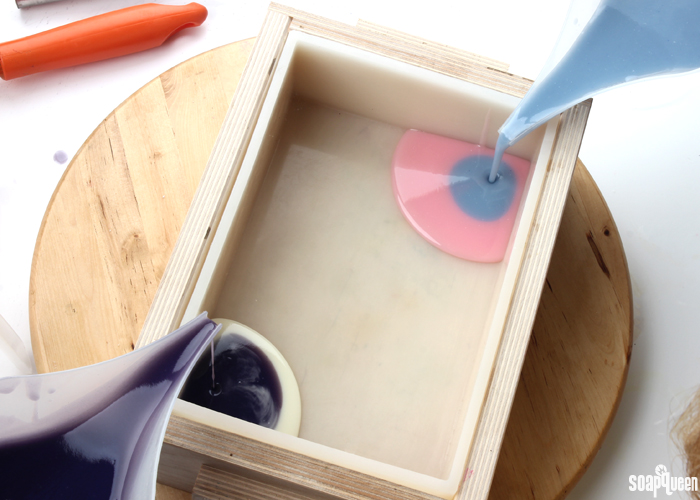 SEVEN: Pour pink soap onto the purple layer while counting to three, then pour white soap onto the blue while counting to three.
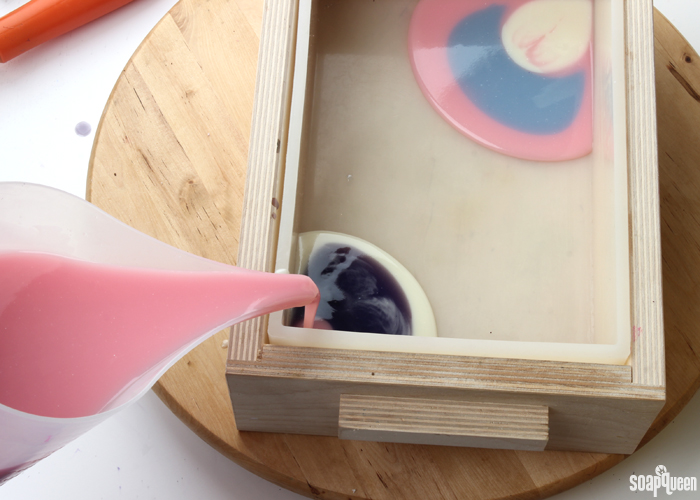 EIGHT: Pour a layer of blue soap onto the pink while counting to three, then pour purple soap onto the white while counting to three. Working quickly, continue the color pattern in each corner of the mold. The two patterns were: pink, blue, white, purple and white, purple, pink and blue.
Continue to pour the soap into the corners of the mold. If necessary, whisk the soap to help it stay fluid. As you can see in the bottom right photo below, my soap batter started to get a little bit thick. Once the soap is not “pushing” the layers below towards the center, but is instead piling on the top, it’s time to stop pouring. If you continue to pour the soap at this texture, the soap will not swirl when spun. This is when I decided the soap was too thick to continue with the spin swirl design. If I had continued to pout the thick soap into the mold, the spin swirl effect would not have been achieved.
 NINE: Give the mold a few firm taps on the counter to help eliminate air bubbles, and to help the layers of soap settle. Begin to spin the Lazy Susan (if you have one), stopping it quickly to help give the soap movement. You want the centrifugal force created by the spin and stop movement to move the soap in various directions within the mold. Be careful not to spin too hard, or the soap may spill out of the mold! Watch this swirl in action in the Vine video below. My username is Brambleberry on Vine. =)
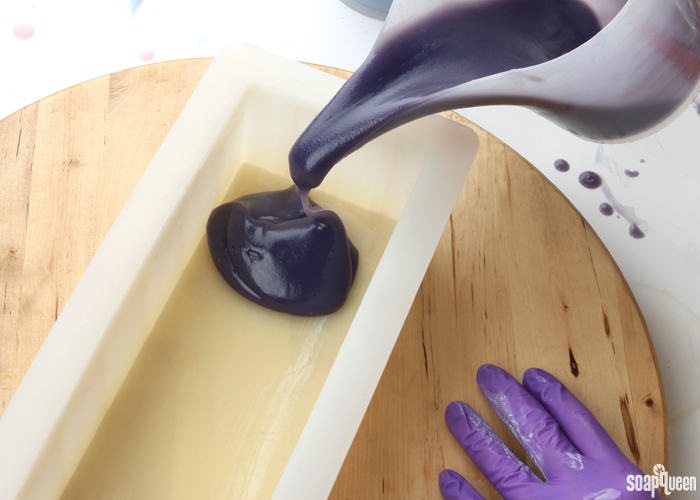
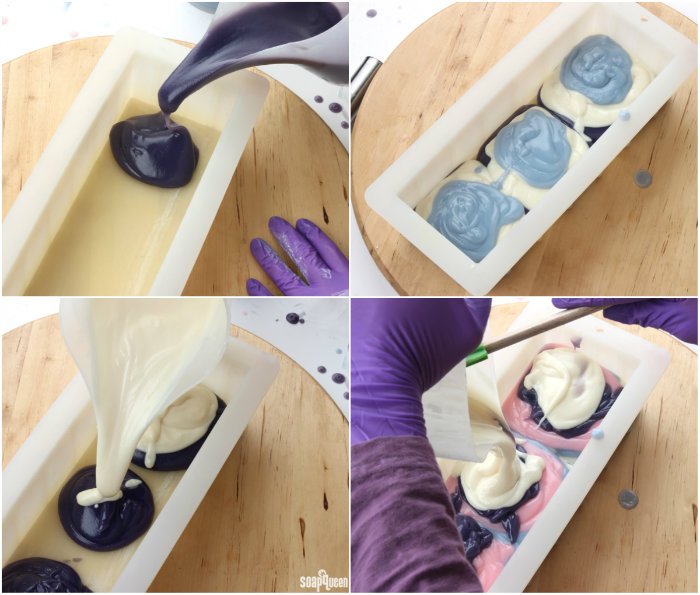
TEN: I ended up with a decent amount of leftover soap; there was enough to make a whole different project. Because the soap was fairly thick, I knew it would make a great texture for a spoon plop. Grab a large spoon for each color. Spoon the soap into the mold, one color at a time, layering them in three different spots within the mold.
 ELEVEN: Continue to plop the soap into the mold, using various sizes of “plops” for interest. To see another spoon plop project, check out the Creamy Cow Milk Cold Process Tutorial.
 TWELVE: Once all the soap has been placed into the mold, tap it firmly on the counter to help eliminate bubbles. Insert a chopstick or dowel into the very top of the soap, and drag the chopstick down the length of the mold in an “S” curve.
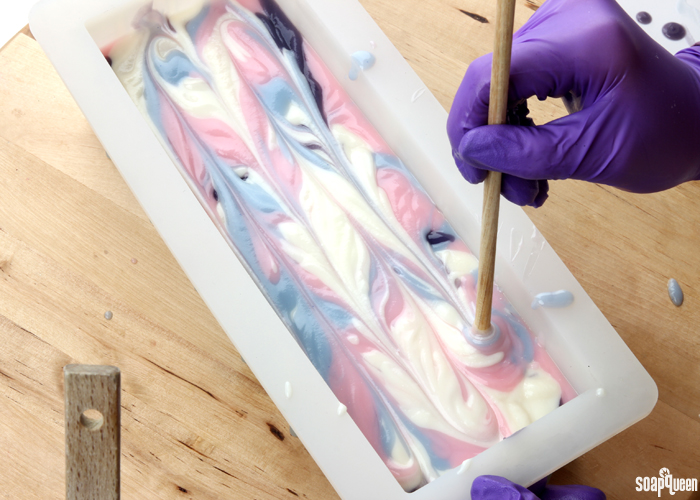 THIRTEEN: Use the chopstick to swirl the top of the soap in an “S” curve down the length of the mold in the opposite direction. Finally, use the chopstick or dowel to swirl the top of the soap in a “loop de loop” pattern down the length of the mold. Don’t worry too much about making this swirl perfect. =)
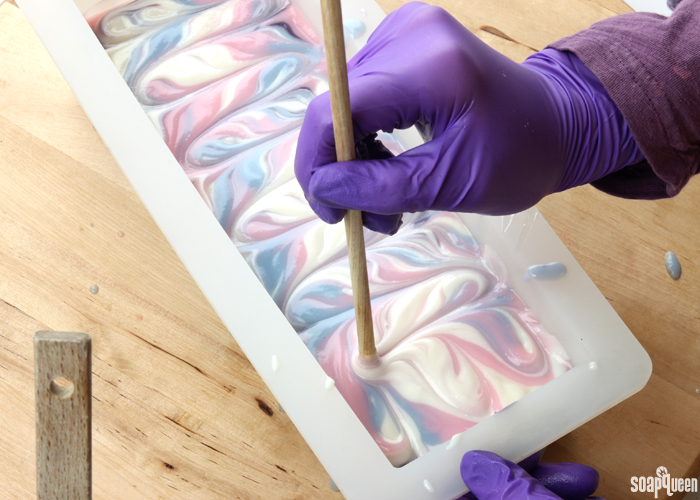
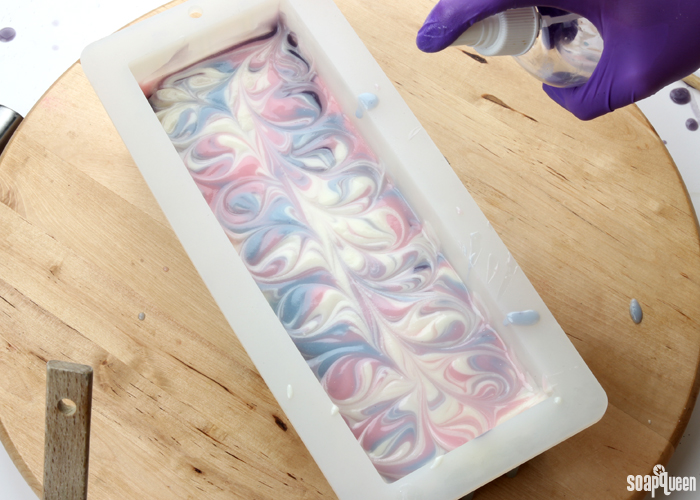
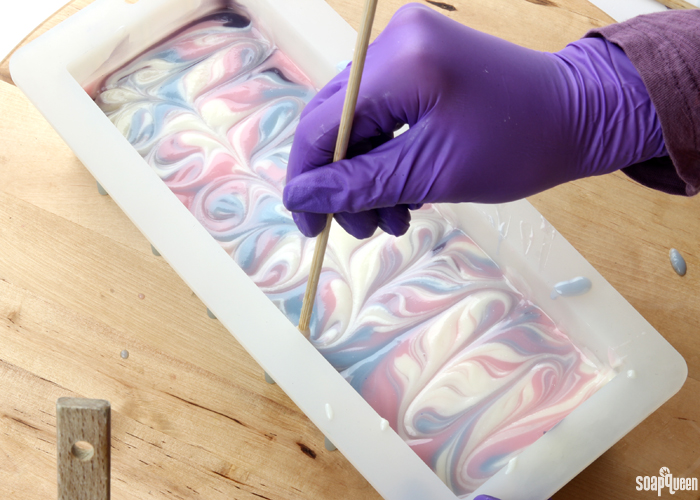 FOURTEEN: Spray the top of the spin swirl soap and the spoon plop soap with 99% isopropyl alcohol to help prevent soda ash. Cover both soaps to insulate for 24 hours. Allow the soap to stay in the molds for 3-4 days before attempting to remove. You may find that the spin swirl soap needs extra time in the mold, because it was poured at a very thin trace. Cut into bars and allow to cure for 4-6 weeks before use!
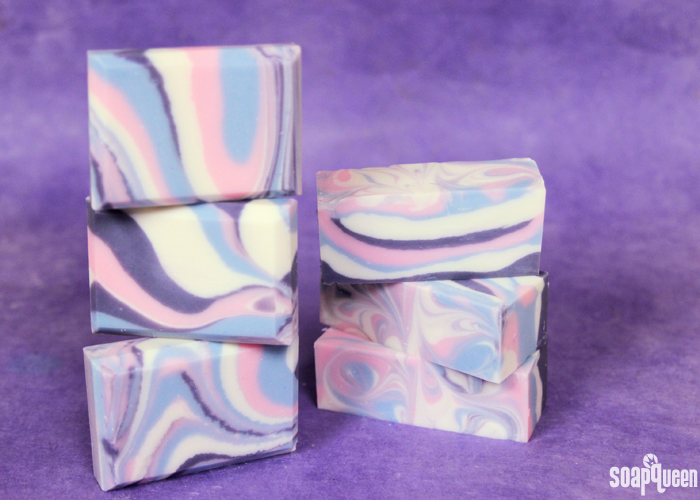 I’m so happy with how both batches of soap turned out. Sometimes when soaping, not everything goes as planned and you need to think on your feet. Especially when attempting a difficult technique, such as the spin swirl. Have you ever had to switch gears halfway through soaping?
- 9 Bar Birchwood Mold
- Silicone Liner for 9 Bar Mold
- Optional: 10″ Silicone Loaf Mold
- 1.4 oz. Avocado Butter
- 18 oz. Canola Oil
- .9 oz. Castor Oil
- 9 oz. Coconut Oil
- 9 oz. Palm Oil
- 6.8 oz. Rice Bran Oil
- 6.1 oz. Sodium Hydroxide Lye
- 14.8 oz. Distilled Water
- 2.5 oz. Sweet Grass Fragrance Oil
- .5 oz. Crisp Cotton Fragrance Oil
- Bright Blue Jean Colorant
- Fired Up Fuchsia Colorant
- Titanium Dioxide Pigment
- Orchid Mica
- Activated Charcoal
- Slowly and carefully add the lye to the water and gently stir until the lye has fully dissolved and the liquid is clear. Set aside to cool.
- Melt and combine the coconut oil, rice bran oil, canola oil, avocado butter, castor oil and palm oils (remember to fully melt then mix your entire container of palm oil before portioning). Once the lye water and the oils have cooled to 130 degrees or below (and are ideally within 10 degrees of each other), add the lye water to the oils and stick blend until a very thin trace. If you’d like a harder bar of soap that releases faster from the mold, you can add sodium lactate to the cooled lye water. Use 1 teaspoon of sodium lactate per pound of oils in the recipe. For this recipe, you’d add about 2.5 teaspoons sodium lactate.
- Be careful to not over emulsify the batter. The soap batter should be very thin and just emulsified. You can always stick blend more later. =) Once the batter has reached a very thin trace, split the batch into four containers. Each container will contain about 500 mL.
- To each container, add the dispersed colorants in the amounts below. Mix in each colorant with a whisk until completely blended.
A (White): 1 Tbs. dispersed Titanium Dioxide
B (Pink): ½ tsp. dispersed Titanium Dioxide + ½ tsp. dispersed Fired Up Fuchsia
(Blue): 1 tsp. dispersed Bright Blue Jean Colorant + ½ tsp. dispersed Titanium Dioxide
D (Purple): ½ tsp. dispersed activated charcoal + 1 tsp. dispersed Orchid Mica - Add the fragrance oil blend evenly between the four containers (it’s okay to eyeball it!). Use a whisk to thoroughly mix in the fragrance blend. The batter should still be very thin.
- Now it’s time to pour! I like to place my mold on a Lazy Susan table to help spin the soap once I’m done pouring. The order in which you pour the colors into the mold is up to you. I just recommend choosing a color order and sticking to it throughout pouring. I chose to pour two different patterns of colors in each corner of the mold. This is optional. Pour the pink soap into one corner of the mold and count to three during the pour to help pour an even amount.
- In the opposite corner, pour the white soap while counting to three. Then, pour the blue soap onto the pink while counting to three, and the purple soap onto the white while counting to three. At this point, the soap should be nice and fluid. As you layer the colors, it will push the soap towards the center of the mold and fill it up. Work as quickly as possible during this process, as the soap will continue to thicken up with time. Every now and then, give the colors a whisk to help keep them fluid.
- Pour pink soap onto the purple layer while counting to three, then pour white soap onto the blue while counting to three.
- Pour a layer of blue soap onto the pink while counting to three, then pour purple soap onto the white while counting to three. Working quickly, continue the color pattern in each corner of the mold. The two patterns were: pink, blue, white, purple and white, purple, pink and blue. Continue to pour the soap into the corners of the mold. If necessary, whisk the soap to help it stay fluid. As you can see in the bottom right photo below, my soap batter started to get a little bit thick. Once the soap is not “pushing” the layers below towards the center, but is instead piling on the top, it’s time to stop pouring. If you continue to pour the soap at this texture, the soap will not swirl when spun. This is when I decided the soap was too thick to continue with the spin swirl design. If I had continued to pout the thick soap into the mold, the spin swirl effect would not have been achieved.
- Give the mold a few firm taps on the counter to help eliminate air bubbles, and to help the layers of soap settle. Begin to spin the Lazy Susan (if you have one), stopping it quickly to help give the soap movement. You want the centrifugal force created by the spin and stop movement to move the soap in various directions within the mold. Be careful not to spin too hard, or the soap may spill out of the mold!
- I ended up with a decent amount of leftover soap; there was enough to make a whole different project. Because the soap was fairly thick, I knew it would make a great texture for a spoon plop. Grab a large spoon for each color. Spoon the soap into the mold, one color at a time, layering them in three different spots within the mold.
- Continue to plop the soap into the mold, using various sizes of “plops” for interest.
- Once all the soap has been placed into the mold, tap it firmly on the counter to help eliminate bubbles. Insert a chopstick or dowel into the very top of the soap, and drag the chopstick down the length of the mold in an “S” curve.
- Use the chopstick to swirl the top of the soap in an “S” curve down the length of the mold in the opposite direction. Finally, use the chopstick or dowel to swirl the top of the soap in a “loop de loop” pattern down the length of the mold. Don’t worry too much about making this swirl perfect. =)
- Spray the top of the spin swirl soap, and the spoon plop soap with 99% isopropyl alcohol to help prevent soda ash. Cover both soaps to insulate for 24 hours. Allow the soap to stay in the molds for 3-4 days before attempting to remove. You may find that the spin swirl soap needs extra time in the mold, because it was poured at a very thin trace. Cut into bars and allow to cure for 4-6 weeks before use!


I’d like to try this with some essential oils, could you recommend some that won’t effect the trace too much and still give time to work with the swirl. Thanks in advance and I can’t wait to try this 😀
Hi Helen!
Absolutely! Most of our essential oils perform really well. I would just recommend avoiding floral or spicy essential oils, like geranium or cinnamon leaf – they can accelerate trace. The descriptions on BrambleBerry.com will have cold process performance notes!
Lemongrass, spearmint or petitgrain essential oil would all work well! You could even mix them together for a fun blend. 🙂
Read more about blending essential oils here: http://www.soapqueen.com/bath-and-body-tutorials/tips-and-tricks/how-to-blend-essential-oils-safely/
-Kelsey with Bramble Berry
Lemongrass essential oil: https://www.brambleberry.com/Lemongrass-Essential-Oil-P3822.aspx
Spearmint essential oil: https://www.brambleberry.com/Spearmint-Essential-Oil-P3821.aspx
Petitgrain essential oil: https://www.brambleberry.com/Petitgrain-Essential-Oil-P6340.aspx
Essential oils: https://www.brambleberry.com/Essential-Oils-C157.aspx
Love the colors, thinking they are very sophisticated looking. Sad that the batter got too thick, but you created a lovely bonus batch with the batter. The spinning swirl is beautiful, nice job all the way around. Thanks for sharing…
Thank you so much for your sweet comment! It can be a little scary when the soap starts to thicken, so we thought it would be nice to include a second design in case it happens to anyone else. 🙂
-Kelsey with Bramble Berry
The colors look amazing! Great job!
Thank you so much Amanda, that means a lot to us! 🙂
-Kelsey with Bramble Berry
I think the colors are pretty, and they do look baby-ish, but combined carefully with other colors, the effect can be different. Like your combo with black and white, looks way more sophisticated. 🙂
I also had to change my designs before, and mostly the same way as this tutorial- changing the swirl into a spoon plop. 🙂
Thanks so much Martina, glad you like the color combination! I love the spoon plop design, it’s great for thick soap and always turns out so pretty. 🙂
-Kelsey with Bramble Berry
That is such a pleasant color combo, and the design for both batches is fabulous! A while back I attempted an infinity swirl, but the dividers I made shifted and the soap batter filled the whole mold. I ended up doing a drop swirl, which ended up being one of the most striking designs I’ve done to date! 😂
Ha, I love when that happens! Sometimes what we think of as a failed batch actually turns out to be a beautiful design. Not to mention, it’s handmade soap – so it will also feel awesome on the skin. 🙂
-Kelsey with Bramble Berry
I love that you showed your soap “mistake” and how beautiful it turned out. I had a hard time accepting “imperfect” batches of soap for a long time but have finally started to learn how to pour the accelerating soap into one pot and pour it into a waiting alternative mold. I call it an imperfect swirl and it can be really pretty.
Even with lots of research and preparation, that soap can still accelerate! We thought it would be a good idea to show what you can do if that starts to happen. That way, you don’t waste any soap and it’s fun to see the design of the finished product! Also, having an alternative mold is a great idea. It’s definitely a perfect way to use that acceleration to your advantage! 🙂
-Kelsey with Bramble Berry