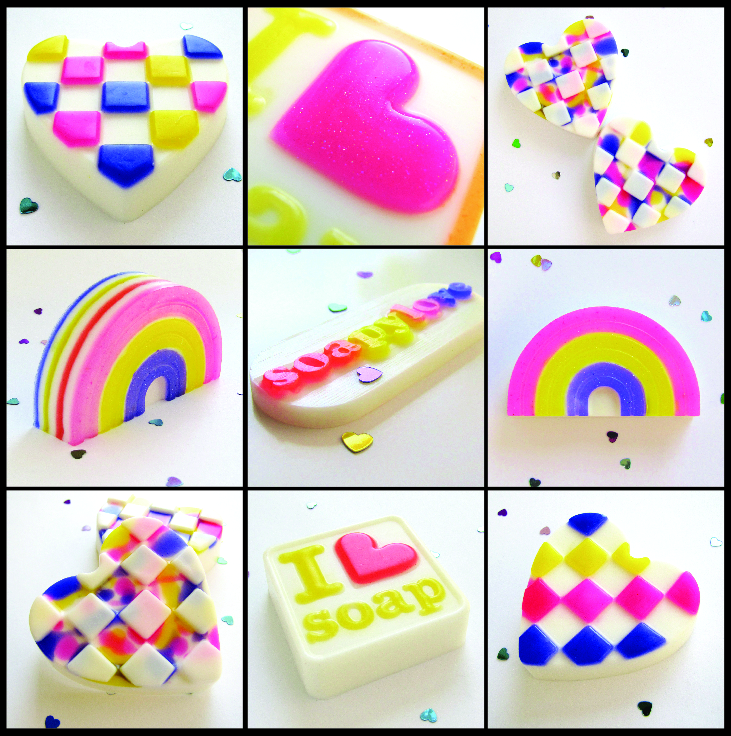
Recently I received a wonderful surprise in the mail – the new neon colorant sample pack from Bramble Berry! I guess Anne-Marie really knows me since neons are my favorite colors! So yesterday while my kids were happily at Grandma’s house, I hit the kitchen with my Soapylove molds to take the neons for a spin. Here are my projects and some tips to get super bright, clean details in your next project!
Supplies needed for all projects:
- Soapylove clear and white soap base
- Neon Pigment sampler pack
- liquid glycerin
- soap injector tool
- Soapylove molds
- Soapylove Candy Jar fragrance set
To use the neon colorants, which are powdered, simply mix a pea-sized scoop into a few drops of liquid glycerin. Stir thoroughly then add to melted CLEAR soap base. To fill details in your mold, draw hot colored soap into your injector tool, carefully fill in details, then quickly rinse out injector tool with hot water. When you are done filling details, spray with alcohol and top off mold with melted white soap no hotter than 120 degrees. For more indepth instruction, please see the Sorbet Soaps tutorial.
 Project 1: Multi-colored Checkered Heart
Use multiple cups to color 1 ounce of soap in three colors (I used Ultraviolet Blue, Fizzy Lemonade, and Electric Bubble Gum). Fill squares in rows or a random pattern. Top off with white soap after spraying with alcohol.
 Project 2: Neon Splatter Heart
Okay, I admit – I love the 80’s. I guess you may have already guessed considering my attraction to neon, checkers, hearts, and stars. So if you want to get that cool “paint splatter” effect from the MTV days, just fill your checkers with white soap, allow to harden, then randomly drip colors into the mold, overlapping and being messy. Top off with white soap after spraying with alcohol.
Use your injector tool to fill each area with colored soap. For extra sparkle, add Soapylove Sparkle Dust from the Jewelry Box Colorant Set. To clean up any messy areas or overflow, allow the soap to harden then scrape across the surface with a plastic card. Voila! Perfection!
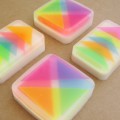
Like the other projects, simply use the injector tool to fill the arches. If you have some soap spill over into the other arches, use a skewer or toothpick to scratch the soap away (this is good for tiny detail fixes, while the plastic card for project 3 is good for large flat areas). Now that you have 3 cups of colored soap left, you can layer the rest of the bar with white and neon for an extra 3-D rainbow effect!
I know you will have a ton of fun with the new colorants. They would be amazing for some fun neon soap sprinkles – check out the latest Soapylove eZine for the full step-by-step tutorial.
Have an awesome day!
Debbie Chialtas, aka “Soapylove”


Wow! Totally cool use of the neons Debbie and the molds are just too cute! I am totally awake now! Looking at the pics is like putting peppermint in my eyes – in a good way!
How lovely! The rainbow one is too fun. Again, another soap that is so cute I’d have trouble using it! 🙂
Great tutorial! I am totally into Neons colors too! Not just in soaps. 😉 So cute!!! And the checkered soaps are awesome!
Neon colorants are so popular right now in everything! I’m loving it too. Neon soaps are just too much fun and the colorants are really easy to work with. What you see is what you get!
Courtney from Bramble Berry
Yay yay! So bright and cheerful! Makes me smile on the inside!
Next order….. next order.
It’s what I keep telling myself. lol
Love this. I’ve been eyeing that I Soap mold for a while.
Those colors put a huge smile on my face…they’re so sunny and fun! Trust Debbie to make fabulous things with them. 🙂
Debbie is always so creative. We love seeing her latest and greatest projects!
Courtney from Bramble Berry
Your readers love to see her projects too…LOL!