With St. Patrick’s Day less than a month away, it’s time to break out the green colorants and get crafting. It’s also a great time to get inspired by shades of gold and rainbow color schemes. If you’re looking for a little St. Patrick’s Day inspiration, look no further. We’ve got tons of fun green tutorials and projects for all levels of crafters.
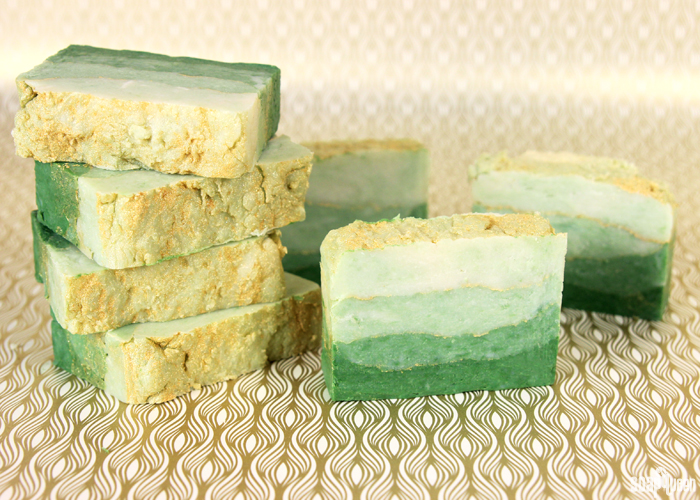 The Luck of the Irish Hot Process Soap features a beautiful ombré effect.
One of my favorite green inspired projects is the Luck of the Irish Hot Process Soap. This tutorial uses the hot process method of soaping to create four layers of green soap. Each layer gets a little lighter to create an ombré effect. A thin layer of Gold Sparkle Mica is applied between each layer of green, and is also sprinkled on top. It’s scented with Kentish Rain Fragrance Oil for a fresh and clean smell. It’s a great option if you’d like to use your soap by St. Patrick’s Day, because the hot process method speeds up cure time. Looking for more green hot process projects? You can see the process in action in the Lemongrass and Lavender Hot Process video on Soap Queen TV below.
If you don’t mind your soap not being fully cured by St. Patrick’s Day, check out the Shamrock Cold Process project. It uses the Four Leaf Clover Stamp to accent the gold and green color scheme. It’s scented with Raspberry Porter Fragrance Oil, which is a crisp and fruity take on a traditional beer scent. To cut down on cure time, you could do a water discount. Learn more about water discounting cold process soap here.
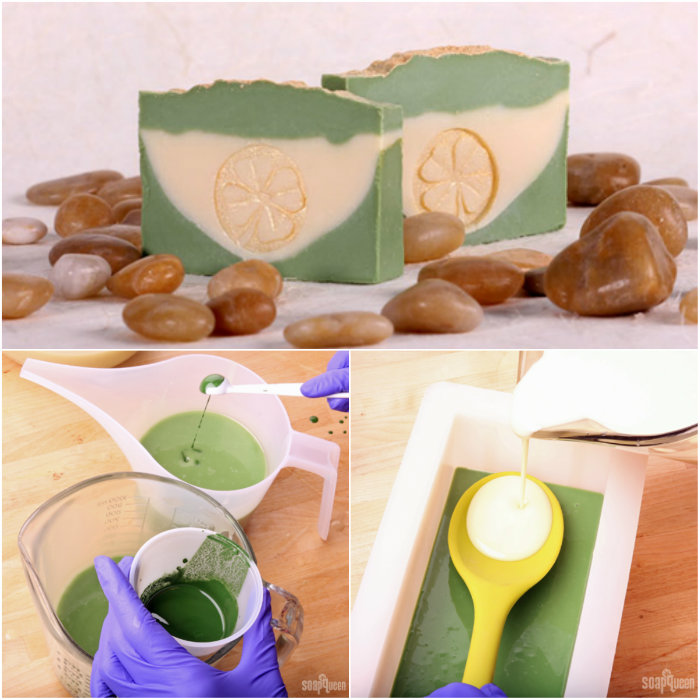 The Shamrock Cold Process Soap uses a green and gold color combo and features a clover stamp.
If you love green but don’t want your soap to scream St. Patrick’s Day, the Exfoliating Green Tea Bars are super sophisticated. They are made with green tea instead of water, and also contain green tea extract. They are scented with Green Tea Fragrance Oil. If you want to give milk soap a try, the Lime in the Coconut Milk Cold Process Soaps uses coconut milk powder for extra moisture. Can’t get enough sparkle? The Emerald Swirl Cold Process Soap features a King’s Gold Mica painting and shimmery green embeds.
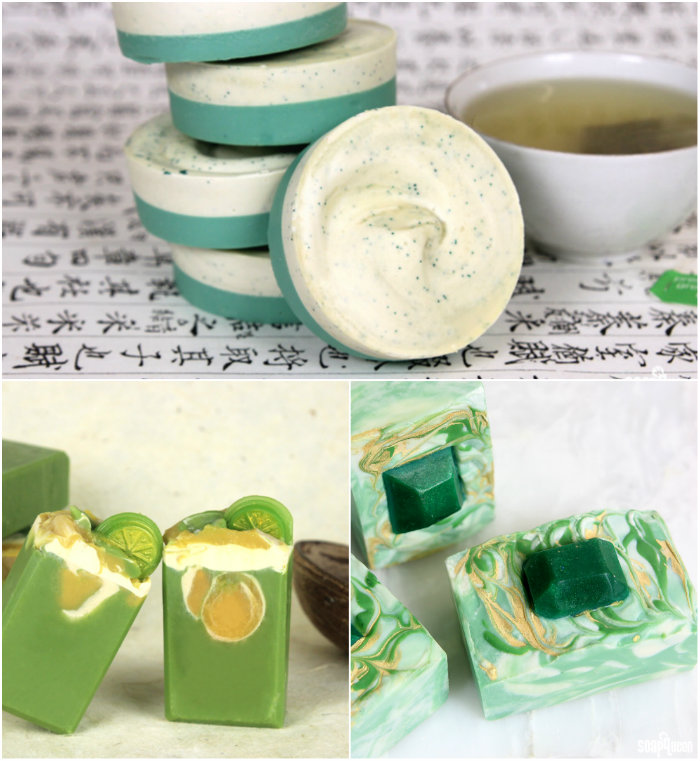 Top, clockwise: Exfoliating Green Tea Bars, Emerald Swirl Cold Process Soap, Lime in the Coconut Milk Cold Process Soaps
If you’d like your project to be ready to use and give to friends and family on St. Patrick’s Day, melt and pour is the way to go. In the Green Meadow Melt and Pour, shavings of green melt and pour soap are embedded to give the bars a confetti look. If you prefer something more natural, the Star Anise Melt and Pour Bars use spirulina powder and green zeolite clay for a soft mint tint. The same combination of natural colorants is also used in the Minty Clay Melt and Pour Bars to create contrasting layers. In the Reimagining Honey Ale Soap, honey melt and pour base is fragranced with Honey Ale Fragrance Oil to make a beer inspired soap that’s perfect for St. Patrick’s Day.
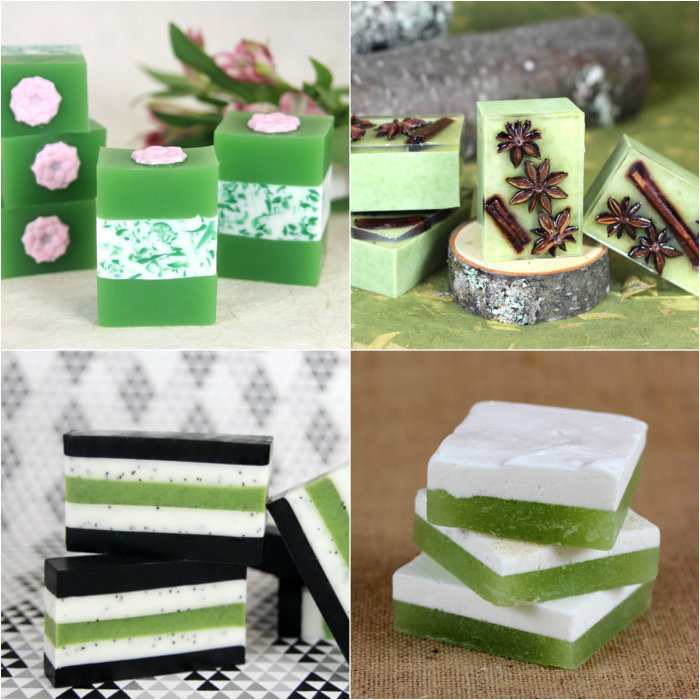 Top left, clockwise: Green Meadow Melt and Pour, Star Anise Melt and Pour Bars, Reimagining Honey Ale Soap, Minty Clay Melt and Pour Bars
If you’re looking for an easier green project, the Anti-Pinch Nail Polish is a great way to avoid any pinchy fingers. Nail polish is super fun and easy to make; learn how in this Soap Queen TV video. The Basic Lotion Base makes it easy to create and customize your own unique lotion. In the Creamy Cucumber Lotion DIY, a small amount of Emerald LabColor and Kermit Green Mica is added to the base to give a soft green hue.
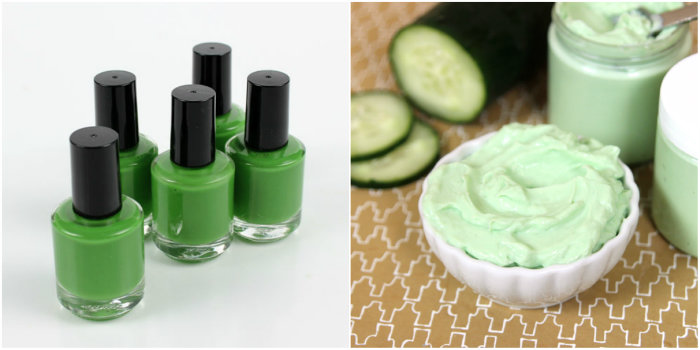 Left to right: Anti-Pinch Nail Polish, Easy Creamy Cucumber Lotion DIY
What are you making for St. Patrick’s Day? If you’ve made a green inspired project, I would love to see it. You can upload a photo on the Bramble Berry Facebook Page, tweet the image @brambleberry or post a photo on Instagram with the tag #SoapShare! Can’t wait to see them. =)
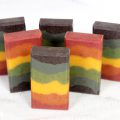
I love the colors associated with Ireland and St. Patrick’s Day, shades of green and gold – and orange. I love the way hot process soap turns out too, it has that pixelated rainy look. I bet this would look great in a rainbow scheme. Great post!
Thank you Michael! I think you’re right, a rainbow hot process soap would be really gorgeous.
-Kelsey with Bramble Berry
I recently followed the tutorial on goat milk soap. I made sure the temps on milk were 58 degrees and oils were 90 when I mixed them to trace. I put the soap in the mold and put it in the refrigerator. A large crack appeared down the center of the soap. I read that this is the start of a volcano. I am guessing I should have put it in the freezer instead of the refrigerator. Could this be what caused my issue? Once I put it in the freezer it seemed to stop cracking anymore and did not volcano. Also I see many goat milk soap recipes that do not require refrigeration. Just put away in a cool dark place. How can these recipes come out if just putting mine in the fridge vs freezer made a volcano?
Thanks,
Natasha
Hi Natasha!
How you store your soap depends on a number of factors, and will vary for different people! For instance, if you live in a cold area, keeping the soap in the garage or basement can keep it nice and cool and refrigeration isn’t needed. If you live in a warmer area, you may find your soap needs to stay in the freezer for the full 24 hours. This will also change based on the season! For instance, summer may require more freezing. Read more about how temperature affects how you store your soap here: http://www.soapqueen.com/bath-and-body-tutorials/tips-and-tricks/when-to-insulate-handmade-soap/
Because your soap was cracking in the fridge, I would recommend keeping it in the freezer for the full 24 hours. That will ensure it stays nice and cool! Also, the soap you have now should be just fine to use. Cracking is typically only aesthetic and the soap will feel nice on the skin.
If you notice any separation (which can sometimes happen if the soap gets really hot), you can use the Hot Process Hero method to emulsify that batch: http://www.soapqueen.com/bath-and-body-tutorials/tips-and-tricks/hot-process-hero-2/
-Kelsey with Bramble Berry
Thank you for the great advice Kelsey. I just have a few more questions. After the soap is in the freezer for 24 hours, will it be ready to take out of the mold and cut or do I leave it at room temperature for a while? Also if I did not do the freezer method and wanted it to gel, how would I keep the soap from making the volcano?
Thanks,
Natasha
Once the soap is out of the freezer, we recommend letting it sit for another 3-5 days before unmolding. The freezer keeps the soap cold, but also slows down the saponification process a bit. As the soap sits at room temperature it will harden and you can unmold it.
Finding the perfect balance for your soap will take a bit of practice! To make the soap gel without overheating, I would recommend wrapping it with a towel. That keeps it warm without making it too hot. If you notice the soap still overheating, you may be able to leave the soap at room temperature! If you notice it’s cooler or gelling partially, you can pop it on a heating pad set to medium for 20 minutes. This post has more information on that: http://www.soapqueen.com/bath-and-body-tutorials/tips-and-tricks/when-to-insulate-handmade-soap/
-Kelsey with Bramble Berry