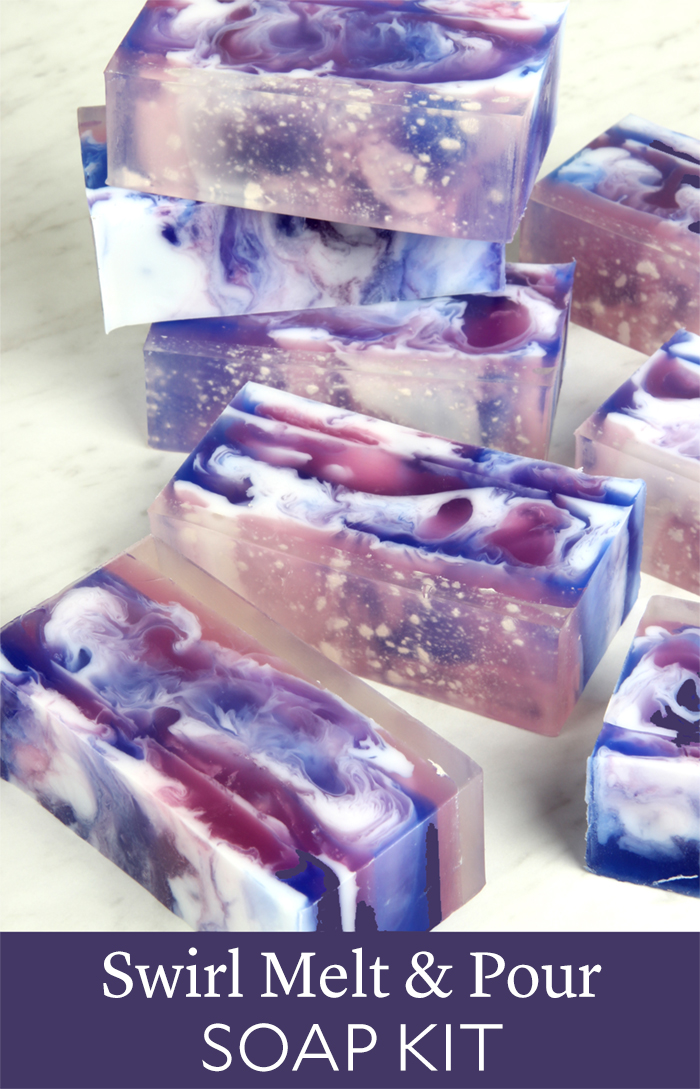
There’s a reason swirl designs are so popular. Not only are they fun to do, but your soap turns out differently each time. The Swirl Soap Kit includes everything you need to give the technique a try. We first shared the tutorial in 2009 – you can watch the Soap Queen TV video here. Eight years later, it was time for a refresh.
The updated Swirl Soap Kit has a similar design and feel, but it now comes with printed instructions to make it easier than ever to use. There are also new items like the 10″ Silicone Loaf Mold, which is durable and flexible.
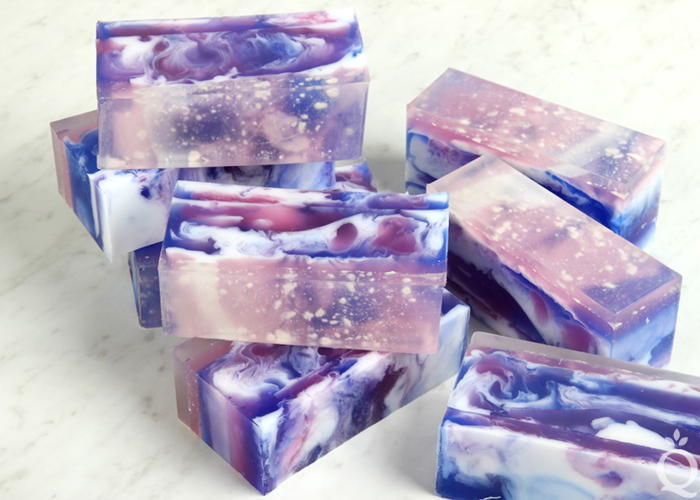
If your loved one wants to get creative or if they want to try a new project, these kits are the perfect way to start. You can also put them on your wishlist so people know exactly what to get you. Everyone deserves to get creative – make time for it this holiday season.
Swirl Soap Kit Includes:
10″ Silicone Loaf Mold
2 lbs. Clear Melt and Pour Soap Base
1 lb. White Melt and Pour Soap Base
1 oz. Yuzu Cybilla Fragrance Oil
Super Pearly White Mica
Liquid Blue Colorant
Liquid Pink Colorant
Liquid Violet Colorant
1 Dropper
99% Isopropyl Alcohol in a Spray Bottle
- 10" Silicone Loaf Mold
- 2 lbs. Clear Melt and Pour Soap Base
- 1 lb. White Melt and Pour Soap Base
- 24 mL Yuzu Cybilla Fragrance Oil
- 1 Dropper
- Super Pearly White Mica
- Liquid Pink Colorant
- Liquid Blue Colorant
- Liquid Violet Colorant
- 99% Isopropyl Alcohol in Spray Bottle
- Chop all the Clear Melt & Pour Soap Base into small cubes. The smaller the pieces of soap, the easier they will melt. Place the soap into a heat-safe container and melt in the microwave using 30 second bursts. After each burst, stir the soap. Be careful not to overheat and burn the soap.
- Once melted, use the dropper to add 15 mL of the fragrance oil into the soap and mix in with a spoon. Pour a small amount of the clear soap into the mold (just enough to cover the bottom).
- Sprinkle a pinch of the white mica onto the soap and spritz with alcohol to get rid of bubbles. Allow to harden and cool for about 10 minutes.
- Once the first layer has hardened, remelt the clear soap base in the microwave using 30 second bursts, stirring between each burst.
- Split the remaining clear soap equally into three separate containers. Add a few drops of the pink colorant into one container until you have reached your desired color and stir to mix in. Add drops of the blue and violet colorants into other containers and stir to mix in.
- Chop all of the White Melt & Pour Soap Base and place in a separate heat-safe container. Melt in the microwave using 30 second bursts. Add 9 mL fragrance oil to the soap, and stir to mix in.
- Spritz the soap in the mold with alcohol. Pour half of the melted white soap on top of the previous layer. Pour about ½ of the pink, violet, and blue soap into the white. The soap will naturally swirl itself as you pour. Experiment with pouring into different areas of the mold. Spritz with alcohol to get rid of any bubbles after pouring. Allow to cool and harden for about 5 minutes.
- If the remaining white, violet, blue, and pink soap has cooled and hardened, reheat each color in the microwave using 10 second bursts until it's fluid.
- Spritz the soap in the mold with 99% isopropyl alcohol. Pour the remaining white, violet, pink, and blue soap into the mold. Spritz with alcohol to get rid of bubbles.
- Allow the soap to fully cool and harden for at least 3-4 hours. Remove from the mold, cut into bars. Enjoy!



I am new to MP soap, can you reheat MP soap once color has been added? Thanks so much for your help!
Yes, you sure can. You can melt and re-melt MP soaps with no issues. After several tries though, you may notice that it gets a little more ‘gummy’ than it would be otherwise from lack of moisture.
Yes , I do all the time
I noticed that the liquid colorants used in this recipe has been discontinued. What would you recommend using instead? Is there a certain mica color that would give the same colors? Thanks for any help!
Hi there Ashley, you can achieve the same results by using these colors instead:
Ultramarine Blue: https://www.brambleberry.com/Ultramarine-Blue-Pigment-P4043.aspx
Ultramarine Pink: https://www.brambleberry.com/Ultramarine-Pink-Oxide-Pigment-P4039.aspx
Ultramarine Violet: https://www.brambleberry.com/Ultramarine-Violet-Oxide-Pigment-P4047.aspx
The ratios will remain the same, but you’ll want to pre-disperse your colorants in a bit of glycerin before adding them to your mix.
I just made this recipe today with aloe vera melt and pour and goat’s milk melt and pour. I used different colors and put aloe vera soap for my bottom layer and again on the top. Absolutely love the finished product. Would love to share a picture with everyone, but didn’t see a way to do that.
So glad you’re loving the finished soap. We’d love to see it, you can share it on our Facebook wall or post it on your Instagram page with the tag #BrambleOn.
Bramble Berry Facebook page: https://www.facebook.com/BrambleBerry/
Hi! I have been using Bramble Berry products for several years and have been very happy with the quality & ease of use etc… I recently placed an order for some more white & Clear M&P bases. This weekend, my sister and I tried making some very simple soap bars. Both the white base, the goat milk base and even the clear base gave us problems! We cut the soap into small chunks as directed, microwaved them in Pyrex measure cups at 10 secs intervals, stirred as directed, but they all became gloopy, and stringy like…kinda like Elmer’s glue. The temperature never was over 135. Needless to say, the whole day was a bust and rather frustrating! Did we over stir the M&P base, (tried metal spoon, wire whisk) was it too hot, not hot enough??? I’ve never experienced this before when making M& P. Any help you can provide will be most appreciated. I hate wasting your product!
I’m wondering if it may be temperature related. When the soap is around 125-135F it will be thicker. Around 140F it’s more fluid. You may try heating the soap until it’s around 140-150F to see if that makes it easier to work with.
If you give that a try and it’s still gloopy, let me know. In that case it may be drying out or getting too hot.
Hi Kelsey, I’ll give that a try! We were so concerned not to burn it, so we may have been overly cautious.
Sounds good, let me know if it helps.
Are you heating it up 30 seconds at a time it sounds like it may have gotten too hot
Hi. I absolutely love these tutorials and have learned tons from them 🙂
This swirl soap looks amazing and I can’t wait to try it myself!
My question is this: I would love to top my soaps (piping) but I am not sure if that is possible to do with MP? I was wondering if I can add any clay or butter (Shea, Coconut etc) to make it more “pudding” like? Or is this something just not possible with MP? I am just about 3 weeks into soaping and absolutely loving it! I am grateful for your videos and find them super easy to follow and tons of fun to watch! Thank you to all you guys there!
Frosting is possible with melt and pour soap. We have a few different recipes you can try, I’ll link them below. Also, thanks for your sweet comment, it means a lot to us. 🙂
Melt and Pour Cupcakes: https://www.youtube.com/watch?v=n0CB4osn6Zk&t=13s
Luscious Lemon Soap Cupcakes: https://www.soapqueen.com/bath-and-body-tutorials/melt-and-pour-soap/luscious-lemon-cupcakes/
Really, really a great experience! My daughter and I did it together on Saturday. It was my first time doing making soap so the melt and pour method was perfect. The soap came out so well. It looked and smelled great! I put them in meat bags , wrapped in paper and they were gone! Really recommend this kit!
So glad to hear the soap came out well Kim. Handmade soap makes the best gift, especially this time of year.
I bought the pink bucket because I love making soap. But if the oil needs to be melted and clear before I measure it out, how do I measure it before I hear it.
You can wrap those buckets with an electric blanket or place them in a bathtub filled with hot water to melt the oil. Once it’s melted, you can portion it out into smaller containers to make it easier to use. These heat-resistant plastic bags work well: https://www.brambleberry.com/Search.aspx?k=heat+resistant
I am planning to make my first batch of soap this weekend, but I have watched so many videos and read so many tutorials that I have confused myself on the alcohol. I have seen some people say to use 90%, some say 91% and this one states 99%. Does the dilution, once above 90$, make a difference? I am just unsure of which to buy, and when to use the varying options.
Thank you!
We recommend using 99% isopropyl alcohol. It has the highest concentration of alcohol, which helps the layers stick together and pop any bubbles on the surface.
99% Isopropyl Alcohol: https://www.brambleberry.com/99-Isopropyl-Alcohol-16-oz-P5682.aspx
What a beautiful and creative soap. What is the best temperature to pour at, to make this lovely design?
Yes, soap swirls best around 125-130F. At that temperature it’s thicker so the colors won’t muddle together. Learn more about swirling here: https://www.soapqueen.com/bath-and-body-tutorials/tips-and-tricks/tips-for-swirling-melt-pour-soap/