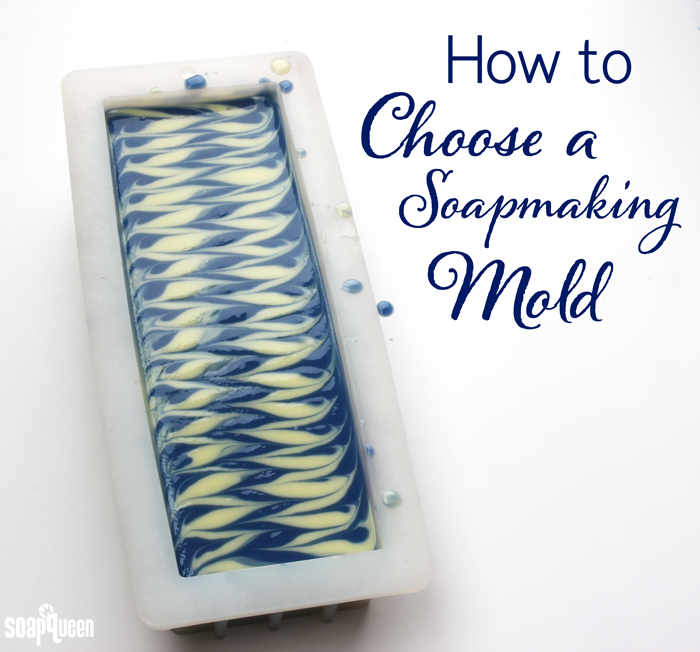
Soap making molds come in various shapes, sizes and materials. It’s crucial to consider what kind of mold you’ll be using when designing a soapy project. The mold will determine how big your batch needs to be, and may influence ingredients and cure time. One of the most popular soap mold options is a silicone mold. They are easy to clean with no lining necessary and come in a variety of shapes and sizes. Other mold options include recycled containers, plastic and wood molds. Each have benefits that may affect your soaping experience.
Silicone Molds
Pros: Easy to unmold soap with flexible material, easy to clean, no need to line mold, long lasting, professional looking bars
Cons: Soap takes slightly longer to unmold, soap can speckle with bubbles if soap overheats
Silicone molds are extremely popular due to their ease of use. Sturdy yet flexible, silicone molds make unmolding both cold process and melt and pour soap easy. The key is to break the airlock by gently pulling away the sides of the mold from the soap. If you experience any resistance when removing cold process soap, stop and give it a few more days in the mold. It’s not worth it to tear the sides or bottom of your project!
Soap does take longer to harden in silicone molds because there is no air in contact with the soap. Sodium lactate is a key additive to use when working with silicone molds. Sodium lactate is a liquid salt that helps produce a harder bar of soap that lasts longer in the shower. Sodium lactate also helps the soap harden faster in the mold. This means that instead of waiting 3-4 days to unmold your project, you can often unmold the very next day! We recommend adding 1 tsp. of sodium lactate per pound of oils in your recipe to cooled lye water. Click here to read more about sodium lactate, and how to use it in your projects.
In addition to easy unmolding, silicone molds are easy to care for. After removing your soap from the mold, hand wash the silicone mold with hot water and dish soap. Allow to dry and the mold is ready to use for your next project! While silicone molds are sturdy, we do not recommend placing them in the dishwasher. Also avoid any harsh scrubbing materials such as copper sponges, as they may scratch the glossy finish inside. Click here to read more about caring for molds.
Recycled Molds
Pros: Create unique shapes, cost effective, eco friendly
Cons: Shapes not consistent, may need to line mold, mold may only be good for one use
Just about any container can be turned into a soap mold with proper lining. If the container is plastic, the soap can be poured directly without lining. Popular options include yogurt containers, pudding cups and tofu containers. Cardboard milk containers are also a good option, as the inside is normally lined with a nonstick coating. Check out the How to Recycle Your Recyclables post for more ideas. Recycling objects and boxes in your home is a great way to save money on molds and create eco-friendly and unique looking bars.
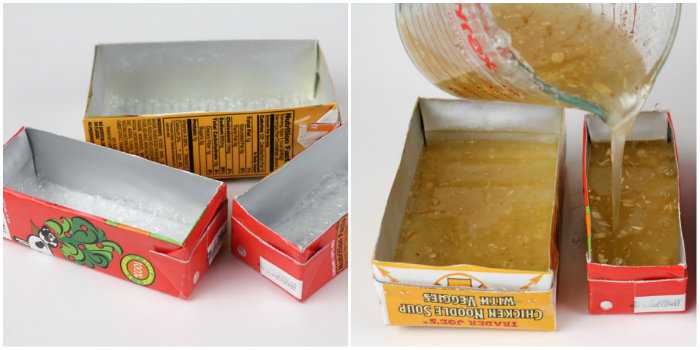 One negative aspect of recycled molds is they may not be very sturdy, and may produce bars that are not completely straight or uniform. If you are looking to create professional looking bars consistently, other mold options are better choice. The container should not be used for food storage once used to make soap. Depending on the sturdiness of the container, it may only be good for one soaping recipe.
Most recycled containers will need to be lined with freezer paper to ensure the soap does not stick. Lining also helps ensure the soap does not leak. For example, both the Creamy Orange Cold Process Soap and the Simple & Gentle Cold Process Soap tutorials were created in a USPS Medium Flat Rate Box. If the soap was poured directly into the cardboard, the soap would stick to the box. To prevent this, freezer paper was used to line the box. The How to Line Any Mold blog post has tips on turning any box into a proper soap making mold.
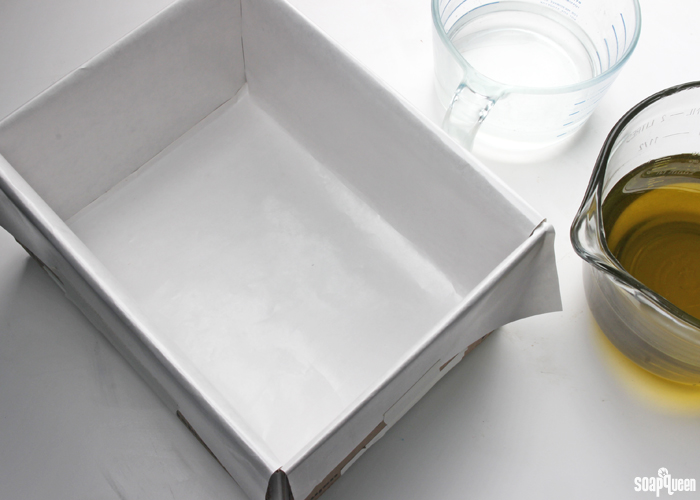
Metal or glass containers are not recommended for cold process soap molds. One reason is they are extremely hard to remove your soap from. If using rigid molds, they should be lined with freezer paper…otherwise you may never get the soap out! The other reason is that lye reacts with many metals, including aluminum, tin and zinc. The sodium hydroxide lye reacts with the metal releasing hydrogen gas which is very dangerous. Avoid all metal containers for soaping with.
Wood Molds
Pros: Easy to insulate/gel phase, long lasting, produces large batches of soap, professional looking bars
Cons: May need to line mold, can soften over time when exposed to raw soap from drips & normal use, prone to overheating
Another popular soap mold option are wood molds. They are sturdy, cost effective and act as great insulators for cold process soap. They can also last for years and years with proper storage and care. Bramble Berry wood molds are made out of top grade Birch plywood that is both sturdy and durable, click here to learn how to care for them.
Wood molds also need to be lined with freezer paper to avoid the soap from sticking to the mold. To make this process easier, many of the Bramble Berry wood molds have silicone liners available. When lining any mold, keep in mind that freezer paper is much different from wax paper. Freezer paper is sturdier, and will not melt under high temperatures.
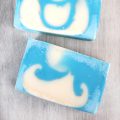
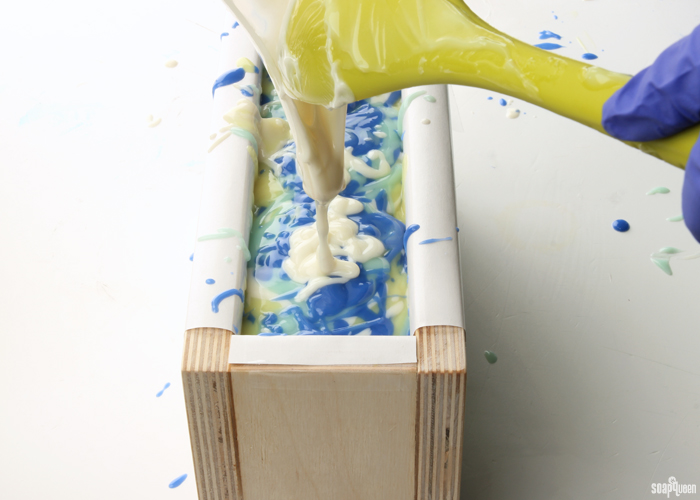 A wood mold is used in the Blue Rain Drop Swirl Cold Process to insulate the soap. Don’t forget to line your wood molds!
One of the best features of wood molds is they insulate the soap well. This makes it easy to achieve a complete gel phase throughout the soap. It’s important to keep this in mind when insulating wood molds; because they insulate the soap naturally, placing the mold on a heating pad may not be necessary. If you want to avoid gel phase completely, you may want to place the mold and soap into the fridge or cool place. Learn more about gel phase and when to insulate your soap in this post.
Plastic Molds
Pros: Wide variety of shapes and designs, cost effective, great for small batches, professional looking bars
Cons: Can be difficult to unmold, requires more time to unmold, prone to soda ash, difficult to make large production batches
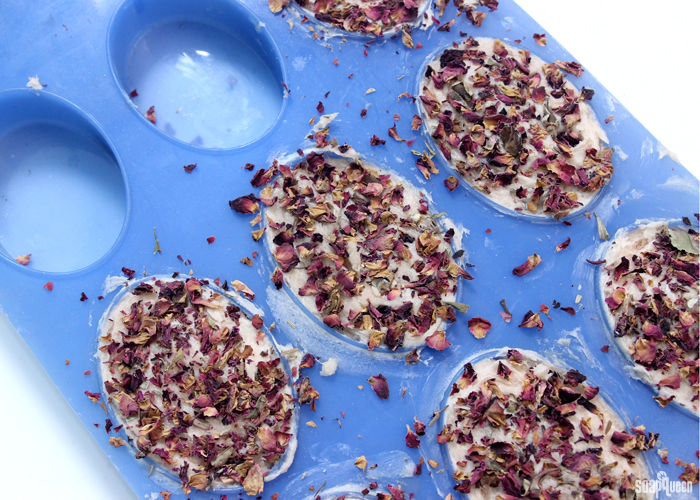
Best suited for melt and pour, plastic molds can also be used for cold process soap. Plastic molds come in a wide variety of shapes and sizes. In fact, Bramble Berry has more than 400 plastic molds to choose from. If you can’t imagine it…there is probably a plastic mold for it! The majority of plastic molds are individual cavity size. The smaller size means that the molds do not insulate the soap as well as large slab or loaf molds. We don’t recommend placing plastic molds on a heating pad, as they can melt or warp if they get too hot. Instead of using gel phase to help prevent soda ash, you can spritz the soap with 99% isopropyl alcohol every 15 minutes for an hour. That helps create a barrier to protect the top of the soap. You can also decrease the superfat level to 3% or water discount at 10%. Read more tips for preventing soda ash here.
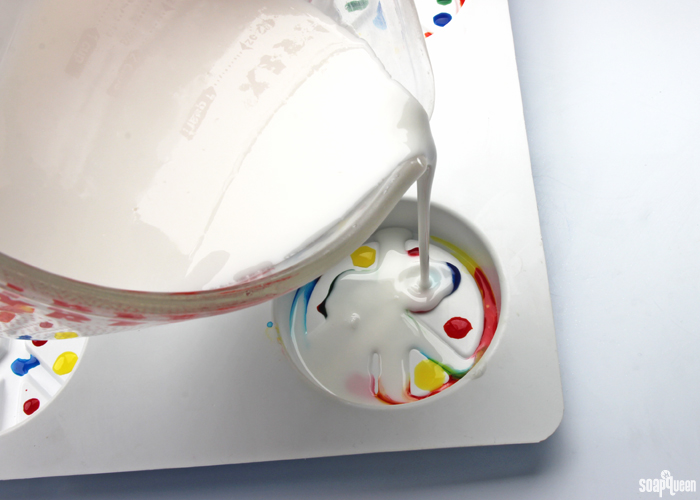
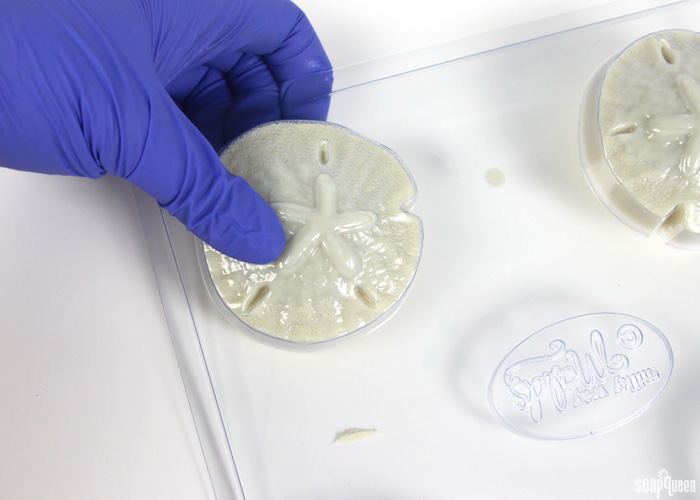
The trick is that cold process soap can be a little bit tricky to remove from plastic molds. Cold process soap can require up to a week to unmold from plastic molds. If using a plastic mold for your cold process project, we recommend using a large amount of hard oils (palm oil, coconut oil, cocoa butter, etc) to help the soap harden. Adding sodium lactate also makes a huge difference; check out the Unmolding Cold Process Soap from Plastic Molds for more tips and an experiment with hard/soft oils and sodium lactate.
Sometimes it takes a little time to find the right type of mold for you. Personally, silicone molds have become my new go to after years of using wood molds. But if I want my soap to go through gel phase, wood molds are still my favorite. When using plastic molds I make sure my recipe contains solid oils, and I always use sodium lactate. When teaching friends how to soap, I usually recommend trying out the craft with recyclables first, just to make sure they enjoy the process. Each mold has its positives and negatives, and so much just depends on personal preference! =)
What kind of molds do you prefer? I would love to hear your thoughts in the comments below.


What is the best way to store silicone molds? Can they be stored in plastic containers, or will they react to the plastic? How do you keep them from warping while being stored?
Silicone molds store best in a cool, dry place. So, you can store them on a rack or in a plastic bin, that will work just fine. Don’t store anything heavy directly on top of the silicone or they can get a little bent out of shape when you first use them. The good news is they’re pretty sturdy molds, so you have a few storage options.
-Kelsey with Bramble Berry
what about freezing the mold from before in the freezer, Then pour in the soap mixture and freeze it again, would this help prevent gel phase even more?
You can do that if you like, that may help keep the soap cooler.
-Kelsey with Bramble Berry
Hi
I do not know which mold should I use .
i am a newbie to soapmaking .
I made soap 4 times first one was good small batch in plastic mold .
The other 3 times were good but with gel phase .
I used homemade silicone mold .
I covered one batch & did not cover the other two batches but also got gel phase .
How can I prevent gel phase please .
Keeping the soap cool will prevent gel phase. I would recommend putting the silicone mold in the fridge or freezer for 5-24 hours. Plastic can crack if it’s kept in the fridge for too long, so silicone works best.
Learn more about preventing gel phase here: http://www.soapqueen.com/bath-and-body-tutorials/tips-and-tricks/when-to-insulate-handmade-soap/
-Kelsey with Bramble Berry
I used silione spoon to dissolve my lye in water and may have left the spoon in too long. Some of the silicone melted off and got blended into the batter. Is this gonna be a problem???
Silicone usually has a really high melting point – around 400F. Because the spoon melted it may not be silicone. It may also be the dye from the spoon. I would recommend contacting the manufacturer to see if it’s skin safe and OK to wash with.
-Kelsey with Bramble Berry
Hi Kelsey
I’m looking to made some soap moulds in the shape of my own nose for an art project. I could cast my nose in alginate or plaster of Paris but I am worried about how the soap may respond to both or either of those materials. Do you think its doable? any advice would be much appreciated, thank you.
Best
Helena
That sounds like it’s going to be a fun and interesting project! I’m not sure how soap would do in plaster of Paris either, so I would recommend lining the mold with heavy duty plastic wrap. Try to get it as smooth as possible so there aren’t any creases on the soap. Then, make sure to pour the soap when it’s cooler (125-130F) so it doesn’t melt the plastic wrap.
-Kelsey with Bramble Berry
I’ve been getting into silicone molding lately and have learned quite a bit about Alginate and how it can be used. Alginate is not a material you should hake a mold with if you don’t plan to use it within 24 hours as it will dry out. You can, however, follow the example of many Hollywood prop makers; make a mold of your nose in Alginate, then cast silicone into the mold. Take out the silicone cast of your nose, spray on a release agent, then use your new fake nose to make a silicone mold.
Hello,
I am looking mold that you have on first picture for ages already. Can you give me a clue how do I find it, or may be you can recommend where to buy it?
Thanx,
Nat
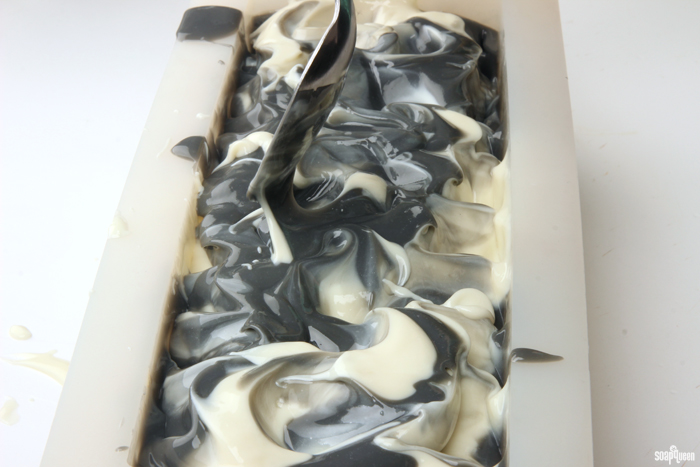
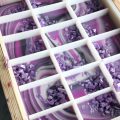
Absolutely! That’s our 10″ Silicone Loaf Mold: https://www.brambleberry.com/10-Silicone-Loaf-Mold–P5199.aspx
It’s one of our favorites because it’s flexible and easy to clean. 🙂
-Kelsey with Bramble Berry
I love silicone molds for melt and pour but it takes too long to unmold with CP. I like to get at my finished soap too fast and I don’t like adding sodium lactate (just “one more thing” to mess with). I do like the different shape options for silicon molds but invariably I mess up softer soaps by trying to unmold too soon. Along with recognizing soap characteristics I guess we have to recognize our own patience levels when deciding!! LOL!
Such a good point Sherry! There are pros and cons to every type of mold. Sodium lactate is another step, but you might be surprised how easily it will slip into your cold process “routine.” It took me a little while to get into the habit of adding it, but now it’s just part of my lye prep! Honestly, I can’t imagine soaping without it now, because waiting more than 2 days to unmold soap can be torturous! Sodium lactate isn’t for everybody, but from one impatient soaper to another…it’s just something to consider ;).
-Amanda with Bramble Berry
I have been producing moringa soap in PNG and wanted to seek assistance so to have a brand name on my soap.I needed soap mold that will contain my brand name. how can I be asisted
I’m not entirely sure! You may check Etsy or teachsoap.com/forum. Someone there may know of a place you can find custom molds. 🙂
-Kelsey with Bramble Berry
It’s actually not hard at all to do. What I would do is take an object shaped like you would like your soap to be shaped and using clay, you can sculpt your brand name onto that soap-shaped object. You can then do a quick Google search on making silicon molds, then use your new master cast to make a mold for your soap.
Hello,
I have made a batch of CP soap and I love it! It one of my favorite new hobbies! My brother helped me build a 4-5 lb mold but, the measurements were wrong and he didn’t realize it was unstable on my work surface. I am looking into the 5lb mold with sliding bottom from brambleberry.com but, I haven’t seen a top for the mold. Does the mold come with a top?
Hi Lexi!
That’s awesome, glad you’re loving soapmaking! The addiction happens fast. 😉
The 5 lb. Wood Mold with Sliding Bottom doesn’t come with a top. However, you can use a piece of cardboard, cutting board, etc to insulate your mold. Anything to seal up the surface will work nicely.
Our Birchwood molds come with lids, as does our Tall Narrow Wood Loaf Mold. Those may be options for you!
Birchwood molds: https://www.brambleberry.com/Search.aspx?k=birchwood+molds
Tall Narrow Wood Loaf Mold: https://www.brambleberry.com/Tall-Narrow-Wood-Loaf-Mold-P6122.aspx
-Kelsey with Bramble Berry
Ok great! Thank you for your help and suggestions! :)!
You’re welcome! 🙂
I haven’t made any soap yet, however I have watched Soap Queen TV & have purchased alot of books on the subject. I am now looking to purchase molds. I was hoping you could tell me the pros & cons of a wooden slab mold versus a wood loaf mold. It seems to me that the slab mold might gel better in the center and not so much on the edges, perhaps making the color inconsistent from bar to bar. But the slab molds would fit better in my oven if I choose to do that. The loaf molds seem like they would produce a loaf that had basically the same color throughout. Any info on pros & cons would be appreciated!
Hi Kathleen!
Both wooden slab molds and wooden loaf molds are great options! Which one you choose will boil down to personal preference. We have found that they both distribute color and gel nicely. The loaf mold is a bit better at reaching gel phase, as the soap is more compact. However, a towel and a heating pad will ensure a full gel! Read more about insulating soap here: http://www.soapqueen.com/bath-and-body-tutorials/tips-and-tricks/when-to-insulate-handmade-soap/
They will also have a difference in bar size! The loaf produces a bar like this: https://www.soapqueen.com/bath-and-body-tutorials/cold-process-soap/stormy-seas-cold-process/
While the slab molds produce bars like this: https://www.soapqueen.com/bath-and-body-tutorials/rainbow-heart-swirl-cold-process-tutorial/
Both will work really well! I would suggest getting whichever one you think would work better for your recipes. 🙂
-Kelsey with Bramble Berry
I have never made soap before, and stumbled across your website, love your soaps! I want to make soap bars as a favor for a bridal shower. Can I use disposable loaf pans? And is I east to remove the soap?
Hi there!
Thank you so much, glad you love the soap! You can use disposable containers if you like. I would recommend using plastic or silicone – something with some flexibility. That way it’s easy to unmold the soap. 🙂
We used recycled containers in this fun tutorial: http://www.soapqueen.com/bath-and-body-tutorials/melt-and-pour-soap/how-to-recycle-your-recyclables/
This video on making wedding favors may be helpful for you as well: http://www.soapqueen.com/bath-and-body-tutorials/melt-and-pour-soap/making-wedding-favors-on-soap-queen-tv-2/
-Kelsey with Bramble Berry
Thank you!!
You’re welcome!
Can I use stainless steel for soap mold in cold process soap? Is there any recommended grade of steel to use?
You can use any stainless steel you like! Just make sure to line it will freezer paper so you can remove the soap easily. 🙂
Learn how to line your mold here: https://www.soapqueen.com/bath-and-body-tutorials/cold-process-soap/how-to-line-any-mold/
-Kelsey with Bramble Berry
We use silicon molds. We tried wood and glass and found them difficult to use. The glass was hard to get out evenly without scratching the soap. The wood was hard to line and then cut evenly. We needed something quick and simple, so went with silicone. We’ve been very happy with the results.
Silicone molds are my favorite too! I love how flexible they are so you can get your soap out nicely. Also, not having to line the mold is a plus. 🙂
-Kelsey with Bramble Berry
As a complete beginner, I bought some melt-and-pour bases and without any particular research, bought a wood mold (most of what I’m seeing online and in books, now, seems to favor silicone molds for melt-and-pour). I’ve seen your tutorial on lining a wooden mold; is there any reason to shy away from using wood for melt-and-pour? Thank you.
Hi Cindy!
You can use a wood mold for melt and pour as long as your mold is lined really well. Because melt and pour is really thin when it’s hot, it may want to leak out of the sides of the lining and can get stuck to the wood. Because of that, we typically use silicone or plastic molds. They make removing melt and pour nice and easy. 🙂
Find out more about lining your mold here: http://www.soapqueen.com/bath-and-body-tutorials/cold-process-soap/how-to-line-any-mold/
And find some great melt and pour molds here: https://www.brambleberry.com/For-Melt-Pour-C547.aspx
-Kelsey with Bramble Berry
Hello,
I want to make a three layer soap in my 4″ Silicone Loaf Mold but I am afraid I don’t know what the measurement of melt and pour soap I would use for each layer. Could you tell me and/or do you have a method I could review for measurements.
Thank you,
Debra
Hi Debra!
Absolutely! We’ve found the easiest way to measure the soap is by weight. The 4″ Silicone Loaf Mold holds 20 ounces of soap. So, you can put about 6.7 ounces of soap in each layer for a nice even look. You can eyeball it, or measure each layer out for super precise layers. If you wanted two layers, you can do 10 ounces in each, etc.
Read more about Weight vs. Volume in this post: http://www.soapqueen.com/bath-and-body-tutorials/tips-and-tricks/a-guide-to-weight-vs-volume/
Hope that helps! 🙂
-Kelsey with Bramble Berry
4″ Silicone Loaf Mold: https://www.brambleberry.com/4-Silicone-Loaf-Mold-P5531.aspx
Holy moly, the color combo in that first picture… *drool*.
So glad you like it Mokhe! Blue and white were made for each other. 🙂
The tutorial for that soap will be up later today!
-Kelsey with Bramble Berry
I have mostly wooden molds (mostly loaf, a couple slab) and a couple silicon molds. I am really enjoying my BB 10 bar silicon loaf mold! I also have a column mold that I like but it can be more difficult to line.
So glad you’re enjoying the 10″ Silicone Loaf Mold Mary Ann! That’s my favorite mold. I love the wooden molds too though, because of how nicely they gel soap. Also, the column molds create such fun shapes! 🙂
-Kelsey with Bramble Berry
10″ Silicone Loaf Mold: https://www.brambleberry.com/10-Silicone-Loaf-Mold–P5199.aspx