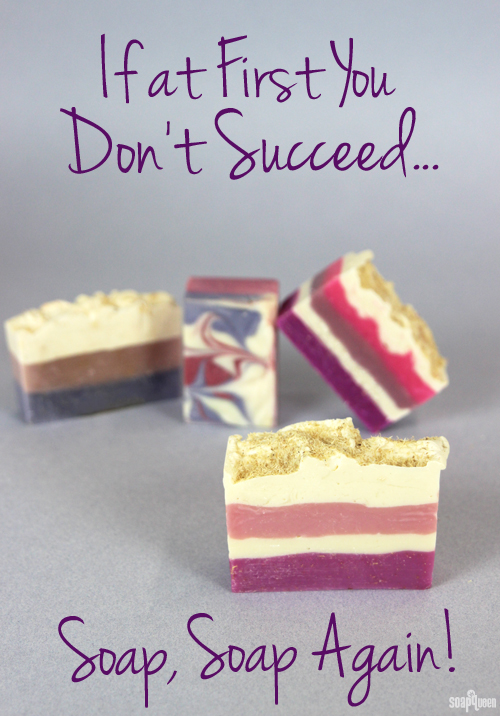
 Dreaming up soapy designs and projects is incredibly fun…there are so many possibilities! When it’s time to make the image in your head come to life, sometimes it can be tricky. In the Soap Lab, the team and I are constantly testing new designs and recipes. Often, these projects turn out great after the first attempt…but not always. Sometimes, a project on Soap Queen has been made several times in order to get the design or recipe just right. That way, you’ll have the most success when you recreate it.
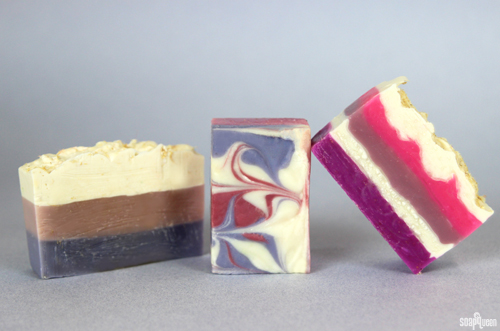
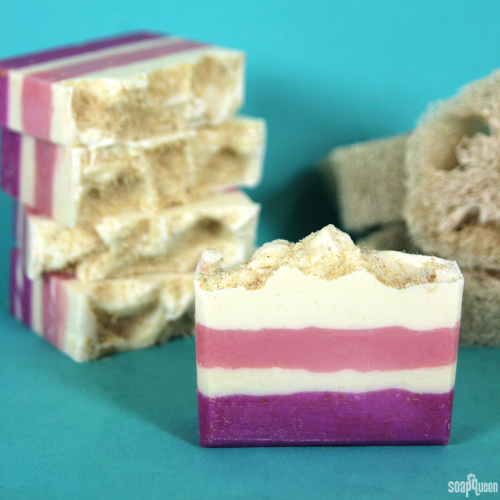 One great example of a project that required several attempts is the Layered Lilac Loofah Cold Process. A fairly simple design, it took a few tries to get the colors and layers just right. To be exact, I made this soap three times in order to feel 100% happy with the final product. The first three attempts resulted in perfectly lovely bars of soap. In fact, I gave them away to delighted friends and family for Christmas. But, they were not exactly what I pictured in my head.
Moral of this story? Not every soapy creating comes out 100% perfect the first time and that’s okay; half the fun of the creating is the process, rather than the final product. And when you create that perfect bar, it’s all that more rewarding! To give you a peek into the design evolution process that sometimes occurs, check out the first few attempts below.
Attempt One:
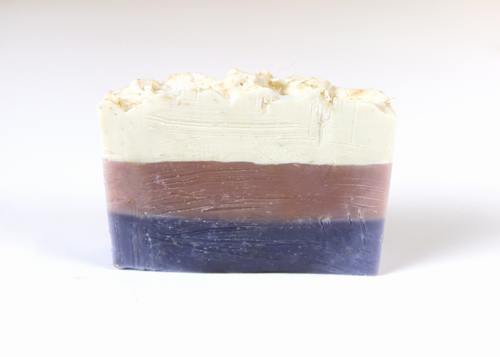
The initial concept for this soap was to use the accelerating fragrance oil, Lilac Fragrance Oil, to my advantage by creating thick layers of color. The color palate was purple, pink and white to mimic lilacs. I knew I wanted white on top, with shredded loofah within the bar, as well as on top. With a general concept, I was ready to soap!
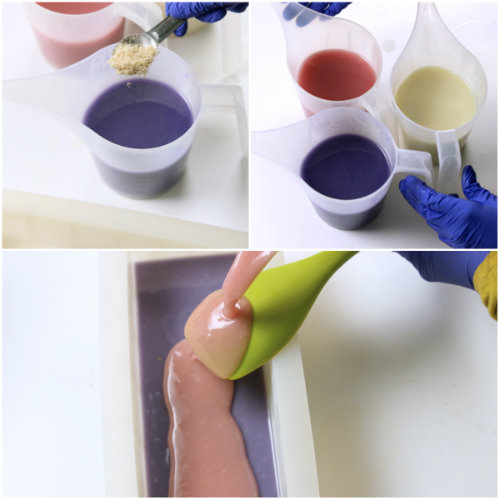 Creating layers with the Lilac Fragrance Oil was easy, and the soaping process went smoothly. Shredded loofah went into the bottom two layers and on top. Once removed from the mold and cut, the colors did not pop quite like I wanted them to. Also, the shredded loofah in the bottom two layers created substantial drag marks throughout the soap. While drag marks are perfectly fine, aesthetically I wanted to avoid them.
Attempt Two:
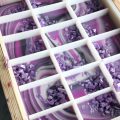
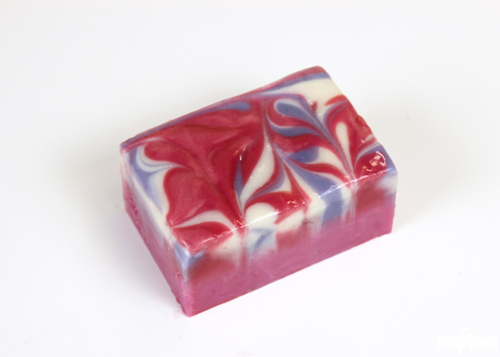 For the second attempt, I tried to eliminate the possibility of drag marks from the loofah by using the 9 Bar Birchwood Mold. Because this mold features dividers, there is no need to cut the soap once it is out of the mold. I also wanted to challenge myself by swirling with the accelerating Lilac Fragrance Oil. Shredded loofah was used in the base layer, with a multi-colored swirl on top.
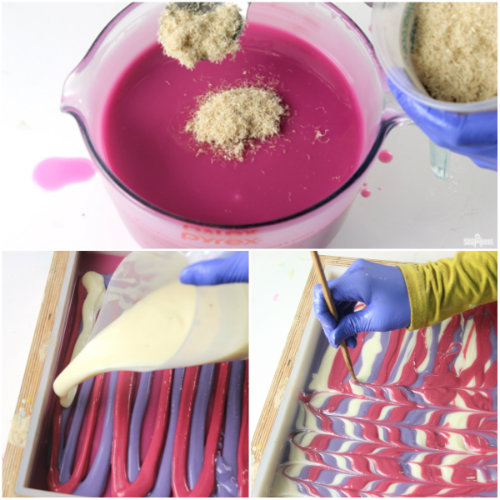 While this soap did not contain drag marks from the loofah, the pink was a little more red than planned. While the swirl looked great, swirling with the Lilac Fragrance Oil was tricky. I wanted the Layered Lilac Loofah Tutorial to be successful for as many soapers as possible, so the swirls had to go.
Attempt Three:
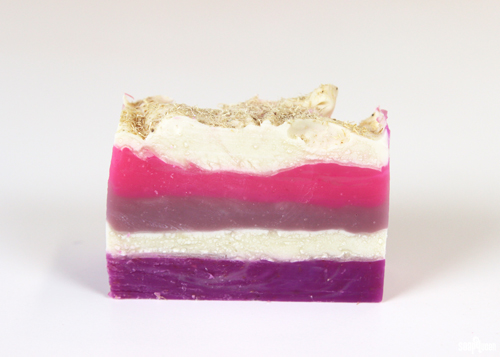
For the third attempt, I went back to my original idea of layers. To prevent drag marks, shredded loofah was used only in the bottom purple layer and on top. The colors were bright, and the drag marks were minimal. But holy glycerin rivers, Batman! The soaping temperatures were higher for this soap, and the heat combined with titanium dioxide resulted in extreme glycerin rivers. If you’d like to learn more about what causes glycerin rivers, this post dives into what causes them and how to avoid them.
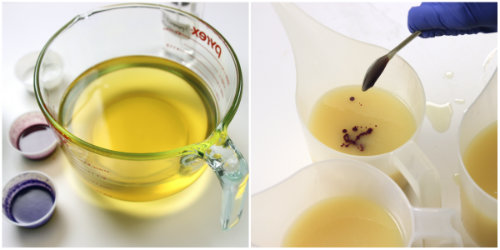
Shredded loofah in the bottom layer and top worked well. But, the pink layer needed to be softer, and the layers thicker. For the fourth and final attempt, I decreased the layers from five to four and adjusted my colors accordingly. I was so happy to finally see the image of this soap in my head come to life!
Has there been a soapy project that you needed to make several times to get just right? The funny thing is, several people in the office liked the previous attempts more than the final project. Beauty is in the eye of the beholder, even when it comes to soap =)



I don’t see anything about my kind of mistake in these posts: I’m trying to use a slab mold and can’t seem to get the amount right… the resulting slab of soap is just too flat. I would rather not rebatch, since there’s nothing wrong with the soap, it’s just flat. Would it be reasonable to make another (small) batch and pour it on top of the existing soap? (it would allow me to practice a new pattern with much less materials – there’s always a sunny side!) I’m not sure if it would stick to the existing slab. The old one hasn’t finished curing… it was a CPOP and has been sitting for only a couple of days… hard enough to cut in a pinch but still very soft.
Thanks in advance for any comments on this one!
Hi Liz!
My worry with pouring more soap on top is that it may not stick. When we make cold process soap with frosting on top, we like to pipe it on right away to prevent any separation. You can learn more about cold process soap frosting here: http://www.soapqueen.com/bath-and-body-tutorials/sparkling-champagne-soap-cupcakes-on-soap-queen-tv/
I would recommend making a really small batch of fresh soap and testing it on a small area of the soap now to see if it sticks. If so, you can make that second batch to pour on top! If not, you can slice the bars up into small pieces and use them as guest or sample soaps. You can also use them as embeds for a future project. 🙂
Get more ideas in this soap scraps post: http://www.soapqueen.com/bath-and-body-tutorials/tips-and-tricks/use-leftover-soap-scraps/
-Kelsey with Bramble Berry
I know all about design changes! I did a rainbow soap with melt and pour and originally wanted to leave out the Orange layer because I don’t like orange! 😛
I poured what was supposed to be my red layer and when it dried it looked orange! So I ended up pouring red on top and it looked great! I’ve also had design changes when colors turned out wrong or layers wouldn’t stick. It all works out though!
Hello!
I love cutting into a bar of soap. Usually, things I think I messed up end up looking surprising and interesting!
-Kelsey with Bramble Berry
Hi Anne Marie or bramble berry team,
I wanted to email you about this but I couldn’t find a suitable adress.
I love brambleberry oils. I. Love. Them. In fact everything from brambleberry I love. But, there is one quirk about those 8 oz oil bottles. They’re so hard to store. And this isn’t just brambleberry bottles. Bottles of that nature are so difficult to store. I was wondering if you could do a post on a tour of your supply storage and some organizational tips?
Thanks so much!
Calla
Hi Calla!
That’s so awesome, I’m happy to hear you like our products! Also, thanks so much for your suggestion. We’ll keep that in mind for a future blog post!
We have several customers who use wooden shelves or baker’s racks to store their oils. You may also like our plastic pouches, which are heat resistant and may be a little easier to store. 🙂
-Kelsey with Bramble Berry
Heat Resistant Plastic Pouches: https://www.brambleberry.com/Search.aspx?k=plastic+pouches
Hi,
It is very encouraging to read that even the pro’s have trouble getting the colors right the first time… The colors change after a few days and are a hard thing to manage if I don’t stick to a recipe or resize it.
As a beginner I am still often surprised by the speed of the tracing process and have to work with a more simple design or less colors than I at first intended. But there is learning in all of this.
With kind regards,
Annemieke
Hi Annemieke!
So glad you like the post! Colors are tricky to work with, and even experienced soapers can get different results than they planned.
Also, we have a great post about trace that may be helpful for you. I’ll include it below. 🙂
-Kelsey with Bramble Berry
All About the Trace: http://www.soapqueen.com/bath-and-body-tutorials/tips-and-tricks/trace/
Haha All About the Trace… I’m seeing a soapy remake of a popular song!! 🙂
Hi Jill!
That would be a fun remake! 🙂
-Kelsey with Bramble Berry
Thanks for sharing! This is encouraging… it’s easy to imagine it all coming together perfectly the first time, all the time for the pros! (P.S. The end result is my favorite design. It’s beautiful.)
Hi Donna!
You are so welcome! We like the end design a lot too. 🙂
-Kelsey with Bramble Berry
I knew that you must try things out more than once. I found as a beginner that you always got the colors and techniques spot on and I could make soap that looked just like yours even with my own recipe if I just followed the directions carefully and didn’t use any oils that changed the colors. I totally recommend your tutorials for learning techniques!
Hi Margaret!
We definitely do a ton of recipe testing! It means a lot to us to hear that our recipes work well for you. Thank you so much for saying so. 🙂
-Kelsey with Bramble Berry
You created the perfect red for the top swirl on #2 – what colorants did you use? And in what amounts?
Hi Sharon!
So glad you like the red! We used 1 Tbsp. dispersed Electric Bubble Gum Colorant and 1 1/2 tsp. dispersed Merlot Sparkle Mica in about 15 ounces of soap. We dispersed 1 tsp. of the colorant in 1 Tbsp. of sweet almond oil. 🙂
-Kelsey with Bramble Berry
Electric Bubble Gum: https://www.brambleberry.com/Electric-Bubble-Gum-Colorant-P4966.aspx
Merlot Sparkle Mica: https://www.brambleberry.com/Merlot-Sparkle-Mica-P3064.aspx
Sweet almond oil: https://www.brambleberry.com/Sweet-Almond-Oil-P3205.aspx
Prepare Your Colorants for Cold Process Soap Making: http://www.soapqueen.com/bath-and-body-tutorials/tips-and-tricks/learn-prepare-colorants-cold-process-soap-making/