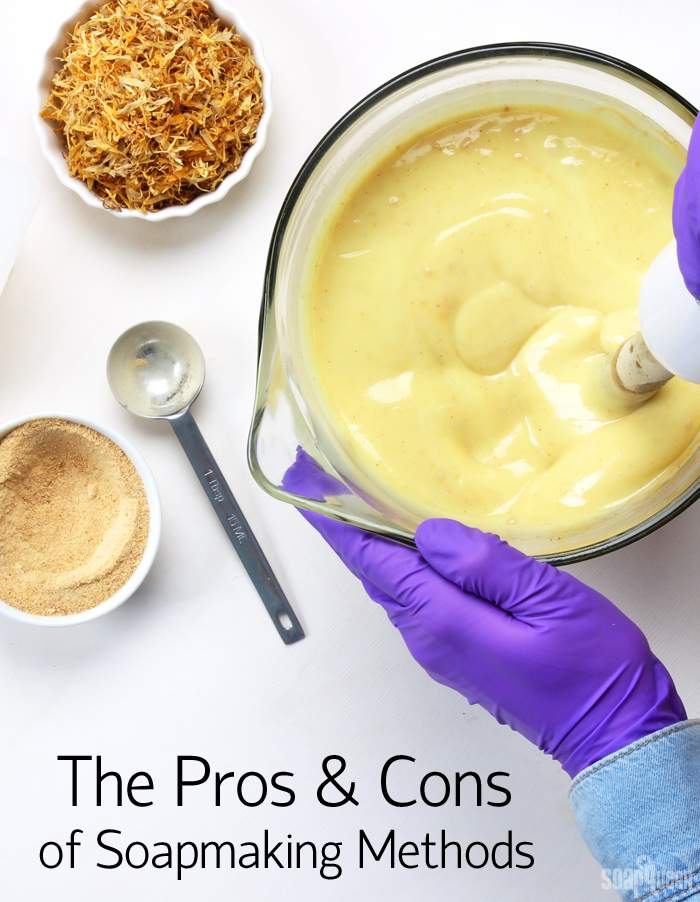
Years ago when I started soaping, after 6 failed Cold Process soap batches, I switched and focused on melt and pour soap. Eventually, I tackled cold process soap again, which then lead to trying hot process and rebatch. There are several other soaping techniques that fall somewhere in between, like CPOP (cold process oven process), HPOP (hot process oven process), but melt and pour, cold process, hot process and rebatch are the “main four.” Each of them creates a great bar of soap, but in very different ways.
There are pros and cons to each method, and every soaper has a personal preference. If you’re wondering which method may be the best one for you, I’ve included a roundup of the most obvious pros and cons of each method below. As I was writing this post, it dawned on me that some of the things I would consider a “pro,” might be another soapers “con.” It’s really all about personal preference, and the skill set of the individual soaper. What is your favorite soaping method, and why?
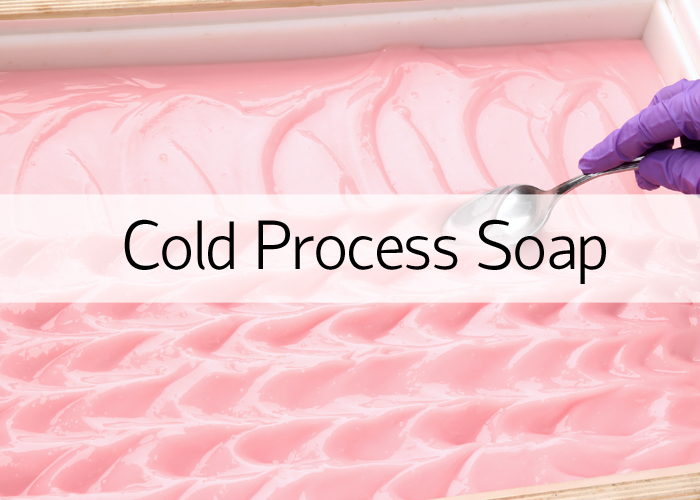
Pros:
- Allows you to customize every single ingredient to suit your personal preferences.
- You can add fresh ingredients like milk and fruit/vegetable purees because you control the saponification process.
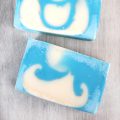
- The trace of cold process soap batter can be manipulated for a wide variety of techniques and effects. Thin trace can be used to make swirls, while thick trace soap creates frosting.
- With so many technique options, it’s a great way to get creative. The sky is the limit!
- The thick texture makes it great for suspending heavier additives.
- Generally considered a more “natural” bar of soap.
Cons:
- Cold process soap must be made with sodium hydroxide lye, which can be dangerous when handled incorrectly. Learn how to handle it safely here.
- Cold process soap takes about 4-6 weeks to cure. The soap can be used before then, but it will last longer in the shower with a full cure.
- Some colorants tend to morph in the high pH environment of cold process soap, particularly some mica or FD&C based colorants.
- Fragrance oils can react with the high pH of cold process soap in negative ways, causing acceleration, ricing or seizing. Always make sure your fragrance behaves well in cold process!
- Vanilla color stabilizer is not reliable in cold process soap, and fragrance oils with a high amount of vanilla content will turn the soap brown.
- Because cold process soap batter is opaque, glitter does not show up very well when placed in the soap. Glitter still works great on top!
- Clean-up can be a long process depending on how many colors your soap was (more colors = more containers).
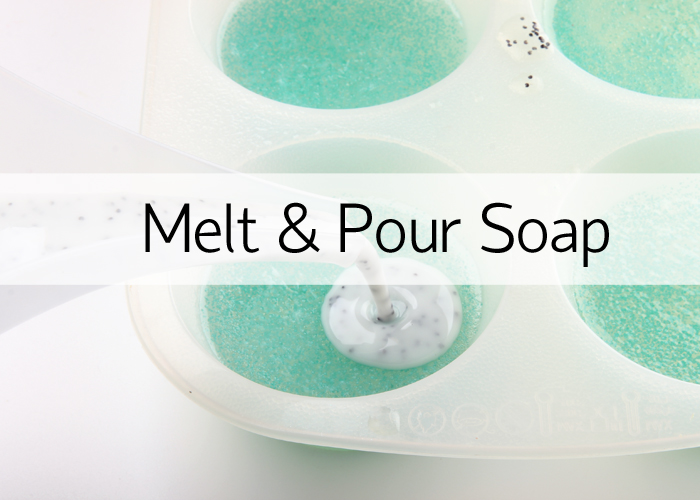
Pros:
- Great for beginners! You can do melt and pour with children as young as 4 with parental supervision.
- The base has already gone through saponification, so working with lye is not required.
- Does not require wearing safety gear because you’re not working with lye.
- Melt and pour soap is quick to make; it hardens in several hours and does not need to cure.
- Fragrance oils do not cause acceleration, ricing or seizing in melt and pour soap.
- You can use Vanilla Color Stabilizer to prevent vanilla discoloration in soap.
- In translucent varieties of melt and pour soap (Clear, Aloe Vera, Honey, etc.) light is able to shine through, making glitter and shimmery micas really pop!
- Melt and pour soap is great for creating extremely clean, straight layers. Just make sure to have some 99% isopropyl alcohol nearby so the layers stick together.
Cons:
- Because melt and pour soap contains extra glycerin, it is prone to glycerin dew/sweating.
- The base is not fully customizable. Because saponification has already happened, you cannot choose the oils/butters within the soap.
- Fresh ingredients like milk and purees will eventually go bad in the soap.
- Once melted, melt and pour soap is quite thin and fluid. Larger additives tend to sink to the bottom of the soap if not added at a cooler temperature.
- Melt and pour soap cools and hardens quickly. This means some swirls that can be made with cold process soap are not possible with melt and pour.
- Melt and pour soap can burn if it becomes too hot. Once burned, the base becomes thick, gloopy and difficult to work with.
- Clean-up is easy because your dishes are all coated in fully ready-to-use soap.
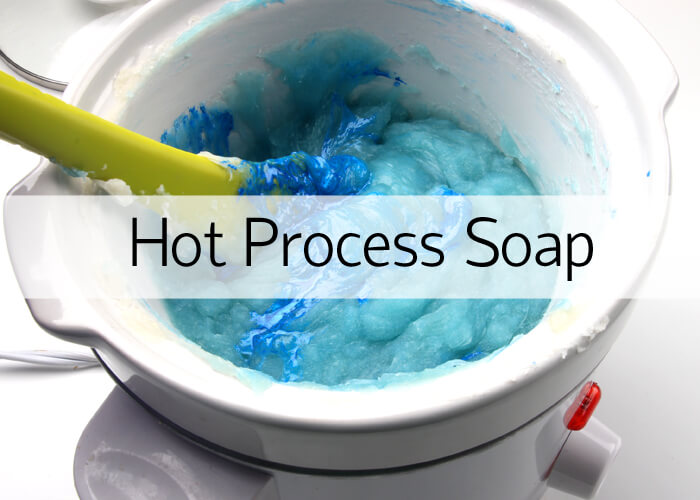
Pros:
- Allows you to customize every single ingredient, including fixed oils.
- The additional heat speeds up the saponification process. Three cheers for instant gratification; hot process soap can be cut within one day, and used right away.
- The bars have a “rustic” appearance with a less smooth texture than cold process. Whether or not you like this look is a personal preference.
- Can be made in a Crock-Pot or double boiler.
- The thick texture makes it great for suspending heavier additives.
- Generally considered a more “natural” bar of soap.
- Clean-up is easier because the soap in the slow cooker/Crock-Pot is already soap.
Cons:
- The thick texture of hot process soap makes some swirls and techniques, such as layering, very difficult.
- The bars have a “rustic” appearance with a less smooth texture than cold process. Whether or not you like this look is a personal preference.
- If your fragrance or essential oil has a low flashpoint, some soapers find the high temperature of hot process tends to “burn off” the fragrance, causing it to fade.
- As the soap cooks, it expands. Because of the possibility of it overflowing, it’s important to not leave it unattended.
- Difficult (but not impossible) to add fresh ingredients like milk and purees; they tend to scorch during the cooking process.
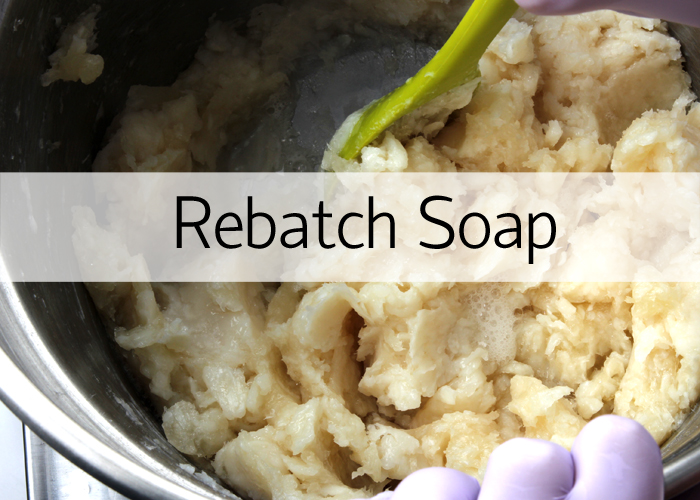
Pros:
- The base has already gone through saponification, so working with lye is not required.
- Does not require wearing safety gear because you’re not working with lye.
- Great for beginners!
- Rebatch soap is a great way to fix or use batches of soap that didn’t turn out quite right.
- Rebatch does not require the 4-6 week of cold process soap. In general, I recommend about 1-2 weeks of cure time, but it can be used once cut.
- The bars have a “rustic” appearance with a less smooth texture than cold process. Whether or not you like this look is a personal preference.
- Super simple to clean up.
Cons:
- The soap already went through saponification, so the recipe (oils, butters, etc) can not be customized.
- Fresh ingredients like milk and purees will eventually go bad in the soap.
- The bars have a “rustic” appearance with a less smooth texture than cold process. Whether or not you like this look is a personal preference.
- If your fragrance or essential oil has a low flashpoint, some soapers find the high temperature of rebatch soap can “burn off” the fragrance, causing it to fade.
- Due to the thick texture, swirls are difficult and layering, while not impossible, is a timing game with rebatch soap.
I love each and every method for different reasons, although my favorite method has to be cold process soap. I’m just a sucker for the swirls! What is your favorite method of soapmaking, and why?

Great article! I’m curious, can I use the same recipe (same ingredient amounts) for either hot or cold process soap? I found a great “hot-process” soap recipe but would like to prepare it as a cold-process soap.
Yes you can use the same ingredient amounts for a hot process recipe as cold process. Just keep in mind ingredients that heat up the soap (like milk, fruit purees, etc.) work best in CP.
Hi Anne Marie. I’d like you to pls tell the difference between Castile Soap and Melt and Pour soap. Also, what recipes can be added into soap for acne prone skin, and sensitive skin. Thank you
Pls can you give a tutorial on how to make Melt and Pour Soap base from the scratch. It will be appreciated.
Castile soap is made from 100% olive oil, whereas melt and pour soap is not. Soap is a wash-off product and is not intended to treat or cure skin diseases. We’d recommend that you check with your dermatologist for their recommendation.
We don’t have any tutorials on how to make melt and pour from scratch at this time, but I’ve passed your suggestion on to our R&D team.
Hi. I have just started my soaping journey. I have only been doing melt and pour. I am so glad for this information. I had a melt and pour that I kept thinking this is bad soap because it was gooey not knowing it was my fault. This site has been invaluable to me. A few questions. People keep suggesting I start selling my soaps. Is that ok, selling melt and pour soaps? Can I still consider them natural an am I required to list ingredients on labels? I want to start doing CP and I am going to purchase one of your beginner kits and I have been doing body butters. Does it matter if I am using stainless steel, glass, and plastic? Mine spoons are not stainless steel. I want to purchase stand mixer to use for body butters should the bowl be glass. Would love your help. Also, I have tried tagging brambleberry online when I use kits not sure if I have been successful. Is there a place for just general questions. Thank you and your team. I love love soaping.
It’s okay to sell melt and pour soap. In fact, some people specialize in melt and pour. This post might help you get started selling your soap: https://www.soapqueen.com/business/much-charge-products/
As for calling melt and pour soap natural, well that’s up to you. This post talks about it a little more: https://www.soapqueen.com/bath-and-body-tutorials/melt-and-pour-soap/talk-it-out-tuesday-melt-and-pour-soap/
If you want to keep it on the natural side, you can add natural ingredients like essential oils and natural colorants. This post recommends some natural colorants that look great in melt and pour soap: https://www.soapqueen.com/bath-and-body-tutorials/melt-and-pour-soap/natural-colorants-for-melt-and-pour-soap/
This melt and pour base is nourishing and skin-loving: https://www.brambleberry.com/SFIC-Goat-Milk-Melt-And-Pour-Soap-Base-P3184.aspx
If you sell any of your products, you are required to list the ingredients on the label. This post has a lot of great information about labeling and links to more resources: https://www.soapqueen.com/business/understanding-inci-names-on-cosmetic-labels/
For cold process soap, it is best to use heat-safe, non-reactive bowls. So we recommend glass, but there are some plastic options that work well, too. We use the same containers for cold process as we do for body butters and melt and pour, so most of our containers are glass or non-reactive plastic. It’s important to have separate containers for making soap and for cooking. We do recommend using stainless steel spoons for working with lye. Bramble Berry sells bowls and utensils that are perfect for making handmade bath and beauty products. Get them here: https://www.brambleberry.com/Utensils-Containers-C593.aspx?ps=12&p=0
Feel free to leave any questions you have on the blog. We hope it is a resource to people. You can also email Bramble Berry customer service for help.
If I am making a bar soap containing dried herbs, herbal oils and essential oils, will melt and pour be the best way to go as far as mixing in the additional ingredientts before pouring into the mold?
It would be best to add those ingredients to cold process soap. You can customize your oils when you make cold process soap, but not when you make melt and pour. Melt and pour soap has already gone through saponification, so adding extra oils to it can create weird textures. You can add essential oils and dried herbs to either, but the dried herbs will turn brown inside the soap eventually.
Hello my name is Rochelle and I’m new into soap making. My concern is the key that into soap. What method I can used and doing natural soap making for my children and families.
I hate using hard chemicals like lye in my body products.
I ment to say the lye that is into soap
Soap cannot be made without lye, but if you don’t want to work with it, melt and pour soap and rebatch soap are great options. Both methods use soap bases that have already gone through saponification, so you don’t have to worry about working with the lye.
Here is a great melt and pour recipe that made with natural ingredients: https://www.soapqueen.com/bath-and-body-tutorials/garden-loofah-melt-pour-soap-diy/
Here is a rebatch recipe that you might like: https://www.soapqueen.com/bath-and-body-tutorials/wildflower-rebatch-soap-tutorial/
Cant thank you enough for writing such a great article ,it helped me alot 🙂
You’re welcome, thanks for reading. 🙂
hi i was wondering if i am too young to use lye im only 12 what are the precuations if not
I would recommend talking to your parent or guardian before getting started, as lye can be dangerous if it’s not handled properly.
Hi! My name is Andrew and I have a question I am hoping you can help me with. I am just starting out but I really want to go with a cold process soap. I have tried multiple times. I have a gram scale and all the rite equipment. For what ever reason my batches never came out. I’m sure this is do to my ratios being off. I just find it very confusing and overwhelming trying to figure out with all these different oil calculators how much of what oil and lye to use and mix together. Do you have an easier way to figure out exactly how much of what product to put in? Do you have a simple clear soap recipie? White soap recipie to add colorant ? Can you even make a cold process clear soap ? I have so many ideas and I am ready to get started. It’s been about 2 years of failed attempts because I seem to ither start out going to big I guess or I don’t know exactly how much of what to use . Hope you can answer some of these questions for me so I can get on the rite road to a great few batches of soap! Thank you
Yes, we have some recipes that are great for beginners. They only use a few oils and we give you the exact amounts, find those here: https://www.soapqueen.com/bath-and-body-tutorials/back-to-basic-series-roundup-quiz/
You can use titanium dioxide to get a light color in soap. We recommend mixing 1 teaspoon with 1 tablespoon of a lightweight liquid oil. Then, add 1 dispersed teaspoon per pound when the soap is first mixed until you get a color you like.
Titanium dioxide: https://www.brambleberry.com/Titanium-Dioxide-Pigment-P4040.aspx
You can make clear soap from scratch, but it is a difficult process we haven’t had luck with. We prefer to use these premade bases: https://www.brambleberry.com/SFIC-Soap-C647.aspx
I absolutely LOVE hot process soap-making and hand milling. With hot-process, you have to love being in the kitchen, because you will be there for awhile watching your pots. With re-batch and hand-milling, you get to add more great ingredients the second (or third) time around to make for a much more luxurious bar. I’m learning to control my oil content, because too many free oils ruin the creamy lather that I love. I’ve made natural bar and liquid soaps that beat most of the in-store brands that I’ve tried. Cold process and melt-and-pour creations don’t fit my research and development scheme for my line. Maybe, I will try those methods for fun. In the future, I’d love to master the art of beer and wine soap-making.
Absolutely, once you try handmade soap it’s hard to go back to store-bought. Also, this post can help with your beer and wine soapmaking: https://www.soapqueen.com/bath-and-body-tutorials/tips-and-tricks/how-to-use-alcoholic-beverages-in-cold-process-soap/
Hi, I absolutely love hot process. Quick and instant, I can use a soap just after a day or so! I am a big fan of pure castile soap made 100% from extra virgin olive oil. I had made a batch recently and it is excellent – love to use it as all-in-one bar for body and hair. By the way my hair feel fantastic, no need to use any conditioner – never had shinier hair.
How can I make it looking less rustic as some people may not like it at all and also when can I add essential oils – my hubby would love to have some fragrance in our castile soap.
I would recommend giving sodium lactate a try. When you add 1 teaspoon per pound of oils to your lye water, it helps make the hot process soap more smooth and fluid. That can help with the rustic appearance. Learn more about sodium lactate here: http://www.soapqueen.com/bramble-berry-news/sunday-night-spotlight-sodium-lactate/
It also helps to spoon your soap in when it’s just finished and still soft. If it’s cooked a bit too long, it can take on a rough appearance when it’s being scooped into your mold. Also, make sure to tap the mold on the counter frequently when you’re spooning it on to smooth everything out and get rid of air bubbles.
You can add essential oils as well, we recommend adding them when the soap is finished cooking. Learn how much to add with our Fragrance Calculator: http://www.brambleberry.com/Pages/Fragrance-Calculator.aspx
This video has more on hot processing soap as well: https://www.youtube.com/watch?v=mxTXwxbpzLM&t=324s
Thank you very much for your advise. 🙂
You add essential oils at the very end once your soap has a neutral ph. You can test the soap with phenolphthalein drops. If it turns light pink there is still a bit of lye left but if it turns dark pink there is more and it needs to cook at least another 30 minutes and retest. An woman in Alabama called Kimberly McNutt does youtube videos on hot process soap.
I’m getting ready to get started with soap making and here’s my question: Do I need to have different pots and pans/crock pot, blender, etc for soap making? Would the lye or anything else poison my pots so to speak? Thanks!
Yes, we do recommend having one set of tools for soap and another for food. Even with thorough washing, lye and fragrance can get stuck in cracks in the tools, which means you can accidentally ingest them. It’s best to be on the safe side and not use soaping tools for food.
I’m SO excited to get into soapmaking! I love the Soap Queen’s videos and I’m eagerly awaiting my first batch of supplies to get started.
Two questions, please?
1. I bought a silicone mold from Ebay. It would hold about as much batter as a loaf of bread. It’s quite flimsy. I’m wondering it if it has to be put in some kind of wooden box, like you show in your videos? Or is typical-thickness silicone sufficient to hold its shape?
2. I’ve made candles for years, so I have many candle molds I could use. We use a releasing spray (probably toxic or something!) inside the molds, which I presume are aluminum, as are my pans and pour pot. You write that it’s dangerous to mix lye with aluminum, but this would only be used in the very last stage of the process, as a mold. Should I NOT use my candle-making molds or can I? I don’t understand yet.
Thank you for your advice and guidance. I’m looking forward to success with this. It looks like a lot of fun!
If the silicone mold is flimsy, you can place it in a box or in between something heavy, like a pair of books. That will keep it from bowing when the soap is poured in.
You don’t want to use any aluminum during the soaping process. It can react with the lye and create toxic fumes. We recommend stainless steel, glass, or heat-resistant plastic tools and containers.
Find soaping containers and utensils here: https://www.brambleberry.com/Utensils-Containers-C593.aspx
I made my own molds from (3) pieces of 18″ long pine wood (1″x4″x6′ ) if you google Kimberly McNutt she has videos on how to make wooden molds. You line them with waxed paper. They have hinges at the sides and both ends so they open flat when the soap is dry. You could make a mold the same size as your silicone one and put it in the wood for support.
Why does melt and pour soap actually melt? What causes this to happen since it doesn’t happen with other methods?
Good question. Melt and pour soap is formulated with a higher glycerin content, which is what allows it to melt down with heat.
-Amanda with Bramble Berry
So is that a good thing then for the soap to melt with heat.
It is a good thing. The melt and pour soap is formulated so that it will melt.
Hi! I wanted to ask about hot process soap microwave method. Heres a link http://www.soapmakingforum.com/showthread.php?t=37276 Do you think that this method is fine to use? And will it be ready to use after a day?
We haven’t given that method a try so I’m not entirely sure. We’ve had good luck using the Crock-Pot and oven though. I’ll link some recipes using those methods below.
Lemongrass and Lavender Hot Process Soap: https://www.youtube.com/watch?v=mxTXwxbpzLM&t=1s
Snowdrop Hot Process Soap: https://www.soapqueen.com/bath-and-body-tutorials/snowdrop-hot-process-soap-tutorial/
Oven Process Soap: https://www.soapqueen.com/bath-and-body-tutorials/cold-process-soap/hot-process-series-oven-process-layers/
-Kelsey with Bramble Berry
I am new into soaping and tried making a melt & pour without alcohol & only glycerine. I saw a recipe on the net and followed the same. It was:
Castor Oil 144 grams
Coconut Oil 144 grams
Palm Oil 144 grams
Distilled Water 160 grams
Lye 66.04 grams
After Cook: 432 grams Glycerin
I followed all their instructions. Soap turned out well but I notice that all of it is sweating. I live close to sea in a humid climate.
Can I rebatch this lot?
What can I do to avoid such sweating in future? Reduce glycerine %?
Is there any other recipe to making melt & pour without alcohol or chemicals? Prefer going down the all-natural path.
Thanks for all your lovely guidance.
We haven’t done a lot of experiments with making melt and pour from scratch, so I’m not entirely sure why that’s happening. I do know that glycerin is a humectant and draws in moisture, which is probably the reason for the sweating. You may check teachsoap.com/forum to see if someone there knows more.
This book may be helpful as well: https://www.brambleberry.com/Making-Transparent-Soap-1-Book-P3732.aspx
-Kelsey with Bramble Berry
Hello Ann,
Can I use the Rice cooker to make hot process soap? I cannot find a slow cooker in my area
Rice cookers get pretty hot, so they may be tricky to use. The best temperature for hot process soap is around 160F, and rice cookers get up to 212F. So, if you give it a try, you may need to monitor the temperatures pretty closely. If it gets too hot, you can switch the cooker off and back on again when it’s ready. You can also use the oven: https://www.soapqueen.com/bath-and-body-tutorials/cold-process-soap/hot-process-series-oven-process-layers/
-Kelsey with Bramble Berry
can you make a batch of hot process soap with out fragrance and color, and store for a later use and then melt down and add color and fragrance like the melt and pour.
jen
You can if you like! You are essentially creating a rebatch base. Once you’re ready, you can grate the soap up and melt it into bars. Learn how to do that here: http://www.soapqueen.com/bath-and-body-tutorials/cold-process-soap/soap-queen-tv-presents-how-to-make-rebatch-soap-2/
When you store the soap for later use, any excess water can get trapped inside. So, you may want to cure your soap for around 4 weeks before storing to get rid of that water, or use the base within 1-2 months. 🙂
Learn more about how to store your soap here: http://www.soapqueen.com/bath-and-body-tutorials/tips-and-tricks/how-to-store-handmade-bath-products/
-Kelsey with Bramble Berry
I love melt and pour soap, mostly because I can find it easily at Michaels, and I’m a beginner soap and lotion maker. I also like the convenience of using the soap almost right away if I ever run out, and I don’t have to wait for it to cure. Although I love a good body wash (I make my own), I make and use melt and pour for when I run out of body wash ingredients and when I want to make sugar scrub cubes.
I love how quickly melt and pour is ready to use! Sugar scrub cubes are a great use for it as well. 🙂
DIY Violet Sugar Scrub Cubes: https://www.soapqueen.com/bath-and-body-tutorials/violet-solid-sugar-scrub-cubes/
-Kelsey with Bramble Berry
I love a lot of lather in my soap but also need moisturiser, I have made a couple batches of soap using 10 oz coconut oil, 16 oz olive, 6 oz grapeseed oil, 3 oz Shea, 3 oz of bees wax. It turned out okay but was wondering if you had suggestions to better it. Thanks for all your help
Absolutely! Some really moisturizing options include avocado and sweet almond oil. You can add those around 10-12% in your recipe. You can also use avocado butter at 12.5% or less. You can reduce the coconut oil to add some of those oils, or reduce the olive oil. Either way works fine. 🙂
Find more oil options here: http://www.soapqueen.com/bath-and-body-tutorials/tips-and-tricks/free-beginners-guide-to-soapmaking-common-soapmaking-oils/
-Kelsey with Bramble Berry
Avocado oil: https://www.brambleberry.com/Avocado-Oil-P3198.aspx
Sweet almond oil: https://www.brambleberry.com/Sweet-Almond-Oil-P3205.aspx
Avocado butter: https://www.brambleberry.com/Avocado-Butter-Solid-P3207.aspx
I love making the melt and pour technique, since my 7 years old daughter is too young to work with lye. So I have never tried the cold process method. but would love to try that..
Melt and pour is a perfect craft to make with kids! Cold process is a lot of fun too, hope you get a chance to try it out. 🙂
-Kelsey with Bramble Berry
hi… i just came accross this, and i want to know how long it would take for coconut milk and alovera juice to go bad in a melt and pour process(solid soap) plus can i make body wash using melt and pour process (with coconut milk, carrot juice and alovera juice) … my soap base is d African black soap… how long would it take fr d milk to go bad…
Hi Omah!
In melt and pour soap, milk will go bad in about 6 weeks. We don’t recommend adding it because it will spoil. You can read more about that here: https://www.soapqueen.com/bath-and-body-tutorials/tips-and-tricks/purees-fresh-ingredients-melt-pour-soap/
If your aloe vera liquid has a preservative, it should be fine to use and will likely last about a year in the melt and pour bars! However, too much can make the soap wet, so I would recommend about 1 teaspoon per pound of soap or less. 🙂
Aloe vera liquid: https://www.brambleberry.com/Aloe-Vera-Liquid-P3704.aspx
-Kelsey with Bramble Berry
Thank you for all the information on here. It is so helpful!!
I do have a question with one of my first batches I have made. I took it out of the mold after 24 hours and noticed a lot of oil on top. When I cut it, there was just a few oily holes throughout the soap. Not on every bar though. Its been another day since I cut them, and the oil is starting to absorb more along the top and even with the few holes. Would I still have to rebatch?
If I do have to rebatch, what would add to absorb more of the oils?
Hi Natalie!
Sounds like the soap may be separating. That can happen for several reasons, most commonly heat. If the soap gets too hot the oil can pool on the top. The good news is that oil does reabsorb after a couple days! It sounds like it’s starting to, so your soap may be dry in a few days.
Can you tell me more about your recipe, what temperatures you soaped at and how you stored it? How long did you stick blend? I can help you troubleshoot and prevent the oil pooling in your next batch! 🙂
-Kelsey with Bramble Berry
I took a soap making class and so learned the CP method first. I love it for the amazing swirls – CP is still the method of choice for the soaper who likes design.
However, I now prefer HP. I find that the little tips made a world of difference- adding sugar, not stirring the pot, keep the lid on until you reach “apple sauce” phase. These small steps have really helped make my HP soap smoother. A big thank you to the generous global soaping community for sharing techniques.
Thanks for sharing your great tips Moi! I know other soapers will appreciate them. 🙂
-Kelsey with Bramble Berry
Weirdly I have never done melt & pour soap. I’m a massive control freak when it comes to my crafts, so not being able to have 100% control over the MP base isn’t really attractive to me. However, I do know that you can make your own base, to be used later on in MP projects. Since my kid’s getting old enough to be curious about soapmaking, but not old enough to exercise impulse control around lye, I’m gonna start looking into this. What would y’all recommend as a good MP base recipe? 🙂
You can definitely make melt and pour from scratch! It is a tricky process that does take awhile. We’ve tried a couple times and haven’t found a recipe we love. This book has more information on making it from scratch: https://www.brambleberry.com/Making-Transparent-Soap-1-Book-P3732.aspx
-Kelsey with Bramble Berry
I started out making hot process soap, and found that adding my essential oils after the batch had completed cooking was an effective way to prevent scent loss. I am not sure if this is recommended for fragrance oils, but I imagine the outcome would be similar.
I now exclusively make cold process soap because of the colorants and other additives I use in my recipes, but I will always love hot process for how quickly it speeds up the process!
One of my first batches of hot process, I added the fragrance & essential oils before starting cooking. All the scent was lost and I was 100% just blown away by having wasted it. However, when I’ve made HP and added the scent after the “mashed potatoes” have been thoroughly “cooked,” the scent remains strong. Never had a problem with EO nor FO when adding after cooking.
Adding the scent at the end of the cooking process definitely helps! It ensures the scent doesn’t get “cooked off” and stays nice and strong. 🙂
-Kelsey with Bramble Berry
Agree, add EO or FO after the cook. I also put my additives in last. Scent stays stable and lasts longer (high five!)
I started with melt and pour. On vacation in San Diego area and walked into store that sold everything I thought it would be a fun craft with my kids and it was. I started making cold process a few years ago after getting tired of shelling out money for liquid castile soap. I purchased everything I needed read a one page instruction from e how and it totally flopped. I put it all away for a while and started reading everything I could about how to do it including your book and videos and have gotten pretty good at it. My funniest flop was selecting the buy button on Soap Queen and assumed that you sent exactly weighed out ingredients. Needless to say it didn’t take me long to realize that I had made a mistake. It all went in the trash. I’ve grown a little smarter I think and really love making soaps that have purpose and sharing them with my family and friends I even sale some here and there. I like to encourage others to make there own and tell them to go to U tube to watch your 3 how to videos first. I love it when they do and come tell me about there first time. I admit that I’m a bit of a hobbyist I have way to many. Yesterday I cut out wooden Christmas Trees for my wife she is painting them I will post pictures of the finished project tonight. So it’s off to church then I can make soap all day since my wife has plenty of painting to keep her occupied all day. By the way I hate to paint not on my list of favorite things to do.
That sounds like an awesome project Ray! Thanks so much for recommending our videos as well. Research and practice will really help hone your soapy skills. 🙂
-Kelsey with Bramble Berry
I started with CP then went on to other crafts and used MP for mainly little gifts or for our family. Sometimes the options seem so overwhelming (a good problem). This was a very helpful article. I want to get very good at doing CP so that I have a consistent, pleasant recipe that I can depend on as my “base”. I just had my first run-in with DOS on one of my earliest batches (I keep a bar of each to see how things go over time). I didn’t see the lack of problems with DOS in the PROs on MP. Isn’t it less likely to sprout DOS? Again – loved the article! We lived in blessed soaping times!
Eventually, melt and pour can develop DOS. However, it usually takes quite awhile! We recommend using the bases within a year. After a year the bases can dry out and may eventually develop those spots. Storing them in a cool, dry place helps prolong that shelf life. 🙂
Read more about storing your products here: http://www.soapqueen.com/bath-and-body-tutorials/tips-and-tricks/how-to-store-handmade-bath-products/
-Kelsey with Bramble Berry
I’ve done mp and cp but just made my first hot process today! What are some of the best additives to stir in before putting it in the mold? Would milk powders work, or maybe beer?
Adding milk powder and beer at the end of the cook can be tricky. Because the recipe is mostly done saponifying, the milk and beer may not turn into soap. That means they may eventually spoil in the batch. If you do add them, I would recommend adding them a bit earlier! Keep in mind the milk and beer may discolor a bit because of the heat. They will feel really nice though. 🙂
Read more about using beer in cold process soap here: https://www.soapqueen.com/bath-and-body-tutorials/tips-and-tricks/how-to-use-alcoholic-beverages-in-cold-process-soap/
And milk in cold process soap here: http://www.soapqueen.com/bath-and-body-tutorials/tips-and-tricks/how-to-add-lye-to-milk-for-cold-process-soap/
-Kelsey with Bramble Berry
Cold process is my favorite, too because all the design possibilities, but hot process is a very close second. HOWEVER, cold process oven process (CPOP) combines the best of the two!
Exactly, the best of both worlds! 🙂
-Kelsey with Bramble Berry
CPOP Swirls: https://www.soapqueen.com/bath-and-body-tutorials/cold-process-soap/hot-process-series-cpop-swirls/
I love making and experimenting with cold process. Like you said the sky is the limit. If you can dream it you can soap it. Well try too☺
Exactly! There are so many possibilities. 🙂
-Kelsey with Bramble Berry
I am a die-hard hot process soap maker. With all of the new techniques to make hot process soap, the bars don’t have to look rustic unless you want them to, and you can swirl and layer to get the same effect as cold process. Instant gratification is awesome!!
Britni – do you (or the wonderful Soap Queen folks) have any recommendations (or favorite soapers websites) – that would help someone learn how to make the HP soap less rustic? I don’t mind the rustic look/feel, but I sure do love the swirls and such in CP. I’ve seen a couple of videos on using the stick blender through the process – but with lots of warnings it can burn up your blender – so have been a bit cautious about trying those.
I’ve never done the SBHP method because I feel the same about my stick blender! Ridgeway Soapworks has a blog, and that plus a lot of YouTube videos is how I finally got my soap to be fluid, I actually just did a 5 color hot process that turned out beautifully. I hold back an ounce of liquid per pound of oils from my lye solution, add that at the end along with coconut milk and kaolin clay. I also add sodium lactate to my lye solution. I hope this helps!
I’ve been experimenting with getting hot process soap to be more fluid. So far, what’s been working pretty well, is to first keep the hardness in the recipe under 40. Then, after the cook, add (for 1.5 lbs oils); 5g raw sugar dissolved in 10 ml water, 1.5 tsp Na Lactate, 1.5 oz glycerin, and 2 tbsp plain Greek yogurt. I also add the 5% superfat after the cook. If I’m doing multiple colors, I have a second, large crock-pot with hot water in it (~150F). I keep the containers of colored soap in the hot water between pours to help keep them fluid. I just saw someone use Ever-clear to make their soap even more fluid so I will be trying that next. I prefer HP to CP mainly because the clean up is so much easier but I really love swirls!
I’ve been experimenting more with hot process and really loving it! Sherry, we love using sodium lactate because it helps make the soap fluid and smooth. We used that in the Snowdrop Hot Process Soap: https://www.soapqueen.com/bath-and-body-tutorials/snowdrop-hot-process-soap-tutorial/
Also, we have seen some of the tutorials on the fluid hot process but haven’t personally tried them. I would recommend checking out YouTube! There are some great tutorials on it. 🙂
-Kelsey with Bramble Berry
When do you add sodium lactate to hp soap and how much do you add?
We like to add the sodium lactate to our cooled lye water, just like working with cold process soap. We use 3% of the oil weight to help produce a smoother bar.
-Amanda with Bramble Berry