Our Soap Crafting Club had a little bit more of a challenge than we planned for this week. When reports of failing batches came in on the private Soap Crafting forum, we knew something was wrong. After all, the recipe that we were making (Tie Dye from the Soap Crafting Book) had been made at least 8 times and gone through 2 photo shoots and 1 video shoot. It was designed to be fail-safe. We tracked down the culprit to a mis-manufactured fragrance oil that was sent out to the entire group of soapers. Oh dear, chaos, sturm und drang.

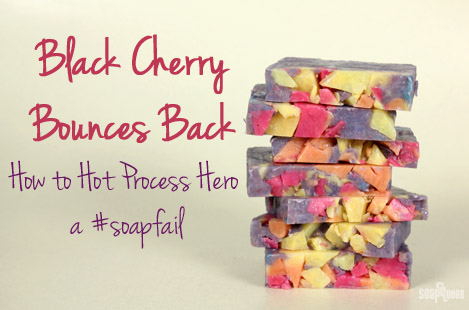
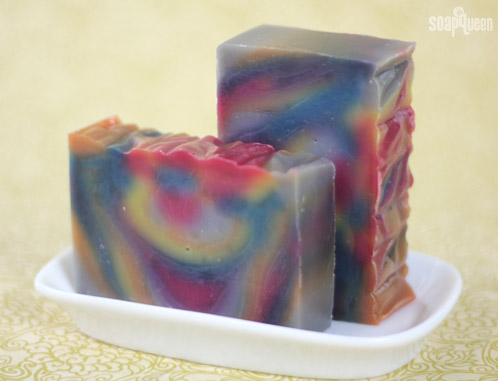
Let’s use this experience to turn lemons into lemonade; soap alongside me as I show you how to Hot Process Hero this crazy batch of soap into something usable, and dare I say, even uniquely lovely? To start, this is what we were after:

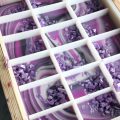
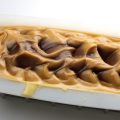
And this is what we got…

ONE: Clearly that batch is in serious need of some help. Despite its appearance, the soap and the culprit fragrance are totally soap and skin-safe. Let’s get started! Wearing all your safety equipment in a well-ventilated area, drain off any extra oils that have pooled on top of the soap into a stainless steel pot. Then unmold the soap.


TWO: Chop the soap into small chunks. You might also want to cover your work surface with cardboard to absorb any extra oil from the soap. Though this recipe does not have any extra lye present, not all recipes have the same variables. This recipe is just oozing a teensy bit of oil and looks a little rough.

THREE: Turn your burner on a medium setting and begin adding the soap. I added just a few ounces at a time. Your pot must be 3x larger than the batch size because you need a lot of head space for this process.

Tip: Can you use a cooking pan for this? Technically, you can. After all, this is actually soap. It’s real-deal, fully-reacted soap. It’s like putting soap in your pot. Now, do you want to use a cooking pan for this? Meh, probably not. The fragrance oil can work its way into the small etchings in pots and your batches of rice and pasta will taste like fragrance oil for a few cook-throughs. I know this from experience!
FOUR: Save a few colorful chunks to press into the top later to add interest and drama to your soap.

FIVE: Stir the pot while you slowly add the remaining soap chunks. If the mixture gets too dry, add 2 – 4 oz. of distilled water. If the soap starts smoking, you can decrease the heat or add a bit more water.

SIX: Keep stirring and cooking the soap down. After about 20 minutes, the soap will start to thicken into a gloppy oatmeal-like texture. That’s what you want. You want to keep your soap hydrated, so you may need to add a little extra water if you notice any cracking or if the mixture turns to a clay-like consistency. Keep in mind that the more liquid you add, the softer the soap will be, and the more difficult to pop out of the mold. I recommend adding water 2 ounces at a time.

SEVEN: When the entire batch is mostly consistent in texture and color (no oil leaking, no strange looking globby spots), you are ready to glop. Use gloved hands or place wax paper down on the soap to press a flat top.

EIGHT: Press chunks of colorful soap (from Step Four) into the soap.

NINE: Allow the soap to harden for 1 – 2 days. After that, it is ready to cut and use right away since it’s gone through a full hot process phase — no need to wait the traditional 4 to 6 weeks! Keep in mind, this technique works for any failed batch of soap! No matter how far gone you think a soapy project may be, there is almost always a way to fix it =)

Bonus: We took Instagram videos of the entire process. Check them out!


I made this tie dye soap from the soap crafters book loved it. I used a different fragrance so didn’t have this problem. I have had success with rebatching soap and use the crock pot method. I love the way they turn out. I had some older soaps that I grated up and made them into something new. This is the perfect way to remake soap gone bad. Thanks for sharing it.
Hi Lori!
I’m so glad you liked this tutorial. 🙂
-Kelsey with Bramble Berry
Hi. Thank you for the recipe.
I have followed all the above steps in order to save a failed soap (it had too much oil on the surface)and I have let it sit in the mold for 2 days. However even after 2 days the soap is still a bit soft. I was wondering if the soap will become harder when I’ll cut it?
Thanks,
Eliza
Hi Eliza!
It’s possible that your original recipe did not have enough lye in it, which is why you had too much oil on the surface. The video below has a great explanation regarding why having the right balance of oils, water and lye is so important! 🙂
Superfatting Soap: An Explanation:
http://www.soapqueen.com/bath-and-body-tutorials/cold-process-soap/superfatting-soap-an-explanation-2/
Your soap won’t be really hard for about 6 weeks or so. Four to six weeks is the recommended time to allow your soap to fully cure. I would recommend giving your soap more time in the mold (about a week, maybe a little more). Then attempt to cut it, and allow it the full cure time. I hope this helps 🙂
-Amanda with Bramble Berry
Can you add another fragrance or eo?
Hi Valerie!
You could definitely add another fragrance or essential oil :). I recommend adding it when the soap is a thick paste consistency.
-Amanda with Bramble Berry
I haven’t had a chance to use the kit yet, then I read about all the problems, and now I’m tempted to do it on purpose just because I like this look much better than the original (not that the original isn’t pretty, but I guess this one is more “my thing”, so to speak)! Oh, and it’ll be a good learning experience for the inevitable future batch that goes wrong…
Hi Karin!
The hot process soap is quite pretty! If you want, you could skip the “oops” cold process step and go straight to the hot process! You may enjoy the blog posts below which feature the hot process technique 🙂
Hot Process Oven Process Layers:
http://www.soapqueen.com/bath-and-body-tutorials/cold-process-soap/hot-process-series-oven-process-layers/
Crock Pot Camo:
http://www.soapqueen.com/bath-and-body-tutorials/cold-process-soap/hot-process-series-crock-pot-camo/
-Amanda with Bramble Berry
The soaps look great. I like them better than the original thought. The hot process soaps have more personality
Hi Julie!
Thanks so much for the kind words and support! We were pretty happy with how this project turned out 🙂
-Amanda with Bramble Berry
I was curious if there is any scent left in the reprocessed soap. Did you add more fragrance after the cook?
Hi Pam!
The majority of the mis-manufactured fragrance was cooked out. Because of this, the final hot processed soap does not have much scent to it. We did not add additional fragrance, but you can! We recommend adding additional fragrance once the soap has melted down to a thick, mashed potato texture 🙂
-Amanda with Bramble Berry
So, I will be receiving a bottle of Black Cherry FO tomorrow. Is there a problem with this FO? Or was it a special blend for this group?
Hi James!
Only a small amount of the Black Cherry fragrance was mis-manufactured. We will be contacting customers who received the mis-manufactured fragrance. If you purchased the fragrance after March 13th, there is a possibility it may be bad. If so, look out for our email which will contain instructions on what to do next 🙂
-Amanda with Bramble Berry
Can I say that I really like the end soap (not that the intended soap wasn’t really pretty). I am almost tempted to “mess up” a batch for the end product. Or is that just weird? 🙂
Hi Lyssa!
I’m so glad you liked the end result of this soap! I really like it too :). While I normally don’t advocate messing up a batch of soap to later “Hot Process Hero” it…I can understand why you would want to, it’s a cute bar of soap!
If you like the look of hot process soap, I would probably skip the “oops” cold process, and just go straight to hot processing! Here are a few tutorials you may enjoy 🙂
Oven Process Layers:
http://www.soapqueen.com/bath-and-body-tutorials/cold-process-soap/hot-process-series-oven-process-layers/
Crock Pot Camo Hot Process:
http://www.soapqueen.com/bath-and-body-tutorials/cold-process-soap/hot-process-series-crock-pot-camo/
-Amanda with Bramble Berry
I’m confused…..won’t the “cut up chunks” still be raw soap? Is that safe to use right away?
Hi Lauri!
The soap that we cut up into little pieces went through the saponification process, so there is no raw soap :). Additionally, adding heat to the process makes the soap go through a modified hot process technique. The original soap was made with a fragrance not appropriate for soapmaking, which resulted in the unpleasant texture, but it is perfectly safe to use :). Instead of throwing the soap out, we decided to hot process the soap, to make something pretty :).
-Amanda with Bramble Berry
Love how the HotProcess soap turned out! I was unlucky enough to use this FO so I may just HP it!
Hi AnnaRose!
I’m so glad you liked the end result of this rebatch. I agree, I think it turned out great! I’m sorry to hear you used the mis-manufactured fragrance, I hope that you end up rebatching it! While it’s definitely not the same as the original project, at least that way you don’t have to throw away your soap! 🙂
-Amanda with Bramble Berry
LOVE how your newly hot-processed soap ended up – cute as can be! Thank you for working so hard to make the class fun, and help out with quick solutions for a problem that was not even your fault. I really do hope the fragrance co. comes through for you and reimburses you for any losses! I LOVE these classes! Best Christmas/Birthday gift I’ve had in years! 🙂
Thank you Jill. And, thank you for all your positivity and helpful hints in the classroom. I was just reviewing all the comments this evening to make sure no one had gotten left out and I hadn’t missed anything, and your comments are helpful, positive and calming. I really appreciate it. =)
It’s a bummer that this happened on such a huge scale, but way to turn it around! This was supposed to be learning experience, and don’t we learn more from failures than successes? I’d love to see some photos from the class’s salvaged soap batches.
Hi Megan!
Thanks for the support! You’re so right, you can often learn so much more from failures than successes :). We have seen a few nice salvaged batches so far, maybe we can add them to the post!
-Amanda with Bramble Berry
Thanks for putting this tutorial together so quickly. All of the photos and the videos help me picture how to do this better now – if I have a messy soap, I’ll know what to do!
Is there a time limit on when you can recover a failure with this method? I’ve heard 24 hours … if you go past that, is it considered to be a rebatch? This method and rebatch look very similar. How are those methods different?
Thanks!
That’s a great question. Technically, if you go past the 24 hours, you’re really starting to get into more of a rebatch arena – primarily because of the consistency of the soap.
Soap that has been really, really freshly made – within a few days – glops down / melts down pretty easily with a little water and heat. If the soap is older than that, it takes more liquid and doesn’t quite melt down / glop down as smoothly.
When it doesn’t glop down as smoothly, that’s fine but it really hits rebatch territory at that point with requiring more liquids and thus, more dry out time.
I was able to make the above soap at 10 a.m. this morning, have it popped out of the mold and photographed by 3 p.m! That’s pretty fast turnaround time for a batch =)
Oh no! Nothing like having the problem broadcast to a whole group like that! Having a class go bad is no fun, but everyone got to learn an important extra technique! In some ways I really like the look of your rebatched bars better than the picture of what you were actually going for.
Hi Margaret!
I really love the look of our rebatch too! It reminds me of pebbles or gemstones :). You’re so right, while it’s unfortunate that the fragrance was mis-manufactured, we hope that everybody will be able to save it and still make something they are happy with…or at least not have to throw their soap out 🙂
-Amanda with Bramble Berry