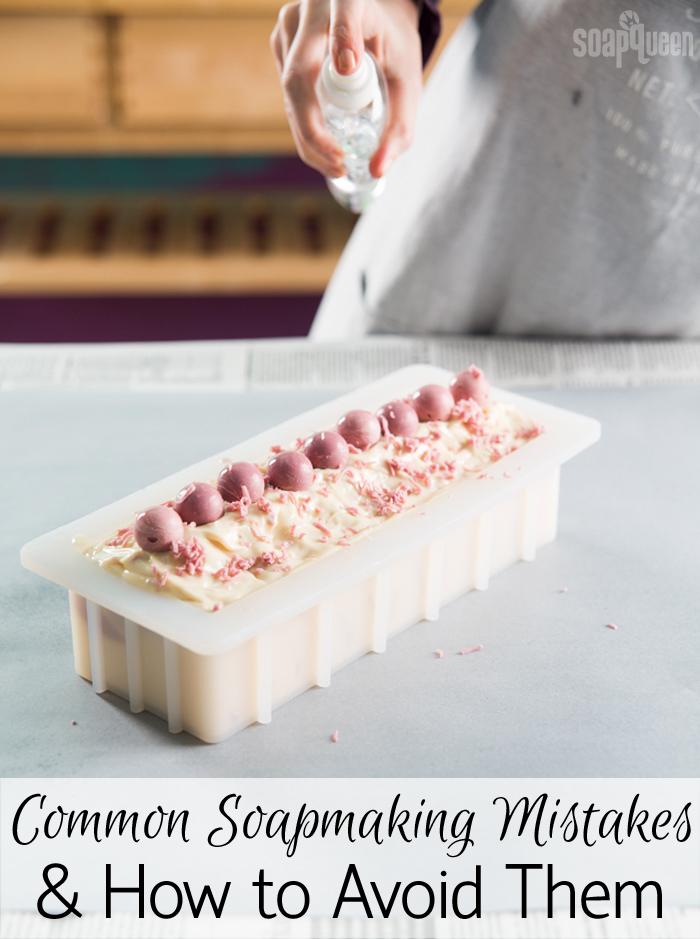
 Photo by Lara Ferroni.
If you’re new to soaping, the process can seem a bit overwhelming. You can learn how to make soap and, with all the resources out there for free, never leave the comfort of your own home to do so =) There are multiple factors to take into account like temperature, equipment, what mold to choose, etc. However, cold process soaping is easier than you think! Once you get started you’ll never look back and this guide is here to help you short-cut mistakes I made when I was just starting out.
Whether you’re a beginner or an expert soapmaker, mistakes happen every now and then. Below are some of the most common mistakes and how to avoid them. The following tips will help the process go smoothly so you can get great bars every time. =)
Not researching before getting started
Preparation is key when it comes to soaping. First and foremost, it’s important to know how to work with lye. Sodium hydroxide is safe to use as long as you handle it properly. Learn how to work with lye in this Soap Queen TV video. It’s also important to research what equipment you’re going to use, what recipe you’ll be making, what colors and fragrance you’ll use, etc. The Soap Queen blog (this blog!) is full of resources that cover all those topics. The Beginning Soaper Resource Roundup has everything you’ll need to get started. The Back to Basics series is helpful as well. It has information like how temperature affects soap and how to choose a mold. The series also features simple beginner recipes. Check out the Back to Basics roundup here.
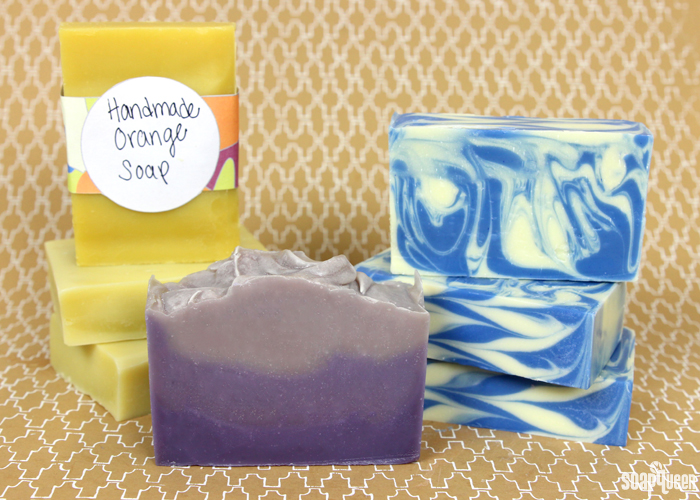 The Back to Basics Series features beginner-friendly recipes.
Not preparing ingredients and soaping area ahead of time
Once the lye is poured into the oils, things start moving quickly. There isn’t a lot of time to try and mix colorants or measure out fragrances once the soap hits trace. Having everything ready to go and easy to access will help everything go smoothly. It also helps you remember to add each ingredient. Before getting started, arrange all the tools you’ll need – whisks, bowls, spoons – on your soaping area. Then, make sure to disperse powdered colorants and measure your fragrance or essential oil in a glass container. Click through the Soapy Session Preparation and Setup Guide for more tips.
 Making sure your soaping space is prepared is important.
Not testing new ingredients
Each ingredient added to the recipe will affect the final bar of soap. For instance, adding a high percentage of olive oil makes softer bars than a recipe with a high percentage of hard oils, like coconut. Learn more about oil percentages in the Formulating Cold Process Recipes post. A lot of olive oil can also affect the color of the soap. If the soap has a yellowish tint from the oil, it can morph the colors in your batch. For instance, a blue colorant will turn green when mixed with the yellow base. The How to Get Vibrant Colors in Soap has more information on that.
Fragrance oils also affect the soap. Certain fragrances can accelerate trace or cause the soap to separate or rice. That’s why it’s important to test new fragrances, colorants or ingredients in your recipe before making a larger batch. You can see how the item performs and adjust if necessary. The 4″ Silicone Loaf Mold holds 20 ounces of soap and is perfect for small test batches. It’s also important to get your ingredients from a reputable source. We test all of our ingredients multiple times in cold process soap to ensure they perform well.
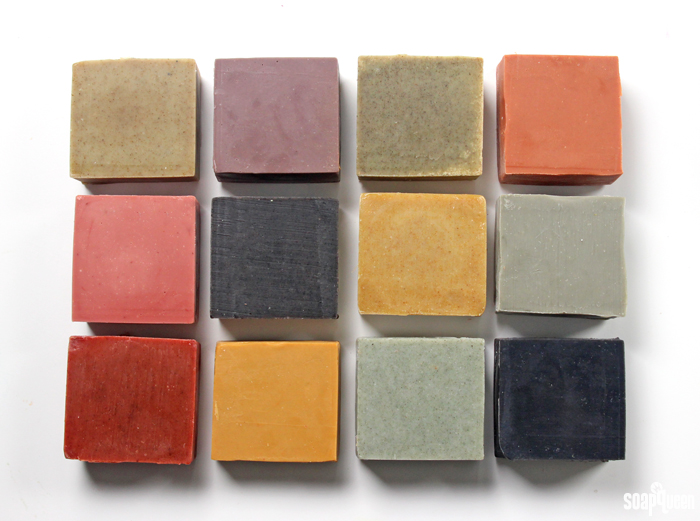 These natural colorants were added in small test batches to see how they perform.
Getting discouraged
Even with the best research and preparation, mistakes can happen. I have had my fair share of mishaps! It can be frustrating to have a batch that didn’t turn out exactly like you planned. Don’t get discouraged. Each mistake is an opportunity to learn and improve on your next batch. It may sound cliche, but practice makes perfect. The best part about soaping is there are so many ways to save your batch. Is your soap separating? Use the Hot Process Hero Method to emulsify it. Forgot to add fragrance? You can rebatch the recipe and add the fragrance or essential oil. If the design didn’t turn out like you planned, the soap will still feel amazing on your skin. Keep trying until you get it just right.
 The Black Cherry Soap Tutorial shows you how to save separated soap.
What are your favorite soaping tips and tricks? Check out fellow soapers’ tips in this blog post.

Hi! Wondering if you can help. I made a batch of liquid soap using a slow cooker and the brambleberry calculator. I used lard, coconut oil, and sunflower oil with lard having the larger percentage and sunflower oil the lower. I added a tablespoon of honey when the mixture reached trace and stirred for a few minutes more before switching to a spoon. After waiting for the cook time and stirring occasionally, the soap did not pass the clarity test so I kept cooking it for an extra two hours at which point I sort of got tired of waiting and added the water to dilute. The liquid soap now looks like condensed milk and even though it feels amazing on the skin and smells amazing, it cannot be used as a shampoo at all because it is very sticky. Any ideas as to what went wrong? I usually make my liquid soap with olive oil and a small percentage of coconut oil but I wanted to experiment with other oils. Not sure what happened.
We haven’t worked a lot with liquid soap so I’m not sure, but I’m wondering if it may have needed more cook time. Our liquid soap batches took up to 12 hours to fully saponify.
My soap are getting more to a stage where I want it to be but I keep getting soda ash ontop…
How do I get rid of that?
Chané, South-Africa
There are a few ways to get rid of soda ash. It helps to use higher temperatures (around 120-130F) and pour the soap when it’s at a thicker trace. Once it’s in the mold you can spray it liberally with 99% isopropyl alcohol.
Get more tips for preventing soda ash and how to wash it off your bars here: http://www.soapqueen.com/bath-and-body-tutorials/tips-and-tricks/explaining-and-preventing-soda-ash/
A water discount really helps as well. This post tells you how to calculate that: http://www.soapqueen.com/bath-and-body-tutorials/tips-and-tricks/water-discounting-cold-process-soap-how-why/
Is rubbing alcohol included in the ingredient list when sprayed on top of soaps??
It doesn’t need to be included in the ingredient list. You spray a very small amount and it evaporates.
Hi There,
I think I really goofed! I made up my lye ahead of time, and then used oil amounts from a different recipe when it came time to make the soap. I used way too much oils for the amount of lye bringing me to about a 22% superfat, if I’m calculating it correctly… Coconut oil, palm oil, and olive oil were 27.3 ounces, Almond oil and castor oil at 4.55 ounces. Water 21.3 ounces, lye 10.65 ounces. It did come to trace and I poured. It’s been almost 24 hours, and it does seem to be hardening up a bit, and no oils floating about. But, it is still quite soft. Is this ruined? Is there anything I can do at this point?
Thank you so much!!
You can rebatch that soap, that may help: http://www.soapqueen.com/bath-and-body-tutorials/cold-process-soap/soap-queen-tv-presents-how-to-make-rebatch-soap-2/
I would recommend rebatching it with double the amount of a hard recipe. That will mix with the softer soap and create more balanced bars.
The Basic Rebatch is a good option: https://www.brambleberry.com/Grated-Rebatch-Soap-Base-Basic-P4540.aspx
Thank you so much! If we choose to rebatch, so we just add the difference in lye water?
You don’t want to add any lye water to the mix. The recipe has already turned into soap, so the lye water won’t – it will just stay caustic and can be harmful.
Rebatch uses already-made soap. By adding batches that are more firm, it will mix with the softer batch to create a more balanced bar.
This video has more information: http://www.soapqueen.com/bath-and-body-tutorials/cold-process-soap/soap-queen-tv-presents-how-to-make-rebatch-soap-2/
Thank you!
is it a big mistake when mixing the oil and lye just only using manual hand whisk (stir with hand)?
We definitely recommend a stick blender. Using a whisk usually takes at least 2 hours to get the soap emulsified, while the stick blender gets it done in just a minute or two.
Black Stick Blender: https://www.brambleberry.com/Black-Stick-Blender-P5245.aspx
I made my first soap with Wisk 3 weeks back, Used palm oil (70%) and coconut oil (30%)on Caustic soda. My Lye was very hot when I mixed with oils and it settled in 5-10mins. I’ll be testing the bar next week upon 4 weeks of curing time.
Sounds good. You can test it after 5 days: https://www.soapqueen.com/bath-and-body-tutorials/tips-and-tricks/troubleshooting-lye-heavy-soap/
How do i know which soaps I should cover ans insulate and which ones not to
It depends on your recipe, the temperature in your house, the results you want, etc. This post talks about when to insulate and has plenty of helpful tips: http://www.soapqueen.com/bath-and-body-tutorials/tips-and-tricks/when-to-insulate-handmade-soap/
I have to laugh. I just made a soap with an aqua mica. The fragrance I bought said slight discoloration. Well I didn’t notice the color of the fragrance was more yellow, so of course it turned my aqua to green the next day. I didn’t mind it so much. It gave my soap a camo look in my drop swirl. However, if I had known I wouldn’t have put the aqua mica oil for a swirl on top. It doesn’t go with the soap. It’s a more masculine scent. Showed it to a male to sample. He didn’t even notice. He loved it! Go figure.
We sometimes find that too – while we focus on soda ash or not-so-perfect swirls, the people we give soap to don’t notice. They’re mostly excited for the pretty colors and delicious scent.
hi, iam new soaper i dont know what mistake iam doing i made soap design swirl it looks nice after i got from mouid then after 4 weeks the design change you know,colour change become less concentrated,less demarkated.
I’m wondering if the colors may be bleeding. What kind of colors are you using?
Hi,
We are relative new to soap making. We use lard and our goat milk to make our soap right now. We have made probably 8-10 batches. The soap turns out usable but it’s always flakey. What are we doing wrong to get flakey soap?
Thanks!
How much oil, milk, and lye are you using? What temperature is your lye milk and oil, and how are you storing the soap? Let me know and I can help you troubleshoot.
Hi there, I am relatively new to CP soap making. This last batch I made came out essentially the way I wanted (minus the accidental trace acceleration) but when I unmolded it, there’s these gray spirals in it…I only used white mica and cinnamon for colorant. What could’ve gone wrong?
Do you have a picture of the soap? I’m thinking it’s glycerin rivers but a picture would be really helpful. You can message that to me on our Facebook page: https://www.facebook.com/BrambleBerry/
-Kelsey with Bramble Berry
Okay, I left a Facebook message!
I made some very pretty layered soaps for Christmas with curls on top. I was so excited as it looked great in the loaf!!! Surprise when I cut it it came apart in three layers. Red green and white tops with red and green curls!!! I was devastated!! I did use the red and green layers as guest soaps as well as tops but what made it separated? I used m/p shea butter. Help because I do want to try again. I just made 117 bars of soap for my very first craft show this weekend!! Real nervous but Ithink I’ve seen every tutorial on my IPad. Thanks for you help!! Love your thoughts
There are a couple tricks that can help your layers stay together. We recommend spritzing with 99% isopropyl alcohol right before the second layer is poured. If the alcohol is spritzed too early, it can evaporate. You want your layer covered with alcohol, but not completely soaked. Learn more about working with layers here: https://www.soapqueen.com/bath-and-body-tutorials/5-tips-layering-melt-pour/
Read more about 99% isopropyl alcohol here: http://www.soapqueen.com/bramble-berry-news/sunday-night-spotlight-99-isopropyl-alcohol/
Another way to help the layers stick is a nice sharp knife. I’ve found my layers separated on me when I used a dull knife, even with alcohol. I like using a sharp kitchen knife with a smooth blade.
For the soap now, you can “glue” those layers back together with melt and pour if you like. To do so, melt 1-2 ounces of clear soap on 5 second bursts. When it’s melted, brush a light layer on and gently press the separated soap on top. Let that harden for 1-2 hours. That should help your soap stick together.
I’m new to soap making, so I don’t know if this is normal or not. Each batch I’ve made has formed a white layer on top of the soap when I’m ready to unmold it. Am I doing something wrong after I pour it into the molds?
Are you making cold process or melt and pour soap?
-Kelsey with Bramble Berry
Cold process.
The best way to avoid this is to spray rubbing alcohol on the top of your batch of soap. Do this about 3 times, 30 minutes apart, for the first 90 minutes that soaponification begins. That white layer is commonly known as ashing. Spraying alcohol avoids the soap ash.
It does sound like soda ash, as Shannon said. Soda ash forms when unsaponified lye reacts with naturally occurring carbon dioxide in the air. The good news is it is just aesthetic and doesn’t affect the quality of your bars. Spraying with rubbing alcohol helps, as does upping your soaping temperatures and water discounting. Learn more here: http://www.soapqueen.com/bath-and-body-tutorials/tips-and-tricks/explaining-and-preventing-soda-ash/
This post has more on water discounting: http://www.soapqueen.com/bath-and-body-tutorials/tips-and-tricks/water-discounting-cold-process-soap-how-why/
-Kelsey with Bramble Berry
Hi, I’ve always been following this website because it made me learn a lot. last week, i was trying to make a melt and pour soapbase. so when i added the alcohol,the whole mixture overflowed and flooded the floor. i was just using the ethyl alcohol in the market. i dont know what i did wrong. but i was so discouraged so i stopped it for a while.
but i didnt cook the mixture for hours, as they advised (i cooked it for 30 mins,). was it the main reason why it made so much reaction when the alcohol was added?
We haven’t done a lot of testing with making melt and pour from scratch, so I’m not sure why that happened. Sorry about that. You may see if someone on teachsoap.com/forum knows more. 🙂
This book may be helpful as well: https://www.brambleberry.com/Making-Transparent-Soap-1-Book-P3732.aspx
-Kelsey with Bramble Berry
Hi Kelsey, thank you so much for responding. 🙂
SUSAN HERE
CAN I USE DOUBLE BUTTER TO MAKE HARD LOTION BARS AND IF I CAN WHAT SHOULD PAIR IT WITH?
Hi Susan! You can use extra butter to make the lotion bars firm. A typical bar ratio is 1:1:1 wax, butter and oil. Cocoa or mango are a good option because they are firmer butters. Wax will also make the bars harder, especially beeswax! Then, you can add an oil to make it feel nice and silky on the skin. Avocado or sweet almond is a great option. 🙂
This Lotion Bar Love recipe uses cocoa and shea butter: https://www.soapqueen.com/bath-and-body-tutorials/lotion/lotion-bar-love/
-Kelsey with Bramble Berry
I’m trying to get back into soaping after not doing it for a few years. I have had a terrible disaster today. I was making your favourite “lots of lather” recipe. I made the lye mixture and it hardly hit 100degrees c and the temp started dropping. I mixed it with the oil anyway and mixed it. It seemed to track quickly but not completely. A bit of the oil looked like it wasn’t mixing but the trace was starting to get quite thick. I mixed in your Moroccan mint fragrance oil which wasn’t mixing in as well as I’d hoped. I pit it in the mold and a minute later had a super volcano! I put it all back in the mold once it finally stopped. I can see some of the fragrance oil just sitting on top. I’ll just wait and see if useable (although not pretty).
Any inside into what went so wrong? I’m a bit gunshy to try again after today’s fiasco. I felt like the lye water should have gotten hotter as a start. Would it have heated more if I left it longer? Maybe I wasn’t patient enough with letting it just do its thing.
Anyways, thanks for any help you can offer.
I think the soap got too hot and caused that volcano! The 100 degrees is in Fahrenheit, not Celsius. Sorry for the confusion. You’ll want to soap around 46C. That will help everything mix together without getting too hot. It will also prevent your trace from getting too thick too fast. 🙂
If your soap now isn’t quite how you want it, you can rebatch it! Learn how here: http://www.soapqueen.com/bath-and-body-tutorials/cold-process-soap/soap-queen-tv-presents-how-to-make-rebatch-soap-2/
-Kelsey with Bramble Berry
Help. As per usual, a friend wanted a batch of soap. It was goats milk, olive oil and shae.
It was beautiful as I poured it. The next morning, there was an oil slick on top, and it cracked in two spots. What happened, and how do I correct it. I get the feeling the lye reacted with the milk.
Its usable, and I’m going to send my friend some of it, but I’m planning to rematch most of it.
Thanks
Hi Lisa!
I’m wondering if the soap overheated. When it overheats, it can crack and some of the oil can pool on top. If that’s the case, the oil should reabsorb as the soap cures. How long ago did you make the soap?
Read more about why soap cracks here: https://www.soapqueen.com/bath-and-body-tutorials/tips-and-tricks/why-did-my-soap-crack/
For milk soap, we like to soap at cooler temperatures and place the soap in the freezer for 24 hours. That prevents overheating! Read more about working with milk here: http://www.soapqueen.com/bath-and-body-tutorials/tips-and-tricks/how-to-add-lye-to-milk-for-cold-process-soap/
-Kelsey with Bramble Berry
Hi I’m hoping you can help me with a problem I’m not understanding how to fix, I’ve been learning how to make cupcakes but when I use color in my frosting it gets ash all over it and looks awful, I sprint it with alcohol and it doesn’t seem to matter, it kinda looks like snow but I don’t want that look, can you please give me some suggestions thanks
Hi Jerri!
Because soap frosting tends to be cooler, soda ash can form. You want to keep the temperatures lower so I would recommend keeping the method the same! You can remove the soda ash with steam or with a nylon afterward. 🙂
Read more about soda ash and how to remove it here: http://www.soapqueen.com/bath-and-body-tutorials/tips-and-tricks/explaining-and-preventing-soda-ash/
-Kelsey with Bramble Berry
Regarding expired products, i would also mention that lye has a shelf – life and looses potency when you open the bottle. So either do a master batch, or use all the lye at once. Don’t save part of a bottle for “next time.”
That’s a great tip Laura! Lye does have a shelf life of about a year. We have found the lye bottle can be used multiple times for recipes. Keeping the bottle stored in a cool, dry place in between uses helps it stay fresh. 🙂
Read more about expired lye here: https://www.soapqueen.com/bath-and-body-tutorials/tips-and-tricks/expired-lye/
-Kelsey with Bramble Berry
Great tips! I would add that even if something doesn’t go as expected, don’t give up. One of my best designs resulted when my trace accelerated quickly and swirling became impossible. I ended up with beautiful, defined, layers instead!
That is so true! Even if the design didn’t go as planned it will still look amazing. Sometimes the unexpected designs are even better than the original. 🙂
-Kelsey with Bramble Berry
Great tips! One more to add, I always test my immersion blender before getting started. It would be very discouraging to get all your ingredients ready, oils melted, etc. only to find out your blender would not start.
I’ll add one more to Cheryl’s: my immersion blender is very old and has done hundreds of batches so I went ahead and bought a new one. I alternate the new one and old faithful, but when old faithful finally dies, I still have the new one.
That is awesome advice, thanks for sharing Cheryl and Eric! Checking your tools beforehand will ensure everything goes smoothly. 🙂
-Kelsey with Bramble Berry
I would add this this – Not using fresh ingredients. I learned the hard way about using old ingredients that were past their prime. Not the usual results. Some soaps and lotions are OK, but don’t look or smell good. Now I mark recommended shelf life dates on ingredients when I receive them.
That’s a great tip Ann, thanks for sharing! Using fresh ingredients ensures your products have a longer shelf life. 🙂
Shelf Life of Bath Products and Ingredients: https://www.soapqueen.com/bath-and-body-tutorials/tips-and-tricks/shelf-life-bath-products-ingredients-rancidity-vs-mold/
-Kelsey with Bramble Berry
Nice article! I want to add one thing, excess use of essential oils and fragrance oil also cause irritation to skin. Thanks for sharing this!
That’s a great tip Rebecca! We recommend using our Fragrance Calculator for the correct usage rates. 🙂
Fragrance Calculator: http://www.brambleberry.com/Pages/Fragrance-Calculator.aspx
-Kelsey with Bramble Berry