Bramble Berry: Your photography is clean, professional and very artistically staged. Do you have any sort of art background or photography training?
Lisa: Oh my no. I’m such an amateur. I just do a lot of reading & researching. I’ve learned many tips & tricks about using natural lighting vs. light boxes and it’s helped me to fine tune the color and contrasts of my photo’s. I prefer to shoot images of my products using the ‘hero’ shot (a shot which shows product alone) rather than a styled shot (which uses other appropriate elements along with the product). There’s a great tutorial and how-to article on “The Storque” on Etsy here.
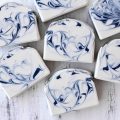
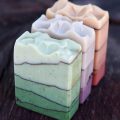
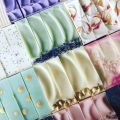
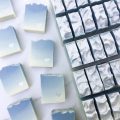
Lisa: You’d be surprised at how far my soaps have come in the 5 years that I’ve been making soap. The very first year I soaped, my bars were so small and skinny, it was embarrassing really. Again, through tons of reading until my eyes were bloodshot, I educated myself about fatty acid profiles (with the help of some VERY talented & more experienced soapers) and properties of oils and butters so that I eventually was able to formulate an incredible recipe for my soaps that made it easier to sculpt the tops of the logs after the pour. I’ve tweaked those recipes to perfection over the years and I’m happy to say that my current 3 soap formulas have been perfected and haven’t been tweaked in a very long time. Depending on the FO or EO used, some batches are thinner than I’d like, so it takes a little bit of patience to wait until the soap batter is thick enough to allow me to sculpt the tops. My trick? Simple, I use an ordinary kitchen whisk. Make the whisk your friend and you’ll be able to get very high whips, peaks and textures. I also purchased a ‘tank’ soap cutter from For Crafts Sake, which was made to my specifications. This allowed me to make sure my bars were all uniformly cut to a very thick bar. Everyone comments on the size of my bars. They’re quite large and heavy in comparison to most handmade soap.
I love to get creative with the tops after I’ve sculpted them, by using raw materials and ingredients that I feel compliment the name or scent of that particular soap. For example, on the cinnamon frosting soap, I thought that putting some cinnamon chips on the top of the soap after I’ve textured it, would be a nice touch that would draw the eye directly to that soap. It worked. Everyone loves that look and I’ve had other soapers ask me if it would be alright to try to duplicate that look themselves. Sure, I say…. “go for it.” There really are no original ideas, only the realization and fulfillment of an idea. Besides, every soaper puts their own twist on things anyway. Have fun, I say. Experiment, play around. That’s what’s so exciting about this craft, whether it’s just a hobby or your primary business. There are so many ways to do the same thing.
Bramble Berry:Tell us a little bit about your solid shampoo! The bars look great!
Lisa: Aaaah, my solid shampoo bars. One of my best selling b&b products. People love them because they’re extremely economical, great for traveling because there’s no leaky mess in a bottle to worry about, and they last forever. I could never understand the reason behind paying for a bottle of water (liquid shampoo). Such a waste. With our solid shampoo bars, there’s no waste, no bottles to clutter up landfills and you’re getting a product that not only is better for the environment, but it’s a fantastic product for the health and conditioning of your hair, if I do say so myself. You get a literal mountain of thick, creamy, foamy lather on your head with only 2-3 swipes of the bar. I’ve been going to an upscale spa for almost 10 years now to get my hair done and every time I go, my stylist remarks about how healthy & shiny my hair has become since I started making and using the solid shampoo and solid conditioner. It’s basically all the same ingredients that I would use in my liquid shampoo, minus the water. I use many different emollients for the conditioning that your hair needs, plus I add in the extra goodies like panthenol, hydrolyzed wheat protein and cocoa butter. The surfactants that I use are very mild and gentle and contain no harmful chemicals or sulfates. These solid shampoo bars will clean your scalp so well that you’ll be amazed at how fast your hair grows after consistent use of the product. We can’t even wait a full 6 weeks in between hair cuts in my household.
Bramble Berry:Your salt bar looks awesome! When do you add the salt? Is it a lot of salt? A little? Tell us more about the concept behind the bar.
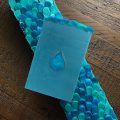
Lisa:Much to my own surprise really, I can’t keep my salt bars in stock. They sell very, very well. I say that I am surprised because I didn’t think that my customers would really ‘get’ what the salt bar is and how to use it. It’s not a regular bar of soap, it’s not a salt scrub. It’s a combination of the two. You won’t get tons of lather like you do with one of my bars of soap. Instead, you’ll get a lovely white, milky, lotiony effect. You won’t feel a lot of scrubbiness, it’s not harsh or overly abrasive. Rather, it’s very much like a smooth river stone would feel if you rubbed that on your skin. It’s very smooth. But don’t be fooled by that, you definitely will be exfoliating your skin and you’ll notice a healthy, radiant glow after stepping out of the shower with just one use. The idea behind the salt bar has been around for ages, but I’m fortunate enough to know an incredibly talented soapmaker who lives in Denmark, that openly shared her methods and techniques to perfecting the salt bar. Of course being the formulating tweaker that I am, I couldn’t leave well enough alone after reading and researching about this type of bar, so I came up with a few extra ingredients that I add in with the salt, to help give the bars that extra ‘umph’. I have my own technique and methods for making these bars, but I’ll have to keep those a secret for now. Haha! But if you want to try your hand at making your own salt bars, I’ll give you a few hints: Use a high % of coconut oil, as this is one of the few oils that will actually produce a lather in a salt environment, calculate the total amount of your oils/butters (NOT including the water & lye) and then use equal amounts of fine dead sea salt (do NOT use the iodized). If the salt feels too coarse to you, just throw it in your food processor or grinder. You don’t want a powder, but you don’t want large, rough chunks of salt either. Always use the FULL water amount suggested by your favorite lye calculator and superfat your batch at least 10%. I superfat mine at 15%. I soap using the cold process method, but for this soap batch, I use the CPOP method. Be prepared to move fast, because of the high salt content and depending on your scent choice, these batches set up very fast. Stick the whole log into the oven at 170 degrees for 2 hours, turn the oven off and let the log sit inside the oven for an additional 3 hours. Once you remove it from the oven, you need to unmold and cut right away, otherwise the salt content turns the log into a hard, solid brick very quickly and you’ll be unable to cut the log into bars. Voila, salt bars! Hope that helps.
We’ll have Part II of the Lissa from Arcadia Aromatics tomorrow.

Thanks for introducing us to her! I don’t have near enough time to peruse etsy to my liking so I love all these shops you find!
The first link to her website is broken however…it has 2 web addresses in the link, bloggers and hers. Just thought I’d let ya know!
Her soap creations are fabulous. I can’t wait to read the rest of the interview.
Just beautiful soaps she has created! Just lovely! Thanks for sharing her work and this interview!
Good. I need more. This is exciting. I am loving this interview!!
~Can we have more info on this CPOP method? Is this like hp? what type of mold (other than the silicon baking pans) can you put into the oven?
Andrea~