
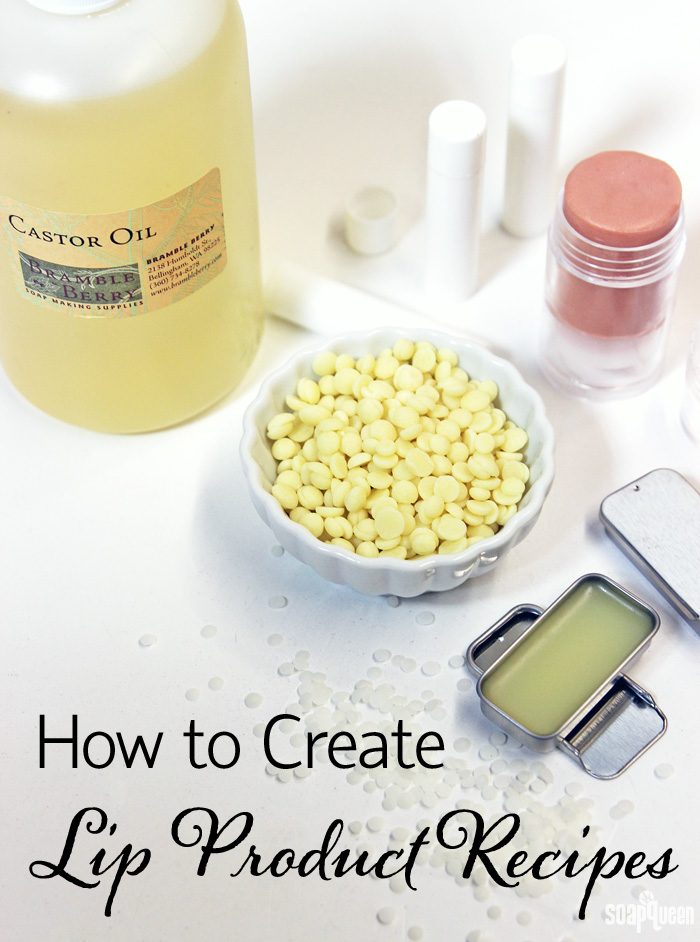
Creating lip products is one of my favorite things to do. They are simple to make, cost less to make than you pay in stores and bonus, are fun and efficacious to use. If you have never made lip products before, it can be tricky to know where to start. There are lots of different ingredients that you can use in your lip products, including various waxes, butters and oils. Luckily, there are no concrete rules to making lip products. It’s all about personal preference, which is why formulating lip recipes is so fun.
Lip balm, lip gloss and lipstick are often made out of similar ingredients, including several kinds of oils and butters. What’s the difference between these terms? Well, it depends on who you ask. Lip balm usually refers to a product with a solid yet spreadable texture. Lip balm may or may not contain color. Lip gloss normally refers to an extremely shiny and soft lip product, with or without color. Lipstick usually refers to an product that is heavily pigmented, with a firmer texture.

There are plenty of other terms used to describe lip products, including lip tints, sheer lipstick, lip butter, lip stains and more. The bottom line is these terms don’t have a concrete definition and mean something different to everybody. If you plan on selling your lip product, consider the amount of color and texture to name appropriately. For example, it wouldn’t make sense to call your product a lip tint if it contains no color.
Now, let’s get started formulating your product! Below are some of the most common lip product ingredients, along with the properties they add to a recipe. Lip products usually only contain oils, waxes and butters. Once water or a water soluble ingredient is introduced, an emulsifier will be needed. When you begin emulsifying water and oils, you’re on your way to creating a lotion. Because lip products do not contain water, a preservative is not necessary. Read more about preservatives in this post.
One of my favorite tricks for formulating lip recipes is the “Frozen Spoon Trick.” This trick is a great way to test the consistency, color and flavor of your balm as you go. Simply place a spoon into the freezer about 30 minutes prior to making you lip product. When you’re ready to test, dip the spoon into the melted mixture. The mixture will quickly harden on the spoon, which allows you to test the lip product on your lips. Then, you can add more oils, color or flavor to your preference. Click here to read more about the spoon trick.
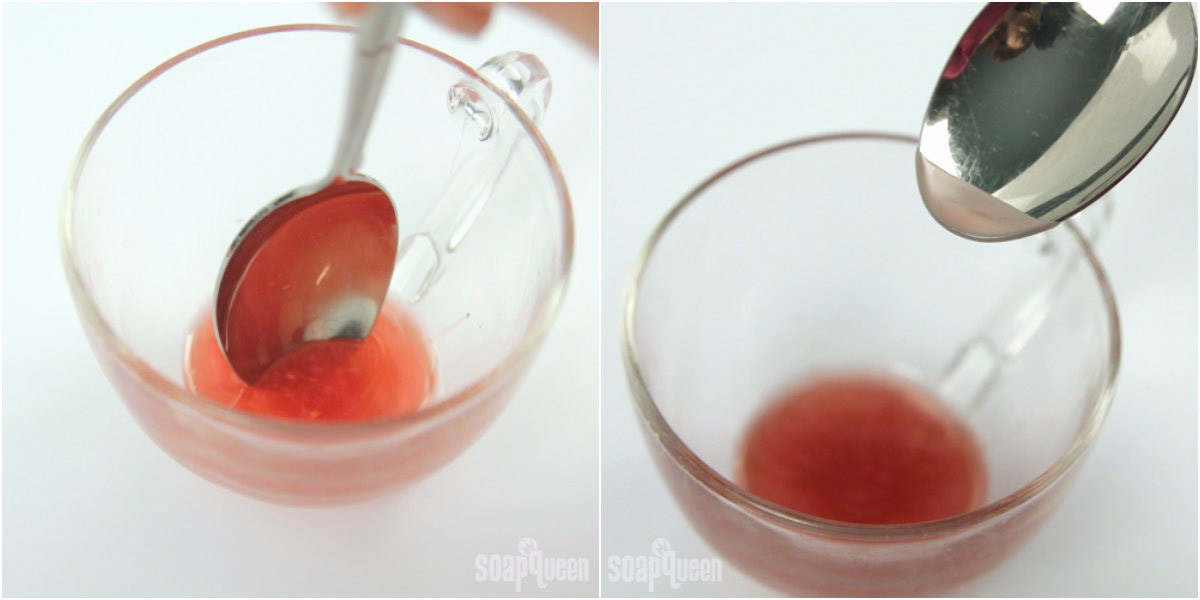 The frozen spoon trick is a great way to test your lip products!
A good place to start formulating lip balm is one part liquid oil, one part wax and one part butter. I have found this ratio usually leads to a firm yet spreadable balm. Of course keep in mind that butters, oils and waxes all have slightly properties. For example, adding one part beeswax will lead to a firmer balm than one part cera bellina wax. Check out the Making Lip Balm Soap Queen TV video, and then learn more about different wax, butter and liquid oil options below!
Butters
Various butters are great for adding firmness to lip balm recipes, as well as skin-loving properties. Solid at room temperature, many butters make great balms on their own, including avocado butter, mango butter and shea butter. In general, butters do not add as much firmness to lip products as waxes. When working with butters, you may want to temper the product to avoid graininess and to keep the butters smooth. Tempering involves heating butters and maintaining a high heat for a prolonged amount of time, about one hour. The product is then rapidly cooled, which results in a smoother butter. For more information on tempering butters, check out this blog post.
- Avocado Butter: Manufactured by the fruit of the avocado tree, avocado is a soft and creamy butter. It can be used straight for a soft balm. Avocado butter is a great substitute for shea butter. Find it in the Winter Lip Balm recipe.
- Cocoa Butter: Obtained from cocoa beans, cocoa butter has a wonderful chocolate-y aroma. It also has a slight neutral beige color. If you prefer a milder scent and color, try deodorized cocoa butter. Cocoa butter is a good substitute to beeswax if you’re looking to create a vegan product. It’s fantastic for creating a barrier to help retain moisture in the skin. Click here to read more about cocoa butter. Find it in the Vanilla Latte Lip Balm recipe.
- Mango Butter: Mango butter has a medium firmness; not too soft and not too hard. It’s softer than cocoa butter, but firmer than avocado and shea butter. It’s soft to the touch and melts when it comes in contact with skin. It can be used alone as a lip balm if you prefer a firm product.
- Shea Butter: Soft and creamy, shea butter adds a mild firmness to lip products. Shea butter melts on contact with the skin, making it a popular choice for lip products. Shea butter is a great substitute for avocado butter. Click to read more about shea butter. Find it in the How to Make Infused Lip Balm video.
Fixed Oils + Vitamin E Oil
Just about any fixed liquid oil can be used in lip product recipes, and many of them will behave very similarly. When adding fixed oils, keep in mind some contain a strong odor or color. For example, tamanu oil is not a popular choice for lip balms because of the dark green color and strong odor.
- Avocado Oil: Full of vitamin A, B1 and B2, avocado oil has a lightweight texture and neutral color. It helps give lip products a soft and spreadable feel texture. Find it in the Exfoliating Kisser Scrub recipe.
- Castor Oil: Castor oil is thick and rather sticky. It is great for adding shine to lip products. On the lips, it feels rich and smooth. It’s a great choice for lip gloss, or other shiny lip products. Find it in the Rosy Red Lip Gloss recipe.
- Coconut Oil: Coconut oil is solid at room temperature, which gives lip products a slight firmness. Find it in the Shimmery Ski Lip Balm recipe.
- Sweet Almond Oil: Full of oleic and linoleic essential fatty acids, sweet almond oil is lightweight liquid oil. It helps give balms a soft and spreadable texture. You can find it in the Making Lip Balm video on Soap Queen TV.
- Vitamin E Oil: Vitamin E oil is great for adding skin-loving benefits to your balm. It also has a thick consistency (similar to castor oil) and adds a small amount of shine to your product. Find it in the Honey Kisses Sheer Lipstick recipe. Learn more about vitamin E oil here.
Waxes
Waxes are great for giving lip products firmness. In general, a little goes a long way. Waxes have a higher melting point than most butters, which makes them a great addition if you need a heat resistant product. Be careful when melting down wax. Because it has a high melting point the container may become very hot and even explode. Many crafters like to use a double boiler when melting wax. Too much wax can cause your lip product to not spread as easily, or sit on top of the lips and not absorb.
- Beeswax (White and Yellow): Beeswax gives great firmness to lip products. Beeswax comes in two varieties, white and yellow. Yellow beeswax usually refers to a wax that has been fully refined, but not bleached. Yellow beeswax contains a natural smoky scent. White beeswax has been fully refined and bleached. This process results in a white color without the deep scent of yellow beeswax. Click here for more information on beeswax, including how to use it in other bath and beauty projects.
- Cera Bellina: A hydrophilic derivative of beeswax, cera bellina wax gives lip balms a unique gel-like texture. It provides an incredibly smooth feeling and lots of shine. It’s also a popular choice for thickening lotions.
- Candelilla Wax: A very hard wax, candelilla wax gives firmness and shine to lip products. It’s a great substitute for beeswax, especially when formulating a vegan product. Candelilla wax has a more brittle texture than beeswax.
Adding Color & Flavor
Once you have created a lip balm texture that you’re happy with, it’s time to play with color and flavor. Always make sure the colorant and flavor oil you are using are lip safe. The frozen spoon trick is a great way to test color and flavor as you go!
Flavor oils are fragrance oils that are specially formulated for the lips. The general usage rate of Bramble Berry flavor oils in lip balms is 1% to 3% of the total weight of your recipe. Flavor oils are unique in that they don’t actually add “flavor,” but instead give your product a smell. When the smell is combined with a sweetener, the flavor oils tricks your brain into “tasting” the flavor. Some flavor oils are already sweetened, while others are not. If they are not, you can add bleached stevia or Lip Smacking Sweet Flavor Oil. You can also use lip-safe essential oils in your balm, like Peppermint 2nd Distilled Essential Oil and Anise Essential Oil. Click here to read more about using lip flavors and essential oils in your lip balm.
When adding color to your balm, it’s all about personal preference. The key is choosing lip safe colorants. Both micas and pigments can be lip safe. Click here for a list of lip safe colorants. Micas have a finer texture than pigments and oxides, which makes them easier to blend into balm. Micas can be added directly to melted lip balm mixtures. To add pigments into your lip products you may want to have a mini mixer handy to work out any clumps!
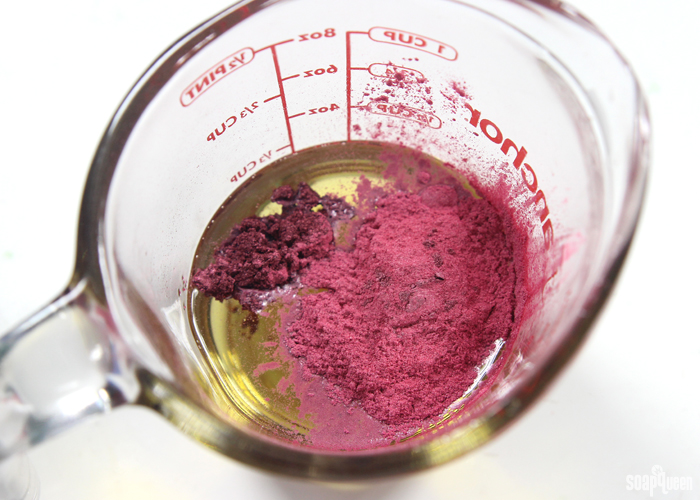 When working with micas, keep in mind they also add a hint of shimmer in your product, while pigments do not. Micas tend to add a more sheer color, while pigments give lip products more saturation. For a light tinted product, expect to use about 1 tsp. of mica per ounce of product. See an example in the Creamy Marsala Lip Tints recipe, which uses 1.5 teaspoons of Merlot Sparkle Mica into about 1 ounce of oils. For more saturation, expect to use anywhere from 3 to 6 teaspoons of colorant per ounce of product.
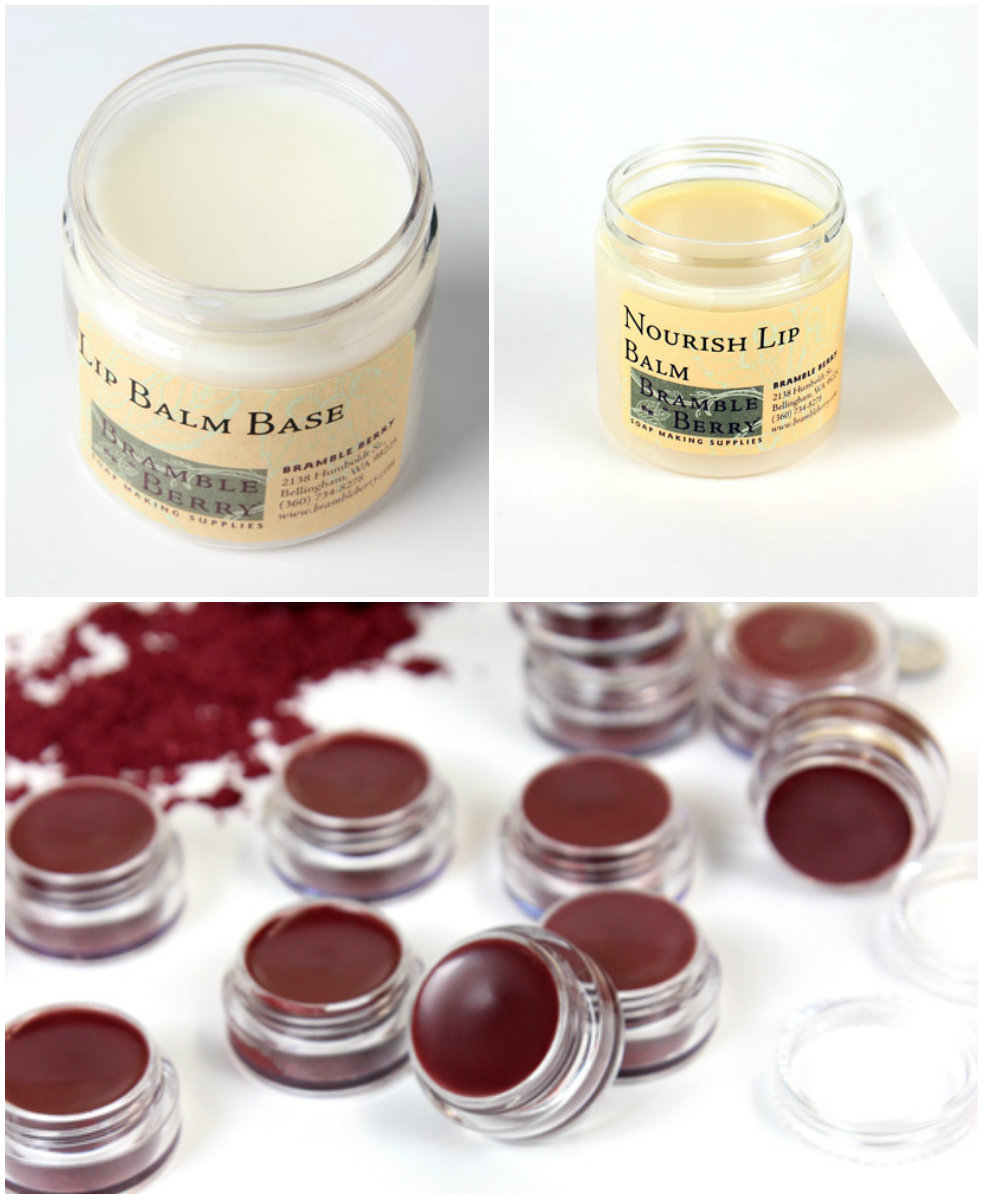
If formulating a lip balm recipe from scratch is a little intimidating, Bramble Berry Lip Balm Base and Nourish Lip Balm Base are here to help. These bases can be melted down and customized with flavor and color. You can also add additional oils, waxes and butters to change the texture to your personal preference. In the Creamy Marsala Lip Tints recipe, argan oil is added to the Nourish Lip Balm Base to create a slightly softer lip product.
Once you’re done making lip balm, it’s time to cleanup. Cleaning waxy and oily containers can be a pain. This is especially true if making a highly pigmented product! For tips on cleaning out your oily and waxy containers, check out the Soap Queen TV video below!
Have you tried making lip balm before? If you’re looking for recipes and tutorials, be sure to check out the Lip Product category, which is full of ideas, tips and tricks!
