I love adding color and sparkle to my soap. It’s such a fun and easy way to give my projects lots of personality. Micas are a great way to add both color and shine to a wide variety of projects. They work great in melt and pour soap, bath bombs and more. Unfortunately, some micas do morph in cold process soap. This means that they may change color, or even turn to a dull gray. This can make adding micas to cold process soap tricky. Click here to learn more about micas.
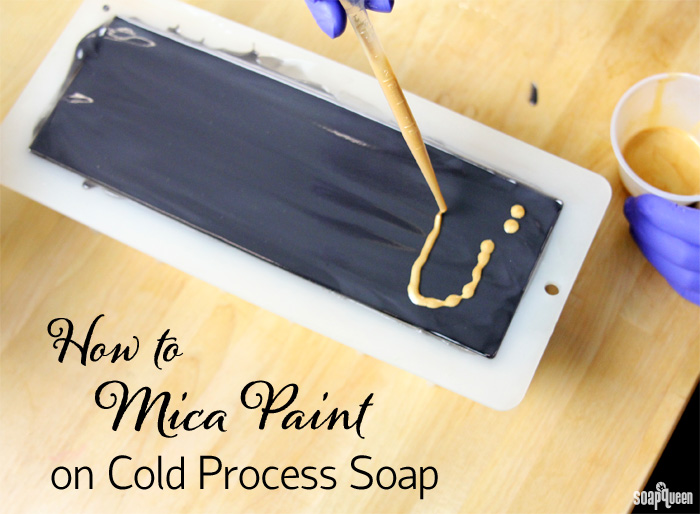
Mica painting is a fun technique that allows micas to be incorporated into cold process projects. It even works with micas that morph in cold process soap! Mica painting refers to adding a mixture of oil and mica to the top of wet cold process soap. This mixture is then swirled in various patterns. As the soap hardens in the mold, the oil is absorbed into the soap and leaves behind beautiful swirls of mica. It usually takes a full day for the oil of the mica mixture to sink back into the soap. Mica painting washes off once introduced to water. See the photo below for some fun mica painting examples!
To prepare micas for mica painting, they first need to be dispersed in a lightweight liquid oil. I like to use sweet almond oil or sunflower oil. Other good oil options include avocado oil, canola oil or chia seed oil. Disperse 1 teaspoon mica into 1 tablespoon of oil. Then, use a mini mixer to help get rid of any clumps.
If you’d like the mixture to be highly pigmented, you can add up to 2 teaspoons of mica per tablespoon oil. If much more mica is added, the mixture is more likely to be thick and may not swirl as well. If more oil is added, the oil may not soak back into the soap, leaving behind an oily top. When you are finished adding your mica to the top of the soap, spray very lightly with 99% isopropyl alcohol. Spraying too much can disrupt the swirl and cause the mica paint to expand and spread.
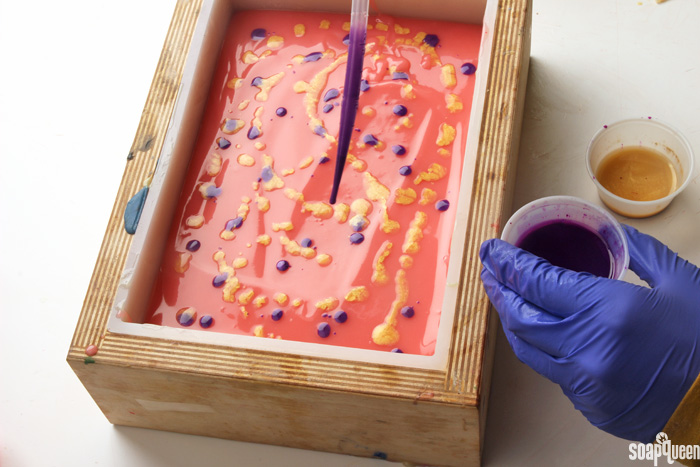
 To apply the mica to the soap, I like to use droppers. This allows me to drop lines of mica (shown above) or small drops. Another thing to keep in mind is the texture of the cold process. If the soap is too thick it will not allow for fluid and smooth swirling. I recommend a thin to medium trace for mica swirls. Read more about trace here.
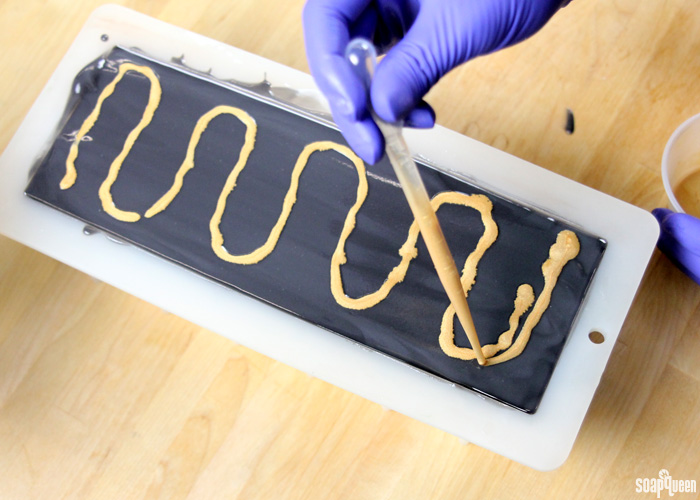
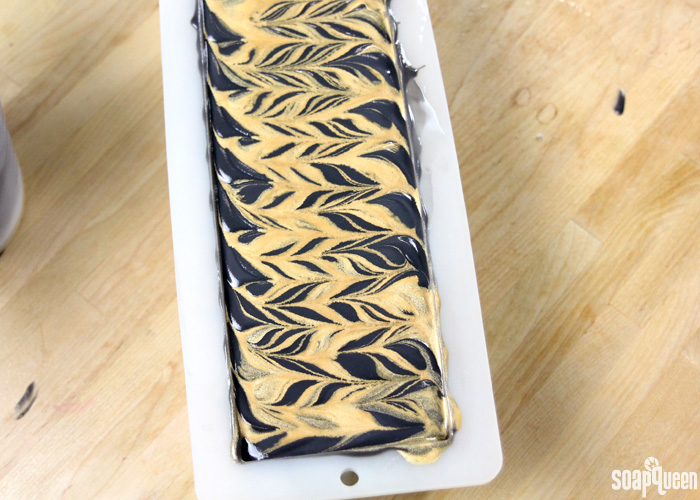
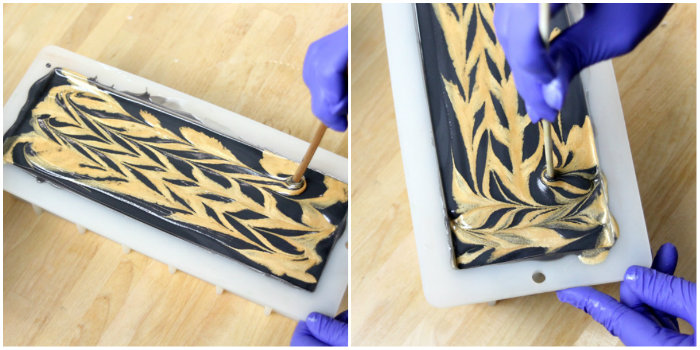 This beautiful gold mica swirl is demonstrated in the Black, White and Gold All Over Cold Process Soap. I love the way that the sparkly gold mica looks against the rich black cold process top. Mica painting is a great way to add some glam to an otherwise basic soap. This project uses the mica painting as you would soap batter to create thick lines of swirls.
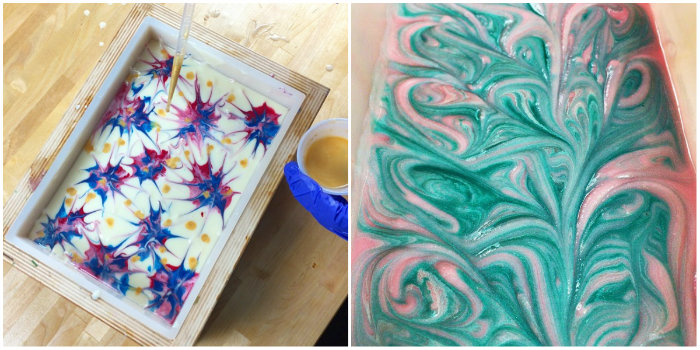
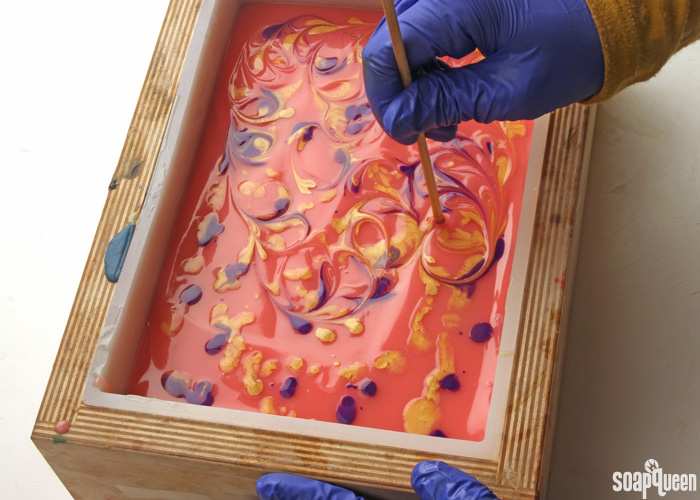
 If you like the look of small swirls of mica rather than the thick lines, place dots of the mica/oil mixture to the top. Then, use a skewer to swirl the dots in random directions. To see this in action, check out the Bramble Berry Instagram video below! This process is demonstrated in the beautiful Vibrant Mehndi Cold Process Soap shown below, and the 4th of July Fireworks Cold Process Soap.
In the Instagram video below, you can see the mica painting in action. Drops of various dispersed micas were placed on the top of black cold process soap. Then, using a chopstick they were swirled in various directions. As they swirl, the various colors mix together slightly, creating a beautiful multi-colored effect.
https://instagram.com/p/pFAeDGA5om/?taken-by=brambleberry
Have you ever tried mica painting before? I love to use micas that usually morph in cold process soap on the top for sparkle and shine. It’s also super fun to do!
