Properly storing your soapy creations extends the amount of time the product looks and feels its best. For cold process soap, proper storage includes plenty of air flow. On the other hand, melt and pour soap should be wrapped immediately. Improper storage can promote dreaded orange spots, faded colors and glycerin dew. Luckily, it’s easy to prevent these problems with a little know-how.
 How products should be stored largely depends on what the product is made of, and the shelf life of the ingredients. For nearly all bath and beauty products, it’s best to store them in a dry and cool place. Excessive moisture in the air can promote DOS (read more about DOS here) and cause bath bombs to prematurely fizz. Extreme heat can cause melt and pour (or even cold process) soap to melt, and the texture of lotions and balms to change. If placed in direct sunlight, soapy colors and fragrances may fade. If you live in a hot climate, find the coolest and darkest area of your home to store your products. If you battle humidity in your area, some crafters invest in a dehumidifier to help reduce the amount of moisture in the air.
How to Store Cold Process Soap
After removing cold process soap from the mold and cutting it into bars, the soap needs to cure for four to six weeks. During this time the water used in the recipe evaporates. Cured soap has a firmer texture and lasts longer in the shower. While curing, soap should be stored in a cool, dry and well ventilated space. If the moisture cannot escape while curing, the chance for dreaded orange spots increases (click here to learn more about DOS).
Here at Bramble Berry, we use large bakers racks to cure cold process soap. The racks allow the bars to come in contact with lots of air, which speeds up the cure time. If using a rack to cure soap, be sure the metal is coated. Metal rust can contribute to soap rancidity. Ideally, soap should have air flow even after the four to six week cure time. Many soapers have two bakers racks; one for soap that is curing, and one for fully cured soap.
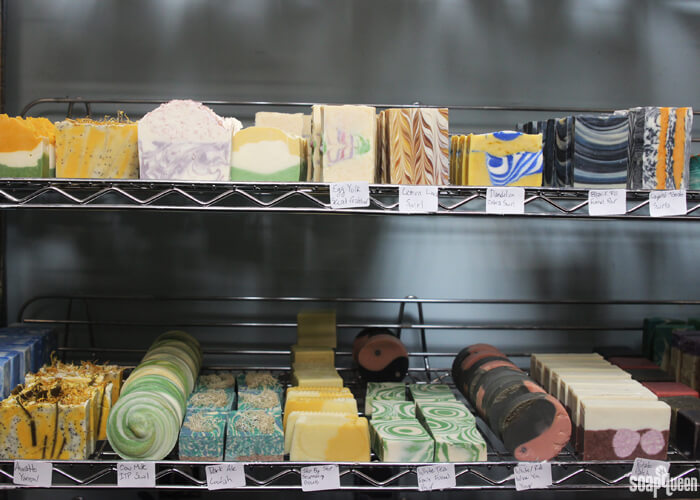 Baker’s racks ensure that cold process soap gets lots of air flow during the curing process.
If you don’t have the space for two bakers racks, you can place fully cured soap into storage bins. Just keep in mind that soap stored in a closed container is more likely to develop DOS due to the possible moisture in the container. This year, we have started saving one cold process bar from each tutorial after they have finished curing. These soaps are stored in a storage bin with the lid unsecured to give the soap a small amount of air flow.
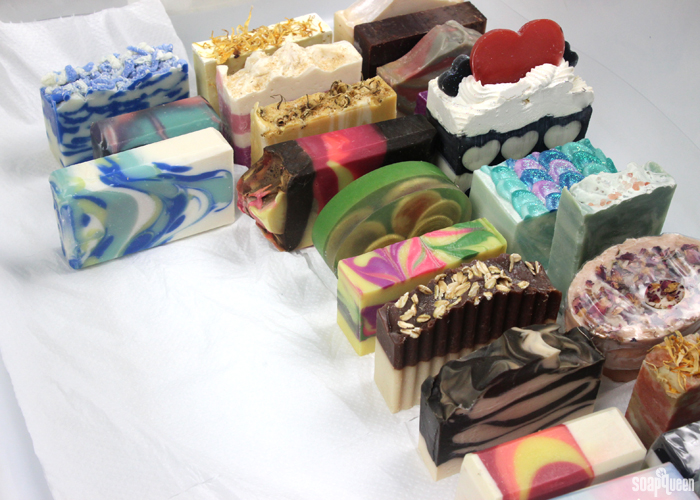 Once cold process soap is fully cured, it can be transferred to storage bins.
Once the soap has fully cured, it’s ready to package. Packaging soap before it is fully cured promotes DOS due to the moisture not being able to evaporate. Many soapers like to package their soap right before selling to ensure soap comes in contact with lots of air beforehand.
How to Store Melt and Pour Soap
While cold process soap should have contact with lots of air, melt and pour soap needs to be wrapped immediately. Melt and pour base contains added glycerin which allows it to melt. Glycerin is a natural humectant and attracts moisture in the air. After melt and pour is removed from the mold, the glycerin immediately starts pulling moisture from the air. This moisture forms what is referred to as “glycerin dew” on the surface of the soap. Glycerin dew looks just like it sounds: small, dew drop-like pockets of moisture on top of the soap.
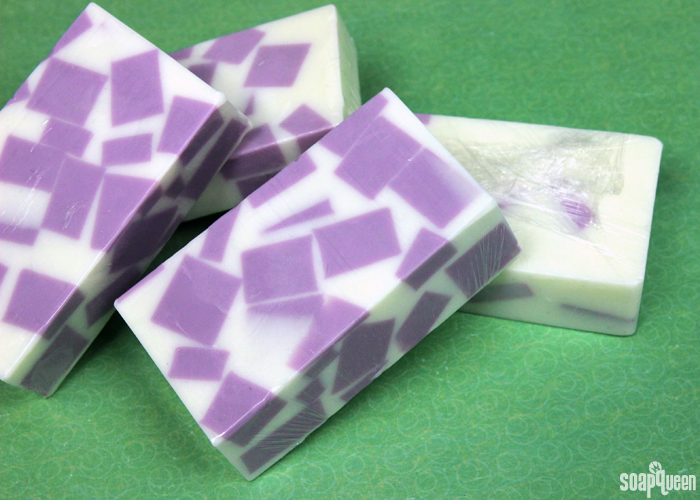 Wrap melt and pour soap in plastic wrap as soon as it fully cools and hardens to prevent glycerin dew.
Glycerin is great for the skin. The natural humectant properties help skin attract moisture from the air, keeping skin hydrated. But, glycerin dew is a cosmetic issue when it comes to melt and pour soap. Once the melt and pour is completely hard and cool, remove it from the mold. Then, wrap the melt and pour in plastic wrap immediately to prevent glycerin dew. Check out the Soap Queen TV video below for a how-to on wrapping melt and pour soap using plastic wrap. If you’d like to learn more about glycerin dew and how to prevent it, check out this blog post.
Once the melt and pour soap is fully wrapped, the glycerin cannot attract moisture. Store the melt and pour in a dry, cool place until you’re ready to use. Melt and pour soap starts to melt around 120° F, so be sure the soap does not reach extremely hot temperatures.
Placing melt and pour soap into the fridge for a few minutes can aid in removing it from the mold. But, melt and pour soap should not be stored in the fridge or freezer for long periods of time. Extremely cold temperatures can cause the soap to become brittle. Placing melt and pour in the fridge or freezer can also cause glycerin dew. It’s best to allow the soap to harden at room temperature, remove from the mold, wrap and store at room temperature.
How to Store Bath Bombs
Bath bombs require a very dry climate. Moisture in the air can cause bath bombs to prematurely fizz. If you live in a humid climate and create bath bombs, a dehumidifier can help preserve the fizzies. A dry climate also helps while making the fizzies; making fizzies on a wet Pacific Northwest days can be a little tricky!
Like most bath and beauty products, bath fizzies are usually stored in the bathroom. Storing the fizzies in an airtight container can help protect them from excess moisture. Another option is to wrap them in plastic wrap to seal out the moisture. Plastic wrap and jars also catch crumbles that may fall off the fizzies. Bath fizzy crumbles can then be used on their own, or used to make this bath fizzy project. Remember to always allow the fizzies to fully dry before wrapping and packaging.
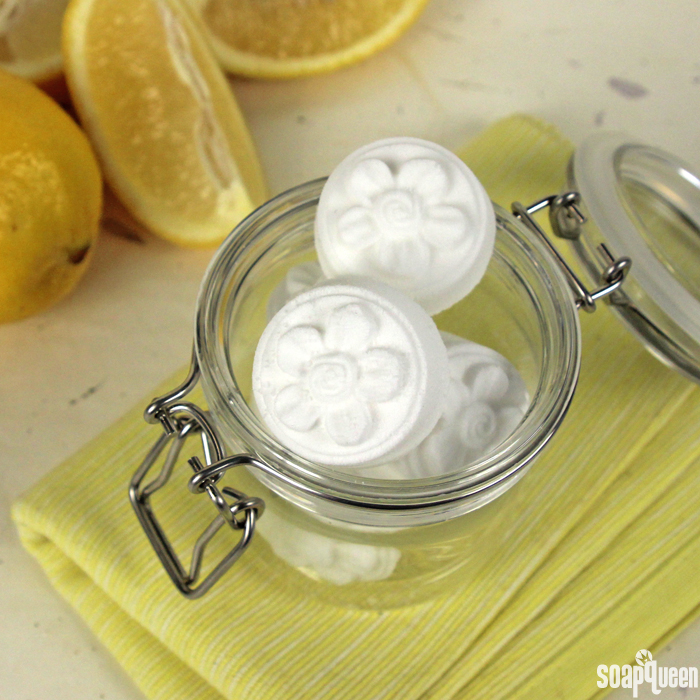 Storing bath fizzies in an airtight jar can help protect them from excess moisture.
How to Store Lotions, Balms & Scrubs
Any scrub, lotion or beauty product that has water added to it has the potential to grow mold and bacteria. No matter how lotion or products containing water are stored, it’s important to use a preservative to prevent bacteria and mold growth. Click here and here to learn more about the different types of preservatives and how to use them. When storing lotion, it’s important to keep temperatures cool. Extremely hot temperatures can cause the emulsification can break, or the texture can change. Lotion containing milk has a very short shelf life, as little as 6 weeks, due to the nature of fresh milk. Milk lotion should be stored in the fridge to increase the shelf life. Even when stored in the fridge, it’s important to remember that milk goes rancid quickly.
 If your lotion, balm or scrub contains water, always include a preservative to prevent mold and bacterial growth. Click here to learn more about preservatives.
Because scrubs are usually used in the shower, this is normally where they are stored. Scrubs made with 100% oil do not require a preservative because water is necessary for mold and bacterial growth. Many crafters include a preservative in oil-based scrubs because water may be inadvertently introduced into it during normal bathing and showering. To err on the side of caution, I recommend adding Phenonip or Optiphen to scrubs not containing water. Balms made completely out of oils and butters are extremely heat sensitive, and are best stored in a cool and dry place.
No matter what kind of product you are making, it’s important to take proper precautions to further the shelf life and appearance. After all, you want your awesome project to last as long as possible! Ideally, the room where you keep your creations should be dry and cool. Avoid extreme temperatures of any kind. Package and wrap your products when appropriate; melt and pour should be wrapped immediately, while other products need time to dry.
How do you store your products? I would love to hear any suggestions or tips you may have!
