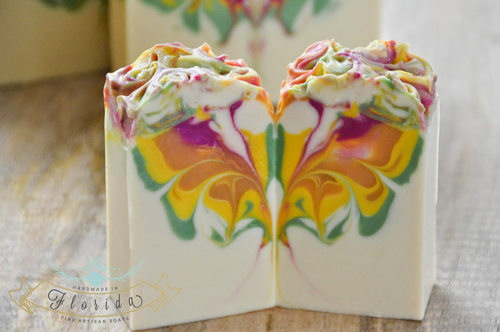
Zahida of Handmade in Florida creates stunning cold process soap featuring signature swirls and gorgeous colors. With numerous soap challenge wins under her belt, Zahida has popularized several soaping techniques including the “Butterfly Swirl.” Her passion for creating and eye for design shines through in her blog and YouTube videos.
 Before diving into soap, Zahida worked in corporate management and was an active member of the aviation industry, serving on several boards including the Pass Bureau Association. Zahida took a break from the corporate world after the birth of her son, and began soaping shortly after. Read on to learn more about Zahida, her business, and what inspires her to create such gorgeous soap!
Search Results for: in-the-pot swirl
Coconut Cream Pie Cold Process
If you’ve been dreaming of an exotic vacation, this is the soap for you. This Coconut Cream Cold Process tutorial is all the fun of a tropical beach getaway without the sand in your shoes!
Made with 100% coconut water instead of distilled water, and featuring our brand new Coconut Cream Fragrance Oil, it’s a unique soap that smells as good as it looks. The top is finished off with melt & pour soap frosting and cold process “coconut flakes” to make this a truly decadent dessert soap.
Speaking of sunshine, this week we’ve been showing you all kinds of tutorials to give your skin that radiant glow perfect for a summer get away. Check out the Beautiful Bronze Lip Tint, Bronze Goddess Nail Polish and Magical Bronze Shimmer Stick. As a bonus, a few of the ingredients in the tutorials are 20% off as part of this month’s web specials!

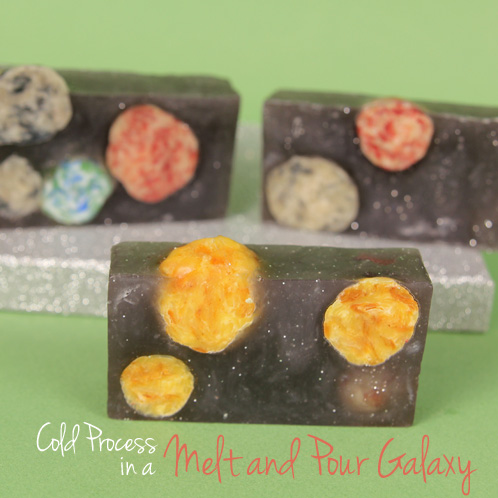
Cold Process Planets in a Melt and Pour Galaxy
This is a guest post from Otion, our a retail store in downtown Bellingham, Wash. This tutorial is similar to our Intergalactic Planetary Melt and Pour, but with a twist; the planets are leftover shreds of cold process soap, making this project a great way to give new life to old soaps.
Facebook Photo of the Week (January 11th ~ January 17th)
This week we made two exciting announcements, including the winners of our S.M.A.R.T. Goals Post. Thanks again to everyone who shared their 2014 goals with us — we had such a fun time reading them.
We also announced the beginning of our 2014 Soap Swap! In case you are unfamiliar with our Soap Swap, it’s a fun way to swap your creations with fellow soap makers, learn new techniques and receive 12 bars of unique soap. Hurry and sign up now, spots are filling up quickly.
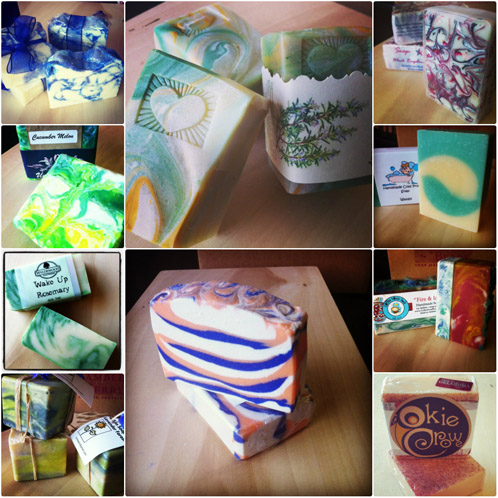
An Instagram collage of some of the lovely soaps we received during last year’s Spring Swap.
This week we also shared our Honey Kisses Sheer Lipstick Tutorial, which is an inexpensive way to recreate my favorite store bought lipstick. Looking for more lip recipes? First, learn all about the process in our Talk It Out Tuesday: Lip Balm post, then give these tutorials a try! We also have you covered when it comes to cleaning up your lip balm project.
As for the Facebook Photo of the Week, this whimsical swirl caught my eye. Bonus points for their awesome use of natural colorants!
2013 DIY Gift Giving Guide
Gift-giving season is here and we want you to be all stoked up with a variety of soapy, DIY presents. This gift guide has everything from gifts for the family and projects for the beginner and the advanced soaper. You don’t just have to make the gift yourself. If you have a crafty friend or family member, a DIY kit might be the perfect gift.
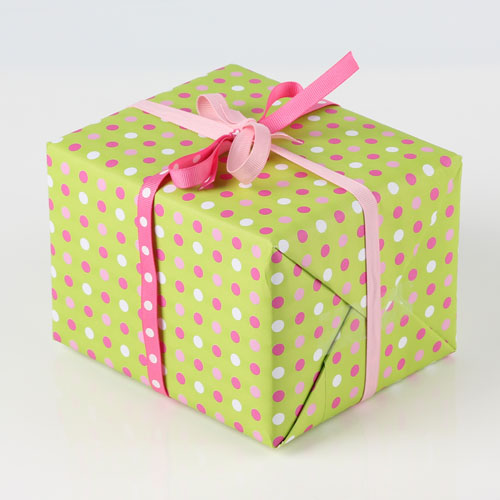
Why yes, this is Soap Queen wrapping paper. Purchase it here.
Facebook Photo of the Week Extravaganza
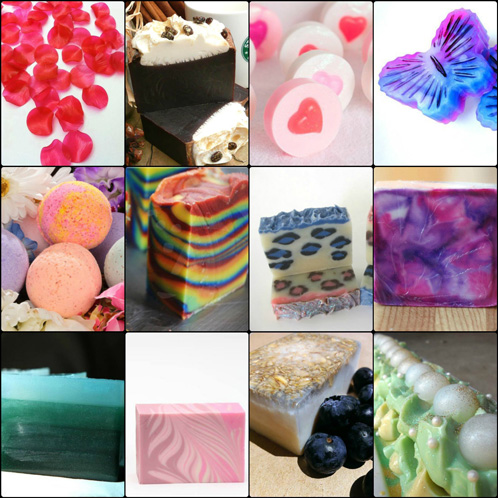
It’s a very special Facebook Photo of the Week because today we’re celebrating one year of featuring your Facebook photos on the Soap Queen Blog. We’re delighted each week by the dozens of photos we see, and I’m so happy to be surrounded by such creative soapers and crafters. We wanted to take a chance to look back at some of our favorite Photos of the Week and share them with you.
Do you have any favorites from this past year? Be sure to leave a comment below with one that has inspired your soapmaking! If you have missed some of the past photos, you can see them all in the archives here. Scroll on to see 12 months of incredible photos!
Sunday Night Spotlight: Merlot Sparkle Mica
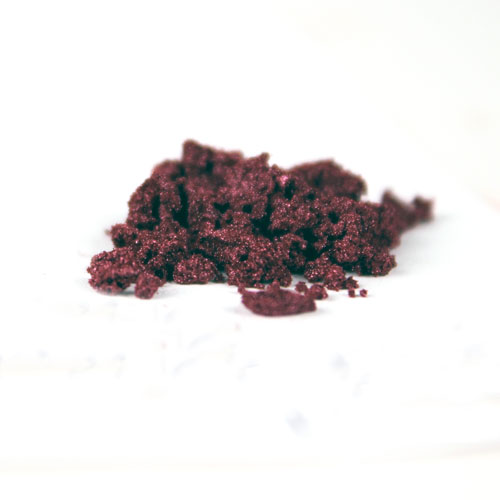
Add a touch of sophistication to your Christmas reds by using Merlot Sparkle Mica. Not only does this mica show up brilliantly in melt & pour soap, it holds color exceptionally well in cold process soap.
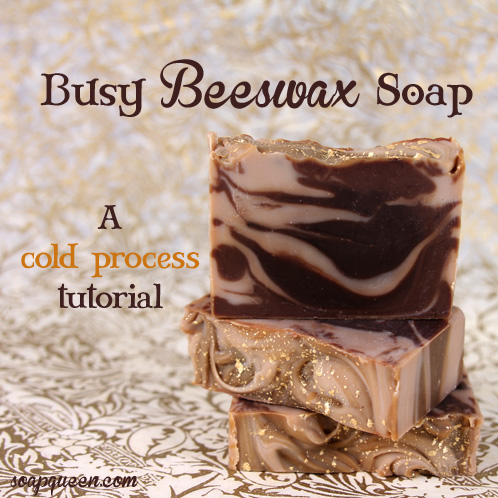
Busy Beeswax Soap Tutorial
This is day three of our Soap Crafting-inspired tutorials, and I’m particularly excited about this one because the result is visually stunning. This soap incorporates real Yellow Beeswax, which gives the finished soap a translucent and shiny texture. It also utilizes a fun spoon plop technique, which is easy to do and results in something that almost looks like an In-The-Pot-Swirl. The fragrance combo of our best-selling Oatmeal, Milk and Honey Fragrance Oil and Black Cherry Fragrance Oil is dessert-like and sweet, and topping this soap off with a little gold mica gives it an elegant look. This is an advanced tutorial because of the beeswax addition so don’t soap this one until you’ve got a few recipes under your belt. It’s worth the wait =)
What You’ll Need:
3.5 oz. Sweet Almond Oil
2.8 oz. Yellow Beeswax
.7 oz. Cocoa Butter
7 oz. Coconut Oil
3.5 oz. Hazelnut Oil
8.75 oz. Olive Oil
8.75 oz. Canola Oil
4.5 oz. Sodium Hydroxide
11.5 oz. distilled water
2 teaspoons Cocoa Powder
Fragrance blend of: 1.5 Oatmeal, Milk and Honey Fragrance Oil and .6 oz. Black Cherry Fragrance Oil
Click here to add everything you need for this project to your Bramble Berry shopping cart! I didn’t put this awesome silicone spoon/spatula combo into the kit but that’s what I used in this tutorial. I highly recommend it.
If you have never made cold process soap before, I highly recommend you get a couple of basic and intermediate recipes under your belt before attempting this advanced recipe. Check out this (free!) 4-part series on cold process soap making, especially the episode on lye safety. Bramble Berry carries quite a few books on the topic as well, including my brand new book Soap Crafting in which you’ll find a ton of great info for new soapers and veterans alike.
FRAGRANCE PREP: In a glass container, combine 1.5 oz. Oatmeal, Milk and Honey Fragrance Oil and .6 oz. Black Cherry Fragrance Oil. Set aside.
SAFETY FIRST: Suit up for safe handling practices! That means goggles, gloves and long sleeves. Make sure kids, pets, and other distractions and tripping hazards are out of the house or don’t have access to your soaping space. Always soap in a well-ventilated area.
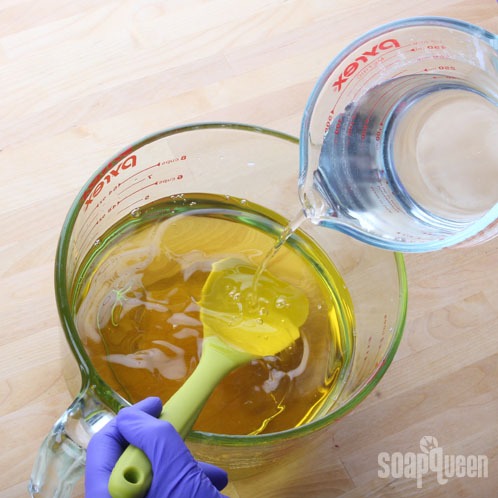
ONE: Slowly and carefully add the lye to the water and gently stir until the lye has fully dissolved and the liquid is clear. Set aside to cool. If you’d like a harder bar of soap that lasts longer in the shower and releases faster from the mold, you can add Sodium Lactate to the cooled lye water. Use 1 teaspoon of Sodium Lactate per pound of oils in the recipe.
TWO: Melt and combine the Coconut Oil and Cocoa Butter. Add the Sweet Almond, Hazelnut, Olive, and Canola Oils and the Yellow Beeswax. Heat the mixture until the Beeswax has melted entirely. Melting the Beeswax in the oils facilitates even distribution of heat for optimum melting. This oil wax mixture is very hot – above 160 degrees to keep the wax melted. Be careful removing it from the microwave or stove.
Note: Beeswax has a high melting point and tends to harden very quickly. This is an expert-level cold process recipe, and you’ll need to keep your oils above 170 degrees and work quickly to prevent the mixture from clumping.
THREE: Pour the lye into the oils and stir gently with a spatula or spoon. Switch to a stick blender and gently pulse until thin trace.
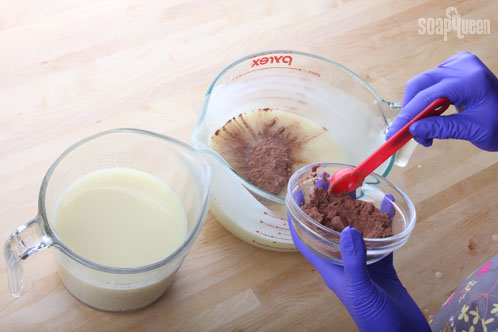
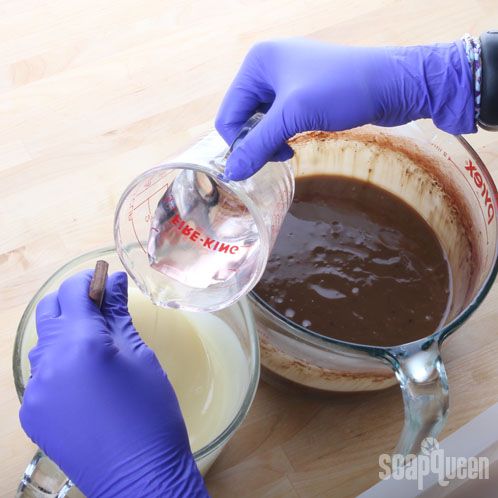
FOUR: Split the batch in half. In the first container, add two teaspoons of Cocoa Powder for color. Mix using a spoon or spatula. Leave the other portion uncolored.
FIVE: Add half of the fragrance oil to each of the portions, and mix well using a spoon or spatula.
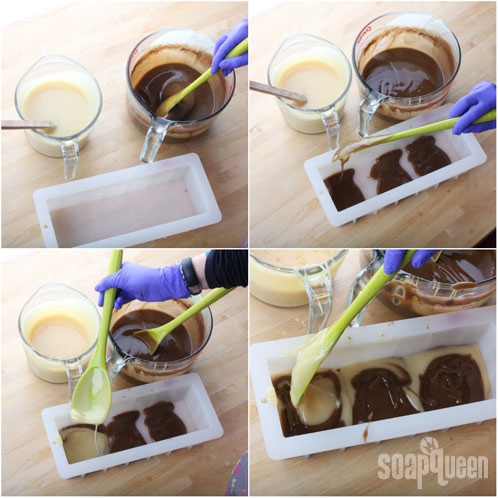
SIX: Starting with the brown soap, use a spoon to plop three mounds of brown soap across the mold. Follow with three plops of uncolored soap, directly on top of the brown soap. Repeat this process, layering mounds of brown soap on top of uncolored soap, until you fill the mold. Tamp the mold intermittently on the table to eliminate any air bubbles. The Square Silicone Spoon/Spatula combo is ideal for this project.
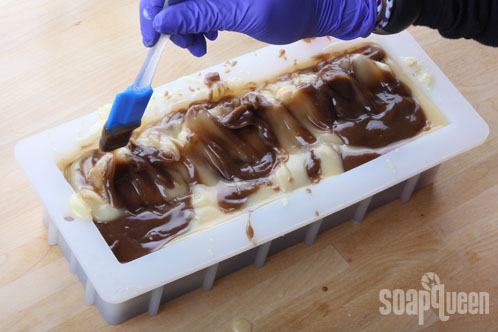
SEVEN: Once all the batter has been plopped into the mold use a spoon or mini spatula to gently form two small ridges running from end to end in the middle of the mold.
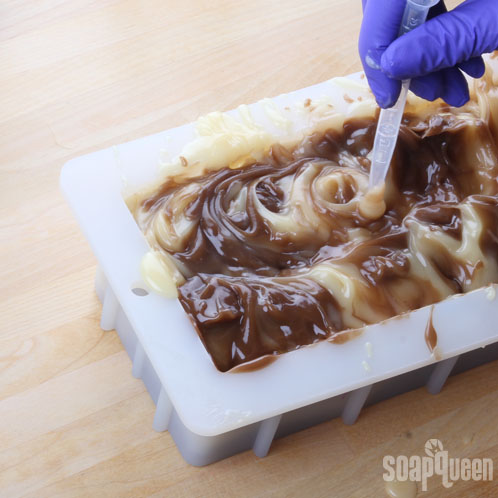
EIGHT: Using a chopstick or dowel (or, in my case a dropper!), make tiny looping swirls on the top of both of the ridges. This will created a nice, swirled texture on the top of the soap.
NINE: To put the finishing touches on this soap, use your gloved hands or a powder duster to sprinkle Sparkle Gold Mica across the top of the mold. Then, gently blow on the mica to press it into the soap batter. Be careful because this part can get messy! Be sure to have 99% Isopropyl Alcohol on hand to clean up any mica spills.
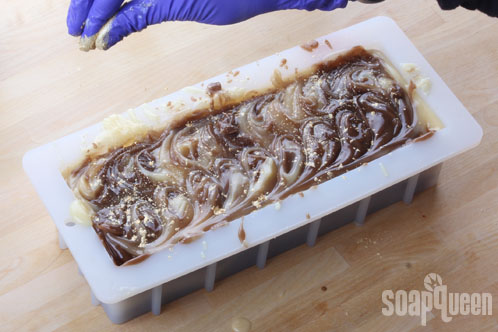
Unmold the soap after 4 -7 days and then allow to cure for 4-6 weeks. Enjoy your busy bee soap!

New Products at Bramble Berry: Summer Edition
The first day of summer was this past week (and it rained, but really, who tracks that stuff?!). Here’s a treat so you can start your summer off right — brand new Bramble Berry products (yay!). Team Bramble Berry has been busy testing all the new products, and we’re happy to share them with you.
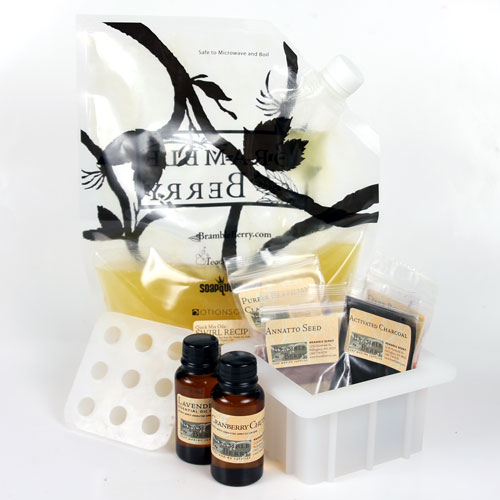
About a month ago, the Soap Guild Conference and Bramble Berry gave a special gift to attendees. Every conference-goer got a mini-cold process kit that included our brand new 4″ silicone loaf mold and various colorants & scents. You can check out the full tutorials and ingredients here. We didn’t want you to miss out on all the fun, so we made it available for everyone!
Who doesn’t love new stick blenders (now available in green and white), as well as a brand new smokin’ hot stand mixer that comes with an awesome 5 quart glass bowl. Looking for just the bowl on its own? We’ve got you covered there too! These mixing bowls are great for large soap batches, and they even give you enough room to do a generously sized in-the-pot-swirl.
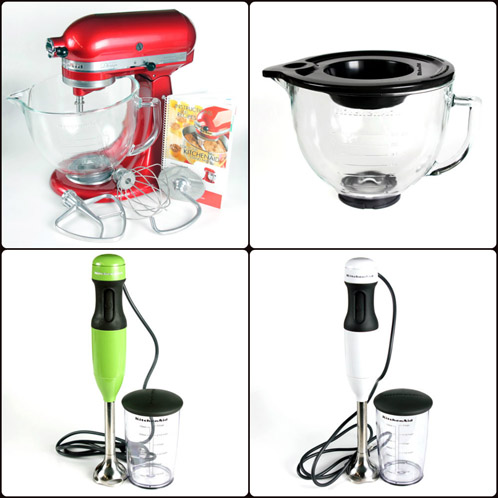
Top Row: Stand Mixer with 5 Quart Glass Bowl & 5 Quart Glass Mixing Bowl with Lid
Bottom Row: Green Stick Blender & White Stick Blender
Trying new molds is one of the best parts of soaping, and there’s almost a dozen new ones for you to experiment with. Experiment with the Pirate Mold for a fun summer party for example, or the 4″ silicone loaf mold for those recipes you’ve been dying to just try out (it holds just 18 ounces when filled to the brim, perfect for test batches). The Silicone Liner for 18 Bar Mold will save so much $$$ in time alone (no more lining that mold!).
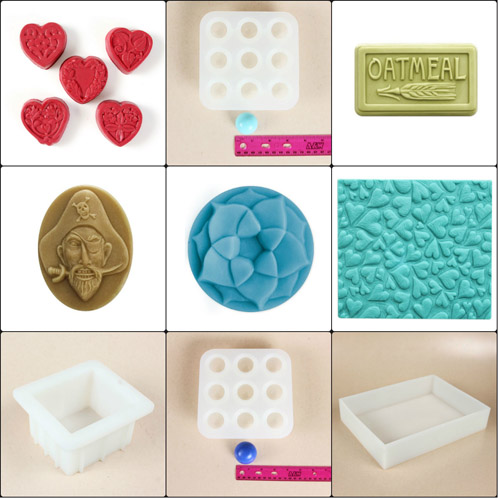
Top Row: Guest 5 Hearts Mold, Medium 9 Ball Silicone Mold, Rounded Oatmeal Mold
Middle Row: Pirate Face Mold, Guest Lotus Mold, Tray Carved Heart Mold
Bottom Row: 4″ Silicone Loaf Mold, Large 9 Ball Silicone Mold, Silicone Liner for 18 Bar Mold
Looking for a new book to help boost your business? We’ve got ’em! Good Manufacturing Practices by Marie Gale and Efficiency in Scaling by Kendra of Amathia Soapworks are excellent for high volume soapmakers who want to streamline their processes. Our very own Kathryn Hackney also wrote the Cold Process Colorant Master Class for those of you looking to hone your soap coloring skills.
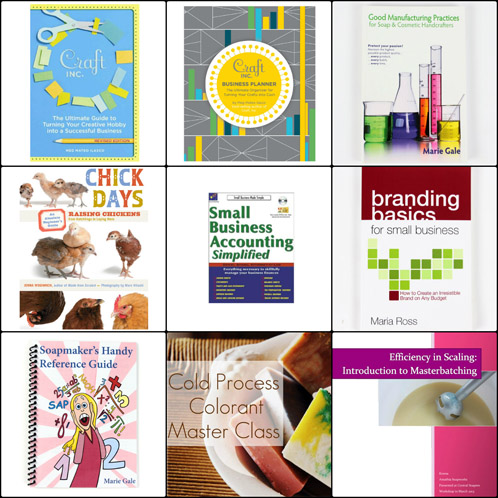
Top Row: Craft, Inc. Revised Edition, Craft Inc. Business Planner, Good Manufacturing Practices
Middle Row: Chick Days, Small Business Accounting Simplified, Branding Basics for Small Businesses
Bottom Row: Soapmaker’s Handy Reference Guide, E-Book Cold Process Colorant Master Class, E-Book Efficiency in Scaling
The newest issue of Let’s Get Soapy from Soapylove is now available. Neon colorants and geometric patterns are all the rage right now, and the tutorials are perfect for fun summer projects. The magazine comes with a set of color blocks, sent to your house, to get you started on your perfect neon soap tutorial.

These downloadable cards add a great finishing touch to any Father’s Day, Mother’s Day and Valentine’s Day bath & body products.

4th of July Day Cards Digital Download, Mother’s Day Cards Download & Valentine’s Day Cards Download
We’ve also introduced a triple-threat of new oils. Get ready to soap with Argan, Canola and Chia Seed Oil! These lightweight oils will add that extra touch of skin-loving goodness to your cold process and balm recipes, and you’ll be wondering how you ever soaped without them.

Argan Oil, Canola Oil, & Chia Seed Oil
With a whole line of botanicals, you can try your hand at a new project — potpourri! You can also use these botanicals to infuse your oils to create all-natural colorants for your soaps. For more on how to infuse, check out this e-book.
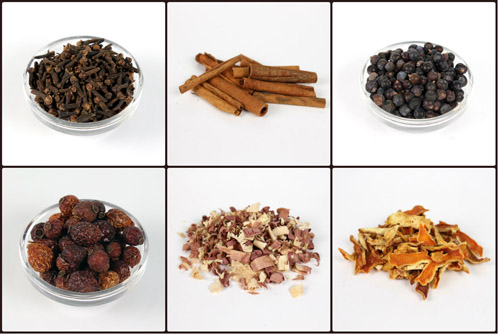
Top Row: Cloves (Whole), Cinnamon Sticks, Juniper Berries (Whole)
Bottom Row: Rose Hips (Whole), Cedarwood Chips, Orange Peel (Ribbon Cut)
Never made potpourri before? Try Nature Fix, the ultimate fixative to make the scent of your sachets last longer. It is a great alternative to other fixatives like benzoin and orris root which have been known to increase skin sensitivity and cause an allergic reaction.
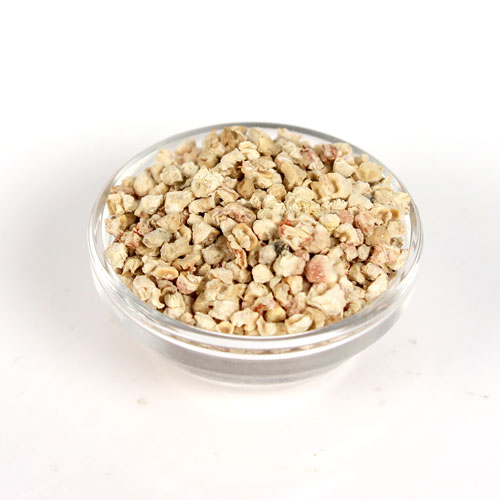
You’ve been asking and we finally got them back in — plastic bail jars in both the 4 and 8 ounce sizes. These jars are great for bath bombs, scrubs, salts, and more. Let us know what you use them for on Bramble Berry’s Facebook page!
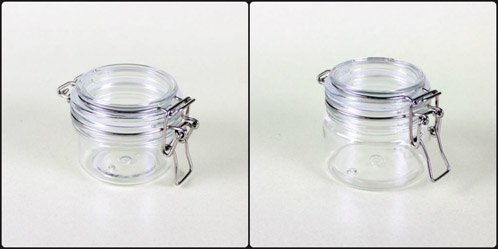
4 oz Plastic Bail Jar & Short 8 oz Plastic Bail Jar
If you need another all natural colorant, these Cambrian Clays perform beautifully in cold process soaps. They come pre-dispersed so you can add them to your batch without having to worry about cracking, accelerating trace or separation.
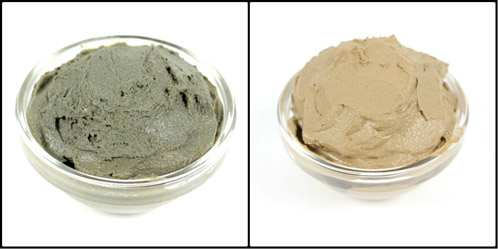
Cambrian Blue Clay (wet) & Cambrian Yellow Clay (wet)
Cera Bellina Wax is natural derivative of beeswax and will give any lip balm, lotion bar or emulsion and nice smooth and luxurious texture. Try using the wax in the Tutorial for Everything Balm or the Lotion Bar Love tutorial to feel the difference for yourself.

We have a surplus of Olive Oil Melt & Pour and we wanted to share it with you! Our Olive Oil Melt & Pour Base is super gentle and provides a deep, creamy lather. If lotions are more your thing, we’ve also included an Aloe Lotion Base.

Surplus Olive Oil Melt & Pour Base
After weeks of testing by members of our S.O.A.P. Team, we finally revealed the winners. Check out this blog post for more info, and welcome Tart Apple, Shave and a Haircut and Spring Meadow Fragrance Oils to our fragrance family. And because we love new scents so much, we’re also introducing Cucumber Oak Fragrance and Green Tea & Cucumber Fragrance Oil, as well as our newest essential oil, Red Brazilian Mandarin. If you lean more toward lip balms, we’ve brought back a reformulated Coconut Flavor Oil, and added a Winter Clementine Flavor Oil.
Have you tried any of Bramble Berry’s new products? If so, let me know in the comments what you thought, how you used it, and what you’d like to try next!
Facebook Photo of the Week (Feb 22nd ~ March 1)
Let’s start out our week with some inspirational soap….Facebook Photo of the Week time. As always, there have been some incredible bath and body product photos that each and every one of you are creating (and posting to our Facebook page). We have such an active soapmaking community and I’m grateful for all of you that continue to participate and make it a better place for all soapers. Are you ready for the winner? Let’s go!
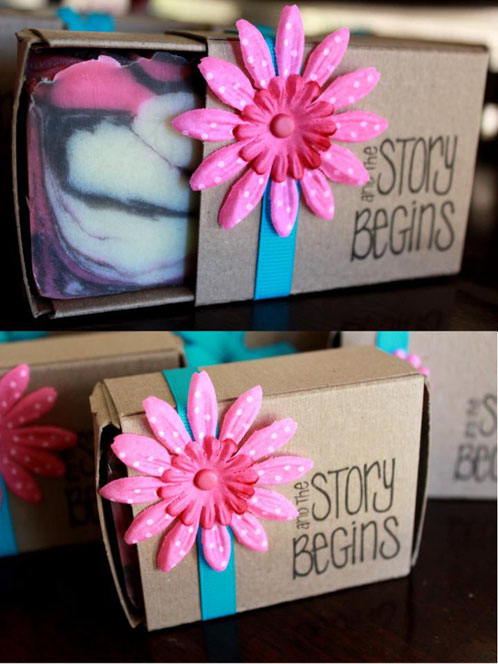
This week’s photo comes to us from Andrea of Soaps4Squares. Andrea told us that she used our soap boxes to create these adorable bridal shower gifts and that she really used loved how the Tropical Vacation Fragrance Oil stuck in her ITP (In-the-Pot) Swirl Soap. I totally agree with her, these little soap favors turned out so cute and show that you can do so much with just a little soap box. You might actually recognize Andrea from when she was on our BBAC Team from last year, and you can check out her super inspirational interview here. Thank you so much for being part of our amazing soapmaking community on Bramble Berry’s Facebook page, Andrea. Keep your eyes open for a special little package being sent your direction.
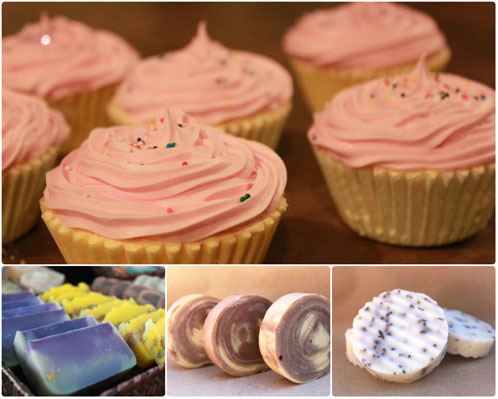
Andrea’s Facebook Page: Soap4Squares
Andrea’s Blog: Soap4Squares
Would you like your photo or project to be featured on the blog? Come join us for soap talk, contests and lots of crafty inspiration on Bramble Berry’s Facebook page and share a photo of your latest project. Your handmade soap might be next week’s feature!
Soaping Notes
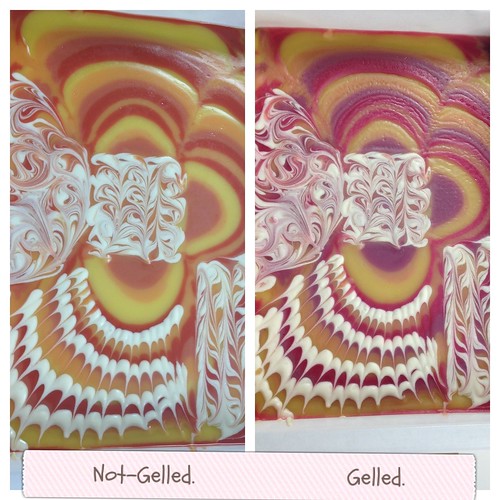
I’ve been making a lot of soap in the last few weeks – testing out new products, trying fun techniques, putting a different spin on color schemes and generally having a creative time in the Soap Lab. I made the soap below with Labcolors (Canary, Tangerine, Red and Berry Red) and the always delightful Pineapple Cilantro fragrance. You can tell that this was a batch that I was playing with some swirling and design techniques on. That’s the bonus of a wide, flat horizontal mold – lots of canvas to play on.
New Videos at Bramble Berry Just for YOU!
It’s here! It’s here! The very special tutorial we filmed with Kristy Schemrich of Kristy’s Lovely Lathers is ready for you to watch! Now you can learn to make amazing soaps like Kristy for just a few dollars. I had such a wonderful time with Kristy when she and her husband came all the way to Bellingham this summer. In fact, I have an entire video of bloopers from when we were filming that prove it. And yes, that’s Amber laughing hysterically in the background.
Embedded Neon Soap Online Tutorial
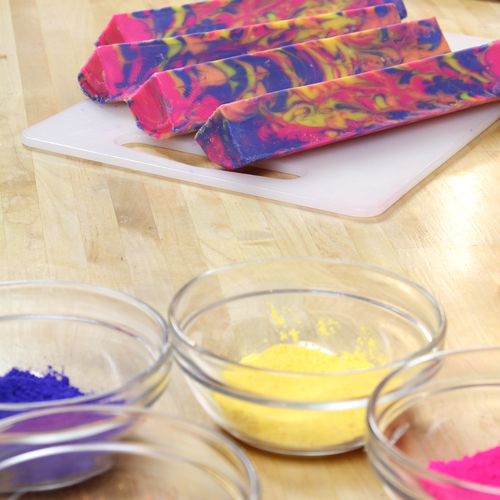 Learn to make a striking Swirled and Embedded Soap Loaf in this online soap tutorial. Taught by Kristy Schemrich of Kristy’s Lovely Lathers and Anne-Marie Faiola of Soap Queen, you couldn’t be in better hands to learn this complex looking project. They break it down step-by-step for you to easily follow along and make the entire project from start to finish. At over 15 minutes, this is a longer, more detailed video than our free Soap Queen TV videos, and for less than $4 how can you go wrong?
Crazy for Cubes
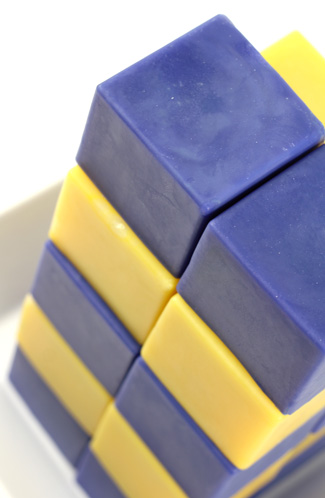
I know I always say this (um, like a lot), but I think I just found my new favorite mold! There are a whopping 25 cavities in this bad boy. It has a glossy finish, which I love, and the cube shape fits perfectly into the palm of my hands. Plus, they are the ideal size for stamping with our new acrylic stamp line. They’re perfect! Ok…enough gushing about the molds. Check out my specially formulated recipe below. Why specially formulated? The cube mold works best with super hard recipes. Since no air flow gets into the mold, it can take forever and a day to get the soap to release. The Sodium Lactate, low (4%) superfat plus water discount all contribute to being able to get this soap out of the mold with no sticking. Because of this, the recipe will move fast. Experienced soapers will still be able to swirl but if you’re a newbie? Stick to one color.
