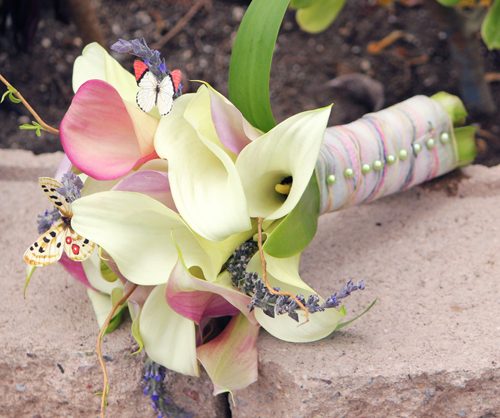
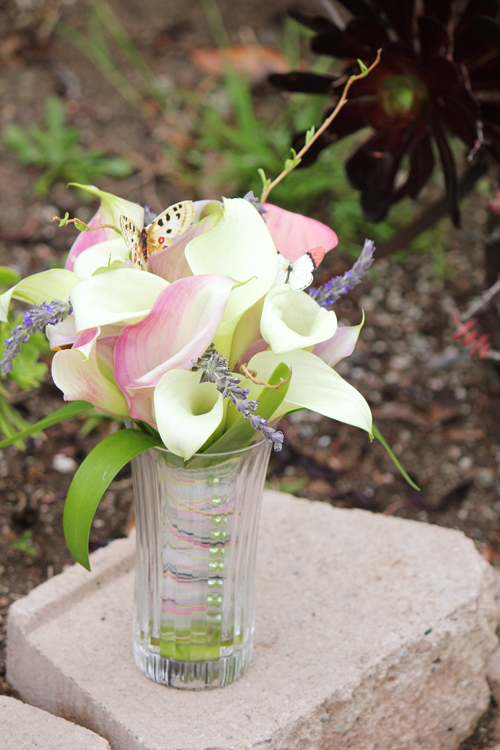
Weddings are beautiful occasions. A day of love and togetherness and the celebration of a new beginning. Unfortunately the sticker price for these festive events can be a shock especially if the bride and groom are paying for it themselves! There are clever ways to save money and going the DIY route on a lot of tasks can really help save money. When researching wedding bouquets I found that the standard was about $175-$250 for a simple rose bouquet. When you start counting Bridesmaid Bouquets and Boutonnieres you are looking at spending $1000 plus dollars. No Thank You! I made this elegant handmade bouquet for less than $30 and there were plenty of flowers left over. I used them in vases but I could have easily gotten another bouquet and a few Boutonnieres out of the three bunches of Calla Lilies that I bought at Trader Joe’s for $7 per bundle. The ribbon was in the $1 bin at a craft store and the pins were about $4.00 for 100 pins. I had the floral wire but it can be purchased for a couple of dollars at a craft store. All you need is an eye for matching color, a few simple supplies and about 30 minutes of time. I embellished the bouquet with lavender and greens found around the yard!
Materials:
• Flowers in colors of your choice. NOTE – if you are having an outdoor wedding be sure to choose flowers that hold up well in the heat. Some examples are Roses, Calla Lilies, Orchids, Sunflowers, Birds-of-paradise, Dahlias and Zinnias.
• Ribbon at least 1 inch wide in color(s) of your choice
• Once inch pins with pearls in color(s) of your choice
• Floral Wire
• Scissors
Method:
1) Under cold running water cut about 1 inch off the bottoms of your flowers and place in a vase filled with cold water for storage.
2) Begin gathering the flowers working out from the center of the bouquet. Hold them high on the stems firmly but not too tightly. You want to have room to slide stems down into the bouquet and you want to avoid bruising the stems.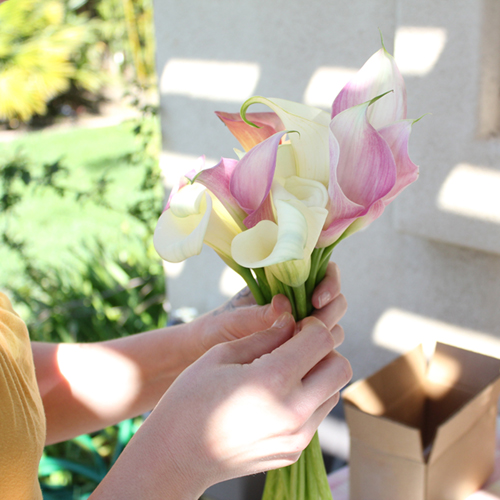 I felt like the bouquet was large enough at about 8 to 10 inches in diameter and the diameter of the stems was comfortable to hold. You can go as large as you like however!
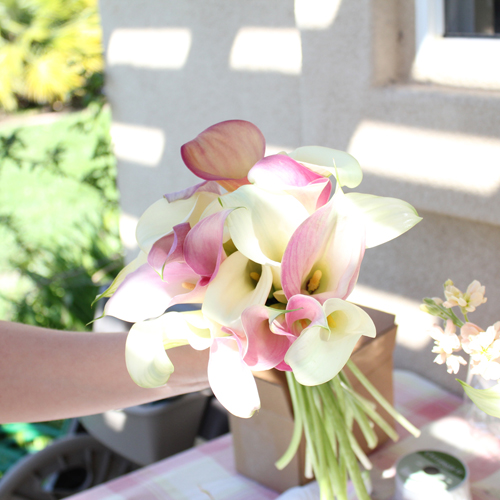 3) Add embellishments such as small flowers, twigs, and leaves. I think greenery looks good around the edges and smaller flowers and branches can be added to the interior of the bouquet by sliding stems down between stems while keeping a firm grip on the bouquet.
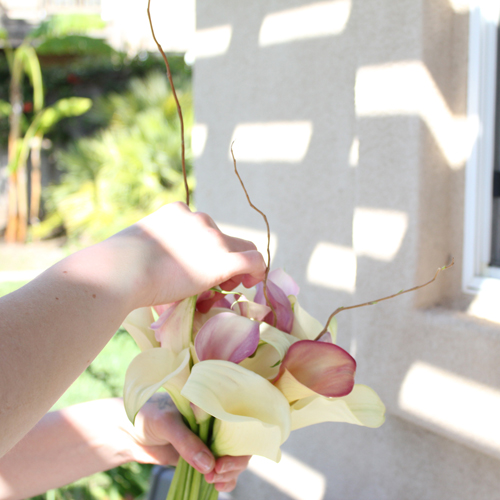
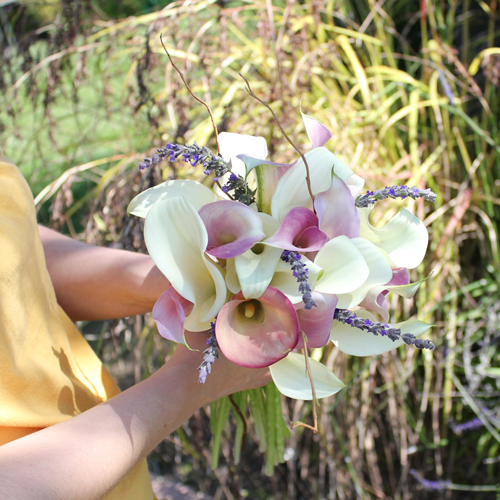
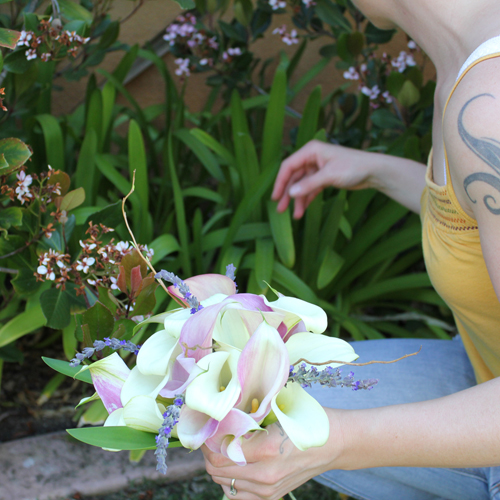
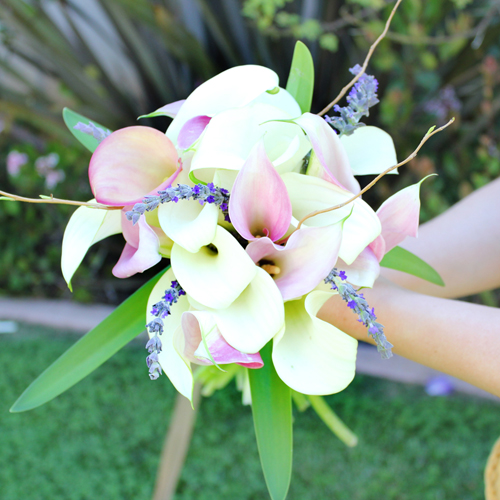 4) Once you have your bouquet flowers all in place wrap with floral wire high up on the stems to hold everything in place. Again, don’t wrap the wire too tight to avoid bruising the stems.
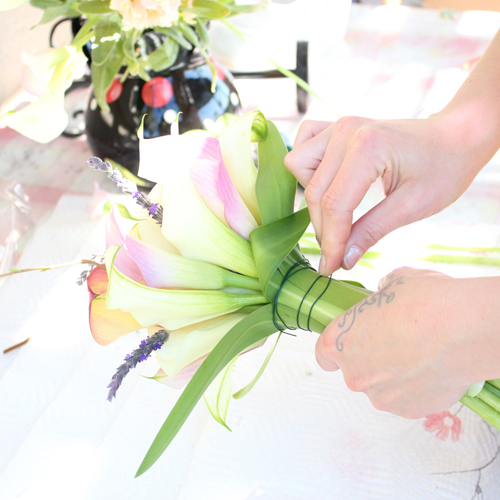 5) Next we want to cut the stems down. I would say 8 inches is safe. You want to be able to get both hands on the stem so I cut the stems to the height of my fists end to end plus one inch which came out to 7-8 inches.
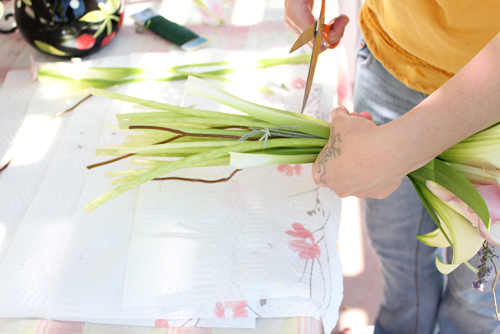 The goal is to have a nice flat bottom.
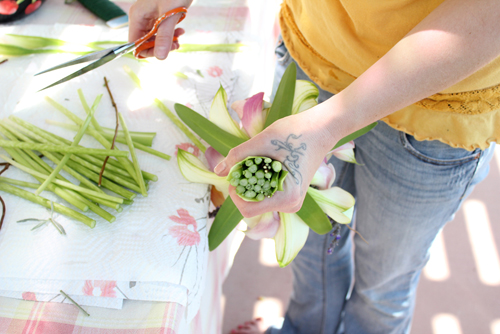 6) Tie your ribbon around the stems over the floral wire and begin wrapping it up and down the stem until you get the coverage that you like. My ribbon was sheer so I had a few layers of ribbon. A solid ribbon may take just one layer. Make sure the wire is covered as well. Leave about 3/4 inch of stems showing on the bottom.
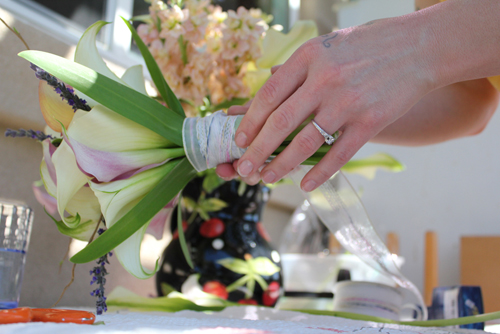
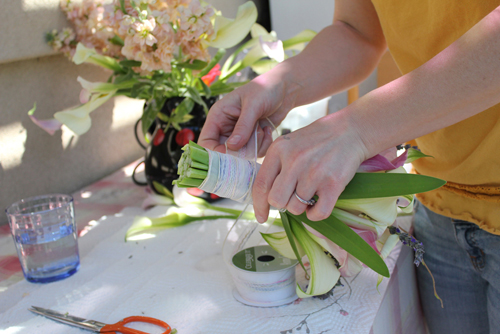 7) Cut the ribbon and hold it in place with your thumb. Begin inserting your pins at an angle into the ribbon in a line down the stem. At the top of the stems angle the pins downward and at the bottom of the stems angle them upward. Be sure you are inserting the pins so that no sharp points are sticking out!
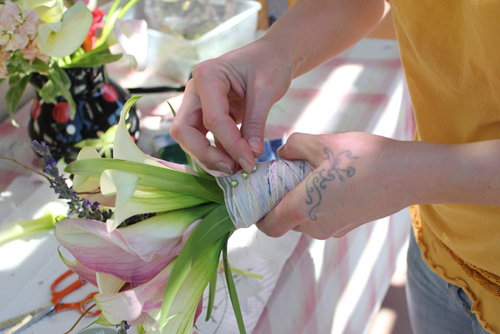
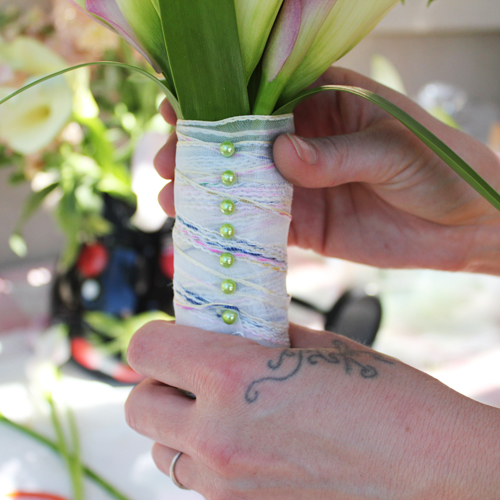 When finished store the bouquet in a vase or glass with about 1/2 inch of water in the bottom to keep it hydrated until you are ready to use it!



I totally love this tutorial. Thanks for sharing!
And thank YOU for reading =)
This is such a GREAT idea! I love it. And since i’m getting married in a few months, this will be a perfect idea for me to do.
Thanks for the awesome tutorial! I especially love the addition of the Peter Pan lily leaves (if I’m calling them the right name)- they just add a certain something. The bouquet looks so elegant! 🙂
I’ll have to bookmark this for when I plan our “vow renewal” wedding in 3 yrs.. Still trying to decide between real flowers or a french beaded flower bouquet.. good thing I have some time!
thank you Erin!
Erin your wedding bouquet is so lovely! The pearly pins add such a beautiful touch to flowers in your bouquet! I’m hoping you will share your cupcakes. Too cute!
Another vote for cupcakes! Ha ha =)
Pam – did you see the cupcake recipe on the Soap Queen? Or did you want me to send you some? LOL! 🙂
just an idea for you the next time you receive a floral arrangement. When the arrangement has lost it’s look, pull out all of the flowers and put on open newspaper. Pull out all greens and other touches and put on another newspaper. This will help you estimate amount of flowers and greens you need.
Run water over the empty foam now to wash it out a bit. You can see the holes where the flowers and greens went into the foam. Get some fresh greens and flowers from the yard in the appropriate amounts you see on the newspaper. It will take a few times but it is such fun and looks new and fresh.
Great tips Pam!
Oh wow, that’s such a great idea. And since I am floral arranging challenged, it’s definitely a good for people like me =)
those are so stunning!
Beautiful, Erin!
Erin,
You are SUCH an artist, and this arrangement
just is so beautiful!
I wish I lived near San Diego…..
(used to live in Mission Viejo, just north of
San Clemente)
It would be SO fun to have some Thai food,
walk along the lovely beach and just visit!
Truly, I believe that there is nothing that you
cannot do! I admire everything you make!
Hugs!
I admire everything she makes too. She’s an amazing artist with so many mediums. I especially love all the time and energy she puts into her gluten-free food too. She’s one awesome chick! =)
aww – thanks! Ditto! 🙂
Thanks Kelly! Truly a grand compliment! San Diego is nice – there is so much to do, so many great places to eat, the beach, the mountains – everything you could want is so close! Do let me know if you ever come for a visit!
What a lovely arrangement! It is “understated elegance”.
Just like Ms. Erin!
Love this! Your bouquet is so delicate and feminine…the butterflies are a gorgeous touch! A friend did my bouquet with roses from Costco, added a rhinestone heart drop to the ribbon banding and it came out beautifully. Love DIY weddings! 🙂 Thanks for sharing yours!
Love that they used Costco flowers – budget that looks just as good as frou frou expensive flowers? Makes the entire thing that much sweeter.
Costco is a great resource too! Love the rhinestone idea!
A great tutorial! Thanks! When I think about how much we paid for our wedding flowers…. your creation is equally as pretty and much less expensive. It makes me want the same flowers from the pix in my garden 🙂
Me too! That makes two of us that are like ‘We paid WHAT for our flowers?!” LOL! =) Erin is such an artist – with so many things. Soap. Flowers. She’s got it all.
Thanks Michelle! I really think that flowers are too pricy in general. I am really cheap too. If I didn’t want to make a bouquet I seriously would have gone without one! Some things didn’t go as planned and I could have benefited hiring out but this project worked out thankfully!
That is a stunning grouping of flowers. You do make it look easy too. Arranging flowers is something I have never really tried to do but I am thinking I should!
I agree – and Trader Joe’s buds? Are you kidding me?! Amazing work.
Right! The callas were in season I guess – totally lucked out!
So gorgeous! Almost makes me wish I were getting married all over again. 😉
Me too! I’m a sucker for all things wedding =)