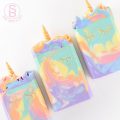
If you missed the Celebration Soap, click here to recap this easy project.
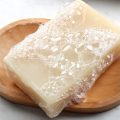
The photo below shows a common issue when embedding objects in melt and pour. Sometimes air bubbles will catch under the wide, flat surface of the embedding soap. If the air bubbles are trapped between the mold and the soap, a bubble will form. The soap isn’t ruined. It’s just not … perfect.
To escape this not-perfect look, first spritz your embedding object with alcohol. Next, add your embedded goodies at a slant. This allows the air bubbles to slide up the side of the hardened soap, leaving your surface smooth and unpocked.
Another pesky issue with the Celebration Soap sinking glitter. Unless the soap is very viscous, it will not support the weight of the glitter. This leaves a very top-loaded glitter star. A solution for this is to pour the soap in the mold, wait 30 seconds and then sprinkle glitter on the backs of all of the bars. The slight surface tension in the soap will support the glitter, leaving both the tops and bottom of the soap densely glittered and shiny.
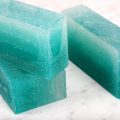
The soap on the left utilizes the same method as the clear Celebration Soap but uses a white overpour instead. One of the features that makes melt and pour soap so artistic and creative is the ease of design options. Just by changing one color, there’s an entirely new design of soap!
Look for more soap combinations and final photos later this week.
