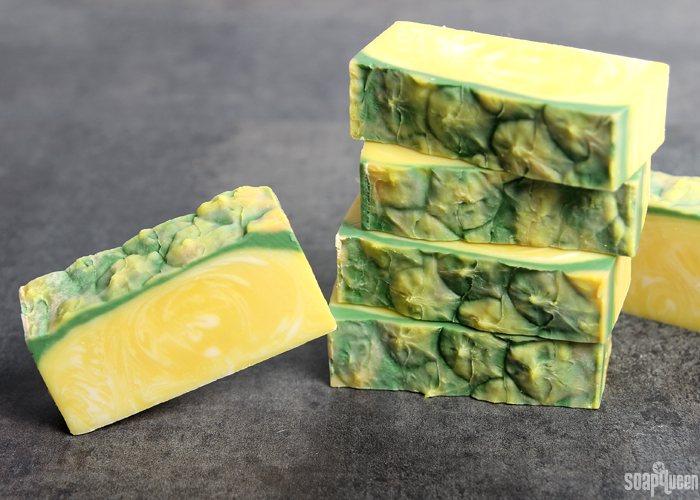
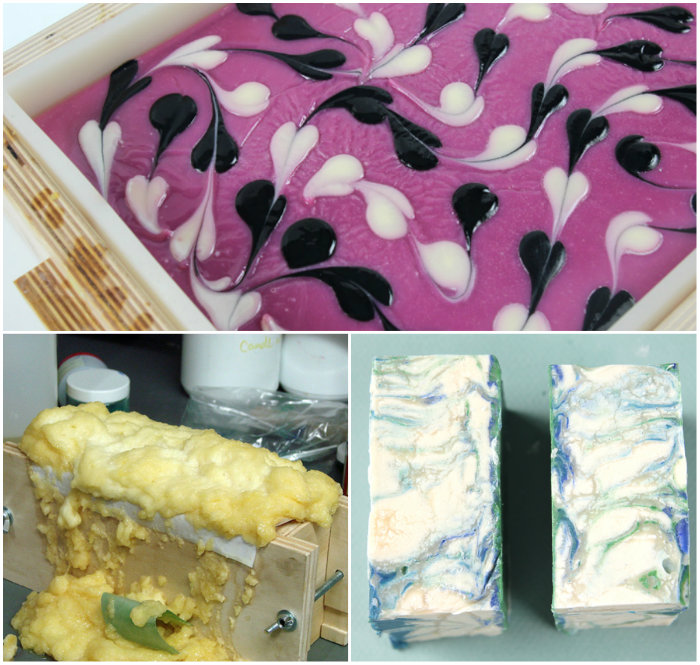
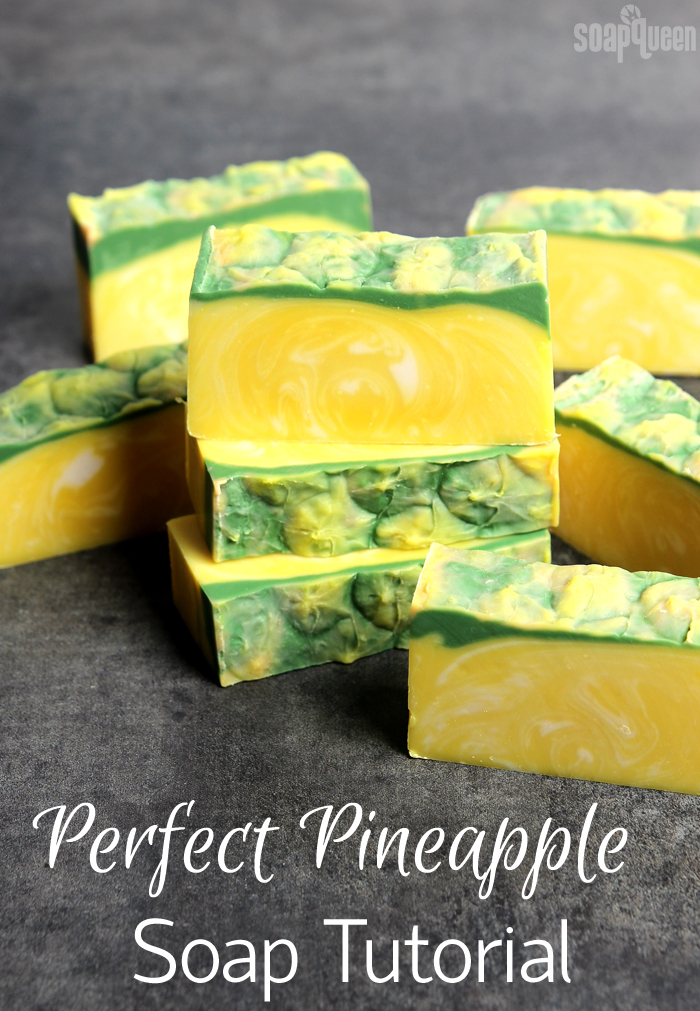
The warmer weather inspired several projects this week, including the Perfect Pineapple Cold Process Soap Tutorial. The recipe uses Flexy Fast Molding Putty and a real pineapple to create an authentic fruit pattern on top of the soap. It’s colored with shades of green and yellow and scented with Pineapple Cilantro Fragrance Oil. It’s a perfect summer soap.
Search Results for: alcohol
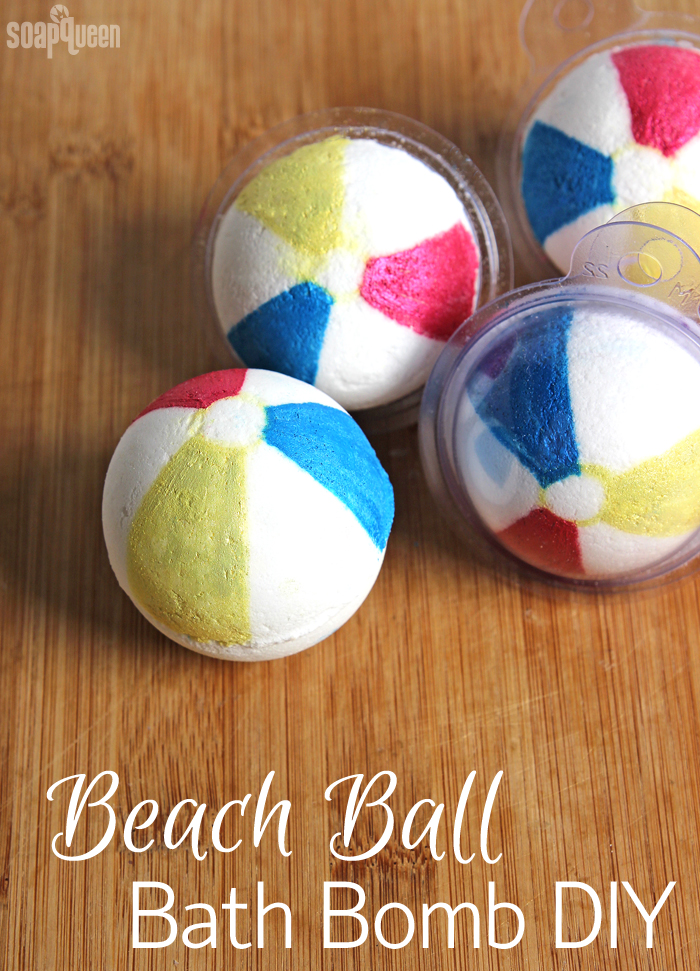
Beach Ball Bath Bomb DIY
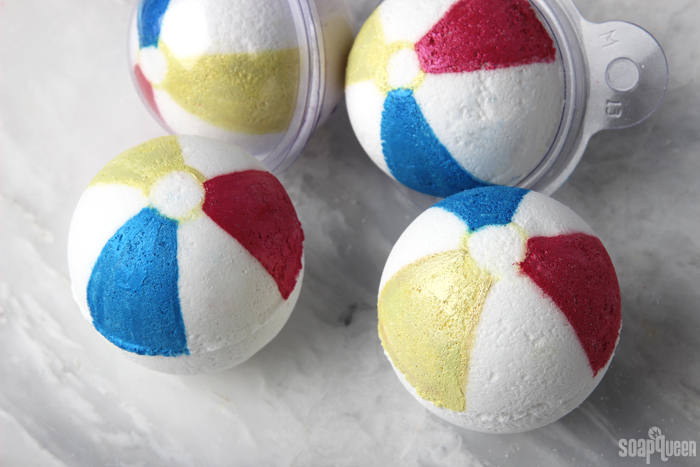
With the summer heat on its way, I have beaches on the brain. If you don’t live close to a body of water, your bathtub is the next best thing. These Beach Ball Bath Bombs bring a little summer fun to the tub. They are created in the Bath Bomb Mold & Package. Once fully hardened, they are decorated to resemble beach balls with various shades of mica “paint.” The paint is created with mica and 99% isopropyl alcohol. The alcohol dries in about 15 minutes, leaving behind the cute beach ball stripes.
I scented these bath bombs with a combination of Flower Child Fragrance Oil and Grapefruit Bellini Fragrance Oil. Flower Child is a unique and sophisticated floral scent with notes of bergamot, amber and jasmine. To lighten it up a bit for summer, I paired it with the bubbly and citrusy Grapefruit Bellini Fragrance Oil. It smells amazing!
When you use micas to color your bath fizzies, they may leave some color on the tub. This will depend on how big your tub is, and can vary depending on the color. For example, if you use Luster Black Mica, you may notice more color on the tub than with a lighter color. I recommend giving your bath a light wipe down before taking a bath so the oil around the tub won’t attract color. This always helps avoid a ring around the tub later on. Also, I like to have a wet rag to wipe off any color right off the tub. It comes off easily that way but don’t use a white wash rag for this. =) You can see how these fizzies looked in a veryyyyyy teeeeeeeeennnnnsy bit water in the video below!
Perfect Pineapple Soap Tutorial
Juicy, sweet and slightly tart, pineapple is a delicious summer fruit. I love putting pineapple in smoothies or just enjoying it on its own. They are also super popular right now; I have been seeing pineapple themed paper goods, clothing and designs popping up everywhere! For this project, I wanted to create a realistic pineapple soap. To mimic the texture of pineapple skin, I rolled a real pineapple over Flexy Fast Molding Putty. This created a silicone mat with a pineapple skin print. Shades of green, yellow and orange soap are poured onto the mat to mimic the shades of real pineapple.
For a sweet fruity scent, I used Pineapple Cilantro Fragrance Oil. The cilantro notes give just a hint of green, which gives the fragrance a well-rounded scent. It also behaves wonderfully in cold process soap, which allows you to create an “in-the-pot-swirl.” If you’d like to see this technique in action, check out this episode of Soap Queen TV.
Guest Post: Thyme & Witch Hazel Facial Bar DIY
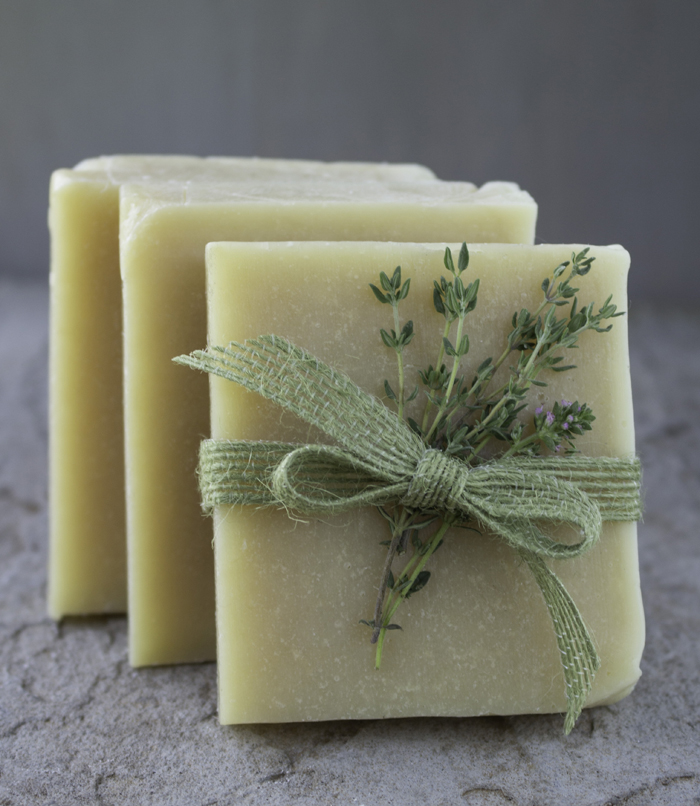
Thyme & Witch Hazel Facial Bars. Photo by Jan Berry.
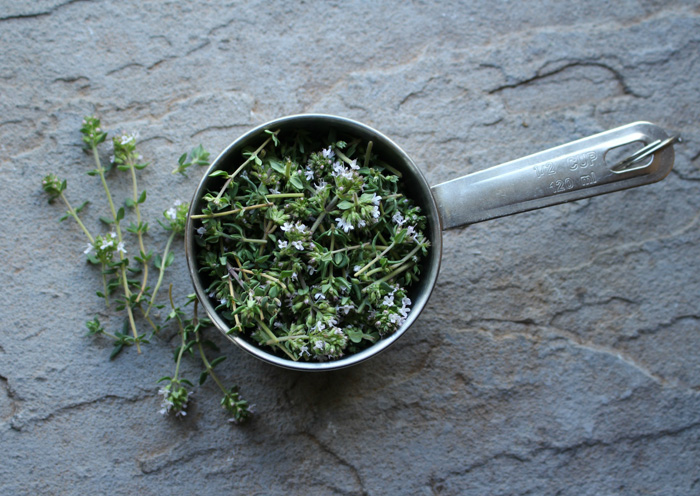
Today, Jan Berry of The Nerdy Farm Wife was kind enough to share this recipe for Thyme & Witch Hazel Facial Bars from her new book, 101 Easy Homemade Products for your Skin, Health and Home. The book is full of unique and simple recipes for cold process soap, scrubs, lotions, balms and more. Jan is also the author of several eBooks, including Natural Soap Making, Things To Do With Roses and Things To Make With Mint.
For this recipe, the distilled water is infused with fresh thyme. Then, witch hazel is combined with honey and added to the soap at trace. The large amount of olive oil and sunflower oil creates a gentle bar, making it great for delicate facial skin. Castor oil boosts lather and tamanu oil is added for its anti-inflammatory properties. To learn more about tamanu oil, click here. Because of the small amount of hard oils, so you may find this recipe takes a little bit longer to reach trace.
The water in this recipe is infused with fresh thyme. Photo by Jan Berry.
I was intrigued by the idea of adding witch hazel at trace, as I previously avoided adding witch hazel to cold process soap. My thought was the alcohol content in the witch hazel would react poorly. Once, I accidentally sprayed witch hazel on top of my soap rather than 99% isopropyl alcohol and it caused some separation. When I tested Jan’s recipe, I found the witch hazel behaved wonderfully with no problems at all. Even after 20+ years of soaping, I’m still learning new things. =)
Jan reports that adding witch hazel to soap at trace can lead to a slightly medicinal smell while the soap cures. When I made this recipe, I found the curing bars had a slightly sweet/medicinal smell that I really enjoyed. After about two weeks of curing, this scent faded.
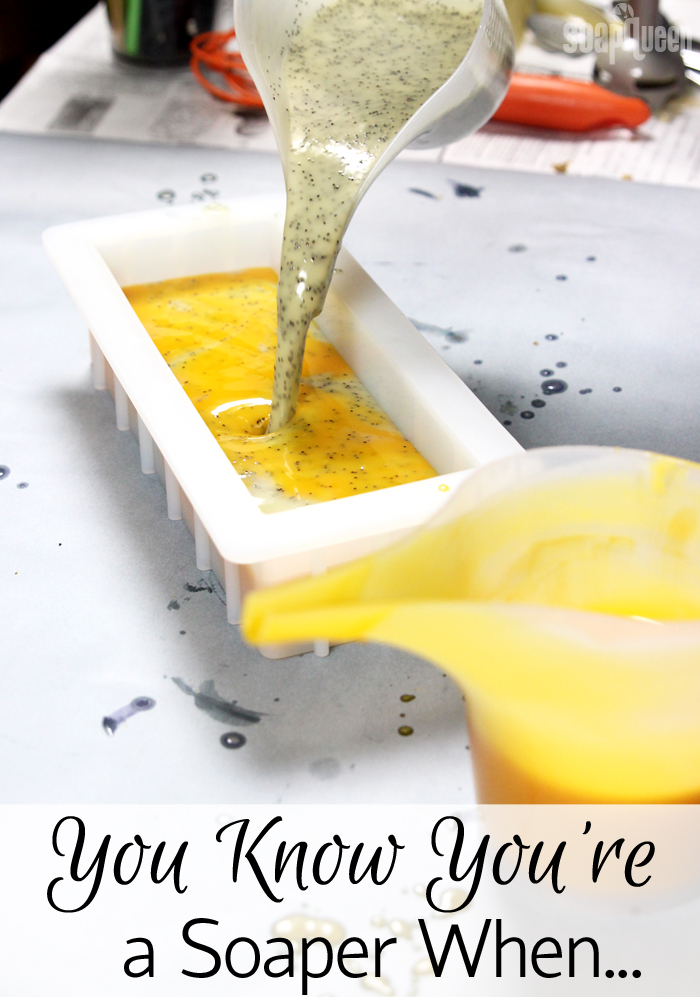
You Know You’re a Soaper When…
Last week I made this gluten-free bread recipe. After pouring it in the pan, I immediately tapped it on the counter to get rid of air bubbles. I had to laugh because that is such a “soaper” thing to do. Knowing other crafters have similar experiences, I asked how others know they’re a soaper on the Bramble Berry Facebook page. There are so many hilarious responses. The team and I had such a fun time reading through them all. You can see all the responses here, and check out some of our favorites below.
- You try to type “soup” but it keeps autocorrecting to “soap.” -Betsy D.
- You are making pancakes and stop stirring because it starts to hit trace. – Tracy W.
- When your soap volcanoes and you run to get the camera to share on FB. -Cindy L.
Cindy L. knows she’s a soaper because her recipe volcanoed and she grabbed her camera to snap a picture! Learn the cause of soap volcanoes and how to prevent them in this post.
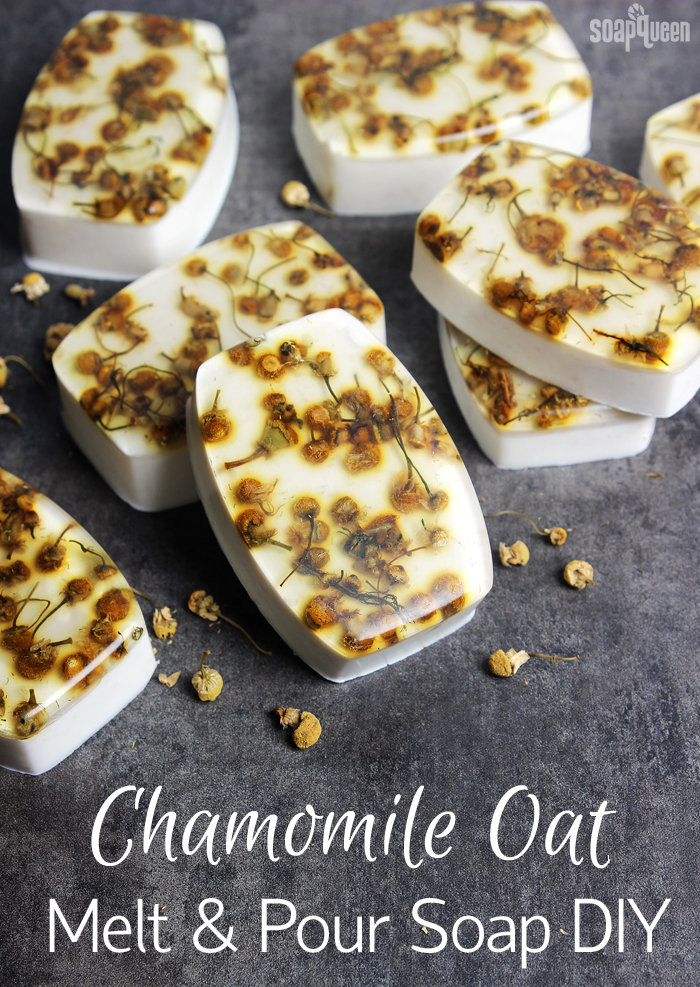
Chamomile Oat Melt & Pour Bars DIY
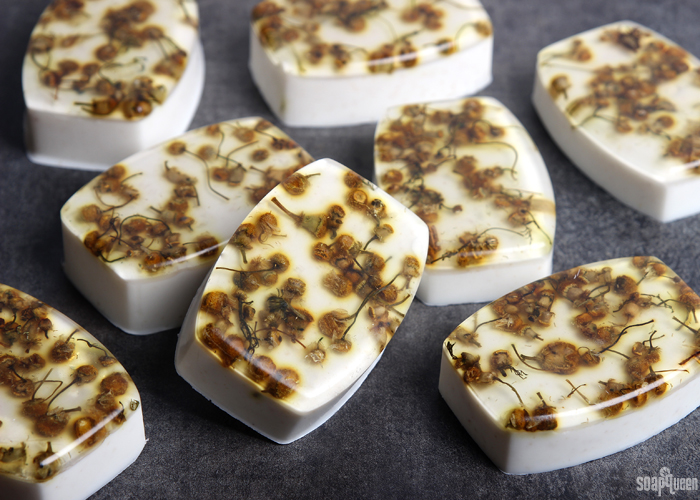
Chamomile is one of my favorite herbs to incorporate in bath and beauty products. It smells amazing, looks appealing and is known for its soothing properties. For these Chamomile Oat Bars, I added chamomile extract to Stephenson Oatmeal and Shea Melt and Pour to create a super luxurious bar. Chamomile Bergamot Fragrance Oil gives a fresh and relaxing scent.
To embed the chamomile herbs into the bar, I placed the herbs into each cavity and covered them with a thin layer of Stephenson Ultra Clear Soap Base. This base is incredibly clear, which makes it perfect for embedding and layering. The chamomile herb does bleed in the soap slightly and may increase over time. I think they still look beautiful, even with bleeding. They can also discolor brown over time.
Watermelon Cold Process Soap Tutorial
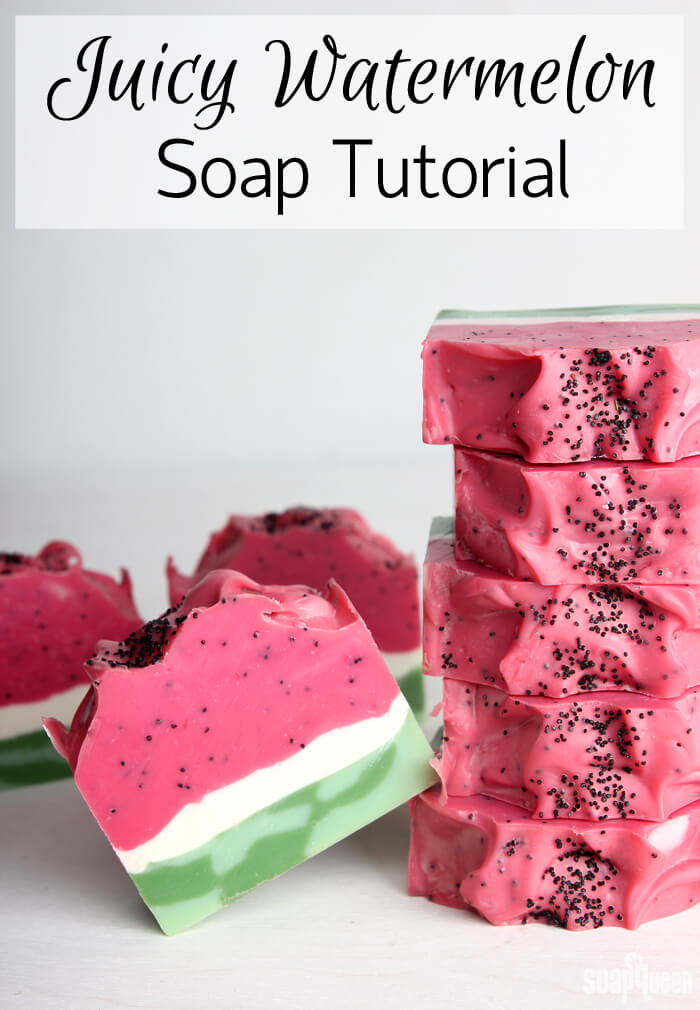
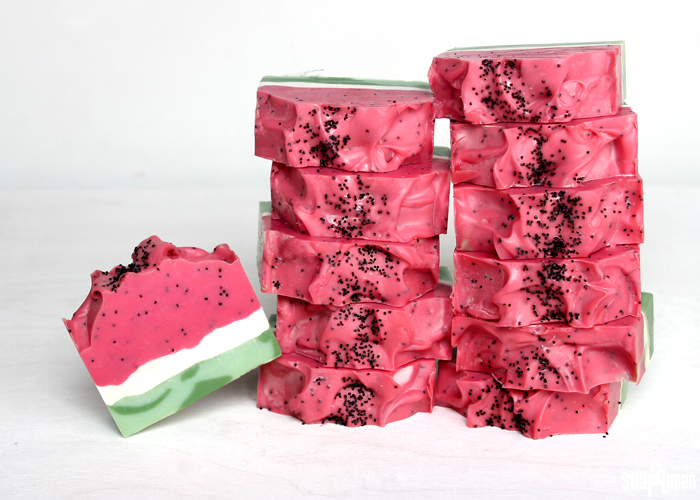
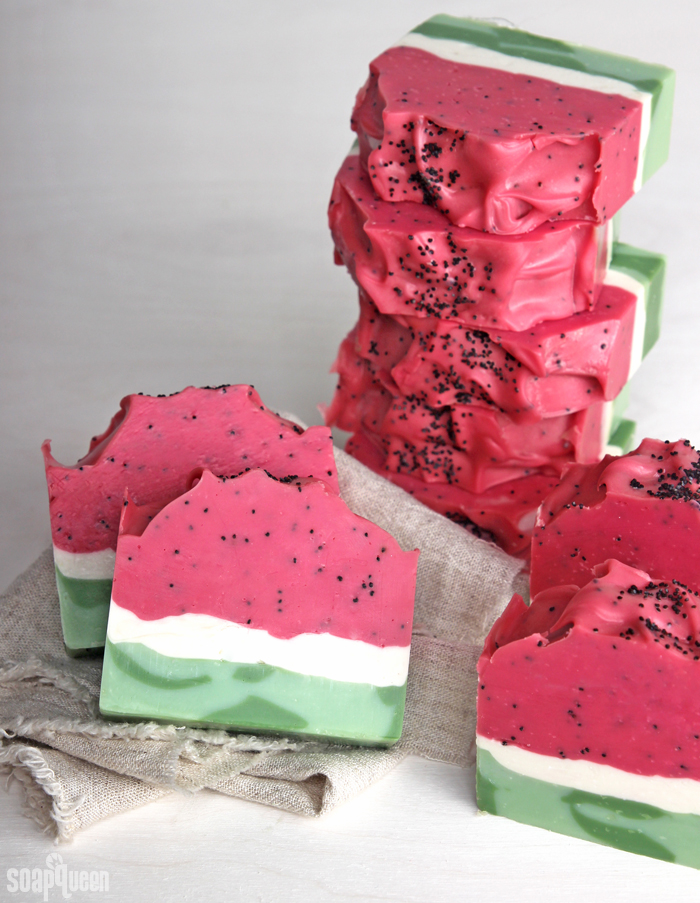
Watermelon is one of my favorite summer fruits. It’s refreshing, light and delicious! With watermelon coming into season, I was inspired to create this fruity soap (of course!). The natural green, white and pink layers of watermelon are surprisingly simple to recreate with thick soap batter. This recipe is formulated with mango butter, coconut oil and olive oil pomace to help create a thick trace that’s easy to layer. The recipe also contains a 12% water discount to prevent glycerin rivers.
To create the perfect watermelon rind, I used a combination of Kermit Green Mica and Green Chrome Oxide Pigment. The two green shades are poured into the mold in strips, which create a realistic look once cut. The new Magenta Mica is the perfect pinkish-red watermelon color, and poppy seeds look like tiny watermelon seeds. They also add a nice amount of exfoliation to the bars.
For this project, I used both Summer Melon Spritzer Fragrance Oil and Watermelon Fragrance Oil. The Summer Melon Spritzer has notes of watermelon which really come through in the soap. The Watermelon Fragrance Oil tends to fade in cold process soap, but the Summer Melon Spritzer Fragrance Oil helps give it a boost. It smells so juicy and fruity; I have a bar on my desk and can’t stop smelling it!
Mechanic Cold Process Soap Tutorial
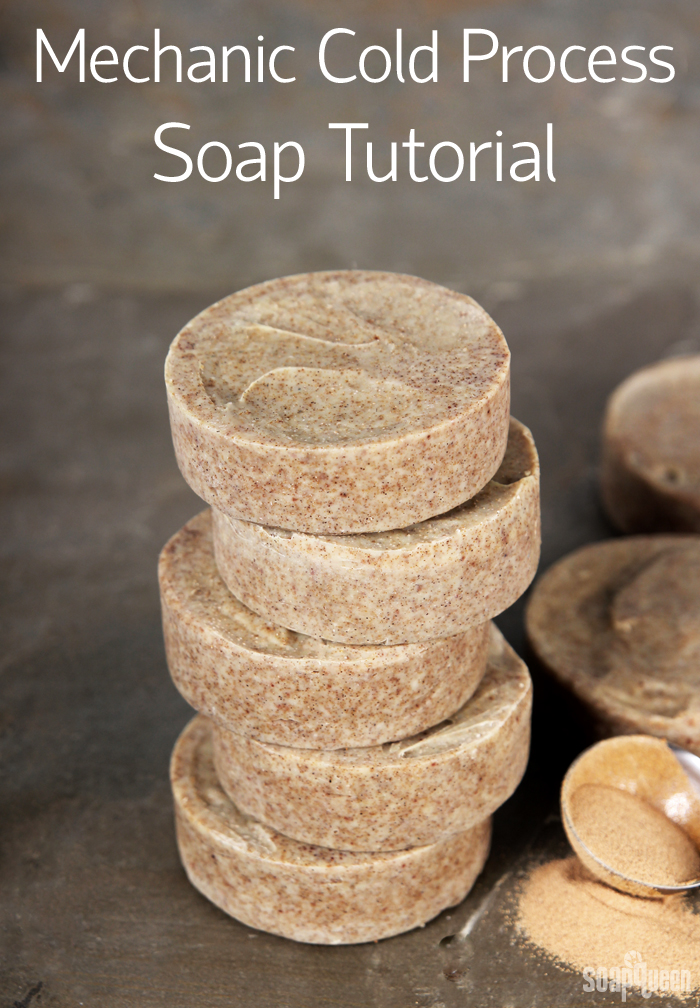
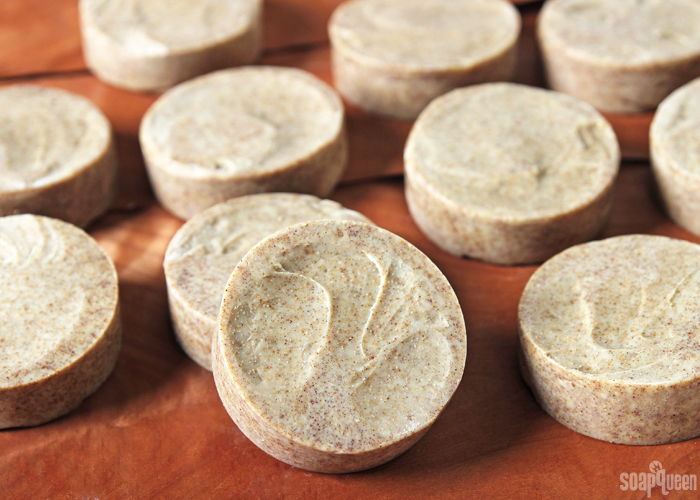
“Mechanic soap” usually refers to extra scrubby bars. The exfoliants help remove grease and oil from working hands. For these bars, I added 5 tablespoons of pumice and 8 tablespoons of walnut shells for plenty of exfoliation. Both pumice and walnut shells are effective yet fine grained, so they are not overly scratchy. These bars are be suitable for the body, but I wouldn’t recommend them for gentle facial skin. They are great for rough spots like elbows, knees and heels.
I kept these bars no-fuss with no colorants or fancy design. Sometimes, simple is best. The walnut shells give a natural warm hue. When the orange 10X essential oil is added, it turns the batter a rich orange, but I found it faded as the soap hardened. The pumice does not affect the color greatly, but it does cause the soap batter to accelerate. Prior to adding the pumice at trace, I recommend dispersing it in oil to help get rid of clumps.
I used my melted and mixed soaping oils to disperse the pumice, rather than adding extra oil to the recipe. This is a personal preference. Normally, I use extra lightweight oil to disperse my colorants and consider the dispersion oils a little extra superfat. For this recipe I did not want to add 5 whole tablespoons of extra oil because I wanted these bars to be nice and cleansing (and remember, any extra oils = weigh down lather and make rinse-off not as easy and fast). This recipe is already formulated with a 5% superfat, and contains a 12% water discount to help these bars cure faster. Read more about water discounting soap here.
Pumice & Poppy Seed Melt and Pour Tutorial
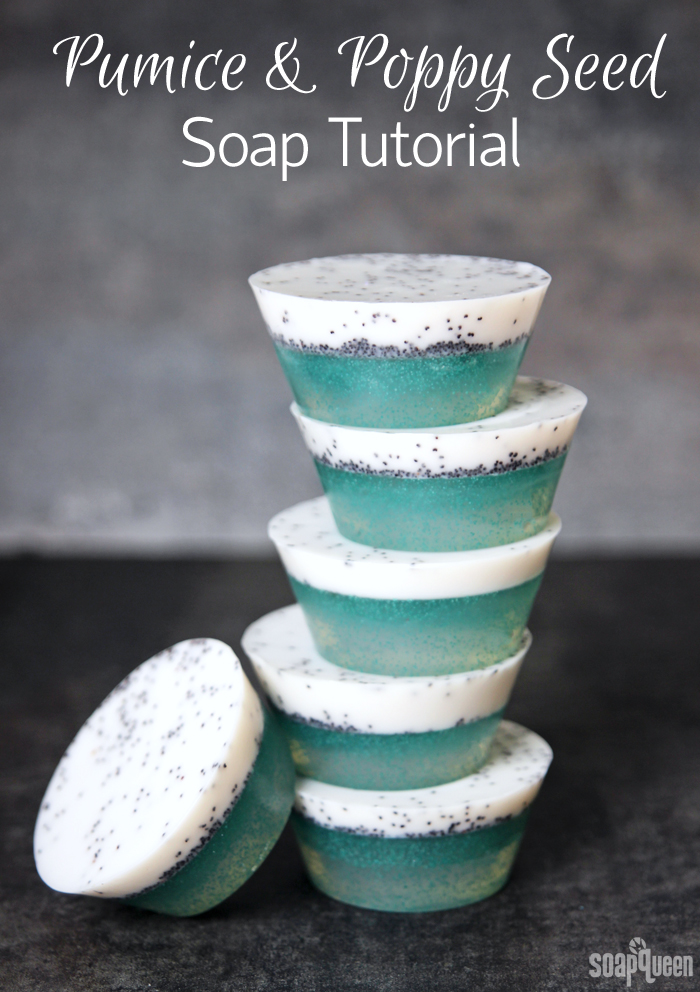
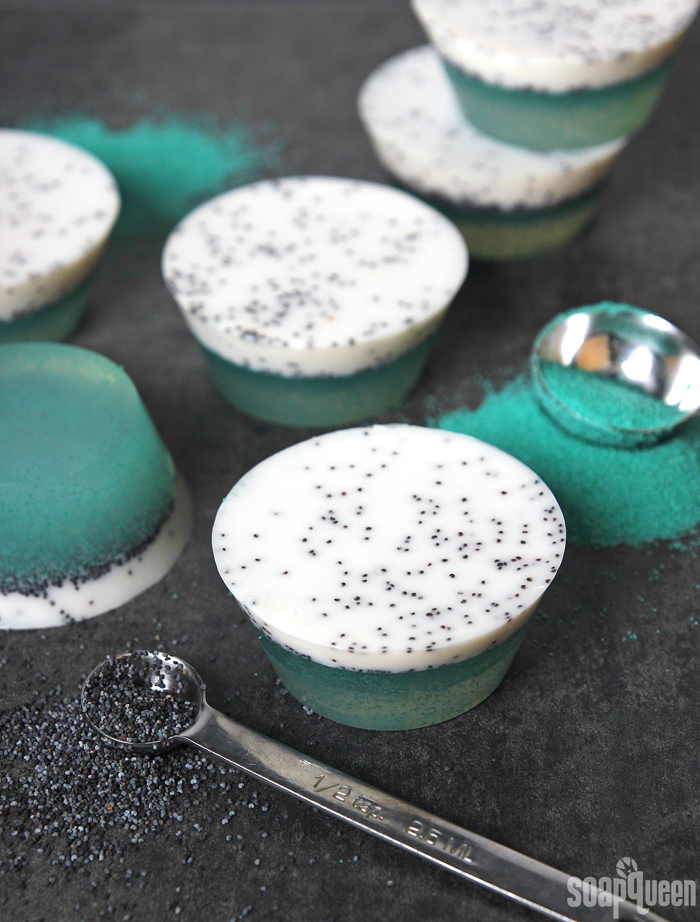
Exfoliation removes dead skin, brightens up skin and helps moisturizer absorb better. These melt and pour soaps contain an exfoliating trio of pumice, poppy seeds and Lagoon Green Jojoba Beads. Jojoba beads are smooth and round, and feel gentle on the skin. They are great for delicate facial skin. Poppy seeds are a little larger and rougher, making them more suitable for the body.
This project is suitable for beginners, but does take a little knowledge regarding layering melt and pour soap. The key to layering melt and pour is temperature and patience. Click here to read my top five tips on creating layered melt and pour designs. I scented these bars with the masculine Bramble Berry’s Made to Measure Type Fragrance Oil, but any fragrance oil could be used for these scrubby soaps.
Facebook and Instagram Photo of the Week (April 30th ~ May 6th)
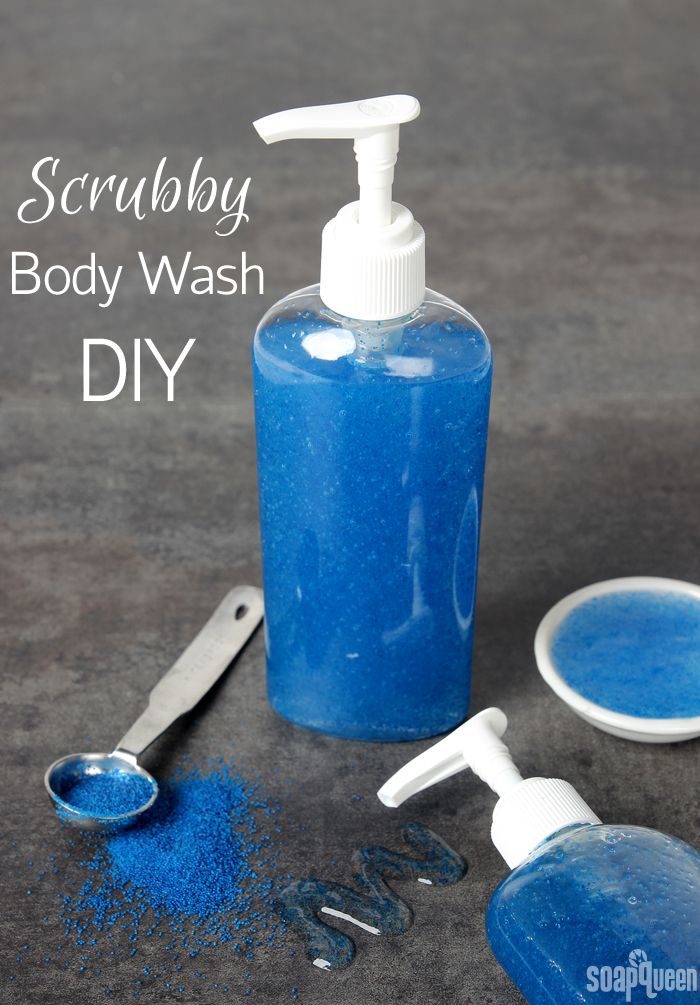
I love pink hues, floral scents and glitter, but this week the blog was all about masculine projects like the Easy Scrubby Body Wash. The recipe is made with Stephenson Suspending Body Wash. The base evenly distributes the Sierra Sky Jojoba Beads, which add color and exfoliation. The recipe is scented with Bramble Berry’s Fierce Type Fragrance Oil. It’s easy to make and perfect for Father’s Day.
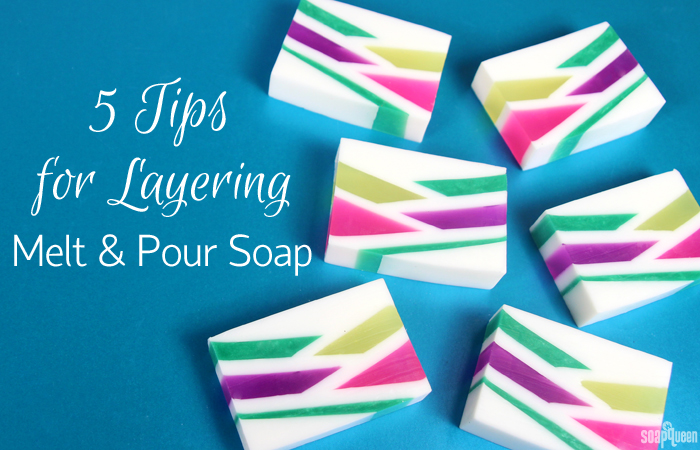
5 Tips for Layering Melt and Pour Soap
Last week, I shared 5 Tips for Swirling Cold Process Soap. Swirls are possible with melt and pour, but can be a bit tricky because the soap hardens quickly as it cools. Swirls in melt and pour soap end up looking much different than in cold process soap. You can read more about my tips for swirling melt and pour here. Right now, I’m playing with the Stephenson Suspension Melt & Pour base to create swirls in melt and pour so be sure to watch my Snapchat stories (bramble-berry) to follow along over the next few weeks with that project. But for now, let’s move to layering.
While melt and pour can’t swirl quite like cold process can, melt and pour can create extremely clean and straight layers. Because melt and pour soap cools quickly, you can wait for the soap to completely harden before pouring the next layer. This prevents the top layer from breaking through to the bottom, which is easy to do in cold process soap. Creating layers with melt and pour soap takes a little patience and a little practice. Below are my top five tips for creating layered creations in melt and pour soap.
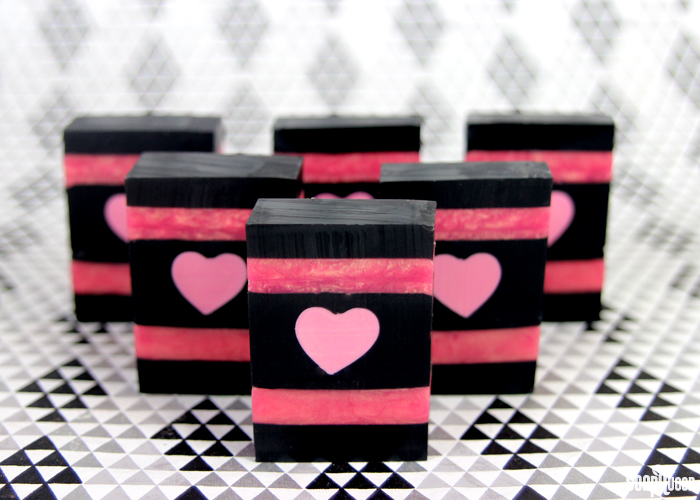
Melt and pour creates clean layers in the Rose Gold & Charcoal Heart Melt and Pour Soap.
It’s All About Temperature!
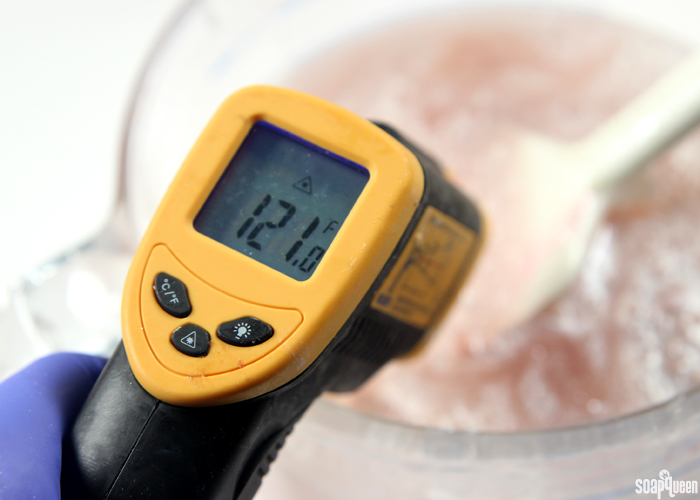
With melt and pour soap, temperature is key. Melt and pour begins to melt around 120-125 ° F. When pouring layers, it’s crucial that the top layer is not too hot or it will melt the soap below. Make sure that the top layer has cooled to 125 ° F or below before pouring. Because temperature is so important, I recommend investing in an infrared thermometer for more layered melt and pour projects.
If the top layer is too hot, it will melt and layer below. Always allow it to cool before pouring!
Masculine Project Roundup
Bath and beauty products are often made with women in mind, but men need soap and grooming products too! With Father’s Day right around the corner, now is the perfect time to create something for the guys. One of my favorite handmade gifts for men is beard oil. It’s incredibly easy to make; simply mix together skin-loving oils such as jojoba oil and argan oil. You can see the process in the Beard Oil Soap Queen TV video below. To save even more time, the Beard Oil Base is already mixed and ready to customize.
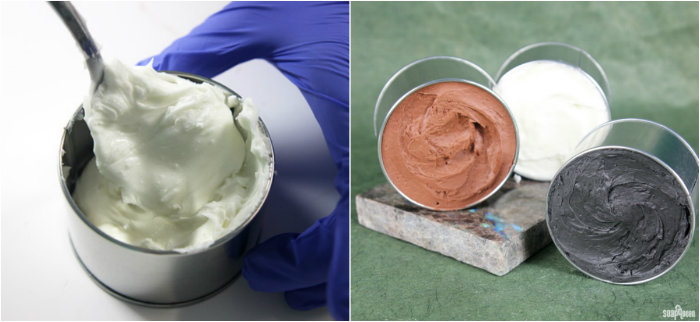
To give facial hair additional grooming, the Sculpting Mustache Wax easily molds hair into various shapes. It’s made with a combination of cera bellina wax, olive oil, hazelnut oil, castor oil and vitamin E oil. The mixture is melted and whipped to create a light, spreadable texture. Leave the mixture uncolored, or add a little brown or black oxide to give the wax color.
The Sculpting Mustache Wax is perfect for shaping facial hair.
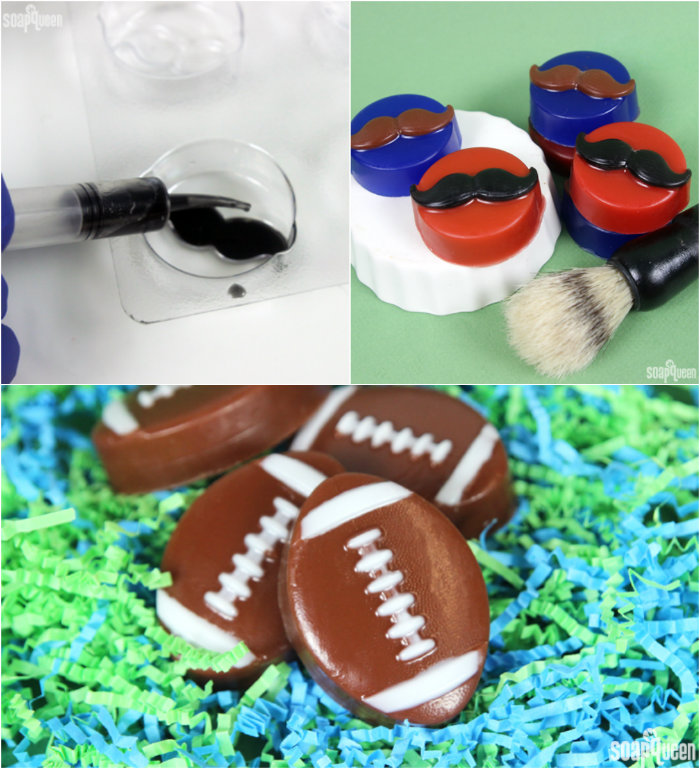
If you don’t have a mustache or facial hair, you can still incorporate ‘staches in your projects. The Movember Mustache Melt and Pour is made with the Guest Mini Mustache Mold to create the bars. They are scented them with Mahogany Fragrance Oil, which is a great traditional masculine fragrance. If you’re looking for more masculine fragrance oil options, click here. The Mini Melt & Pour Foot Ball Soap Tutorial also creates guest-sized soap that’s perfect for any football lover.
Top: The Movember Mustache Melt and Pour creates guest-sized bars.
Bottom: Love football? The Mini Melt & Pour Foot Ball Soap Tutorial will be right up your alley.
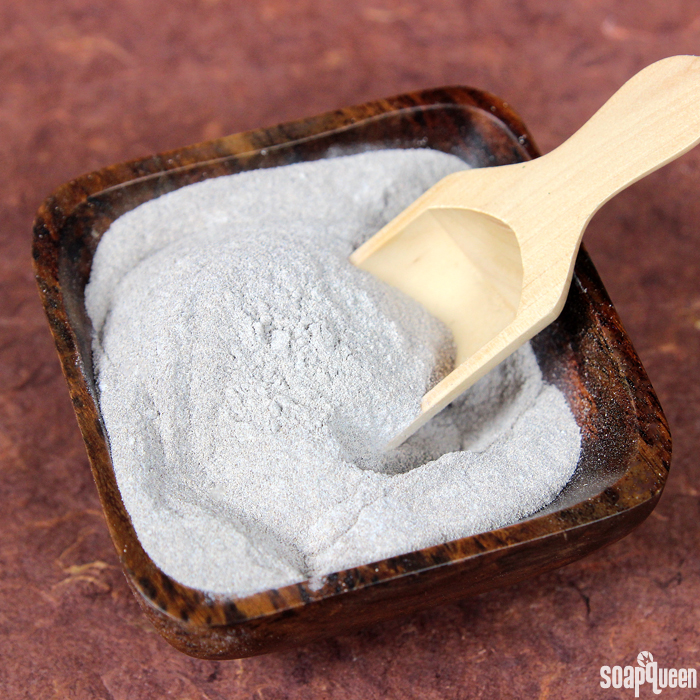
The Walnut Facial Scrub for Men was designed with guys in mind. It’s made with no-fuss ingredients like baking soda, walnut shells and kaolin clay. Simply mix it with a little water and apply to a damp face. For dry skin, mix it with a little lightweight oil like avocado oil or sweet almond oil. Of course ladies can use this scrub too!
The Walnut Facial Scrub for Men is great for both sexes, but was designed with men in mind.
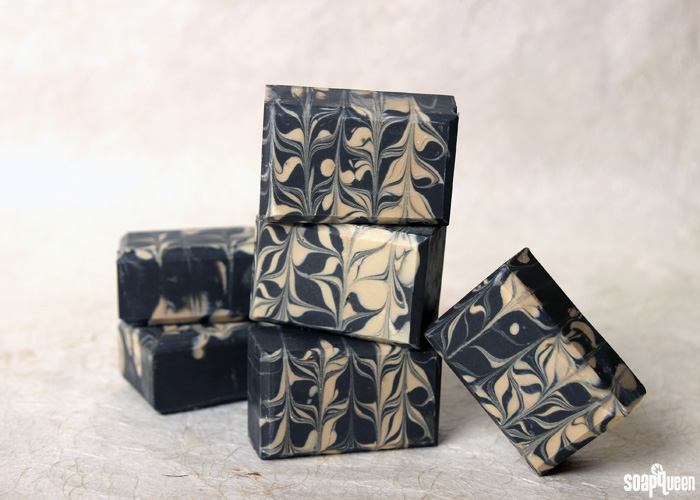
If you’re looking for cold process soap, the Charcoal & Cedar Beer Cold Process Soap is made with a dark stout beer and activated charcoal. Cedarwood and fir needle essential oils give the bars a woodsy scent. To use beer or other alcoholic beverages in cold process soap, the alcohol needs to be boiled first. Learn how in this blog post.
With dark beer, activated charcoal and woodsy essential oils, the Charcoal & Cedar Beer Cold Process Soap is perfect for men.
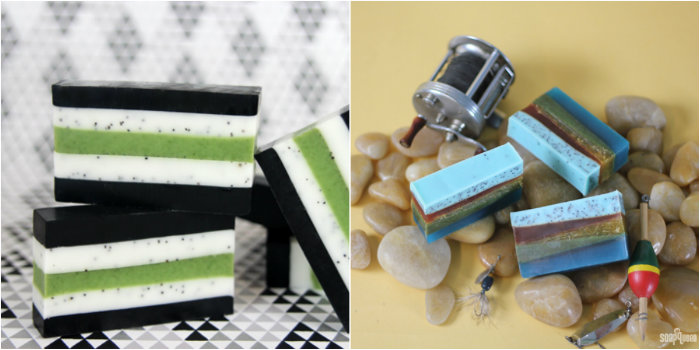
If you prefer melt and pour, the Minty Clay Melt & Pour Bars feature green zeolite clay, charcoal and exfoliating poppy seeds. Scrubby additives are a key component of many masculine products, including mechanics soap. The Havana Layers Melt and Pour Soap features a variety of exfoliants such as shredded loofah and walnut shells for an extra scrubby bar.
Left to right: Minty Clay Melt & Pour Bars, Havana Layers Melt and Pour Soap
What’s your favorite masculine product to create? I love masculine scents…so I like to use “men’s” products as well =)
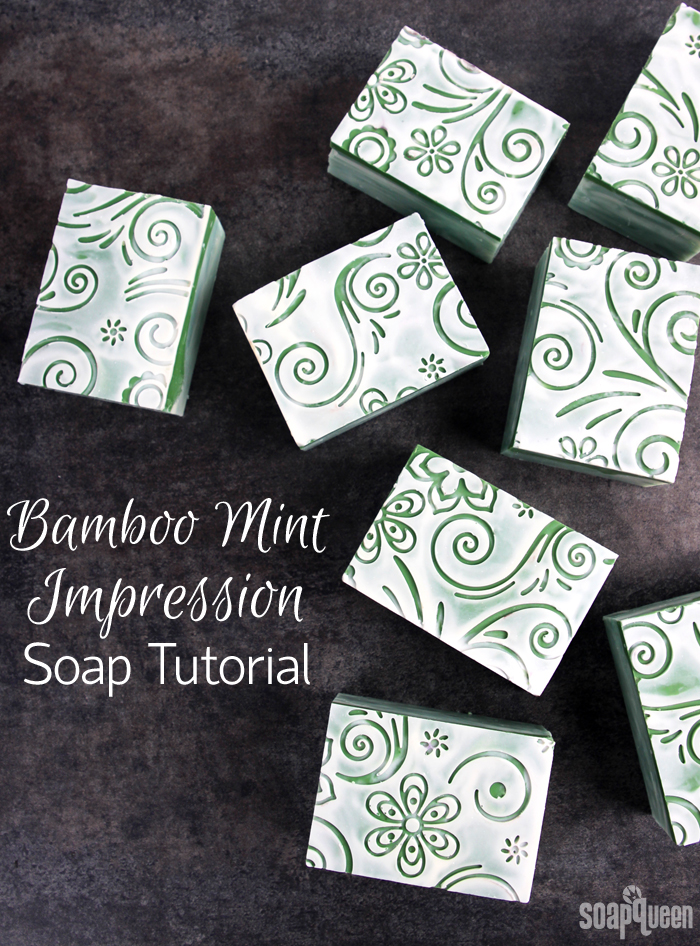
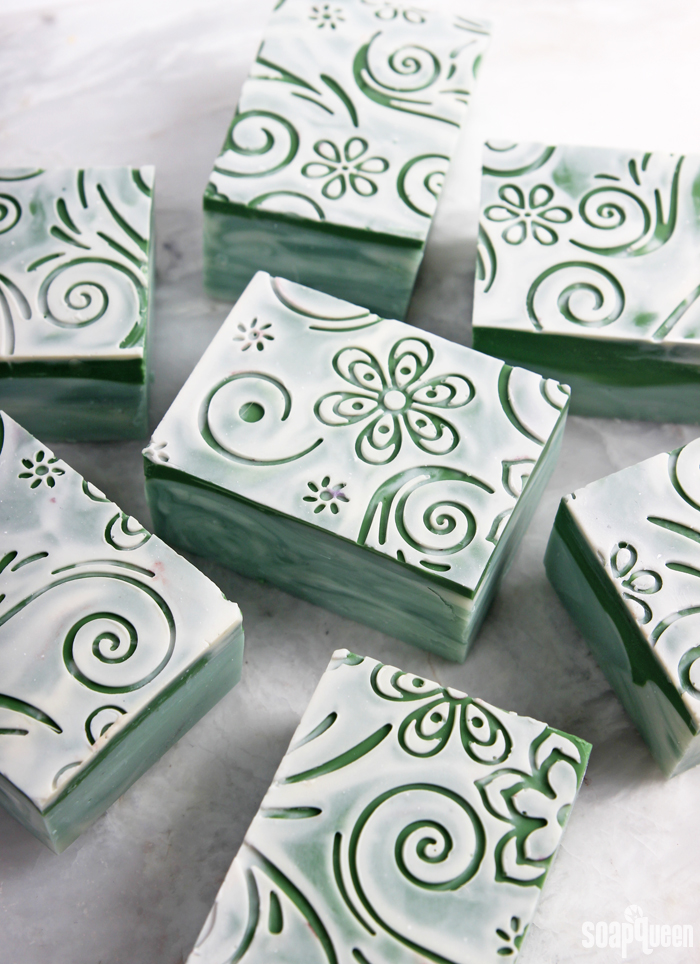
Bamboo Mint Impression Cold Process Soap Tutorial
Last year, I tried making an impression patterned soap for the first time. You can find that tutorial here. I was inspired by Auntie Clara’s gorgeous lace patterned soap. To achieve the pattern, first you need to create a silicone texture mat. Auntie Clara has a wonderful tutorial and plenty of tips on creating your own patterned mat here. Creating your own textured mat allows you to customize the look, but it is a tricky process. These new impression mats are ready to be placed in the bottom of your mold. Simply cut them down to size to fit your mold and pour your soap on top. Then, unmold and peel away the mat to reveal the pattern!
For this project, I used the Flowers and Spirals Impression Mat. This particular mat has a raised pattern, which leaves a stamp-like effect on the soap. To help the pattern pop, I filled the indented part of the mat with white soap and scraped it away from the flower and vine pattern. The Scraper/Cutter Tool worked great for this step. Then, I poured dark green soap on top. This way, the green soap touched the raised pattern of the mat, which resulted in a pronounced pattern.
The process shown in this tutorial an advanced technique. To simplify it, you can skip the multiple layers and colors. Simply pouring one color of soap onto the impression mat will still result in a beautiful soap! I have also found the impression mats that have a recessed pattern (such as the Cupcake Mat or the Butterflies and Feathers Mat) are a little bit easier to use. It’s easier to fill in a recessed pattern rather than a recessed negative space because the pattern is smaller.
Soapy Social Media Roundup
Happy weekend! Today the family and I are spending as much time outside as possible before it starts to rain tomorrow. This should be easy because Jamisen is five this weekend which means, birthday party and so much fun (!). A few weeks ago the family and I walked into town and then took the bus into the heart of downtown. The kiddos loved riding the bus and were super excited every time we stopped to let someone new on. They fought over pulling the cord once we reached our destination. =)
I’m super excited about our upcoming creative projects. Be on the lookout next week for a bath truffle tutorial, as well as a cold process soap made with one of the new impression mats. =)
Left to right, clockwise:
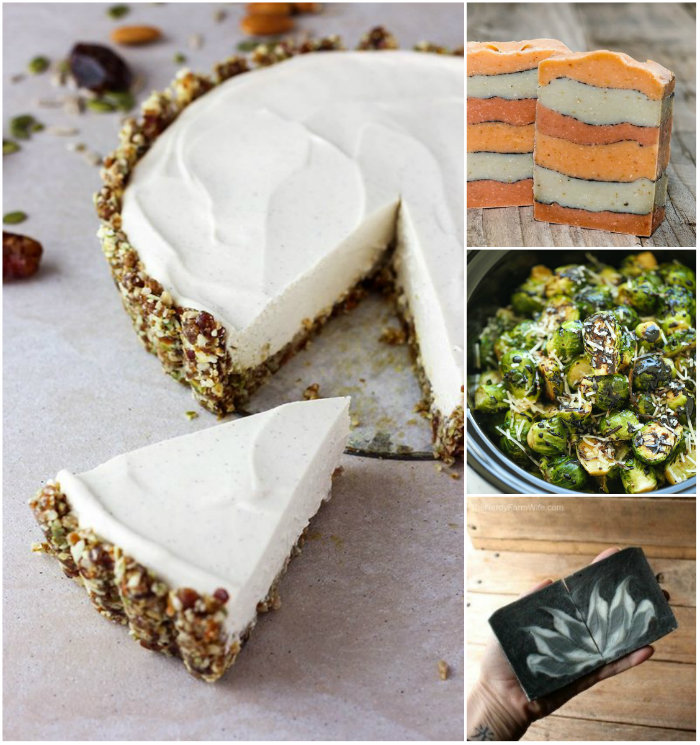
- This Lime and Vanilla Vegan Cheesecake looks amazing. It would make a nice dessert option on a hot day.
- I love the rustic colors and mica lines in this Natural Colorant Pencil Line Soap by Amanda with Lovin’ Soap Studio.
- I usually make brussels sprouts in the oven or on the stove, but I’d like to try this Slow Cooker Balsamic Brussels Sprouts recipe.
- Black and white is such a classic and bold color combination. It really pops in this Circling Taiwan Soap by Jan of The Nerdy Farm Wife.
Instagram:
I have started making my own kombucha, so of course I had to make soap with it. =) If you’d like to see how I made these Kombucha Cold Process Bars, check out the tutorial here.
Did you catch my newest video on Soap Queen TV? Check it out here. It’s a spin swirl cold process soap, made with the new Clover and Aloe Fragrance Oil.
- I love sharing a #SoapShare photo from Instagram on my account each Friday. But what is the proper “regram” etiquette?
- Choose the right time to quit your day job for your startup business. It’s crucial to success.
- What happens to your body when you give up alcohol? Only lots and lots of good things.
- Have you ever asked for a discount? If the merchant asked you “why?” how would you react? It’s an interesting strategy.
- Less than 3% of Americans live a healthy lifestyle. Whoa! Only 3%? That’s a little shocking, and sad.
- Are probiotics for you? Probably!
I hope you’re having an awesome weekend so far. To keep up with soapy social media throughout the week, you can follow me on Twitter, Tumblr, Instagram, Pinterest, Vine, Katch, YouTube and Snapchat. I’m Bramble-Berry on Snapchat. Don’t forget to tag your soapy projects on Instagram with the hashtag #SoapShare and #PureSoapmaking so I can see what you’re making! =)