 Project Instructions – Part One, Part Two, Part Three
Tutorials on soapmaking, bath fizzies, lotions and more
Filed Under: Melt & Pour Soap
 Project Instructions – Part One, Part Two, Part Three
Filed Under: Business Musings
Click here if you missed the first part of Cocoa Pink’s interview.
Do you have your Vision and Values determined? Would you mind sharing?
CocoaPink is committed to the highest standards of ethics and integrity. We are responsible to our customers, employees, to the environments we inhabit, and to the societies we serve. In executing our responsibilities, we do not take professional or ethical shortcuts. Our actions must reflect the high standards we affirm.
You have a great site! I love the graphics on the site. Do you feel like having great graphic design has helped your business?
I love my illustrator. I do all the label design and most of the concept art and my illustrator does all the graphics. We have a great synergy, as she is able to take my vision and realize better than I could have imagined it myself. That’s the true talent of an illustrator, to honor the clients vision and surpass expectation.
I think packaging is very important. I like to pay attention to details. Yes, product quality is the most important element, however people still judge the bottle, label, packaging. I get it with the higher end retailers, as my packaging is not “exclusive” enough to be in the higher end retail shops, even if the product is superior to the “nicely wrapped” ones.
If you only had $1000 to start out your business, what would you spend the money on, knowing what you know now?
1. Insurance.
2. Legal Fees
3. Start Up Supplies
Insurance – I am a stickler for doing things by the book. I’ve learned that to maintain a well run business you need to have a secure foundation. If someone is interested in selling cosmetics to the public, they need to be aware of the liability they are placing themselves in with each sale. There are great affordable insurance options available to the small business owner. I would recommend looking at the Handcrafted Soaper’s Guild as they have a plan with various coverage options that is very reasonable.
Selling to the public without insurance is financial suicide. Just one lawsuit is enough to rack up thousands in legal fees. If you sell it and it hurts someone, you are responsible. So insurance is a must.
Legal Fees – There are companies online that offer affordable legal options for things
like business licenses, corporations, state tax identifications, and any other legal requirements your state may have for running small businesses. Legal Zoom is a good place to begin researching. I would also recommend contacting your local small business association as they can help you state legislatures and laws. You don’t want to invest in a business then get slammed by fines. Make sure you know what is required of you before selling to the public.
Remember, all it takes is one hurt customer, one lawsuit, or one state law that you are unaware of to put you out of business for good. Be responsible and take it seriously. Selling to the public is not like a grade school bake sale. You need to know what you are getting into and make informed decisions.
After you have all the red tape in place, an active insurance policy, and anything else you may need to sell your goodies to the public… your wallet will feel pretty empty. Start with one product – the product you do best – your signature item. If it’s soap, start with that. If it’s fragrance do that. Start small. Get what you need to make a few small batches and focus on that. Depending if you sell online or locally, take photos yourself to save money. Start with Etsy or another low fee way to sell your product. Save money where you can – photos, website (wait on investing in a full blown online shop until you have some profits).
What’s your favorite product to make?
Soap! It’s my zen. I soap alone, in private. It’s intimate. I love it.
What’s your favorite Bramble Berry product?
Right now I’m really diggin’ the Hello Sweet Thang Fragrance oil.
Thank you Ilona for such an informative and information-rich interview!
Filed Under: Melt & Pour Soap
The first part of this tutorial was how to create glittery Ornament soaps. Now I’m going to show you how to add details with your own homemade soap paint. I wouldn’t recommend trying to paint over the glitter, you should choose one technique or the other.
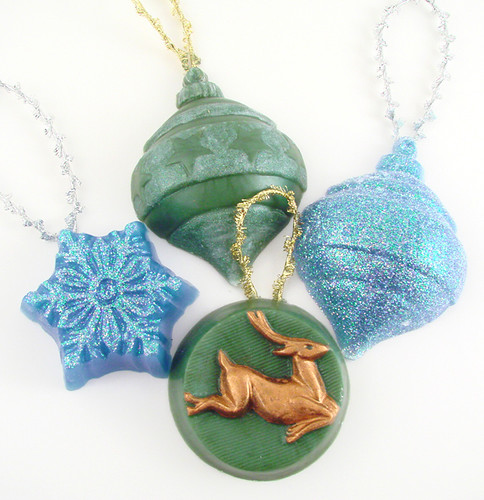 Soap paint recipe:
2 parts Liquid Soap
1 partClear Melt & Pour Base
1 part Rubbing Alcohol
1 part Mica or Oxide
This recipe is in parts so you can make as much or as little as you like. We used 1/2 teaspoon to measure out our paint. So our recipe was 1/2 tsp. Clear M&P, Rubbing alcohol, and colorant and 1 tsp. liquid soap.
tools:
small heat proof container
paint brush
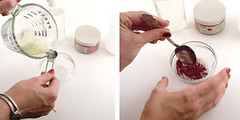 Step 1: Measure out the liquid soap and warm it up briefly in the microwave.
Step 2: Add the rubbing alcohol and colorant and stir to mix well.
Step 3: Add the melted clear melt & pour soap base and stir well.
Hint: If the soap starts to cool down and solidify you can pop it in the microwave to warm it up and make it paintable again. If it gets goopy, mix in a little more rubbing alcohol to help smooth it out.
Step 4: Carefully paint your soap ornament. If you paint an area where you don’t want paint, use the carving tool from our melt and pour tool kit to clean it off.
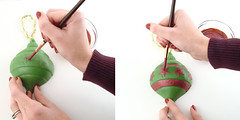 Another Hint: If the paint doesn’t want to stick to your soap, try dusting a little cornstarch over the soap before painting. This gives the soap something to grab onto.
Allow the paint to dry for a day before wrapping in plastic or hanging on your tree. It’s a heavy soap, so pick a sturdy branch. When guests come to visit over the holidays, let them pick their own useful soapy ornament to take home. They’ll think good thoughts about you every time they use their Christmas surprise.
Filed Under: Melt & Pour Soap
For Christmas this year, I made ornaments from soap that smell as festive as they look. Decorate your tree or give as unique holiday gifts. Today I will show you the basic technique for an-all over glittery soap. Tomorrow, I’ll show how you can make your own soap paint and add detailed decorations to your soap.
Here are the ingredients you’ll need to make this project:
Melt & Pour soap base
Lab Color soap colorant
Cranberry Fig fragrance (or another equally holiday fragrance)
Christmas Ornament or Snow Flake Mold
Ribbon or String
To decorate this soap:
Hairspray
Glitter (must be skin-safe if you want to be able to use the soap so no rubber stamp project glitter)
Step 1: Melt the M&P base and add color and fragrance (if this is your first time making melt & pour soap check out this tutorial for more detail).
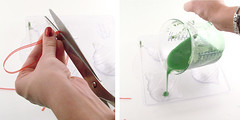 Step 2: Cut about a 6 inch length of ribbon. Pour the melted base in the mold and place the ends of your ribbon at the top of the mold. You might have to hold it in place until the soap thickens or use a little piece of tape.
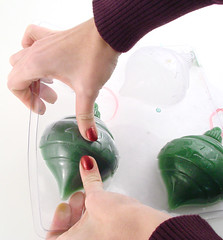 Step 3: Once the soap has fully set-up, remove them from the mold.
Go on to step 4 if you want a quick and easy glittery ornament or check out our soap paint tutorial tomorrow for a fancy finish!
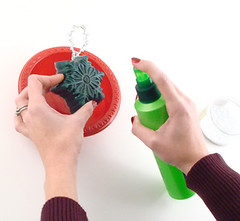 Step 4: Spritz the soap with hairspray.
 Step 5: Sprinkle glitter onto the soap. We used a plastic bowl to catch the excess glitter to easily re-use it. It’s important to use glitter approved for cosmetic use so that it doesn’t scratch the skin or cause an allergic reaction.
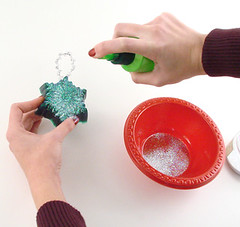 Step 6: Spritz with another coat of hairspray to hold the glitter in place and you’re done!
Check back on Friday for a Soap Painting Tutorial to make your ornaments look even more festive.
Filed Under: Melt & Pour Soap
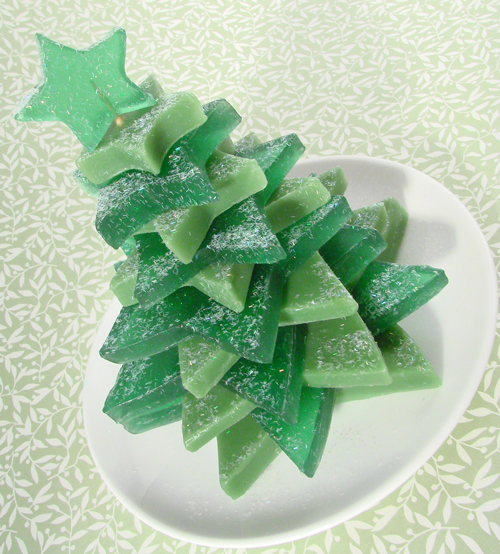
Here’s our final stacked Christmas tree. We sprinkled a little glitter over the top for an extra sparkly snowy effect.
This was a 2 part project, find the first steps here and the finishing steps here.
Filed Under: Bramble Berry News
 I’ll be on Martha Stewart Radio on December 4rd at 2 p.m.EST/11 a.m. PST. The show is LIVE so if you have questions (that you think other people have), be sure to call in. It’s a beginners type show, focusing primarily on melt and pour soap and being crafty creative to save money for the holidays. If you have any questions about any of the Christmas projects I’ve posted in the last month, please call up and ask. I’m excited to be a repeat guest and share the joy that creative soapy crafting can bring to both the crafter and the receiver.
Filed Under: Melt & Pour Soap
Yesterday, in the first installment of this tutorial I demonstrated how to make the star cut outs that form our Christmas Tree Soap Centerpiece. Now I’ll show you how to make a tree with all of those pieces!
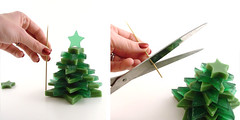 Step 5: Stack up your stars until the tree looks the way you want. Stand your wooden skewer next to the stack and trim it down if needed.
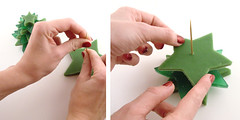 Step 6: Start with the bottom most star (the largest one) and thread the skewer through the center of the star. This will give you a stable base to continue threading the stars on. Thread the stars on, rotating them so each point of the star looks varied and different from the layer above and below. This gives your tree dimension and interest.
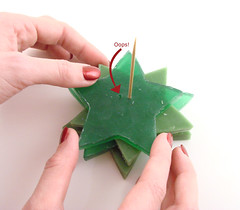 Don’t worry if you are off-center on one of your stars. Just remove the star and try again – the extra skewer hole will be hidden by the next star.
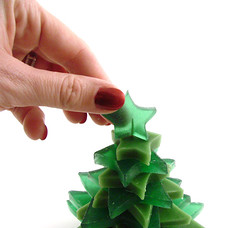 Step 7: When placing the last star, tip it up on end for a cute finish!
When moving your tree it’s best to hold it by the bottom star or better yet, place it on a little soap dish or plate. Your Christmas Tree Soap Centerpiece will look great, smell delightful and impress all who see it.
Filed Under: Business Musings

I just bought some of Bubble Roome’s Christmas Soap ornaments. I can hardly wait to get them. David says this about the set:
Each set contains 3 different doorknobs {in a random grouping of blacks and whites) along with a black plastic soap tray we molded from a key latch plate.
If you missed my interview with the founder of The Bubble Roome last year, click here to read about his company, his set up and his inspirations.
Filed Under: Bath & Body Tutorials, Melt & Pour Soap
Make a fun soap centerpiece; it’s easy, creative, smells good and is unique to you and your house(unless of course your friends do Soap Queen projects too!).
To make this project you will need:
6 oz Clear Melt & Pour Base
6 oz White Melt & Pour Base
Emerald Green Labcolor
Christmas Forest Fragrance Oil
Various Stars, cookie cutter size (Wilton makes great stackable cookie cutters)
Flexible Brownie Mold
Wooden skewer
step 1: Melt 6 ounces of the clear soap base add a drop of the Emerald green color and a dropper of the fragrance (or as much as your prefer). Usage rate for fragrances are about .25 ounces of fragrance per 16 ounces of soap. Pour into the brownie tray mold.
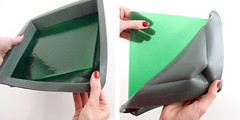 step 2: Once the soap fully sets-up, remove from the mold and repeat step one with the white base. Color the white base with Emerald Green Labcolor, fragrance it and allow to set up.
 step 3: Cut out various star shapes from the soap slab. (Hint: as you cut out shapes, stack them up to get an idea of how tall your tree will be and which size you need more of. We cut out 3 of each size and had 5 sizes of stars).
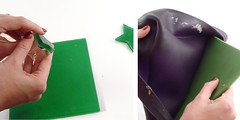 step 4: Smooth the edges with your finger to get rid of the little soapy burrs.
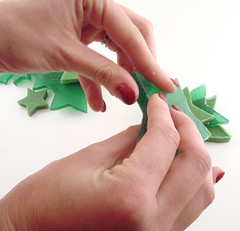 In the next post, I’ll show you how to attach the layers together to complete your soap sculpture!
See part two of this project here and the final touches here.
Filed Under: Bramble Berry News
The second part of Ilona’s interview will post this Saturday. Today, I’m going to work on a fun Christmas Soap Centerpiece ornament project. I promise you, her interview is worth the wait.
Filed Under: Business Musings
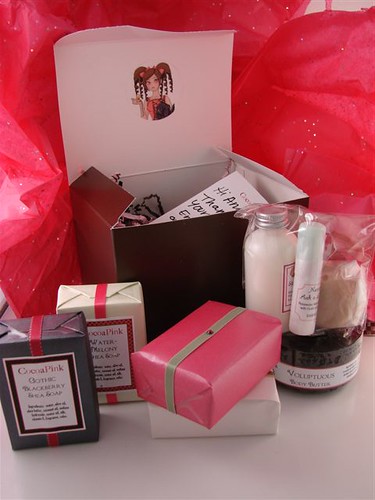
I “discovered” Cocoa Pink a few years ago (along with a lot of other people!) and promised to blog my review for these products. This review is now over a year late and deserves more attention than just a mere review. Cocoa Pink (aka Ilona Timoszuk) has grown her business to employ 10 people with a retail online shop and has several large wholesale accounts. She did it the old-fashioned way – with her own cash, her own sweat equity and a vision that she convinced other people to help her with (aka friends, family and paid employees).
These are the products I bought from her back in 2007. As you read through her interview today and tomorrow, notice how her style has changed in the last year.
Where did you find financing? How in the world did you grow to 10 people and finance that growth?
The way I finance CocoaPink is influenced by my father, who started his now multi-million dollar company in a similar manner, without any credit or loans.
I do not like credit; I never have. I do believe it is necessary for home buying, student loans, and autos, but I draw the line there and refuse to finance personal indulgences. I apply this philosophy to CocoaPink and I believe shifting awareness away from credit-is-the-only-way helps empower business owners – and it feels great!
I started small. I made a couple items and sold them. Then I reinvested 100% of my profits into growth. For example, I use $100 of my own money to make a few batches of Cold Process soap and maybe some lotion. I sell those and get $150 – I reinvest all $150 in more supplies to make more products. I sell those and now I have $225 and again re-invest, make product, and sell. I did not take any personal income until I I felt the business had grown to a size I felt good about, and we had enough capital that I could afford to give myself a salary.
When you begin seeing large numbers, it’s easy to feel tempted to spend. This is where it is important to remember your vision and what you ultimate goals are. For one person this may be an intimate business with just one or two employees, while someone else’s vision may be much greater. What is important is to budget towards that vision.
A person must to feel passion for their business while respecting its growth & limitations. Don’t borrow hundreds of thousands of dollars because you suddenly decided that you want your hobby to become a multi-million dollar empire. Let the company grow itself. It will take you to the size it wants to be. If it’s meant to get there, it will. However, bigger is not better, especially when your company owes more than its worth.
Do you have a big huge goal that you want to share with us?
If you ask my ego, it will yammer on about grandiose manifestations in Manhattan skyscrapers and first class junkets to Paris. My ego is quite dangerous. (grin)
So ego aside, my real goalswould be to demonstrate my values on a wider scale. There is more than enough resources and money available to us. Greed has no place in a business, and I am sick of watching corporate scandals and people not giving a @#$%& about their staff and customers.
CEOs are modern day kings. Their power, corruption, and greed remind me of yesterday’s monarchies. We may have overthrown these governments, but the same greed and power has reincarnated within our corporations. Employees work like peasants, earning next to nothing, treated like a number, while CEOs …well we all know what they are doing.
My biggest dream – the “huge” one is to work in a position of influence and maintain my strength (or stubbornness or heart or whatever drives me) to make morally responsible choices. Choices that are not about money-money-profit-profit – and come at any expense. I’d love to follow the models of CEOs like Howard Schultz (Starbucks), who was a pioneer in ethical business practices.
I’d love to stare greed in the face and facilitate its disintegration. I’d love to empower the hard working, bring employment back to the USA, and do this while being eco-conscious.
Yes, it’s “huge” – and I do not ever see it becoming a reality. I would be just as happy if more CEO “Kings” were de-throned and corporate greed was replaced by corporate generosity.
What sort of support network do you have around you? Like a Mastermind Group or a close knit family or …
My father. We are very close (he lives 3 miles away). My family immigrated from Poland when I was 3 years old and we had nothing. Just one suitcase and a teeny apartment in a very shoddy part of Boston. My father worked as a MIT professor for over 20 years. Now seeing how far he has come (working 80 hour weeks to get there) and to witness him run a company that employs over 60 people with such honor, concern and emotional connection to each employee – it’s my inspiration. He’s my moral compass as he has often sacrificed his own salary during
rough times to make sure his staff was taken care of.
Can you imagine? A CEO giving up their own income to prevent layoffs? That’s a man worth admiring.
I also have two amazing kids and a wonderful husband who remind me that there is more to life than work.
Check back Saturday for more of Ilona’s inspiring story!
Filed Under: Personal Ramblings
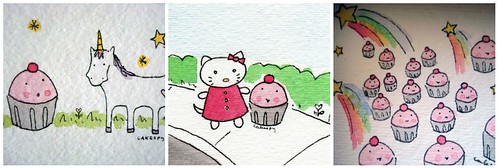
I just bought three adorable mini original watercolors from Seattle artist Jessie Oleson (aka “CakeSpy“) for a Christmas present. I’ve been a fan of Jessie’s since she sought me out after listening to me at the Crave Panel on starting a business. She was a delight to speak with and had natural business talent, especially in sales and marketing. I own a few of her originals and have gone through 20 or 30 CakeSpy cards this year alone (previous CakeSpy posts here, here and here).
Filed Under: Bath Fizzies
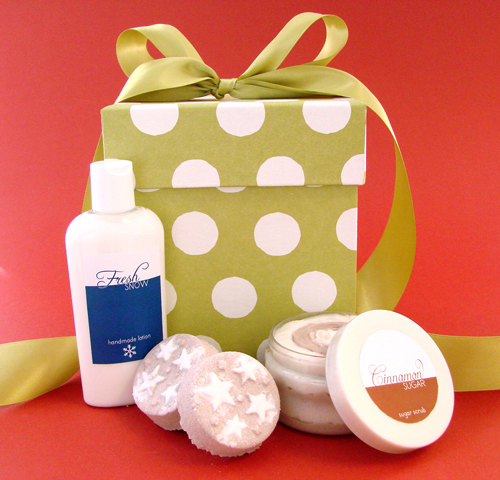 Let’s finish up those bath fizzies so you can be on our way to finishing the delightful ensemble above. Click here for Day One of this tutorial. By the way, the set of items pictured only cost $6.02 in ingredients! Luxurious and cheap.
 Step 5
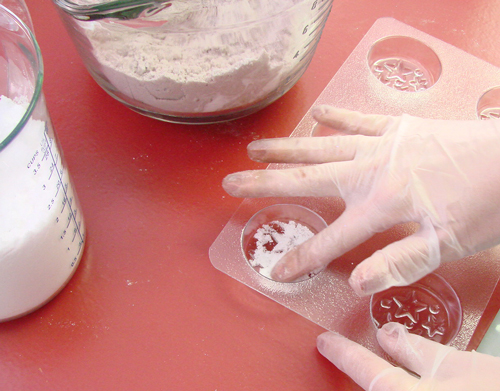
Place a little of the white mixture in the mold just where the star designs are. Be as neat or as messy as you like – they always manage to look great in the end. I’m wearing gloves to protect my nail polish color. Making bath fizzies can dull fingernail polish color and shine.
(NOTE: The Guest Party Stars mold has been discontinued. It has been substituted with the 6 Cavity Christmas Assortment Silicone Mold.)
 Step 6
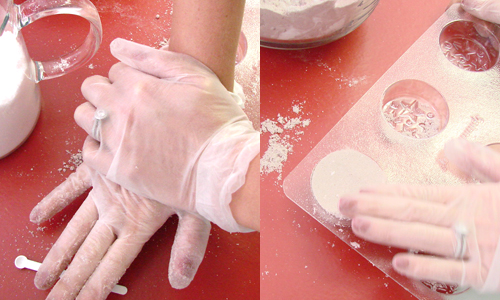
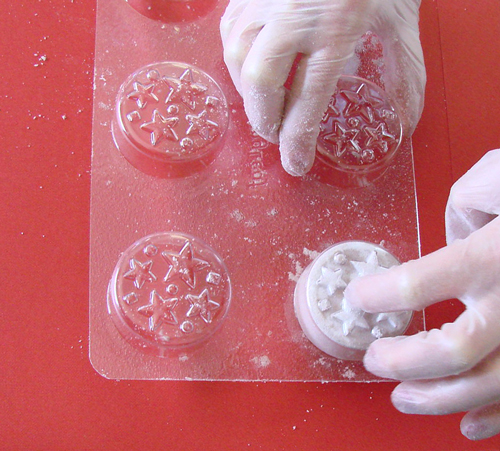
Fill the mold with the Cappuccino brown mixture and press it into the molds really well. You want to pack this as tightly as you can. The more dense your fizzy, the more sturdy it is in transport and the longer it will last in the tub.
 Step 7
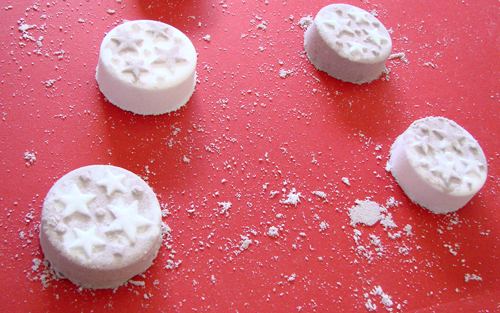
Gently tap out the bombs onto a surface where they won’t be disturbed while they dry. I usually make one or two fizzies in this mold at a time. Flipping a full mold of fizzies is a sure way to have broken fizzies flying everywhere. It can take a few days for your bath bombs to fully harden – so keep that in mind when finding a space. Humidity can wreck havoc on the fizzies. Choose a dry area, well away from your bathroom and shower area.
 Step 8
Wrap your fizzies and shower your friends and family with fizzy bathtime fun!
Filed Under: Business Musings
I follow over 100 people on Twitter – some for their blogging expertise, others for their marketing knowledge, a few because they’re funny and some just because I like their perspective on life. About 20% of the people I follow on Twitter are bath and body industry related. If you’re in the handcrafted bath and body microbusiness niche, I recomend that you follow them as well: