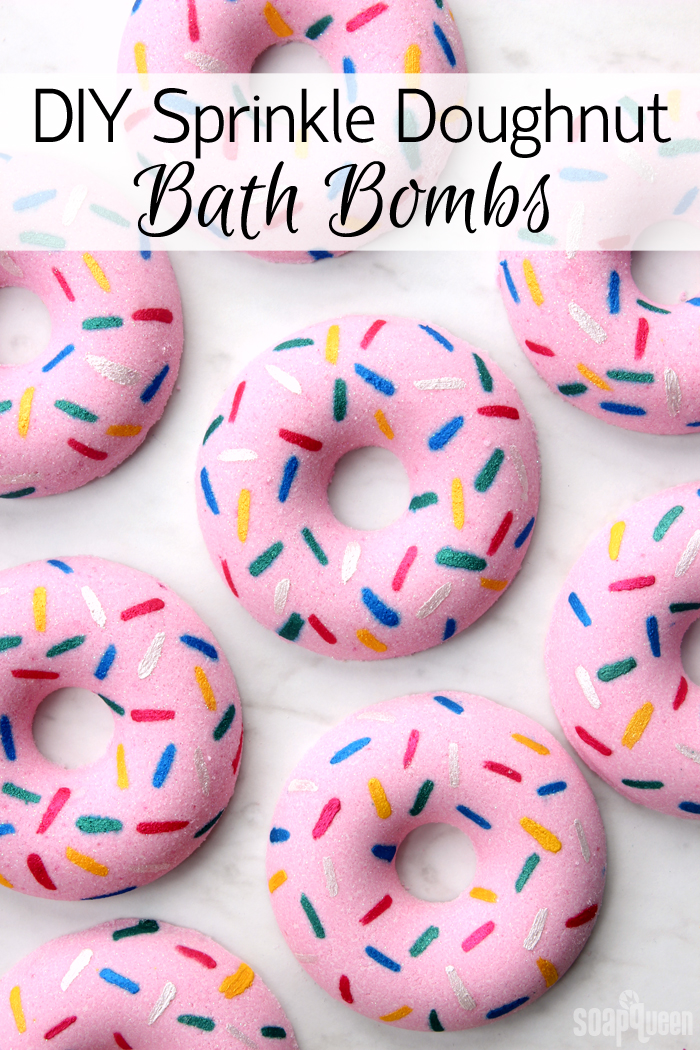
This week the blog featured pretty pink tutorials, including the DIY Sprinkle Doughnut Bath Bombs on Soap Queen TV. They’re colored with Rosy Pink La Bomb Colorant and scented with Strawberry Fragrance Oil. Then, various micas are painted on the bath bombs to look like sprinkles. It’s a cute and easy project you can make with kids.
Search Results for: www.brambleberry.com
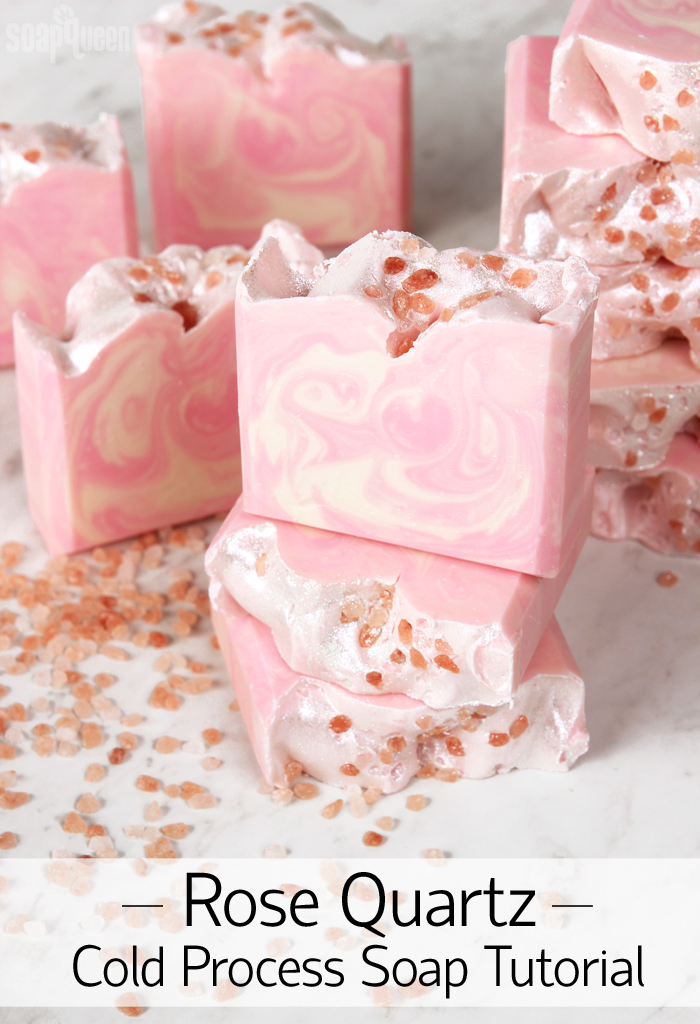
Rose Quartz Cold Process Soap Tutorial
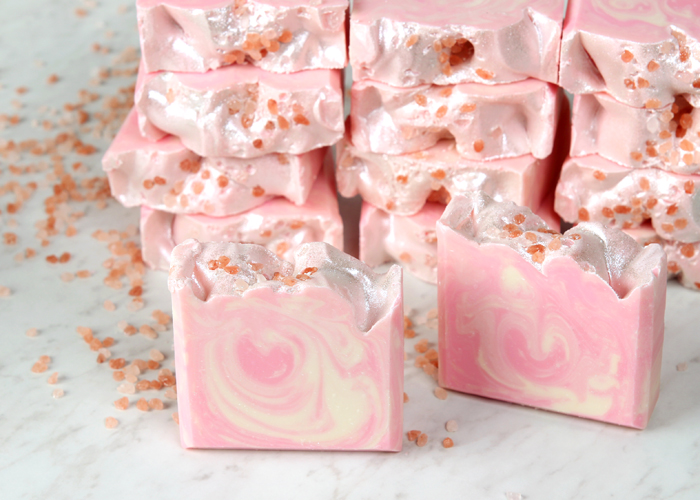
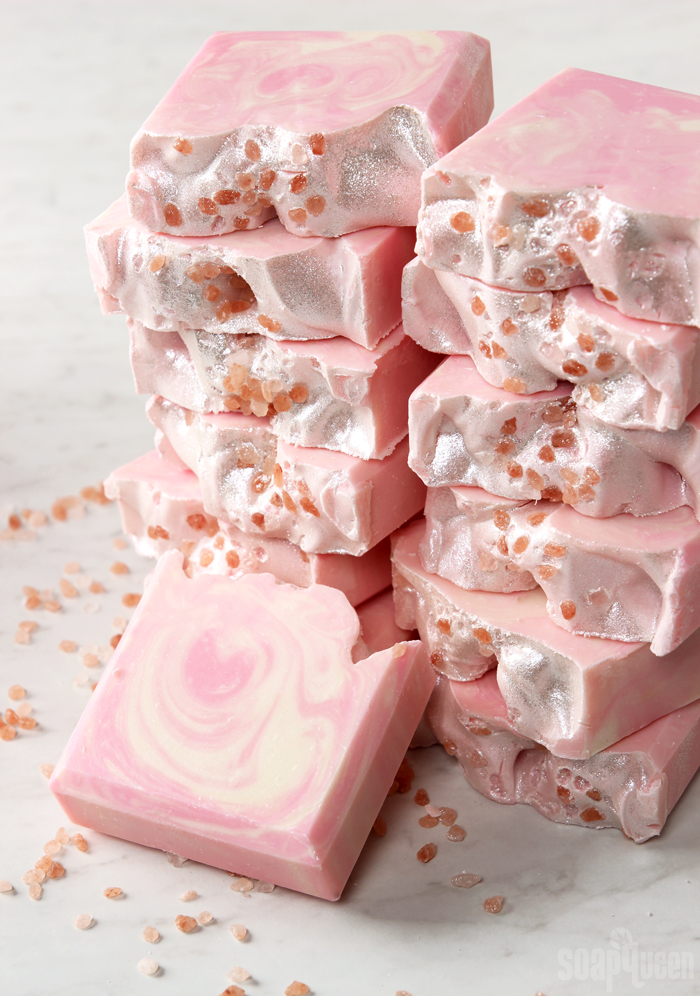
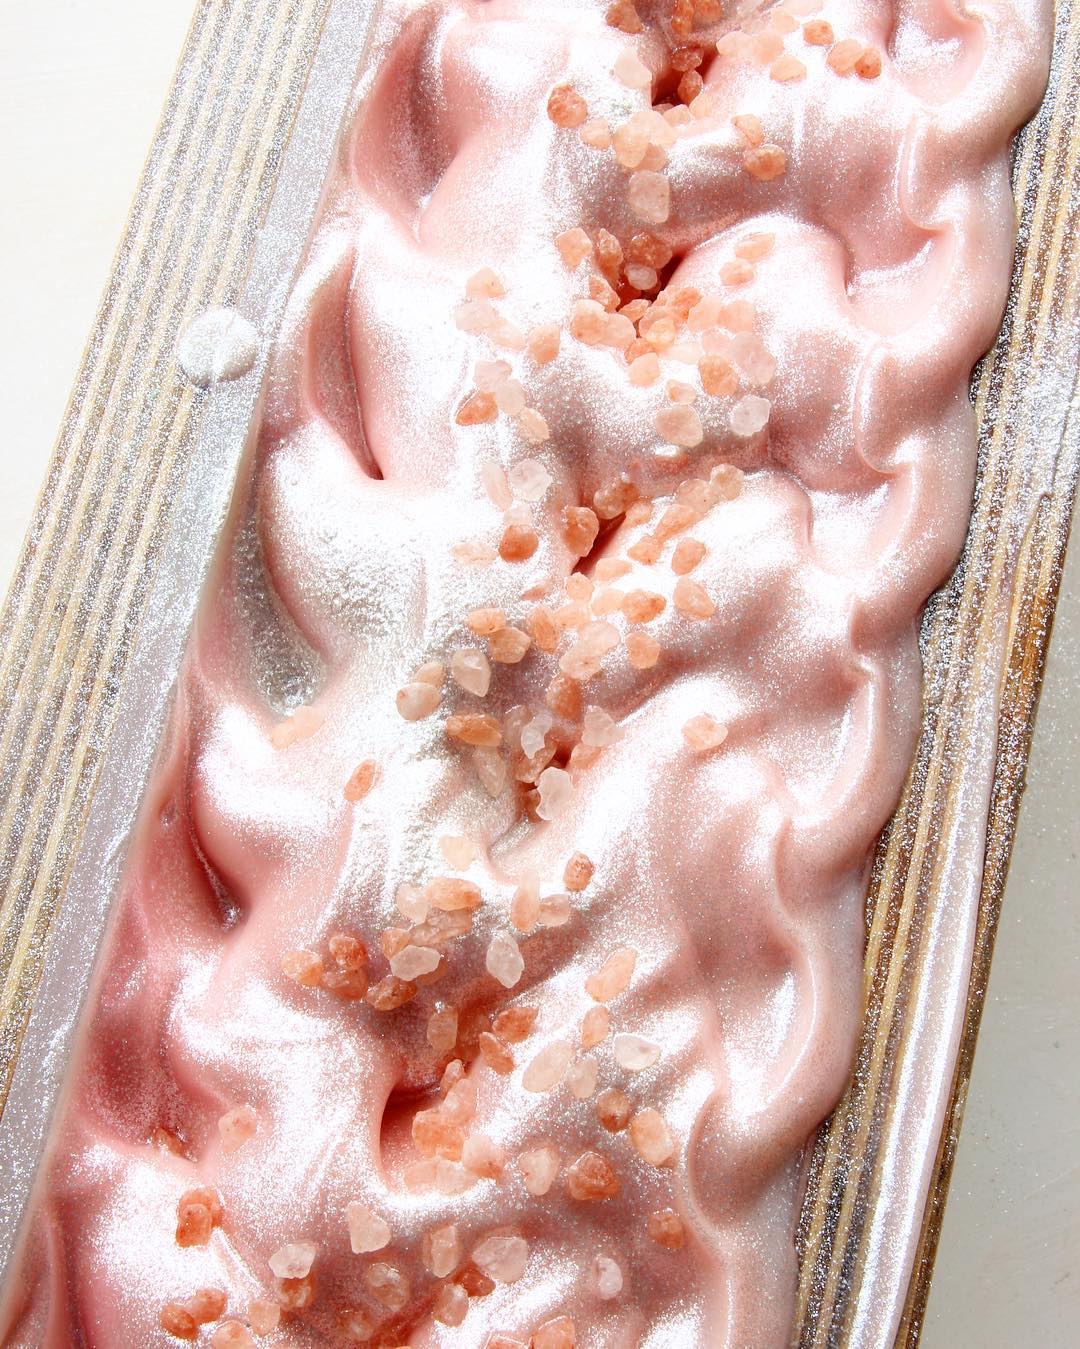
Rose quartz is such a lovely stone. It’s sometimes referred to as the heart stone, love stone, and the “Crystal of Unconditional Love.” With its beautiful rose pink color, it’s easy to see why it has garnered such adored titles. Rose quartz was the inspiration for this rosy and sparkly soap.
This project is scented with the new Rose Quartz Fragrance Oil, which is a fresh take on a rose scent. Notes of orange zest, jasmine and soft sandalwood make the Rose Quartz Fragrance Oil a modern spin on traditional rose fragrances. An In-The-Pot Swirl technique using shades of white and light pink emulate the natural pattern in the gem. Snowflake Sparkle Mica is dusted on top for a pearl effect, and pink sea salt gives texture. This project is perfect for the crystal lover in your life, or for a Valentine’s Day gift.
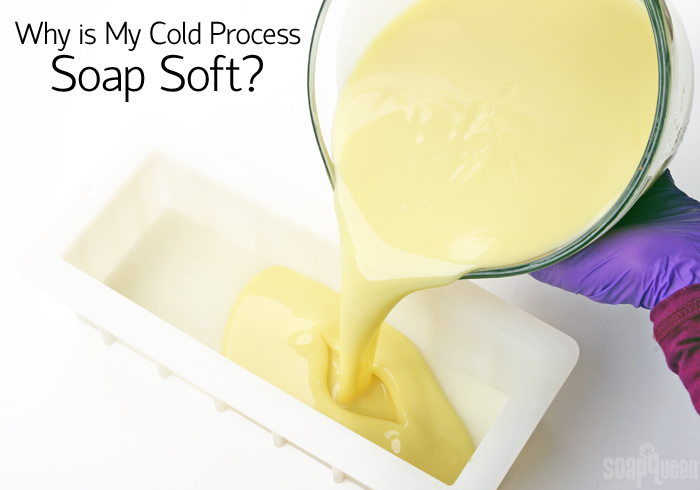
Why is My Cold Process Soap Soft?
Cold process soap requires patience. It needs several days to harden in the mold. Then, it needs to cure for 4-6 weeks to allow excess water to evaporate. Curing creates a firmer bar that lasts longer in the shower. All this waiting can be the hardest part of cold process soapmaking! But, what if your soap takes longer than usual to harden? If your soap is still soft to the touch after a week or two, something might be a little off.
Soap can take anywhere from 1-15 days to harden in the mold, depending on a variety of factors. Two to three days in the mold is average. There are several factors that determine how long soap needs to harden. The first is the type of oils in your recipe. The more soft oils (such as olive, sweet almond, rice bran, canola, etc.) the soap contains, the softer the bars will be. It may take more time to harden in the mold. The more hard oils the recipe contains (such as palm, coconut, cocoa butter, beeswax, etc.), the quicker the soap will harden. For example, if the soap is made with 100% olive oil, it may take up to two weeks to unmold. But if the soap is 60% hard oils, it could be ready to unmold the next day.
Using more firm oils and butters in your recipe will result in a firmer bar of soap.
Another factor is the superfat of the recipe. Oil that’s not turned into soap by the sodium hydroxide lye is called the “superfat.” An average superfat is anywhere from about 1-7%. The higher the superfat, the more “free-floating” oils in the soap. The terms “superfat” and “lye discount” can be used interchangeably. This is because in order to create a superfat, you use less lye in the recipe. Extra oil creates a more gentle bar, but it can also make the bar softer. If you used a large superfat (generally 7% or more) and the bar feels soft to the touch after a few weeks, the superfat may be the culprit. Personally, I use a superfat of 5% in most of my cold process recipes. I have found this to be a good balance between a firm bar that’s also gentle on the skin.
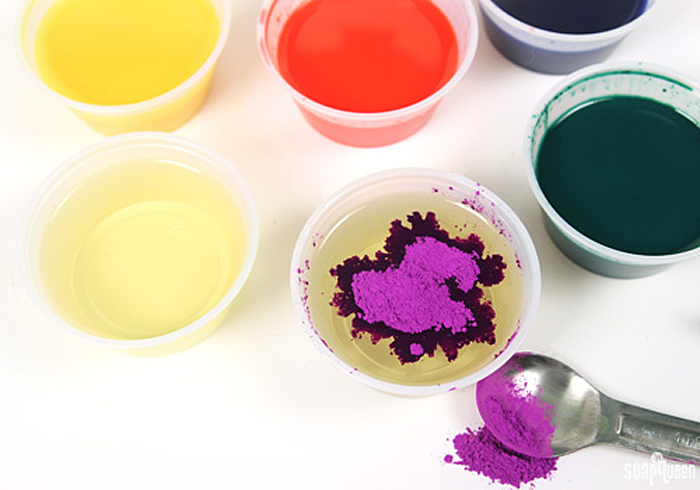
Speaking of “extra stuff” in your soap, let’s talk additives. Colorants and fragrance oils are the most common “additives” and they can make soap soft if too much is added. Dispersing powdered colorants in lightweight liquid oil is a great way to avoid chunks and streaks of color in the final bar. But, if you add too much dispersed colorant it can soften the bar because you’re adding more oil as well. In fact, you’re technically increasing the superfat! If you calculate your recipe to have a 7% superfat and add lots of dispersed color for example, you may end up with a soft bar. Usually, colorants are dispersed at a rate of 1 teaspoon colorant to 1 tablespoon lightweight liquid oil. If you want to add a lot of colorant, you may want to decrease the amount of oil in your dispersion.
Adding too much extra oil (like with dispersed colorants) can lead to a soft bar of soap.
Adding too much fragrance oil can also lead to a soft bar of soap. That’s where the Fragrance Calculator comes in! Simply enter which fragrance oil you’re using, what you’re making and how much. The calculator will give the amount of fragrance oil that’s safe for skin. The amount given by the calculator won’t lead to a soft bar of soap. That’s one of the reasons why it’s so important to measure your fragrance oil by weight; it gives you the most accurate amount of fragrance oil for your project. Adding more fragrance than recommended could lead to a soft bar.
Soap might be soft if too much liquid is used. The Bramble Berry Lye Calculator creates recipes with 22% distilled water in the total recipe. Other lye calculators might have a slightly lower or higher percentage. That’s because the amount of water in your recipe can fluctuate, and still be totally fine. Using less water in your recipe is known as water discounting.
Water discounting has several benefits including decreasing the chance of glycerin rivers and creating a bar that unmolds faster. Learn more about water discounting soap here. On the other hand, if you use more water than suggested, it takes longer for the soap to become firm. This also applies to adding other liquid additives like milk or purees to your recipe. Too much extra liquid (milk, purees, etc.) on top of the water in the lye solution causes soap to not harden correctly.
Water discounting soap reduces the chances of glycerin rivers, shown above. It also produces a bar that hardens faster.
The type of mold also affects how quickly soap hardens. In general, cold process soap made in silicone and plastic molds takes longer to harden and umold. This is because silicone and plastic molds create an airtight seal that doesn’t allow for any air to touch the soap. The more airflow, the faster soap hardens. Soap made in wood molds lined with freezer paper has a little more airflow, which helps the soap release faster. In addition, wood molds tend to promote gel phase. If soap goes through gel phase, it becomes harder faster.
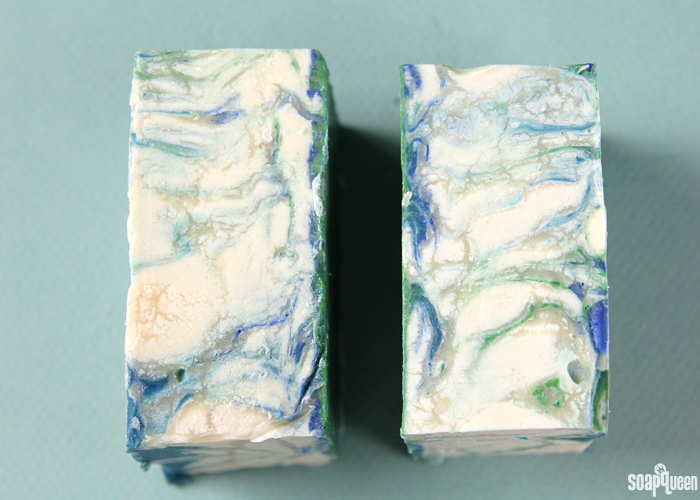
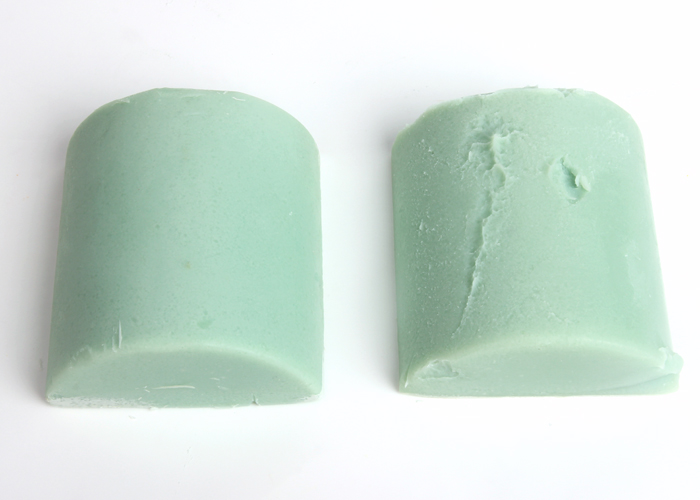
If using a silicone or plastic mold for cold process soap, use sodium lactate. Actually, I recommend using sodium lactate for all your batches! It’s a liquid salt that can be added to cooled lye water at a rate of 1 teaspoon per pound of oils in cold process soap. It’s optional, but I use it in 99.9% of my recipes. It facilitates the hardening of soap, making umolding faster and a longer lasting bar in the shower. For example in the photo below, the soap on the left contains sodium lactate while the bar on the right does not. The bar without sodium lactate was softer, and did not unmold as cleanly. Click here to learn more about sodium lactate.
The bar on the left contained sodium lactate, while the bar on the right did not.
So, what can you do about a soft bar of soap? The good thing about soft soap is that it’s very rarely lye heavy! Lye heavy soap usually has the opposite problem; it’s extremely hard, brittle and crumbly. If your soap is too soft, chances are you added too much of something…but not lye. It’s usually too much oil, fragrance, liquid or other additive. The bad news about soap that’s too soft? It’s a little tricky to fix. The only real option is to rebatch the soap. To help firm it up, you can add shreds of a firm bar. This helps balance it out. Learn more about rebatching soap here.
What can you do if you want to ensure your soap unmolds within about 2-3 days? Check out my tips below.
- Use at least 40% hard oils in your recipe. These include coconut oil, palm oil, cocoa butter, etc. This post has a list of common soaping oils, with general recommended usage rates to aid in formulating your recipes.
- Stearic acid at 0.5% of your oils can be used as a hardening agent in cold process soap. It does speed up trace, so keep that in mind!
- Sodium lactate is your friend! Because I like to unmold my soap within about 2 days, I use sodium lactate all my batches. It’s a liquid salt that’s added to cooled lye water. It helps the soap harden more quickly, which helps it release cleanly from the mold. If I use sodium lactate, I can sometimes unmold my soap the next day.
- Water discount your soap anywhere from 5-20%. Just keep in mind the more you water discount your recipe, the faster your soap will accelerate. Generally, I don’t water discount more than 15% unless I’m in a huge hurry to unmold. If you’re adding ingredients like purees, I recommend water discounting to take the extra water in the puree into consideration. Check out this post for more info.
- Decrease the superfat. The more extra oil you have in your soap, the softer it will be. I have found 5% to be a good balance between firmness, and a skin-loving bar.
- Promote gel phase. When soap goes through gel phase, it speeds up the saponification process. This results in a bar that is firmer more quickly.
- Thicken the trace of your soap. Soap that is poured into the mold at a thin trace will need more time in the mold than thick traced soap.
- Using an accelerating fragrance oil helps your soap harden in the mold faster.
How long do you usually wait to unmold your soap? In general I always recommend 2-3 days, but sometimes you can get away with unmolding the next day if you use some of the tips above!
DIY Sprinkle Doughnut Bath Bombs
There is something about pink doughnuts with sprinkles that make me happy. They are just so darn cute! After making pink melt and pour soap with jojoba bead “sprinkles” a few years back, I revisited the idea and made these doughnut bath bombs. The Doughnut Half Mold gives them a cute doughnut shape, while a touch of coconut oil gives the bath water a touch of moisture. They are scented with the sweet Strawberry Fragrance Oil, but feel free to use any fragrance oil you like!
This bath bomb project uses two different types of colorant. The entire bath bomb mixture is colored with Rosy Pink La Bomb Colorant. The term “La Bomb” refers to a type of colorant that’s formulated specifically for bath fizzies; find them all here. They’re made of highly concentrated FD&C and D&C dyes mixed with glycerin. La Bombs are specially formulated to not leave any color on the tub, and won’t make your bath bombs fizz prematurely.
Once the doughnut bath bombs have hardened and are unmolded, the “sprinkles” are painted on using a mixture of micas and 99% isopropyl alcohol. The mica paint dries almost instantly. To help the micas (and coconut oil) disperse better in the water, I added a touch of Polysorbate 80 to the bath fizzy mixture. You don’t have to add it if you don’t like, but it helps prevent pools of oil, micas and glitter from forming in the water.
Talking with Tania of Soapish
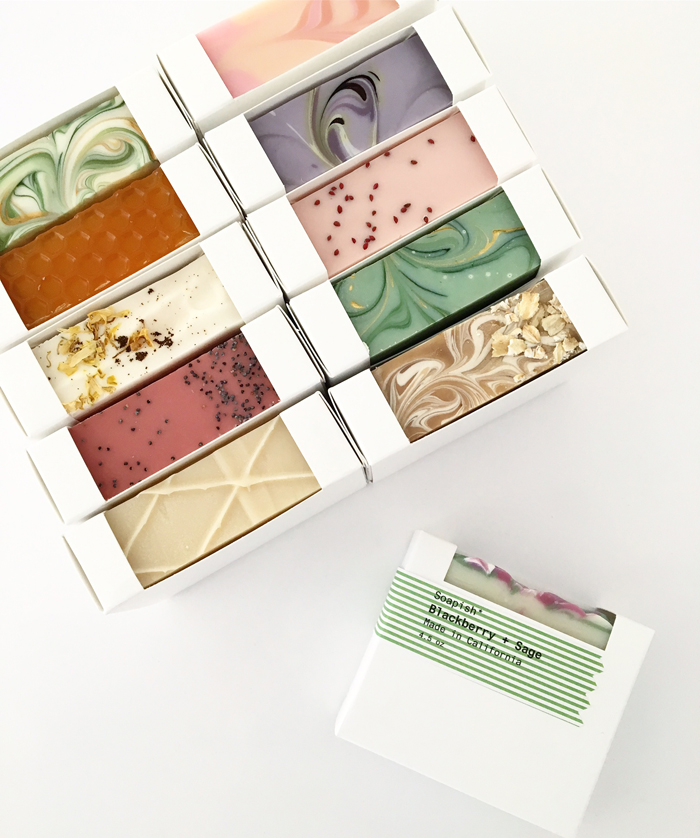
Tania of Soapish is a talented soapmaker who resides in California. Before learning to make it, Tania wasn’t a fan of bar soap. But once she tried handmade bar soap, she was instantly obsessed. Tania creates cold process soap, lotions, scrubs, bath bombs and more. All of her gorgeous creations have a distinct point of view. You know it’s a Soapish bar just by looking at it! Tania shares some of her soaping projects on her YouTube channel, and creates stunning soap eye-candy on her Instagram. Learn more about Tania, including her advice for making YouTube videos and how she came up with her business name.
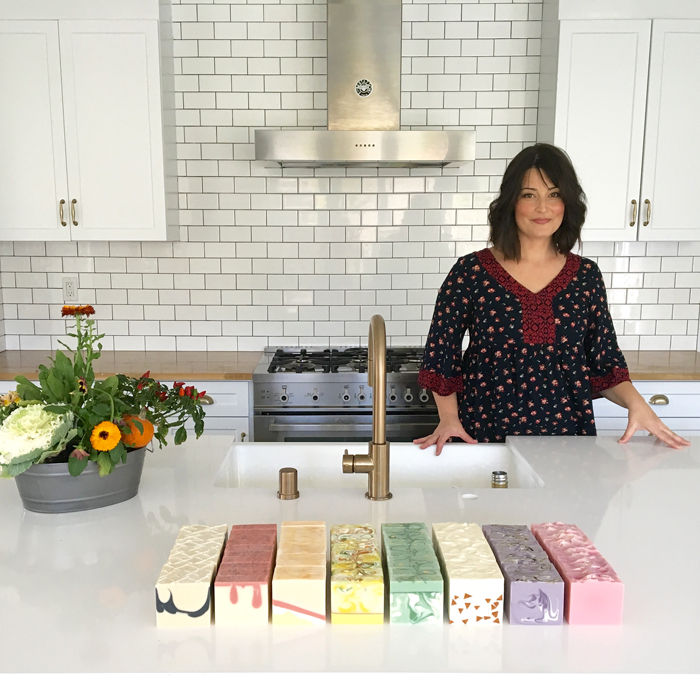
Tania in her gorgeous kitchen, along with a collection of her cold process soaps.
How long have you been soaping for and how did you get started?
I started soapmaking on August 11, 2013. I know the exact date because I posted a picture on Instagram of the first soap mold I built. I was always fascinated by the process of making soap, and I even bought a soap making book years and years ago, but I didn’t try it right away because it seemed so intimidating!
After nervously making my first few batches, I was completely addicted. Soap making was basically all I did and thought about for the next year. I joined a soap makers forum, watched every YouTube video I could find, and read and read anything about soap I could. The really funny part is that I used to hate bar soaps! All of my friends were so amused at my obsession; they all knew how much I disliked soap bars. After I tried handmade soaps, I was hooked.
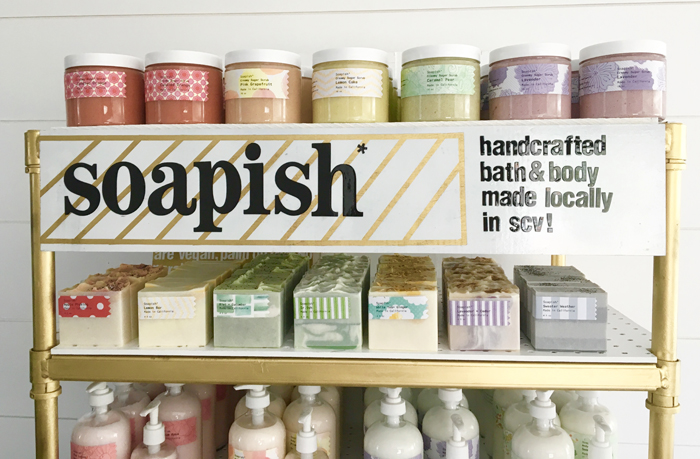
A beautiful Soapish display, full of soap, lotions and scrubs.
What sort of advice would you give to those soapers just starting their businesses?
The first bit of advice I would offer is to find out and follow carefully all of the labeling and insurance requirements in your area. Next, I’d say to get tons of feedback from people outside of your friends and family. Ask for unbiased thoughts and opinions on everything from the products themselves, your packaging, website, and your social media photos. That helpful advice can give you the perspective you need to successfully sell your products. Lastly, talk about your products to anyone who will listen and always carry samples. You never know when someone may be interested in having local, handmade bath and body in their shop.
What is your favorite type of product to make?
Cold process soaps are my favorite! Although I only make them once in awhile, I really love creating complicated designs that challenge me. My favorites are scented with anything citrus!
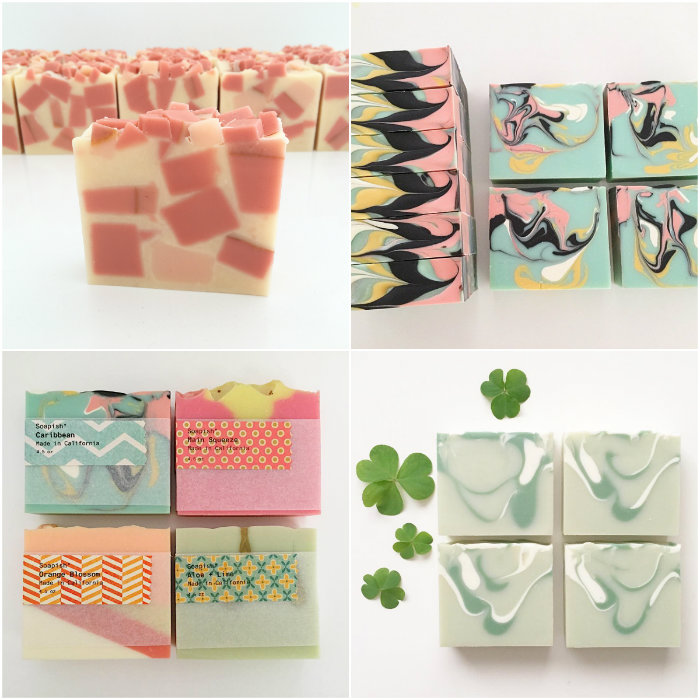
Top left, clockwise: Sweet Orange Chili & Blood Orange Soap, Caribbean Swirled Soap, St. Patrick’s Day Soap, a collection of cold process soaps.
What inspires you to create?
Everything around me inspires me! Flowers and plants, fashion, textiles, and photography are the top of my list. I love looking at color palettes and patterns that immediately make me want to recreate them in a bar of soap. I can’t get enough of other soap makers’ photos, because they inspire me to want to create too. I’m also inspired by a challenge or necessity. I’ve found that I’m at my most creative when I’m being forced to think outside of the box.
I love how clean and eye catching Tania’s packaging is. It really complements the soap!
How did you come up with the name for your business?
Coming up with a business name is not easy! Everything clever and catchy having to do with soap, bubbles, and baths was already taken by someone. I think it’s the Los Angeles in me, but I add “ish” to everything I say. That’s probably why “Soapish” just came to me one day. It was perfect because at the time I was starting to add lotions and scrubs to my product line, it tells people I make soap, but not only soap! Now I realize that my business name didn’t have to have the word soap or even have anything bath related in it: it just had to be individual and say something about me.
You share some of your soapy projects on your YouTube channel. What is your favorite thing about making videos, and what advice do you have for those thinking about making videos?
I love making videos because I love watching them. My favorite part about creating videos is that I enjoy teaching, and for those few minutes I get to teach someone something new or at least inspire them to try a technique or create. What I would tell anyone wanting to make good videos is that you don’t need fancy equipment to shoot them. I shoot my videos with my iPhone and edit them with an app right on the phone. My main recommendations for great soap videos is to always have good natural lighting, this means recording during the daytime which isn’t always convenient. I also use the editing program to cut down the long, noisy parts (that stick blender can be loud!) And lastly, always try to have a clean, uncluttered work space so your viewer can see what you’re doing without distractions.
What is your favorite Bramble Berry product and why?
It’s really impossible to choose just one thing because there are so many that I can’t do without. If I have to choose just one it would be the Ginger Ale Fragrance Oil. It just makes me happy and it behaves extremely well for swirls and designs.
What is your favorite soaping technique and why?
My favorite soap technique is stripes. I love the modern look and I like the challenge of getting the lines perfectly even and straight. I also like that it makes a pretty soap, but not one that’s so fussy people won’t use it.
Left, clockwise: Tiny Triangle Embed Soap, Diagonal Cut Stripe with Swirl Soap
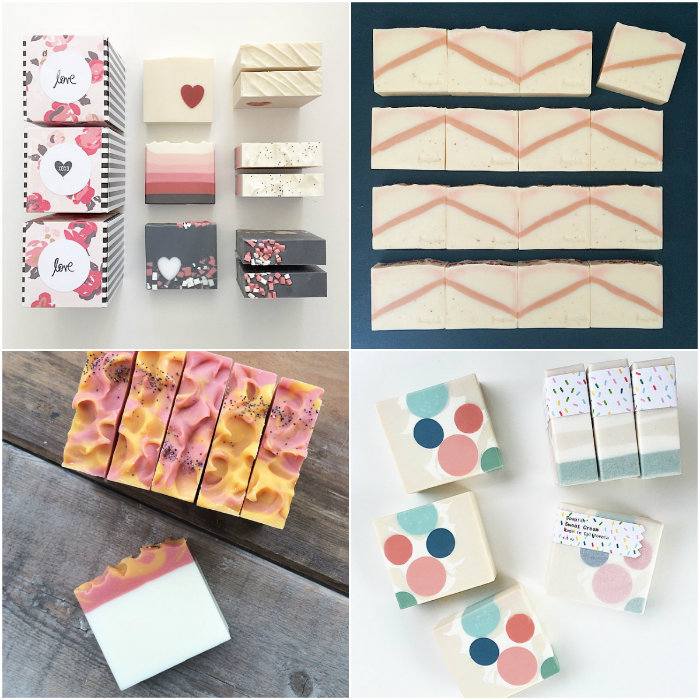
Your photos have such a distinctive look. What tips do you have for photographing soap?
I just try to clean up the soap bars and other products nicely and present them in a way that looks good to me. After that, it’s really all about that natural lighting!
Tell us something unusual or unique about yourself!
People are surprised to find out that I have 4 kids; 2 girls and 2 boys. They pretty much run my life for now, haha. I’m also a power tool loving mama, and I love to build things. My dream girls night out is a stroll through Home Depot with a cup of coffee in my hand.
Top left, clockwise: A collection of Valentine’s Day Soap, Grapefruit & Bergamot Bars, “Hidden Mickey” Soap, Apple Picking Soap
What are some of your other hobbies and interests?
In addition to soap making, I make and decorate cakes with sugar sculpted flowers and figurines. I love to cook and have dinner parties, and I’m also passionate about home renovating and decorating. My husband and I bought a new house a year ago and we spend most of our free time fixing, building, and painting.
What is your number one soaping tip?
My absolute number one soaping tip is to know your fragrance. A badly behaved fragrance oil can mess up even the simplest soap. I’d say that 95% of the batches I’ve botched were due to either accelerating fragrance or discoloring fragrance. Always read the reviews carefully. If you can see photos of test results, that’s even better! If in doubt, make a tester; it could save you a huge mishap!
Tiny Triangle Embed Soap, scented with Energy Fragrance Oil.
Have you ever experienced a horrible soapy fail? How did you work through it, and what did you learn?
I have definitely had a soapy fail! I think we’ve all had those batches that go wrong. There are batches that are so stressful you start sweating and then inevitably a drop of raw soap finds a spot of your skin that’s exposed, so you have to deal with that in the middle of the chaos. When I’ve had those moments I tell myself “get it in the mold.” If I can do what I have to do to get it in the mold, I can usually make something good out of it the next day. Either I can chop it up for embeds or sometimes it turns out better than I expected. And in the worst cases, my friends get a few bars of ugly soap. These experiences also remind me to wear long sleeves when making soap!
What do you love most about creating bath and body products?
I love it when someone writes me a card or sends me a message telling me how my products have helped their skin. Being able to create these pretty things that are colorful, creative, pieces of useable art and knowing they helped someone…what more could you ask for?
Find Soapish:
Online
On Facebook
On YouTube
On Instagram
Soapy Social Media Roundup
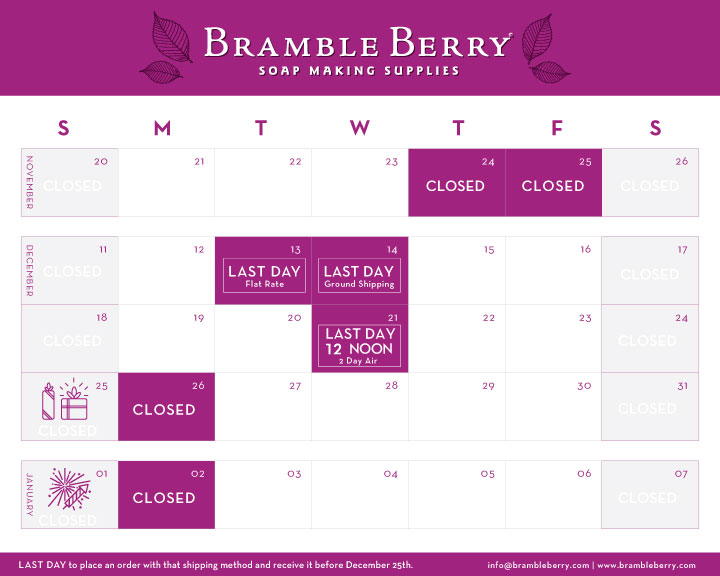
Happy Sunday! Doing any holiday shopping or decorating today? I’m finishing up my list and setting up some wreaths around the house. We also still need to get a tree (eeeek!). If you plan on making gifts for the holidays, or giving supplies to the soaper in your life, use the holiday calendar below to plan. The last day to order from Bramble Berry with ground shipping to receive your package by Christmas is December 14th. The last day to order with 2-Day Air to receive your package by Christmas is December 21st. The calendar also includes days our offices are closed for Christmas and New Years.
Be on the lookout next week for a new Soap Queen TV video! I’ve also got a sparkly cold process project scheduled, along with a live soaping session on the Bramble Berry Facebook page tomorrow.
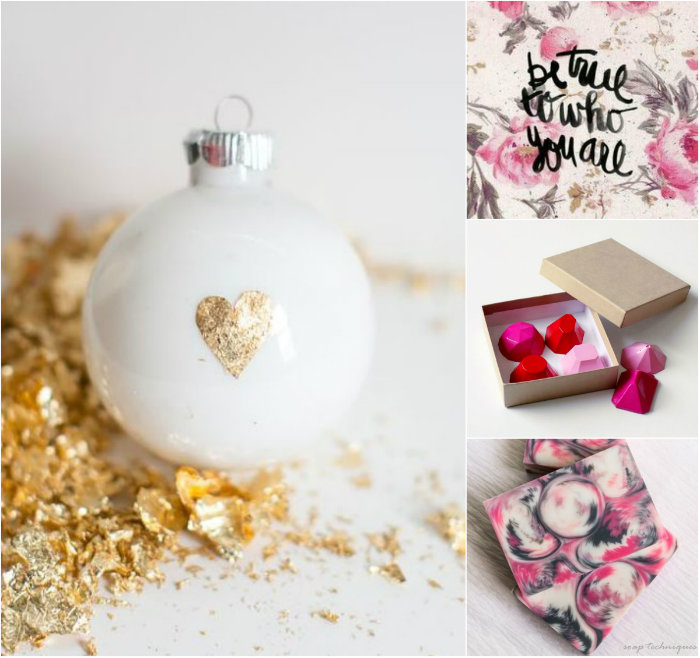
Left to right, clockwise:
- Homemade ornaments are so fun to make this time of year. I really like the simplicity of this Gold Leaf DIY Ornament.
- I think at one point, we have all probably struggled with being ourselves. It can be difficult! I love this quote, it’s a great reminder.
- These DIY Concrete Gemstone Magnets would make a great gift. They would look so cute hanging on the fridge.
- This Love Spell Soap by Soap Techniques is stunning. The colors are so pretty together, and the swirl is awesome!
Instagram:
I have been working with a lot of pink lately; I must be ready for Valentine’s Day already! Next week, we will be introducing several new fragrance oils, including one called Rose Quartz. That fragrance inspired the soap below, made with pink sea salt. I will be sharing the tutorial soon.
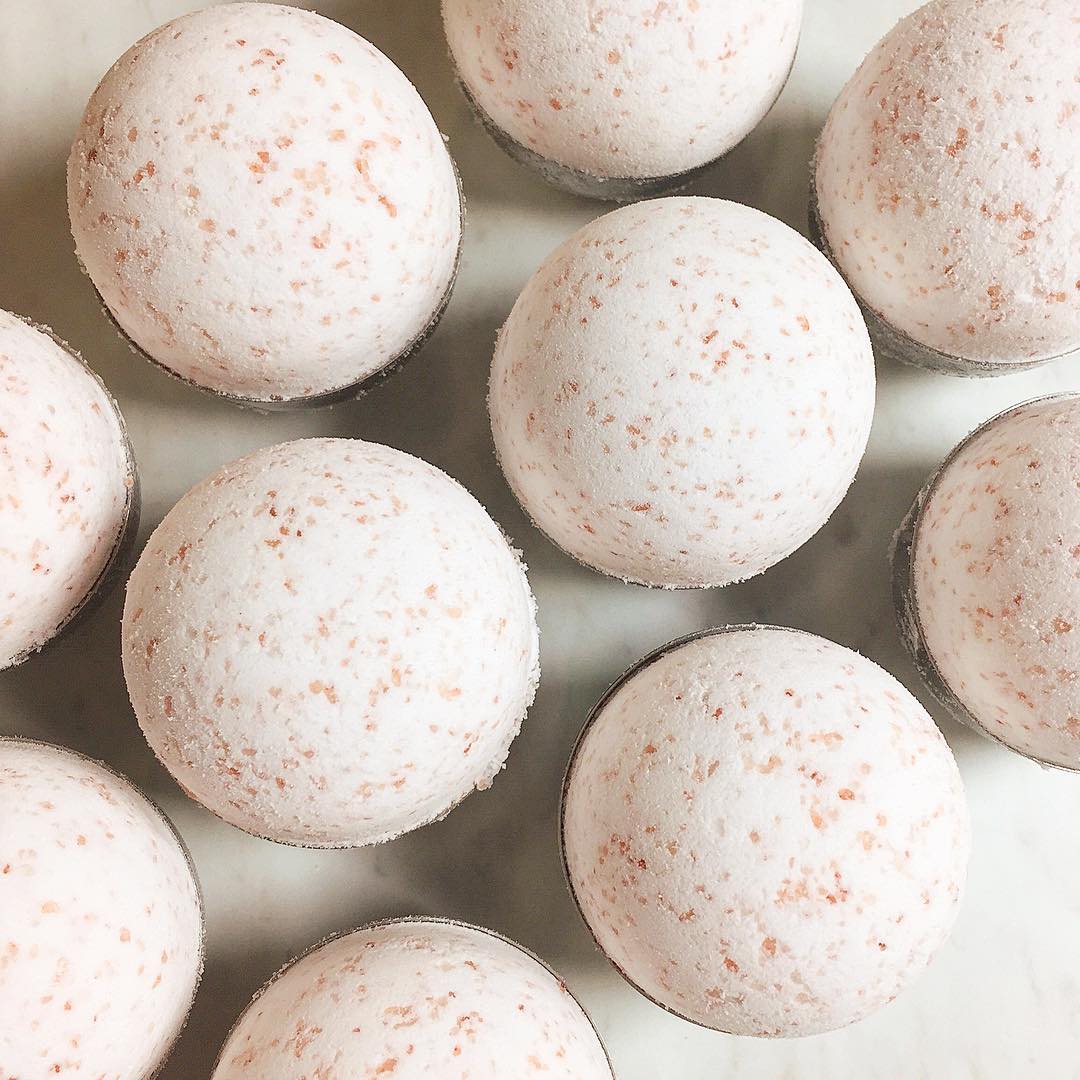
Speaking of pink sea salt, I added some to bath bombs made in the Stainless Steel Bath Bomb Mold. This project won’t be on the blog, but will be in an upcoming newsletter. Sign up if you’d like to learn how to make them! =) They’re a generous size and are perfect for a nourishing bath. I know because I tested one Friday night as I got caught up on my reading. Wondering what I’m reading? Here’s my GoodReads list.
- Need some stocking stuffers? These Best Day Ever Everyday Cards make great thank you notes.
- Somebody pinch me; I’m a ForbesBooks Author! My new book is due early 2017 and is in editing phase now.
- Need effective PR, but working on a limited budget? These tips are great.
- Jump start your day with these Eucalyptus Shower Fizzies. They are especially awesome if you’re feeling congested!
- If you’re trying to lose weight, I’ve got bad news. You have to cut out wine. Sad, I know.
- Jen of Something Turquoise created the Sparkly Bath Crystals, and they turned out beautiful. The color combinations look beautiful.
To keep up with soapy social media throughout the week, you can follow me on Twitter, Tumblr, Instagram, Pinterest, YouTube and Snapchat. I’m Bramble-Berry on Snapchat. Don’t forget to tag your soapy projects on Instagram with the hashtag #SoapShare so I can see your projects!
Facebook and Instagram Photo of the Week (Nov. 26 ~ Dec. 2nd)
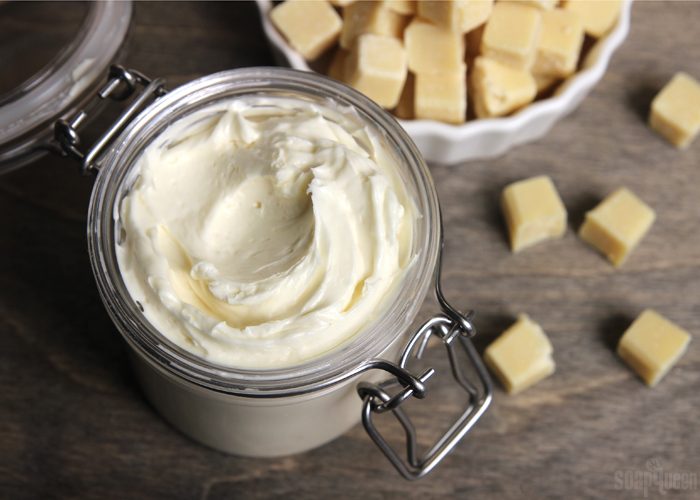
This week the blog was full of quick and easy holiday gift ideas, like the Cocoa Butter Cashmere Body Mousse. Once you whip together the jojoba oil, cocoa butter cubes, avocado butter and delicious Cocoa Butter Cashmere Fragrance Oil, it’s ready to package and gift to loved ones. Find more inspiration and recipes in the 10 Quick Handmade Gift Ideas post.
Christmas Star Melt & Pour Soap Tutorial
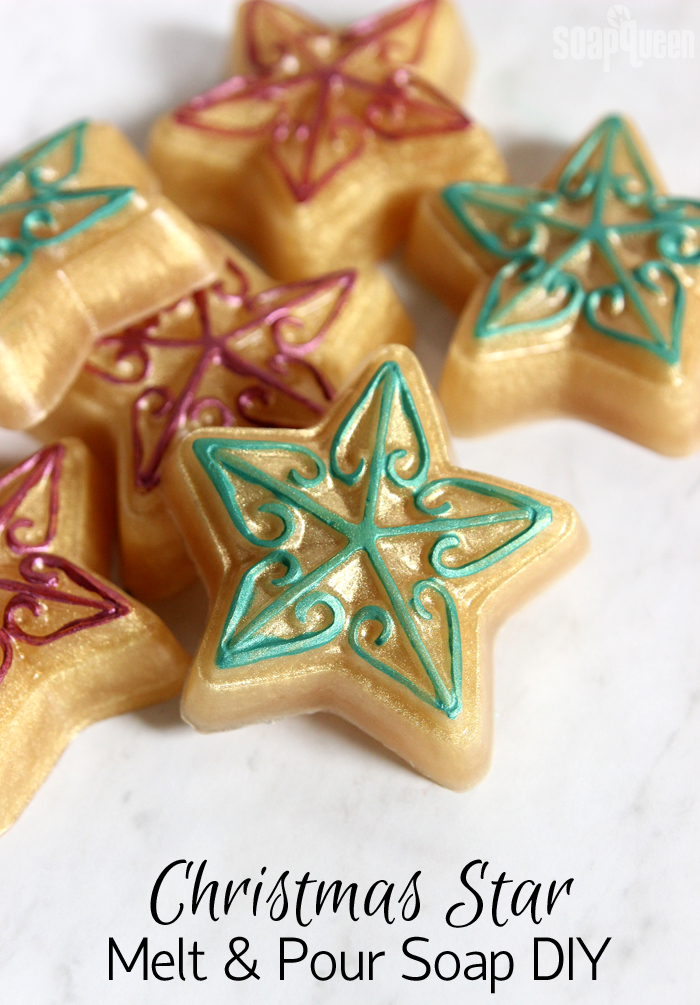
Christmas is just a few weeks away. Hard to believe, I know! If you’re making handmade gifts, melt and pour soap is a great option at this stage in the game. It only takes a few hours to harden, and is ready to use as soon as it’s fully cooled. These Christmas Star Melt and Pour Soaps are the perfect way to spread the Christmas cheer. They are also a great project for beginners.
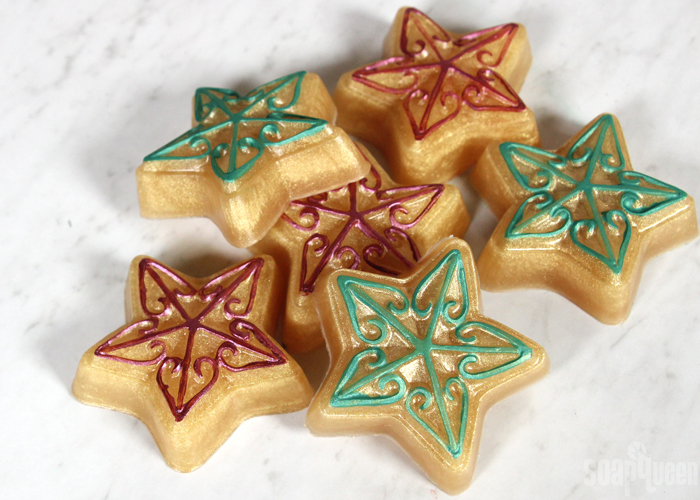
First, the soap is colored with Shimmer Gold Color Block for a sparkly gold hue. It’s scented with Sleigh Ride Fragrance Oil, one of my all-time favorite holiday scents. It does discolor brown, so don’t forget the Vanilla Color Stabilizer! Once the soap is unmolded, a mixture of mica and alcohol is painted on the star details to really make them pop. To help seal the mica, spray the soap lightly with non-scented aerosol hairspray. This creates a seal that makes the mica a little more resistant to rubbing off when handled. That being said, the mica will wash off after one to two uses. I still think it’s worth it though. =)
This project is perfect to make with family visiting for the holidays. The hardest part is “painting” the soap once unmolded, and even that is pretty fool-proof. Young kids would have fun adding the colorant, fragrance and stirring the soap! It would be a great project to create a new holiday tradition.
10 Quick Handmade Gift Ideas
Now that Thanksgiving is behind us, the countdown to Christmas is here! If you’re planning on giving homemade gifts this year, now is the time to get craftin’. At this point in the game, there is still time to gather supplies and create plenty of projects. I would recommend items that can be made in one day and used right away. That means cold process soap is out (it needs 4-6 weeks to cure), but items like melt and pour, bath bombs, bath salts and scrubs are still doable! If you need some inspiration, check out the quick and easy tutorials below.
Soothing Floral Bath Salts
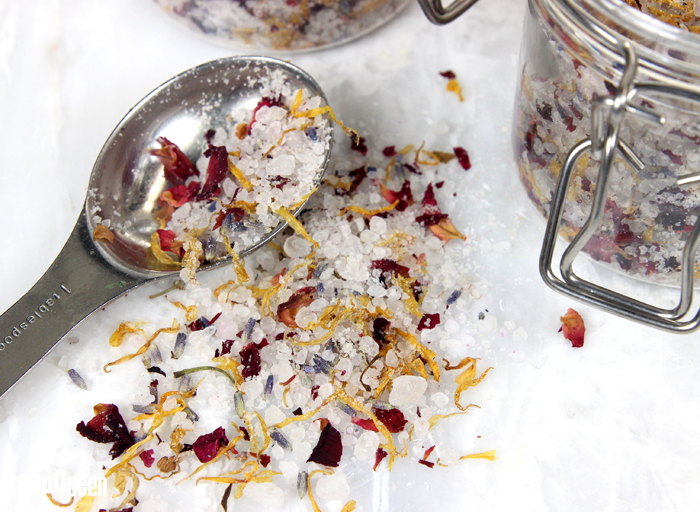
Nothing quite hits the spot like a hot bath during winter. Bath salts create an extra luxurious bath experience, but are something most people don’t treat themselves to. That’s why I love giving them as gifts. Bath salts are also extremely easy to make…but you don’t have to tell your recipients that! 😉 The Soothing Floral Bath Salts recipe involves mixing Dead Sea salts with various flower petals for a feminine touch. Mix them with a fragrance oil or essential oil and voilà!
Honey Bee Melt & Pour Soap
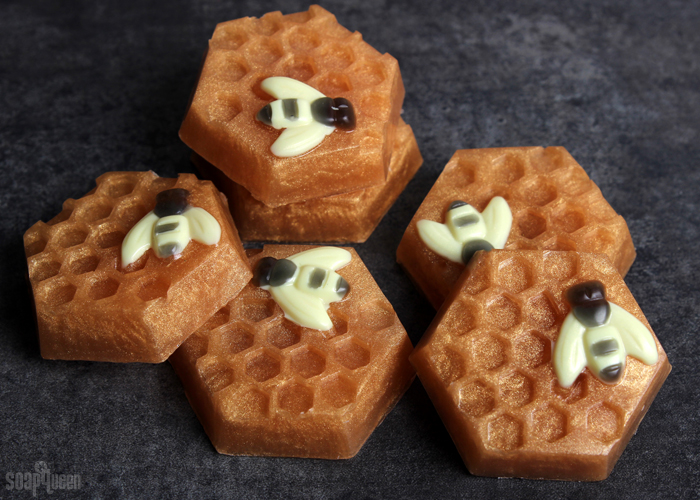
Melt and pour soap is perfect for a quick gift, because it’s ready to use once it’s fully cooled and firm. The adorable little Honey Bee Melt & Pour Soaps involve a bit of detail work to fill in the bee shape, but are still suitable for beginners. They smell amazing – just like warm, sticky honey. Honey is one of those scents that’s loved by both men and women, so these bars are suitable for the whole family. Once they’re made, wrap them in plastic wrap (as shown in the video) and place a Pure Honey Soap Label on the back for a finished look.
Mini Key Lime Bath Bombs
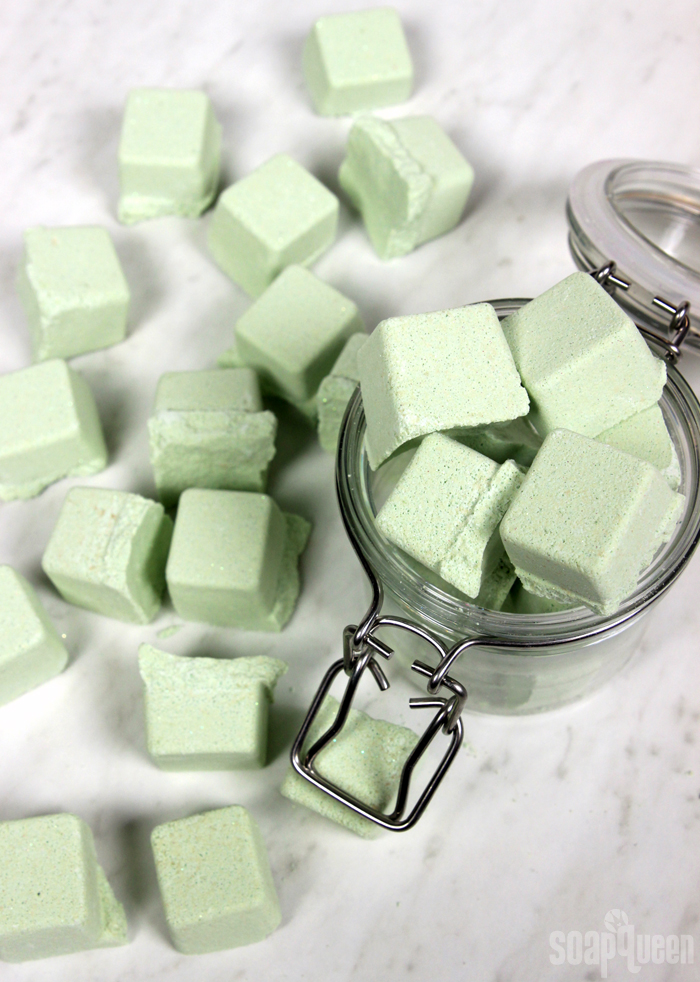
The only thing cuter than a bath bomb is lots of mini bath bombs. These Mini Key Lime Bath Bombs are made in the Small Cubes Mold and Package to create a small shape. They also smell just like key lime pie – yum! This project is easy to customize with the recipients favorite color and scent. The mold doubles as a package, or place them in a bail jar to package and gift.
Beeswax & Honey Lotion Bars DIY
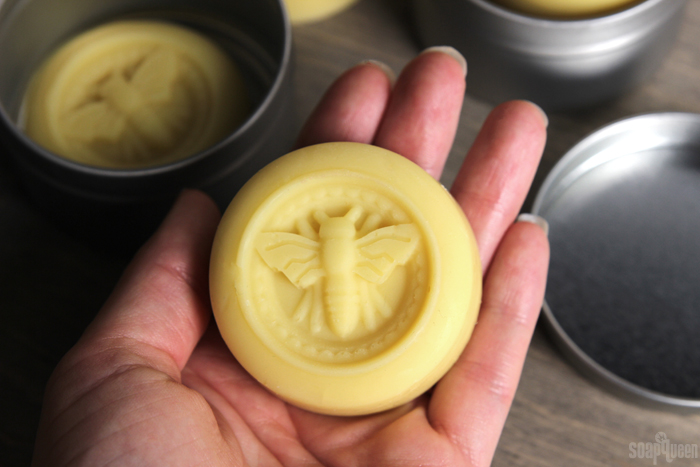
Easy and quick to make, these cute lotion bars are full of skin-loving ingredients. Made with olive oil, shea butter and yellow beeswax, these bars are firm at room temperature but melt slightly on contact with skin. The combination of yellow beeswax and the Pure Honey Fragrance Oil smells absolutely amazing! These bars also include a free downloadable label to help package and give.
Heavenly Lilac Bath Truffle
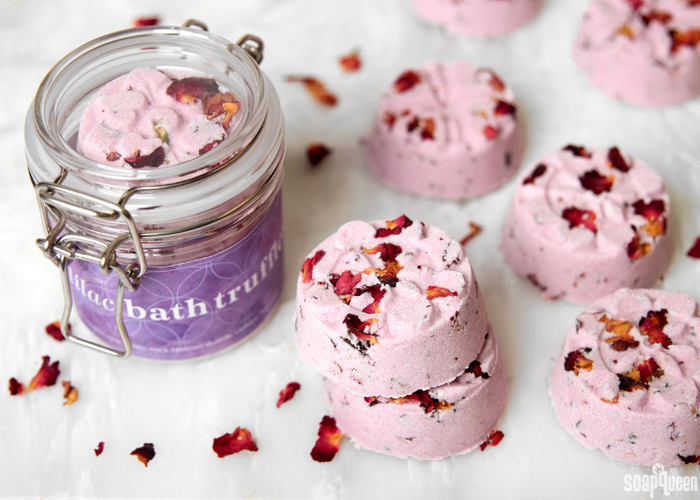
What is exactly a bath truffle you ask? Essentially, it’s a bath bomb with lots of extra oil and butters. Once placed in the tub, it fizzes and also releases the skin-loving ingredients into your tub. In the case of the Heavenly Lilac Bath Truffle, that means cocoa butter and shea butter. They are scented with Lilac Fragrance Oil for a relaxing and feminine scent, but it can be swapped for any fragrance you prefer. This tutorial also includes a free label template to download, print and place on a bail jar. Originally designed for Mother’s Day, this would make a great gift year round.
DIY Sparkling Bath Crystals
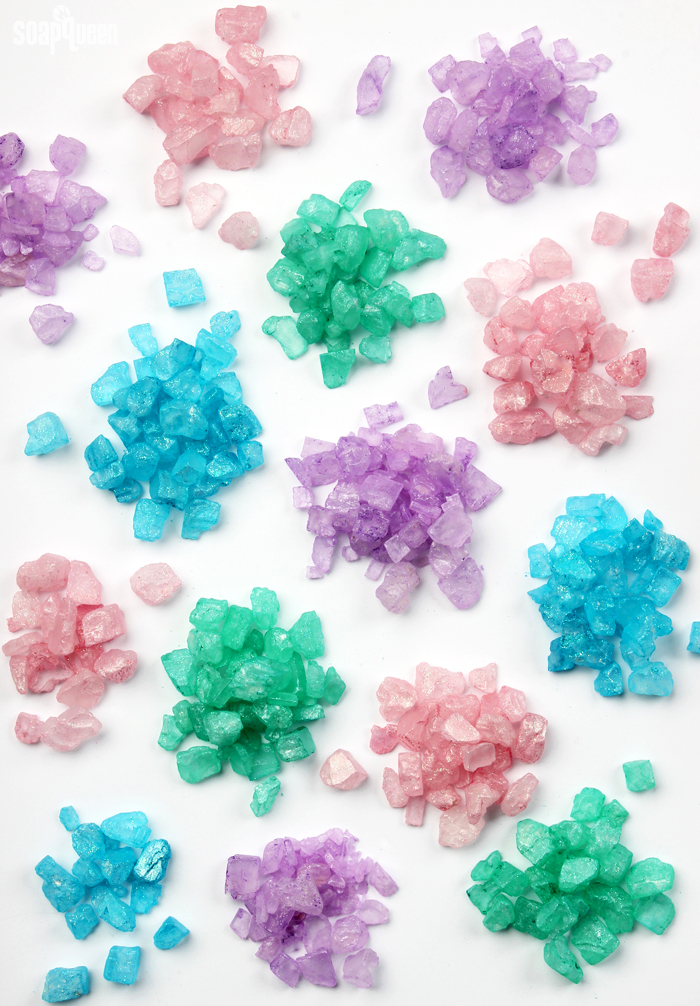
For the person who can’t get enough crystals, geodes, gems and agates, these Sparkling Bath Crystals are the perfect gift. Even better, they only take about 30 minutes to whip up and can be used right away. They can be made with just about any color mica and fragrance oil (or essential oil) you’d like. Customize them for your recipient by creating their birthstone, or their very favorite fragrance.
Cocoa Butter Cashmere Body Mousse
Want to give something incredibly luxurious and decadent? It doesn’t get much better than this Cocoa Butter Cashmere Body Mousse. The texture is totally unique; it’s fluffy yet dense, spreadable but solid at room temperature. It’s made with a combination of jojoba oil, cocoa butter cubes and avocado butter. It’s fragranced with the new Cocoa Butter Cashmere, which is a sophisticated, warm and intoxicating scent. Seriously…it smells so good. When combined with the natural chocolatey scent of the cocoa butter cubes, you won’t be able to stop smelling it!
Snowdrop Hot Process Soap
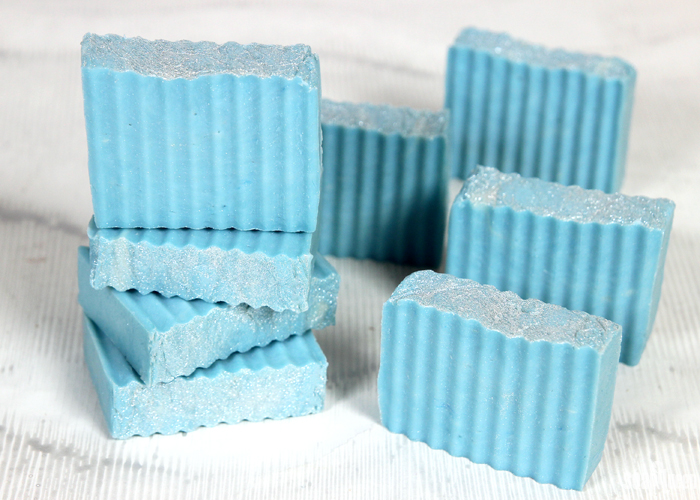
It’s a little too late to give fully cured cold process soap for Christmas, since that takes 4-6 weeks. That’s when hot process soap comes to the rescue! The additional heat speeds up the saponification process. Once the soap is placed into the mold to harden and cool, it’s ready to use after about one day. Personally, I like to let my soap cure for a few weeks to be on the safe side, but many soapers use hot process soap once cut into bars. This Snowdrop Hot Process Soap is holiday inspired, while still being appropriate for the rest of the year.
Pumice & Poppy Seed Melt & Pour Soap
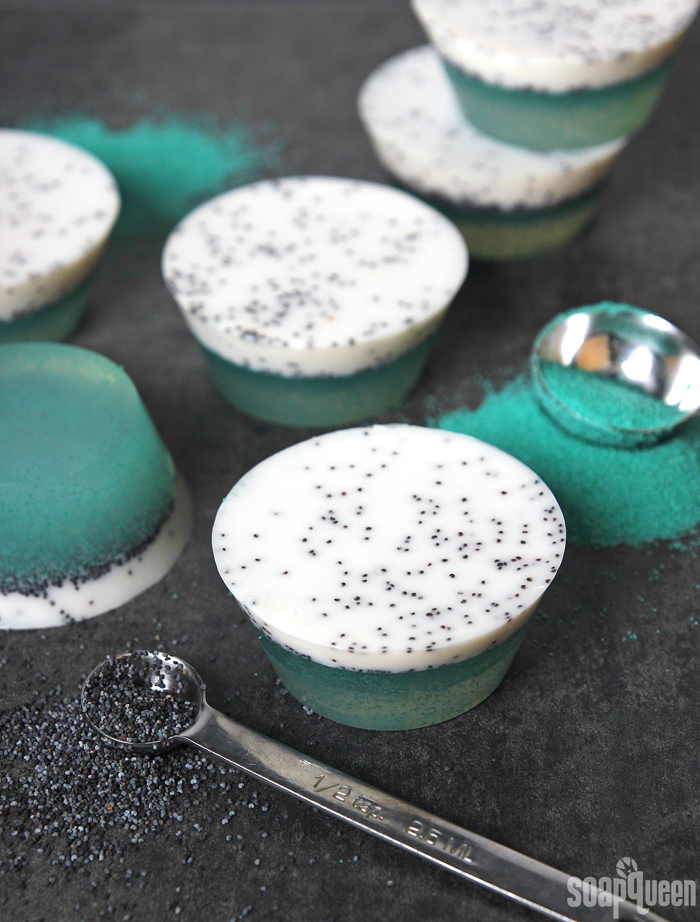
Looking for something a little more masculine? Guys need soap too after all! These Pumice & Poppy Seed Melt and Pour Soaps were made with dudes in mind. They feature plenty of scrub from poppy seeds, pumice and jojoba beads. The bars are scented with Bramble Berry’s Made to Measure Type Fragrance Oil, which is inspired by the popular men’s cologne. And while it does smell “manly,” I know plenty of women who use the fragrance too!
Neon Pink Lip Tint
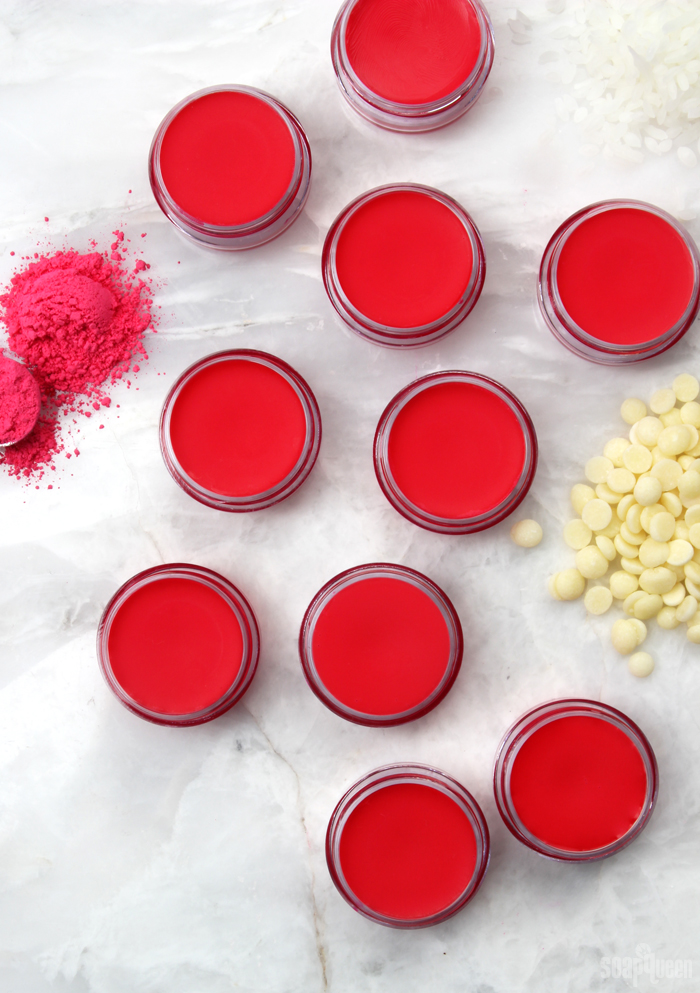
Need some stocking stuffers for the cosmetic junkie in your life? These Neon Pink Lip Tints give lips a wash of hot pink color while hydrating with cocoa butter and avocado oil. They are quick and easy to make, and could also be placed in tube packaging if you prefer. If you’re looking for a more subtle color, check out the Creamy Marsala Lip Tint recipe. It creates a beautiful burgundy hue that’s incredibly wearable all year.
I hope these tutorials give you some ideas if you haven’t started making your holidays gifts yet. It’s not too late to create thoughtful, handmade gifts this year…but don’t wait! =)
Energizing Orange Cold Process Soap Tutorial
Making cold process soap for the first time can be intimidating. To make the process as easy as possible, we designed the Natural Soap Kit for Beginners with the first-time soaper in mind. The kit comes in three color and fragrance options (orange, lavender and lemongrass) and includes 100% pure essential oils, botanicals, lye, soaping oils, a reusable mold and safety gear. All you really need to provide is distilled water, soaping containers and a stick blender. Plus, it ships for free to anywhere in the lower 48 United States! It’s the perfect gift for that crafty person in your life.
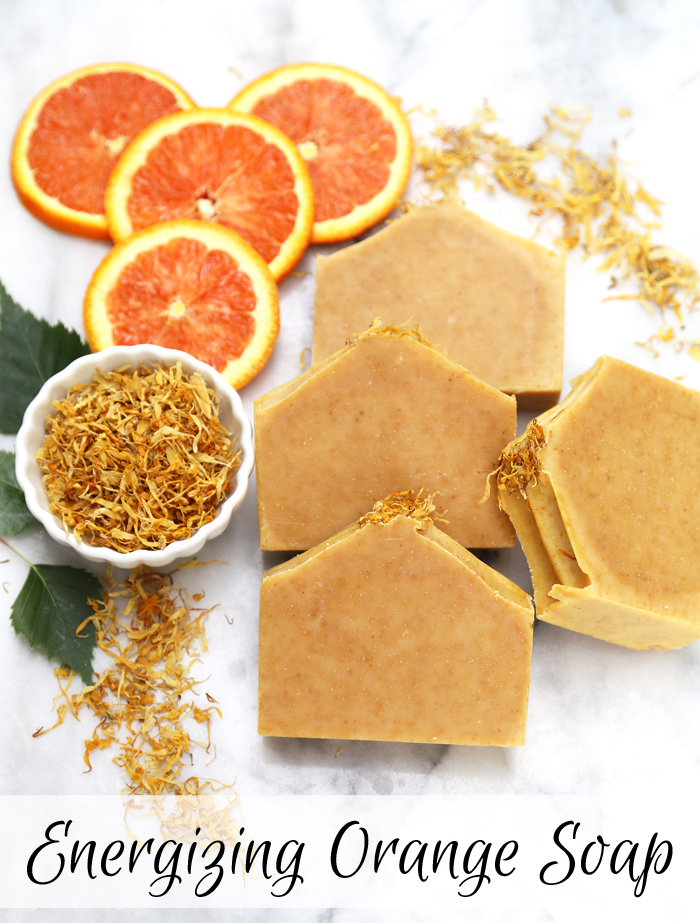
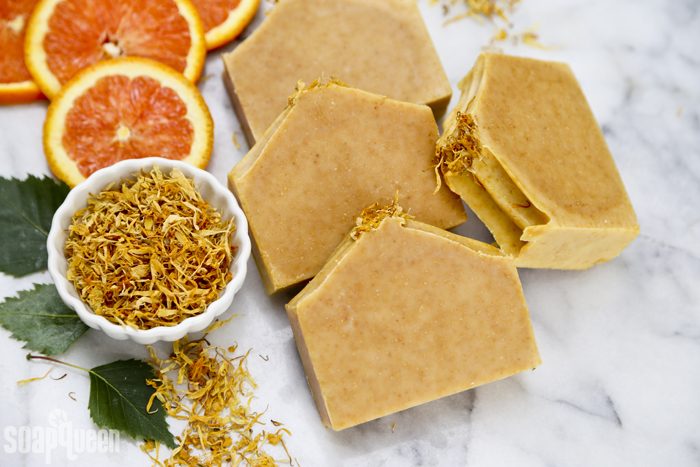
This Energizing Orange soap may be my favorite of the three Natural Soap Kit for Beginners color and fragrance options. The soap is scented with 10X Orange Essential Oil, which gives the bars a bright orange color. Orange peel powder adds extra color and a touch of exfoliation. Marigold petals are added to the top for a finishing touch. The bars smell amazing, and look so bright and cheery. I have yet to meet somebody who didn’t enjoy orange soap. =)
Part of what makes this project so easy is that it requires a nice thick trace. The orange peel powder can be added directly to the soaping oils prior to adding the lye, or it can be added at trace and stick blended. To create the texture on top, continue to stick blend until you achieve a texture of thick pudding. You really don’t need to worry about stick blending this project too much!
Re-Creating Cold Process and Melt & Pour Soap Designs
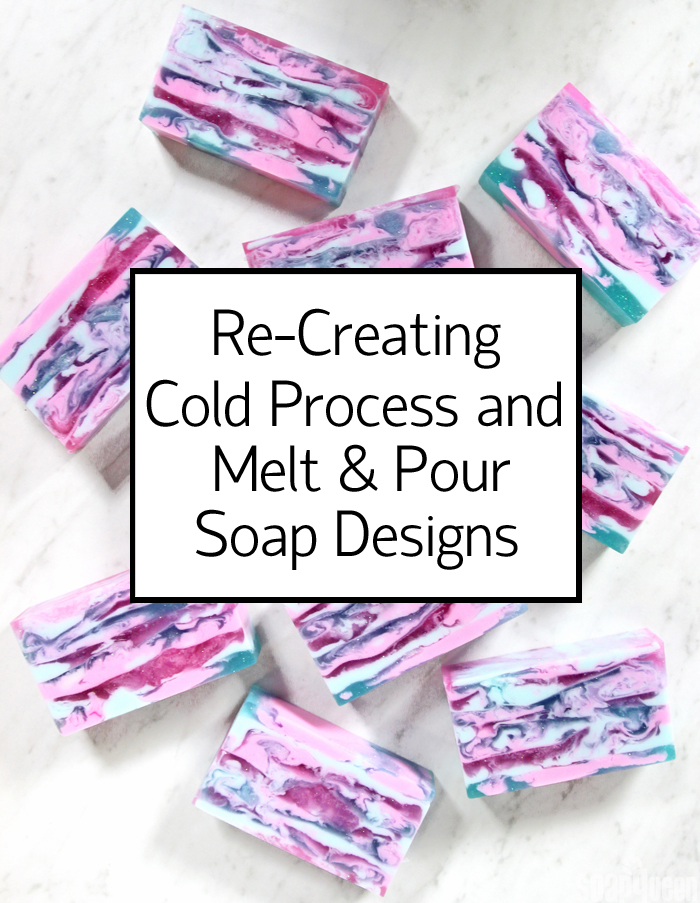
When I post a new tutorial, I’m often asked if it can be made with melt and pour or cold process soap instead. The answer depends entirely on the design and technique of the project. Simply put, some cold process techniques can be recreated with melt and pour and some cannot, and vice versa. This is because the texture and behavior of cold process and melt and pour is extremely different. Below, I go over a few cold process soap techniques that can and cannot be created with melt and pour soap, and what to consider when recreating a cold process recipe with melt and pour soap.
Creating Swirls with Melt and Pour vs. Cold Process
Cold process soap batter is fluid for much longer than melt and pour. It can be manipulated to be thick and pudding-like, or thin and liquidy. Melt and pour soap is always thin, and begins to cool and harden quite quickly. Unfortunately, this means creating some cold process swirls with melt and pour soap is very difficult (if not impossible). Swirl techniques like the linear swirl, spin swirl and hanger swirl require time swirl the soap batter. Techniques that require lots of pouring like the funnel pour or column pour also require several minutes to work with the soap. These techniques cannot be recreated with melt and pour soap because it hardens too quickly.
Once melted, melt and pour soap immediately begins to cool down. It begins to harden around 120 degrees. As it cools, it becomes thick and a skin forms on top. The time it takes for melt and pour soap to begin to harden from its melted, liquid state is about 60-90 seconds. On the other hand, cold process soap can stay liquid for 5 minutes or more, depending on the recipe, fragrance oil and how the stick blender is used.
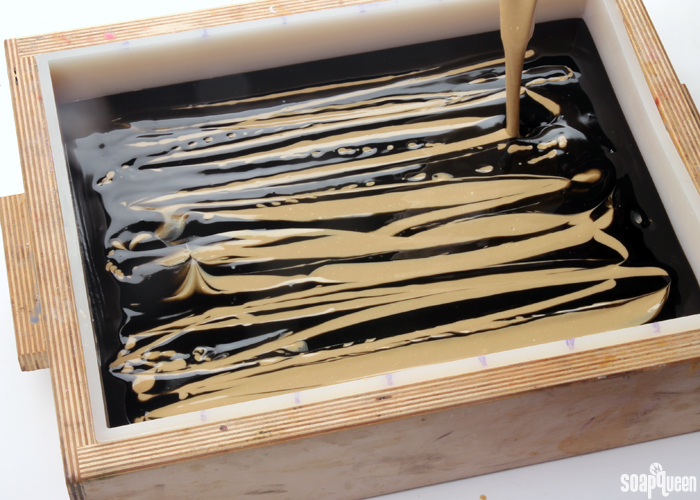
Simply put, the nature of melt and pour soap doesn’t give enough time to create the same swirls as cold process. As it hardens, it also thickens and becomes a little “gloopy.” This texture just doesn’t work well for swirls. The other problem with creating swirls with melt and pour is the thin texture makes it difficult to keep colors separate from each other. For example, linear swirls are created by layering strips of cold process soap beside and on top of each other, as shown here and in the photo below. Because the texture of melt and pour is so thin, the soap spreads out instead of keeping distinct lines of color. Long story short? Many swirl techniques can only be created with cold process soap.
The texture of cold process soap allows you to pour distinct lines that hold their shape, as shown above. Melt and pour soap does not behave the same way.
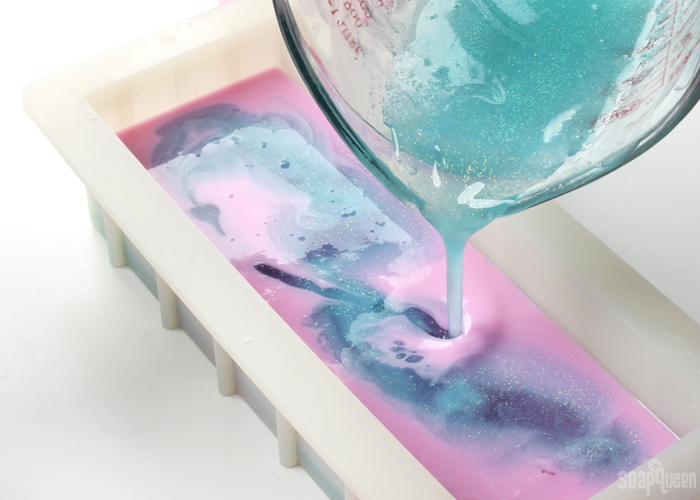
That being said, it’s not impossible to create swirls with melt and pour. They just look very different from the swirls you can make with cold process soap. For example, in the Cosmic Cotton Candy Soap Tutorial, various colors of melt and pour soap are poured together in layers. The final bars are full of swirls, texture and movement. It looks beautiful, but very different from cold process swirls. For tips on swirling melt and pour soap, check out this post.
Swirls are not impossible with melt and pour soap, but they just won’t look like cold process swirls.
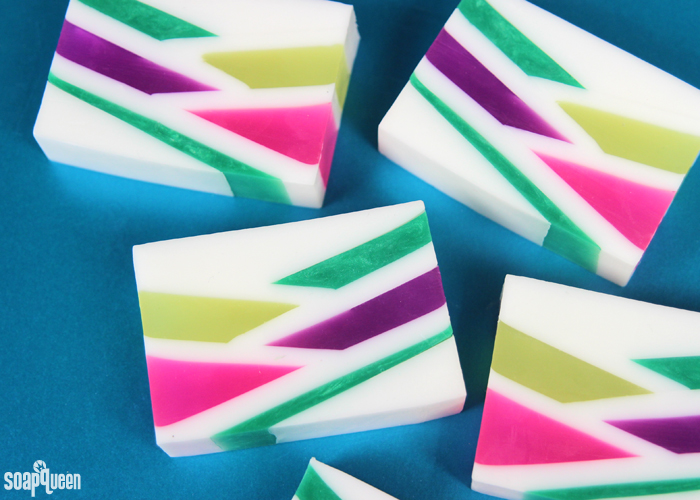
Creating Layers with Melt and Pour Soap vs. Cold Process
Some swirl techniques might not be possible with melt and pour soap, but layers are a different story! Creating straight and clean layers with melt and pour soap may be easier than creating layers with cold process soap. Melt and pour layers can be poured with a long time period in between. This allows the bottom layer to harden and support the layer above. You do need to be careful with temperature, because if the top layer of soap is too hot it can melt the layer below. The hardest part about creating layers in melt and pour soap may be the patience it requires! For more tips on layering melt and pour soap, check out this post.
Cold process soap can be made and poured in batches, but it does involve more prep work. It’s also possible to create straight lines with cold process all in one batch, but it’s an advanced technique that involves a good understanding of trace. If, for example, the bottom layer of soap is thin trace, a thick layer on top may fall into the bottom layer.
If you want to create layers that are not perfectly straight, cold process soap is the way to go. You can find examples of this in the Violet Confetti Cold Process Soap Tutorial, Watermelon Cold Process Soap Tutorial, and the Natural Colorant Rainbow Cold Process Soap. Melt and pour soap does not hold its shape like cold process soap, because it can not be manipulated to a pudding texture.
Textured Tops in Melt and Pour Soap vs. Cold Process
If the cold process project you’d like to re-create with melt and pour has a textured top, I’ve got some bad news. The thin, liquid texture of melted melt and pour soap can not be manipulated to create a textured top, like cold process. Cold process soap batter with a medium to thick trace has a texture similar to pudding. You can use a spoon or spatula to move the soap around to create peaks and divots, and it will keep its shape. In the video below, once the soap is poured into the mold, a spoon is used to mound the soap up in the center. Unfortunately, this texture cannot be achieved with plain melt and pour soap.
That being said, you can add some ingredients to melt and pour soap to create a texture that is more similar to cold process. One example is shown in the Reimagining Honey Ale Melt and Pour Soap. Melt and pour soap base is whipped together with liquid soap, giving it a more “foamy” look. A similar technique is used in the Soap Cupcakes with Whipped Frosting video below. It won’t behave in the same way as thick cold process soap, but it’s a little bit closer!
Coloring and Fragrancing Melt and Pour Soap vs. Cold Process
If you’re recreating a cold process design with melt and pour (or the other way around), it’s important to consider the type of colorant used in the recipe. Some colorants work better for cold process soap than melt and pour, and vice versa. For example, pigments and oxides are great in cold process soap, but not all micas work well in the high pH environment. For melt and pour soap, micas work great and oxides and pigments can be a little trickier to incorporate. Click here to learn about the different types of soap colorants, and which work best for cold process versus melt and pour.
How colorants are added to the cold process soap and melt and pour varies as well. For example, pigments and oxides need to be dispersed in oil before being added to cold process soap. This helps avoids clumps. Learn how to prep colorants for cold process soap here. For melt and pour soap, colorants are best dispersed in 99% isopropyl alcohol or a small amount of glycerin. Adding extra oil to melt and pour soap can inhibit the lather and affect the texture. The amount of colorant needed for the project will most likely change as well.
Color Blocks are specifically designed to color melt and pour soap, but don’t work well in cold process.
When it comes to fragrance oils in melt and pour versus cold process soap, almost all fragrance oils at Bramble Berry are appropriate for both projects. But, some fragrances oils cause interesting effects in cold process soap, like ricing or acceleration. When working with melt and pour soap, you don’t have to worry about these things. Fragrance oils can also discolor soap brown if it contains a lot of vanillin. If a fragrance oil discolors, you can use Vanilla Color Stabilizer in melt and pour soap to prevent the discoloration. Unfortunately, Vanilla Color Stabilizer is not reliable in cold process soap. Learn more about vanilla discoloration here.
If you’re taking a project from cold process to melt and pour (or vice versa), just remember to always use the Fragrance Calculator to recalculate the amount of fragrance needed for your recipe. Cold process and melt and pour soap have very different fragrance usage rates. =)
What About the Mold?
There are a variety of different types of soapmaking molds including silicone, wood and plastic. Some molds are better for cold process soap or melt and pour. For example, silicone molds are great for both cold process soap and melt and pour soap. But, plastic molds don’t work as well for cold process soap. When recreating a recipe, take the type of mold into consideration. Learn more about different types of molds and their pros and cons here.
Plastic molds work better for melt and pour soap than cold process soap.
Phew! As you can see, there are a lot of factors to take into consideration when recreating a cold process soap with melt and pour, or vice versa. Some projects are easy, and just need a few ingredient swaps. Others cold process projects like swirls and textured tops are really hard to re-create with melt and pour soap.
Facebook and Instagram Photo of the Week (Nov. 19th ~ 25th)
I hope everyone had a great Thanksgiving! We definitely did. My sister-in-law hosted the entire family and it was such a treat to just show up with my side and the pie and not worry about all of the hosting details. I owe her for sure (and, next year will definitely be my turn to host again). My aunt made these insane cheese cookie things that she served with a pepper jelly. I probably ate 6 of them? Ooooooof. Eating healthy during the holiday season can be difficult. It really helps to have a support system. If you’d like to focus on healthy habits, join me + 30 others for a special “Best Holiday Ever” 21 day lifestyle challenge. Learn more about the challenge in this post. We are doing our pre-challenge planning right now and everyone is sharing their SMART goals in the private Facebook group.
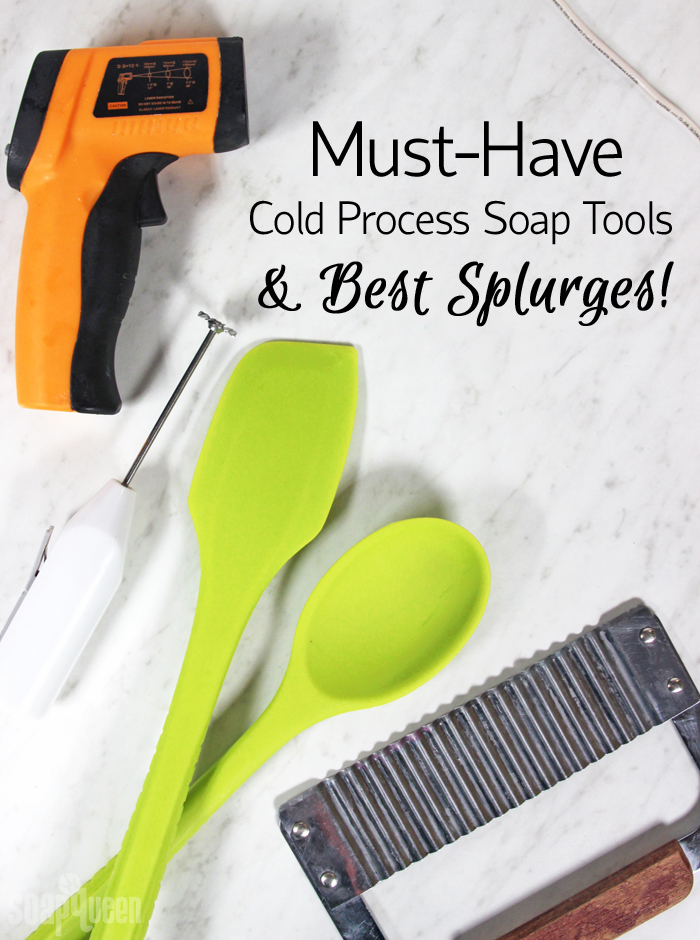
Must-Have Cold Process Soap Tools (And Best Splurges!)
There are so many fun tools and ingredients to create cold process soap. From the basics like stick blenders and molds, to fancier items like the Comb Swirl Tool, tools can really expand what a soaper can do. I have been making soap for over 20 years, and all the new soaping tools that have come out since then are pretty amazing! I have used just about all of them, and there are definitely some tools that I can’t do without.
I rounded up my very favorite tools (and one crucial ingredient!) in a few different categories below based on the convenience they provide, versatility and value. Of course everybody has a different idea of what is essential, a must-have, and what’s a luxury item. But, these are the tools I find myself always reaching for, and what makes soaping so much easier for me and my team! Is there a soaping tool you just can’t live without?
- Safety Gear (Safety Goggles, Gloves, etc.)
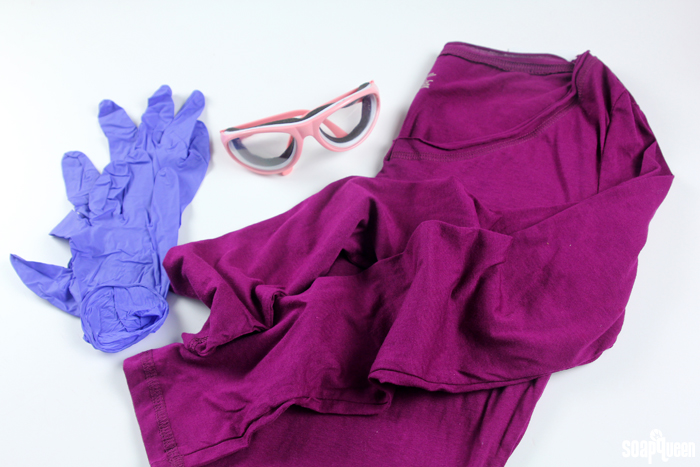
While you can get away with a lot of fancy soaping tools, safety gear is a must. Cold process soaping requires working with sodium hydroxide lye which is a caustic chemical. Lye has the ability to cause skin and eye irritation if it comes in direct contact. But, just like driving a car, it’s perfectly safe when handled correctly. The easiest and most effective way to protect yourself when working with lye is to wear a long sleeved shirt, pants, closed-toed shoes, safety goggles and gloves. This greatly reduces any chance for serious injury. If working with lye makes you nervous (I understand!) this post may help calm your nerves. In addition, the Sodium Hydroxide Lye Safety Guide has everything you need to know about working with lye in soap.
- Sodium Hydroxide Lye
Speaking of lye, you can’t make cold process soap without it. There is no ifs-ands-or-buts about it, cold process soap requires lye to become…well, soap! When oils and lye water are emulsified, the saponification process begins. This means the sodium hydroxide lye solution starts turning the oil into soap. If you’re a visual learner, this video may help you understand saponification a little better. I highly recommend purchasing lye that is intended for soap making. Lye from hardware stores can contain other ingredients that may cause unpredictable results.
- Stick Blender
Before the days of stick blenders, soapers would stir together lye and oils together for hours to create soap. I don’t know about you, but I don’t want to spend hours making one batch of soap. That’s where a reliable stick blender comes in! A stick blender emulsifies oil and lye together in seconds, rather than hours and hours. Some soapers still prefer to skip the stick blender and stir their oils and lye by hand…and more power to ’em! But personally, I can’t do without it.
Note: Our stick blenders are out of stock because we’ve created our own “Best Ever Soaping Stick Blender”and the new ones are due in December 11, just in time for the holidays.
- Easy Pour Containers
I use Easy Pour Containers for just about every batch of soap I make that involves multiple colors. The long pour spout is great for precise pouring, and really comes in handy for swirls. In particular, they make linear swirls a breeze. They are also easy to clean, which is always a bonus!
- Infrared Thermometer
Temperature affects cold process soap in so many ways. For example, if your soap is too hot it can crack, volcano or develop “alien brain.” If it’s too cold it can develop soda ash. Read more about how temperature affects soap here. In order to have consistently successful batches of soap, a reliable thermometer is a must. A candy thermometer works as well, but I love using a infrared thermometer that I don’t need to clean. This is especially true when testing the temperature of lye!
- Silicone Tool Set & Whisks
This seems really basic, but a sturdy set of silicone spatulas and whisks are so valuable for cold process soaping. From plopping soap into the mold with the Round Silicone Spoon to create a spoon plop, to using the Silicone Spatula to get every last bit of soap, I use these tools everyday. I love the silicone whisks for mixing in fragrance oils.The bright green color makes them easy to find and distinguish from your cooking utensils.
- Mini Mixer
Oh little Mini Mixer, how I love you so. If my soap includes any colorants, I use this tool to disperse them in lightweight liquid oil. And because I love color, I use it in roughly 99.9% of my soap batches. =) Sometimes you can get away with using a spoon to disperse micas because they have such small particles. But for larger, heavier colorants like pigments and oxides, the mini mixer helps get rid of clumps. Learn how to disperse colorants for soap here. It has plenty of power for mixing colorants in lightweight oils, but I don’t recommend it for thicker mixtures like lotions or soap.
- Hanger Swirl Tool
I love how many designs you can create with such a simple and inexpensive tool. From the basic Hanger Swirl, to modified versions like the Butterfly Swirl, the Hanger Swirl Tool creates some really beautiful designs. It can be bent to fit a wide variety of molds; in particular I use it in the 10″ Silicone Loaf Mold, Tall Narrow Wood Loaf Mold, and the 5 Pound Mold with Sliding Bottom. While I don’t use it for every batch, it’s included in this section because it’s really worth the small investment!
- Multi-Bar Cutter
Cutting even and straight bars can be tricky. The Multi-Bar Cutter gives you perfectly straight and even bars of soap every time. It really makes your bars look professional, and is a must for business owners who need an exact weight for each bar. It’s definitely a splurge, but I have yet to find a soaper who didn’t think it was worth it. This video shows you how to use the cutter, and replace a wire if it happens to break. To avoid wires from breaking, I like to cut my soap immediately after unmolding. That way, the soap is still slightly soft and the wires can cut the soap easily. Unfortunately, melt and pour soap is too firm for this tool.
- Multi-Pour Sectioning Tool & Multi-Pour Tool for 10″ Silicone Mold
The Multi-Pour Sectioning Tool and Multi-Pour Tool for 10″ Silicone Mold can be placed into their corresponding molds to create 2-4 vertical sections of soap. The dividers are then carefully pulled up and out. Once you have sections, they can be swirled to create designs like the Circling Taiwan Swirl, or left alone to create stripes as shown in the Cindo de Mayo Cold Process Soap. It’s a bit of a luxury item because you can create dividers with cardboard (shown here), but that’s kind of a hassle. The Multi-Pour Sectioning Tools can also be used over and over again, which I think makes them worth the investment!
- Soap Shaver
I use this tool all the time! Simply slide the soap across the blade to remove soda ash, knife marks, bubbles and more. You can use it for the top, bottom, sides and front of the bars. It can also be adjusted to remove larger slices, in order to remove deeper blemishes. I like to spritz the shaver with a little alcohol to give the bars a little more slip and glide when using this tool. Of course be very careful when you’re using it, the blade is extremely sharp! This shaver makes bars look clean and professional. - Soap Beveller
Speaking of making your bars look professional, the beveller deserves a shout out too! Slide the soap across the taut wire in the corner to smooth edges of the bars. Like the Soap Shaver, it has a bench hook to secure it on a table or countertop. I like to save the shavings to make confetti soap.
- Swirl Tool Kit
If you love complex swirls like the Peacock Swirl and French Curl Swirl, the swirling tools are a must. Yes, it would be possible to create these swirls by hand…but these tools make it about 300% easier. Check out this video to learn how to use them, then see it in action in the Perfect Peacock Swirls video.
So there you have it! My top picks for soaping tools, including the essentials, must-haves and luxuries. As a soaper, is there a tool you can’t soap without? Or, what soaping splurge do you think is totally worth it?
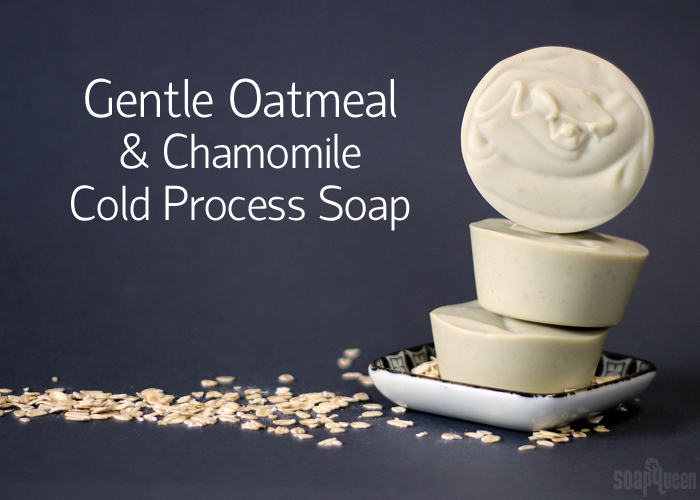
How to Make Gentle Oatmeal Baby Soap
This Gentle Oatmeal Soap recipe is perfect for babies, or those with sensitive skin. The majority of the recipe is made with olive oil pomace that has been infused with skin-loving chamomile herb. Chamomile has been used in skin care for centuries, and is well known for its calming properties. The soap also contains shea butter for moisture and castor oil for lather.
This soap does not contain any fragrance, because that can sometimes be irritating to extremely sensitive skin. If you’d like to add some, feel free. In particular, lavender essential oil would be a great choice. You can use the Fragrance Calculator to find out how much to add to the recipe. Once unmolded, the soaps are stamped with the Stork & Baby Acrylic Stamp for a cute finishing touch. They would be a perfect gift for a baby shower! Looking for more baby soap recipes? Check out the Buttermilk Bastille Baby Bar tutorial!