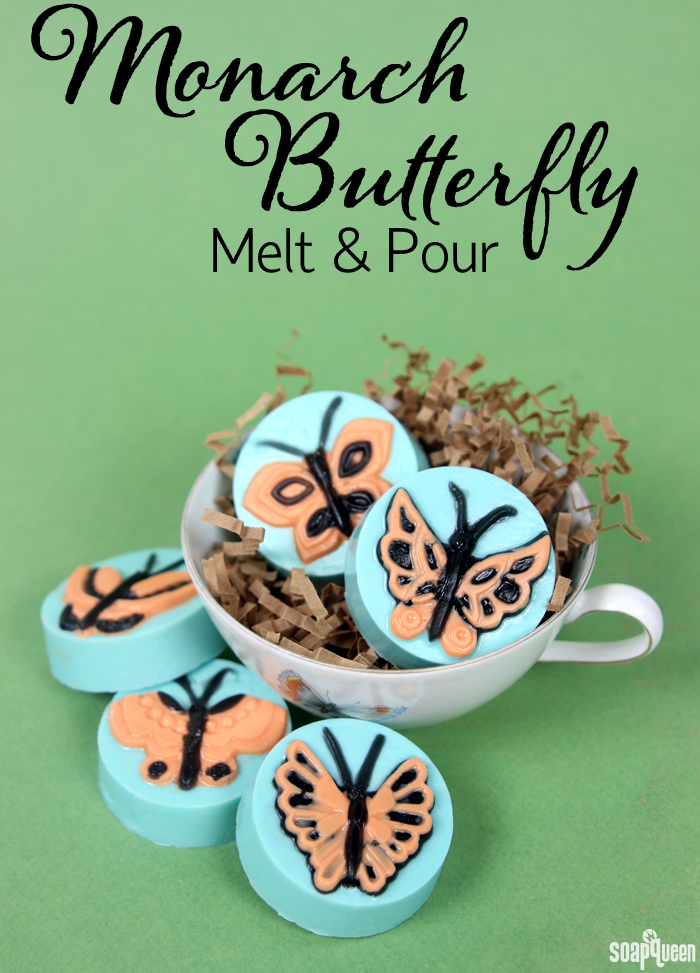
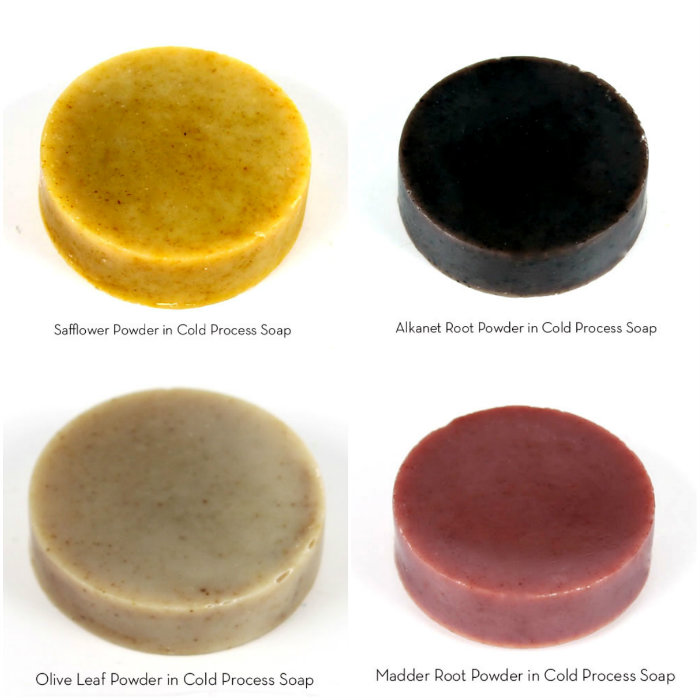
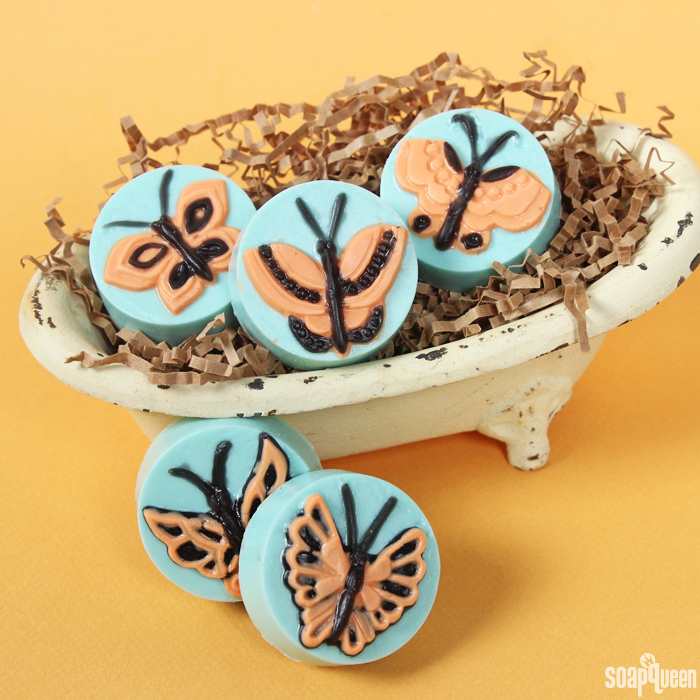
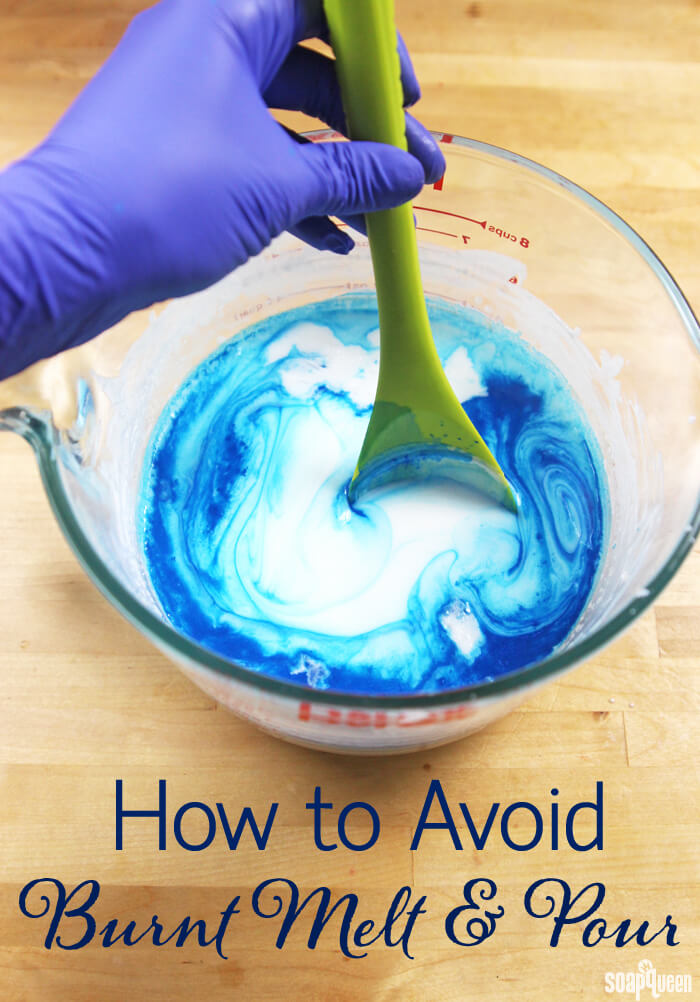
Spring is an inspirational time of the year. The flowers are blooming and the sun is shining (in between the rain of course). This week featured several spring-inspired tutorials, including the Monarch Butterfly Melt and Pour Tutorial. Orange and black soap – classic monarch butterfly colors – are piped into the Guest 5 Butterfly Mold. The butterfly details are topped with a shimmery blue base, and the soap is scented with my current fave, sweet and warm Pure Honey Fragrance Oil.
Search Results for: www.brambleberry.com
Monarch Butterfly Swirl Cold Process Tutorial
With gorgeous orange, yellow and black wings, the monarch may be the most recognizable type of butterfly. It lives in warm climates such as Mexico, California and along the Gulf Coast, and is known for its annual migration from Eastern North America to Mexico. This Monarch Butterfly Swirl Cold Process was inspired by these gorgeous insects. Layers of monarch-colored soap are poured into the mold and swirled with a hanger swirl tool to create the effect of butterfly wings.
The fun part about the butterfly swirl is that every bar looks unique. When the bars are placed side by side, the butterfly image really pops. This technique was created by Zahida of Handmade in Florida, click here to read our interview with her.
How to Infuse Oils with a Crock-Pot
A simple handmade cold process soap is made up of oils, butters and sodium hydroxide lye. Various oils give handmade soap different properties, so each combination of oils will make a unique bar. Click here to learn more about the various properties of common soap making oils. To take your soap making oils to the next level, they can be infused with dried herbs such as lavender, chamomile, marigold and so many more. Infusing oils with herbs can add color, a light scent or skin-loving properties to your oil. If you’d like even more in-depth information on infusing oils including working with teas and clays, check out my E-Book Infusing: Herbs, Spices, Teas & Clays.
There are several different methods of infusing oils. These include infusing the oils on the stove top, in a Crock-Pot and cold infusion. When infusing oils with heat, such as on the stove or in a Crock-Pot, the process takes anywhere from 20 minutes to 4 hours. The time will depend on how hot your oils are and how concentrated you’d like the infusion to be. With cold infusion, herbs are added to room temperature oil and set aside for 4-6 weeks. If using the cold infusion method, be sure to use an oil with a long shelf life.
In addition to herbs, powders can also be infused into oil. Infusing powders in oil prevents speckles of powder that can occur when the powder is added directly to the soap. Popular powders for infusing include madder root powder, olive leaf powder, alkanet root powder and safflower powder. Indigo powder is an interesting ingredient, as it benefits from being added to reconstituted lye water rather than oils. The result is a darker, more intense blueish gray color.
Top row: Safflower Powder, Alkanet Root Powder
Bottom row: Olive Leaf Powder, Madder Root Powder
Common oils used for infusing include sweet almond, olive oil, avocado oil and chia seed oil, but almost any lightweight liquid oil can be used. When selecting your herbs, it’s best to use dried herbs. The moisture content of fresh herbs could promote mold and bacterial growth in your oil. Generally, hard oils such as coconut or palm are not infused, although they can be used if using the stove or Crock Pot method.
Infused oils can be used in cold process soap and other projects that include lightweight liquid oils. This includes bath bombs, massage oils, lotions, lip balm and scrubs. For example, calendula is infused in sweet almond oil in the Infused Lip Balm video on Soap Queen TV. For cold process soap specifically, it’s debatable if the skin-loving properties of herbs survive the saponification process, but it’s fantastic from a marketing and label standpoint. If you’re looking for more recipes using infused oils, check out the tutorials below!
Baby Massage Oil on Soap Queen TV
Sensuous Rose-Infused Massage Oil
Hot Oil Hair Treatment
I love using a Crock-Pot to infuse my oils because the temperature remains steady for long periods of time, and the bottom of the Crock-Pot will not burn the herbs. The amount of time it takes to infuse your oils will depend on your Crock-Pot. It will also depend on your personal preference. It’s important to remember that infusing oils is not a concrete science; the amount of oil and herbs used will depend on your recipe and how strongly you want to infuse the oil. In general, a good place to start is 1 tablespoon of herb per ounce of oil.
For this infusion, I’m creating a blend of both chamomile herbs and calendula petals. Both of these herbs are known for their gentle, skin-soothing properties. I’m using 16 oz. of sweet almond oil with 8 tablespoons of calendula petals and 8 tablespoons of chamomile herbs. Roughly, that was about .6 oz of chamomile and .2 oz of calendula. Place both the herbs and oils into the Crock-Pot, stir and set the Crock-Pot to low. If you’d like, you can add your herbs into a sealable tea bag. This extra step means you won’t need to strain the oils later.
Cover the Crock-Pot with the lid and allow the oils and herbs “cook” for about 30 minutes. After that time, you may notice the oils start to slightly change color. At this point, you can strain the oils from the herbs, or you may choose to infuse them a little longer. I let my oils and herbs infuse for another hour to get all the benefits from the herbs.
Once you are finished infusing the oils, allow them to cool slightly. Pour the oils through a strainer and into a heat safe bowl. If you find that small pieces of the herbs are still in your oil, you can pour them through a cheese cloth, coffee filter or thin paper towel to remove them.
Transfer your oil into a sealable container and write the date in which it was infused. Store in a cool, dark place to ensure your oils last as long as possible. The shelf life of the infusion will be the same as the shelf life of your oil. Find shelf lives for common oils here. The oil can then be used as normal in your soap, lotions, balms and more.
Curious about some more infusing options? The list below has a few common infusing herbs, and what they add to your soap. Do you have a favorite oil to infuse?
Common Infusing Herb Properties:
Alkanet Root Powder: Adds a grey-ish purple color to cold process soap.
Annatto Seed: Adds an orange tint to cold process soap.
Chamomile Herb: Known for its calming and soothing properties.
Indigo Powder: Gives soap a blue gray hue; we recommend reconstituting indigo powder in your lye solution.
Lavender Buds: Known for its relaxing scent.
Madder Root Powder: Gives a reddish color to cold process soap.
Marigold (Calendula): Known for its skin-soothing properties. Can give a slight yellow/orange tint to soap.
Olive Leaf Powder: Gives a greenish-grey color to cold process soap.
Rose Petals: Great for marketing; does not add much scent.
Safflower Powder: Gives a yellow hue to cold process soap.
Monarch Butterfly Melt & Pour Tutorial
With spring comes warmer temperatures, blooming flowers and ripe produce. The influx of flowers brings forth honeybees and butterflies. These Monarch Butterfly Melt and Pour soaps were inspired by the classic monarch butterfly colors, orange and black. These guest-sized soap are great for visitors or traveling. The scent of Pure Honey Fragrance Oil is luxuriously warm and sweet.
Due to the small details in this soap, this project is for advanced melt and pour soap makers. The injector tool works great for filling in the small details, but be sure to have a cup of extra hot water nearby to unclog the tool after each color. Temperature is also important in this project. Because the details are so small, they can melt easily if layers on top are poured hotter than 125 °F. Patience is key!
Kid-Friendly Project Roundup
I am an over-the-top ridiculous, messy crafter. If you left me in a Michaels craft store for a month with enough microwaveable meals and water, I could happily live there, exploring all the different arts, crafts and crazy skills they have to offer (seriously though, I’ve always wanted to learn how to solder; doesn’t that seem fun yet also, useful?!) Arts and crafts promote creativity and problem solving skills in every age – but, especially in our kiddos. Creating art projects with your kids is also a great bonding activity. There are so many fun projects that you and your little can create together, including melt and pour, bath fizzies and nail polish. The project you choose will depend on your child’s age and skill level. In general, I recommend keeping the projects simple. That way the activity stays fun, easy and stress-free. My favorite activity craft subscription boxes are Kiwi Crate, Koala Crate, Messy Play Kit (pictured below, top two photos) and Handmade Beauty Box (of course!).
Sunday Night Spotlight: Salts
Salts are a versatile ingredient for bath and body products. They can be used to remove dead skin in soap and scrubs, or in the bath tub for a soothing soak. There are a wide variety of salts, including dendritic salt, dead sea salt, pink sea salt and epsom salt. Each salt has slightly different properties. Wondering which salt is right for your project? Read on to learn more about salts and how to use them.
One of the most common types of salt is Epsom salt. Interestingly, Epsom salt is not actually a salt as all! Epsom salt is made of hydrated magnesium sulfate. Magnesium and sulfate are known for their hydrating properties, making Epsom salt a popular choice for bath salts. Epsom salt soaks are commonly used to sooth sore muscles and soothe irritated skin. Epsom salt crystals come in various sizes. Bramble Berry’s Epsom salt is extra fine textured, making it a good options for body scrubs and soaks.
If you’re looking for a way to use Epsom salt in the tub, the Winter Salt Soak combines Epsom with baking soda and citric acid to create a fizzy effect. It also features a blend of essential oils that is great for sore muscles. If you’re looking for a refreshing soak option, the Minty Layered Bath Salts leave skin feeling peppermint-y and fresh. Epsom salt is also used in the Margarita Epsom Salt Scrub to create a hydrating and tropical body scrub. If you prefer a dry scrub, the Sea Clay Dry Salt Scrub combines Epsom salt, sea clay and baking soda for an oil absorbing effect.
Soapy Social Media Roundup
Happy Saturday! Today is another beautiful, sunny day in Washington state. So far, the kiddos and I have had a low-key morning followed by a trip to Farmer’s Market and, continuing to move out of our old home. We enjoyed eggs and chia/hempseed/buckwheat cereal for breakfast, followed by reading lots of new books before all that happened though. Speaking of books, Storey Publishing named Soap Crafting as one of their “Fresh Picks,” for May and the Ebook is now available for only $2.99 all month long! Click here to see the full list of awesome books selected this month. I’m continuing to put the finishing touches on my new book that is scheduled for early 2016…I can’t wait for you all to read it!
What are you up to this Saturday? If you’re making soap, I’d love to see your projects on our Facebook page. Or, tag your photos on Instagram with the hashtag #SoapShare; I check that hashtag just about everyday =) Check out my favorite pins, tweets and ‘grams if you’re needing a little crafty inspiration!
Pinterest:
Left to right, clockwise:
- This Goat Cheese Radish Tartine looks amazing! The color combination of pink and green looks so fresh and pretty.
- Made by Lathered Pony Soap Company, this “Blue Moons” soap features a tall shape and circular embeds. The swirl inside looks beautiful!
- Smiling everyday is a must! Just looking at this adorable graphic puts a smile on my face.
- Why pin things with ordinary pushpins, when you can use pushpins with pom poms? Click here for the fun and easy tutorial.
Instagram:
Next week will feature a selection of tutorials inspired by butterflies and bees. On the left is a funnel-pour cold process inspired by the honey bee. On the right is the Stained Glass cold process soap which will be in the Spring Soap Crafting Club.
The weather has been absolutely beautiful in the Pacific Northwest the past few weeks. The kiddos have certainly been enjoying the weather! Below Lily and cousin Alise enjoy the sun =)
Twitter:
- Is it okay to use an ingredient name in the name of your product? Click here to find out.
- Facebook’s News Feed algorithm is changing. This article gives the run-down on what that means for brands and publishers.
- Love string cheese? Learn all about how mozzarella went from a pizza topping to an individual snack.
- If you’re concerned about the Personal Care Product Safety Act S1014, click here for tips on how to contact your representatives. Want updates on soapy legislation? Click here to join the Coalition of Handcrafted Entrepreneurs.
- Do you use Lightroom to edit your photos? These 35 tutorials will help!
I hope you all have an awesome weekend! To keep up with the latest soapy social media throughout the week, you can follow me on Twitter, Tumblr, Instagram, Pinterest, Vine and YouTube and Snapchat. To watch my ‘stories’, which include sneak peeks into future projects, add me. I’m Bramble-Berry on Snapchat.
Facebook and Instagram Photo of the Week (May 9th ~ 15th)
Making soap is a lot of fun, but there are many other products out there you can make by hand. This week focused on simple DIY projects like the Monster-Be-Gone Magic Spray. If your child is afraid of monsters, you know how hard it can be to get them to bed at night. Spraying the Monster-Be-Gone Spray can help them conquer their fear of the dark. It will also leave a subtle floral smell from the rose water. Light Gold Mica adds a bit of shimmer, and Royal Purple LabColor adds a soft purple hue.
Walnut Facial Scrub for Men
Many men are no-fuss when it comes to bath and beauty products. While women can have a routine five steps long, many guys like simple and quick. This Walnut Facial Scrub is just that…truly simple! With only four ingredients including fragrance, this scrub offers plenty of exfoliation. The new Bramble Berry Made to Measure Type Fragrance Oil is a fantastic masculine scent, based on the popular cologne. The combination of walnut shells, baking soda and kaolin clay create a neutral appearance that’s not too fussy or feminine.
To use, apply the dry scrub directly to wet, clean skin. Or, place the scrub in your hands and add a few drops of water to make a paste. People with dry skin might prefer mixing the scrub with oil before each use. Avocado oil, argan oil or sweet almond oil would work well. Apply the scrub 2-3 times a week. If you’re a lady, you can still use the scrub! But, you may want to use a different fragrance or omit the fragrance oil altogether. Because this recipe does not contain water, you don’t need to add a preservative to this recipe. Read more about preservatives here. [Read more…]
How to Avoid Burnt Melt & Pour
Melt and pour soap making is great for beginners. It does not require working with lye, and is easy to customize with color, fragrances and molds. While usually considered an “easy” project, melt and pour can be a little finicky when it comes to temperature. If melt and pour gets too hot, the base will burn and becomes difficult to work with. The key to avoiding burnt melt and pour? Patience!
Bramble Berry melt and pour bases begin to melt at around 120 ° F. The bases begin to burn when they become hotter than about 140-150 ° F. Melt and pour soap should never boil. If it begins to boil, you know it has been burned. When working with melt and pour I recommend always having a temperature gun nearby!
Melt and pour soap can be melted in the microwave or in a double boiler. If using the microwave, be sure to use short bursts of heat. Remember, you can also microwave the soap for longer…but once the soap is burned, there is no going back! Melting melt and pour soap in a Crock Pot or saucepan is not recommended, as the direct heat can easily burn the base. If you get a Crock Pot or turkey roaster that has multiple heat settings (low, medium, high) and melt the soap slowly and carefully, that can work. The multiple heat settings are key!
If your melt and pour begins to boil…you know it’s burned!
Burned melt and pour may smell unpleasant, and may become cloudy. In extreme burn cases, the soap can become yellow or brown-ish in color. Burned soap often develops a thick, gloppy texture once cooled slightly. This thick texture makes pouring smooth layers difficult, and creating small details becomes next to impossible. Unfortunately, once your soap has been burned and has turned into a gloppy texture, there is no way to achieve the fluid texture of not-burned soap. Burned soap is still safe to use…it just does not smell or look very pleasant. The best thing to do with gloppy, burned soap is heat it to a liquid texture, and pour into a heat safe container or mold.
In the photos below, the soap reached temperatures of over 200 ° F. You may notice the color has a slight yellow tint in the photo on the left. It did not smell very good, and there was a lot of steam coming off the soap. While unpleasant to smell, the soap was still liquid and workable. On the right, the soap has cooled to about 150 ° F. At this temperature, unburned melt and pour would be fluid. But, because this soap was burned so badly, the soap has become a thick, jello-like consistency even at 140 ° F.
On the left, the burned soap has taken on a slightly yellow color. On the right, the burned soap has cooled slightly but has taken on a gloppy, unworkable texture.
The first step to avoid burning your melt and pour is to cut the bases into small uniform pieces. When the pieces are different sizes, they melt at different rates. This can lead to a bowl of hot and liquid melt and pour with large un-melted chunks.
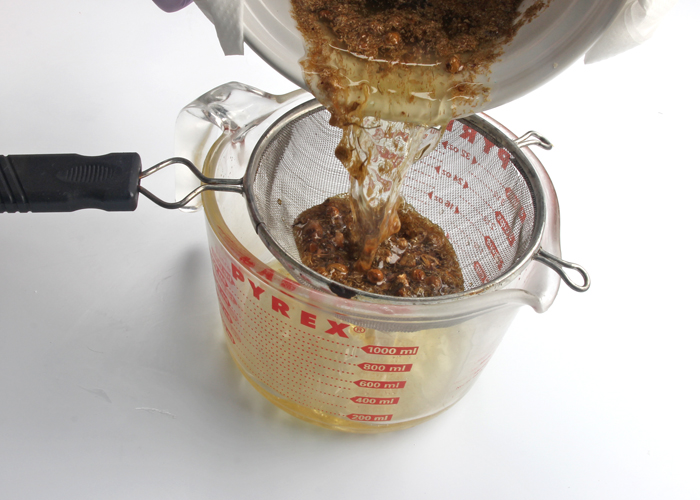
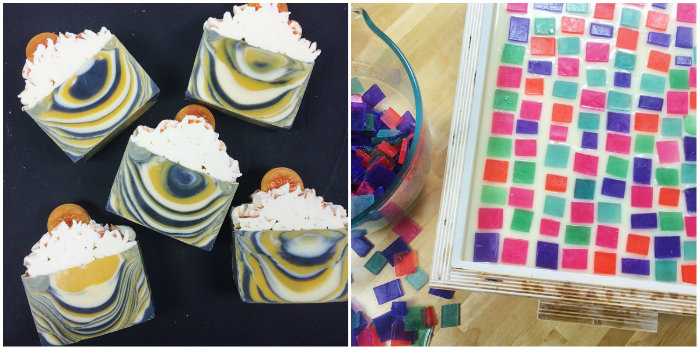
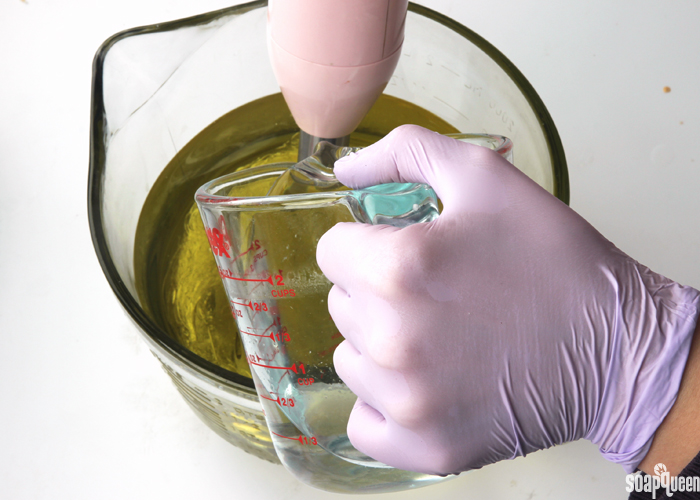
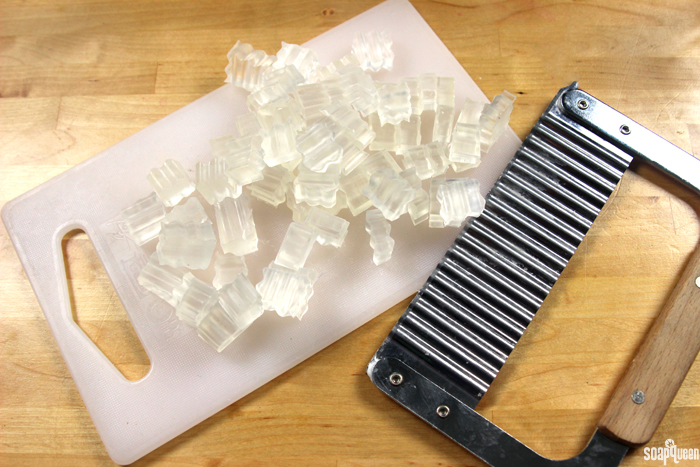
Cutting the melt and pour into small, uniform pieces helps the soap melt quickly and evenly.
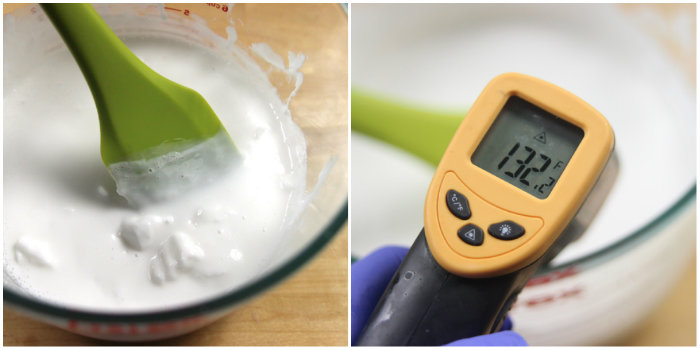
If your container of liquid melt and pour contains chunks, be careful not to over-microwave and burn the melted soap. Remove the bowl from the microwave and stir for 30-60 seconds to allow the hot liquid soap to melt the chunks. Place the container back into the microwave and use small bursts of heat. Continue to stir between each burst until all the chunks are melted. Below, you can see a bowl of melted soap that still has large chunks. But, it is already at 132.2 ° F…more microwaving could cause the soap to burn. Time to stir, stir, stir and melt in 10 second bursts between each stir. If the chunks of melt and pour are really large, remove them from the mixture and melt separately.
If melting large amounts of melt and pour (multiple pounds), a double boiler may be your best option. In the Soap Lab, we use industrial size warmers for melting large amounts of soap. When melting smaller amounts of soap, be extremely careful. Melting less than 5 ounces of soap is tricky; it’s very easy to burn small amounts of melt and pour soap. If you are melting less than 5 ounces in the microwave, use 5-7 second bursts and stir in between each burst. Melting closer to 1-2 ounces? Use 3-5 second bursts. Remember, it’s always easier to microwave the soap for longer!
It’s so easy to burn small amounts of melt and pour. Be sure to use extremely short bursts, and stir in between each burst.
The key to melt and pour that’s fluid but not burned is patience. It’s so tempting to stick a container of melt and pour in the microwave for a minute or two and walk away…but don’t do it! Melt and pour requires short bursts in the microwave with stirring in between. Your patience will be rewarded with melt and pour that is thoroughly melted, and easy to work with.
How do you melt your melt and pour pieces? If you have any tips, I’m all ears! Do you prefer the microwave, or a double boiler?
Monster-Be-Gone Magic Spray
Bed time can be a bit of an *ahem*… challenge if you have kids. This is especially the case if you have a kiddo who’s afraid of monsters. While telling your little one there are no monsters can help, you can also help them spray the monsters away!
Guest Post: Sherbet Surprise Bath Fizzies
Today, Holly Port from the Lotion Bar Café is sharing a fun and colorful bath fizzy recipe. Holly is a bath bomb expert and other of the book, Make it Fizz: A Guide to Making Bathtub Treats. This bath bomb tutorial involves making a mini bath bomb, and embedding it into a larger bath bomb mold. When placed in the tub, the fizzy has two layers of color. Holly also shares her story on how she got started making bath fizzies, and the tips and tricks she has learned after hundreds of batches. -A.M.
Hi Soap Queen readers! I’m Holly Port, author of Make it Fizz: A Guide to Making Bathtub Treats and owner of Lotion Bar Café in Colorado Springs, Colorado. Mother of two teenage boys and married for 21 years to my f-bombing assistant (aka) fizzy bomber. I am a bath lover by heart and take one every night for as long as I can remember. For those that have boys can relate, there is not much girlie time left in the day. Bath time was and is my oasis. After being fed up with breaking out with store bought bath products, I looked into making products for myself and also for Christmas presents. Over 8 years ago I made lotion bars and people loved them. I was inspired to make more things. I learned how to make bath bombs and never bought store bought stuff again. My skin felt amazing, no more itchy dry skin or irritations!
I started making 3 to 4 batches a week and would get half to come out and the others went into a big bucket of failure. Either too dry, too wet, pockets full of unmixed dry ingredients. Ugg, the frustration was real! I learn to spritz, spritz, spritz and mix, mix, mix. I took notes over the years including information on the temperature and how much moisture was in the air. Was it raining or did I have a gremlin lurking in my soap dungeon playing tricks on me?
Soapy Social Media Roundup
Happy Mother’s Day weekend! I hope you’re able to spend some time with your mom or loved ones tomorrow. This weekend is especially fun for me because it’s my birthday week as well. I had a fabulous celebratory day; my friends and family all made me feel extra special. Today, I plan on spending lots of outside time with the kiddos and straightening our new, empty house (but that’s a blog post for another day). It has been so warm and beautiful here in the Pacific Northwest…it officially feels like spring!
Above, I spent some time this week in Jamisen’s classroom. It’s so fun to watch him interact with his classmates and teacher; it really makes me realize how fast he is growing up. I would love to be able to lead a crafty project with his class and have just the perfect project for little hands: bath fizzies. If you’re looking for crafty inspiration for yourself, check out my favorite pins, grams and tweets from the week below.
Left to right:
- I love this Rainbow Ombre Cold Process Soap by Kenna of Modern Soapmaking. The LabColors give a gorgeous, subtle bleeding effect.
- This Healthy Mexican Salad is full of color and texture. Any salad with lots of avocado is alright by me =)
- This tutorial for Color Beans for Play and Art looks like something Lily and Jamisen would love.
- Plain wooden bowls from the thrift store are made modern again with a little paint in this tutorial.
I love the sparkle that mica colorants give soapy projects. If you’d like to learn more about micas and how to use them, check out this Sunday Night Spotlight post.
Last weekend, Lily spent the day playing with her baby cousin Alise who is getting so big, so fast(!). The weather was so beautiful! On the right is the final design for an upcoming Soap Queen TV video. This drop swirl is scented with a blend of berry fragrance oils…I can’t wait to film!
- I love the crisp layers in this Homemade Gardener’s Soap made by Simplistically Living. The exfoliants on top are perfect for removing dirt from gardening.
- In 2014, Tory Burch’s company brought in more than $1 billion in revenue. Her story is so inspiring; click here to learn how she got started.
- Have you heard of the YotaPhone? Released last year, the phone features two displays.
- I’m a huge fan of eggs; they are a great way to add extra protein to salads. This article dives into the terms associated with industrial egg farming to help you choose the highest quality egg.
- Want to turn your blog into a career? The Minimalist Baker has some great tips. My favorite? You gotta hustle!
I hope you all have a wonderful Mother’s Day weekend! To keep up with the latest soapy social media throughout the week, you can follow me on Twitter, Tumblr, Instagram, Pinterest, Vine and YouTube and Snapchat. To watch my ‘stories’, which include sneak peeks into future projects, add me. I’m Bramble-Berry on Snapchat.
Facebook and Instagram Photo of the Week (May 2nd ~ 8th)
This week was full of colorful inspiration, with a vibrant cold process tutorial and information on mica colorants. Micas are a mineral-based colorant that work great in a variety of products, such as melt and pour soap. They are fine textured and usually have a light to intense shimmer. While some micas can morph in cold process soap, they can still be used for mica lines or mica painting. Read more in the Sunday Night Spotlight: Mica Colorants post.