These flip flop soaps would look cute sitting next to your bathroom sink. The soaps are made with two mouth watering fragrances oils – Tropical Vacation and Pineapple Cilantro.

Tutorials on soapmaking, bath fizzies, lotions and more
Filed Under: Melt & Pour Soap
These flip flop soaps would look cute sitting next to your bathroom sink. The soaps are made with two mouth watering fragrances oils – Tropical Vacation and Pineapple Cilantro.

Filed Under: Melt & Pour Soap
Fresh Bamboo is an bright fresh smelling fragrance oil that has gone completely under the radar. So we snuck Fresh Bamboo fragrance oil samples in the Bramble Berry packages going out the door for the month of February to get the word out.
Have you seen our new featured sample idea page on the website? We’re excited about it. I thought it would be fun to feature this project on the blog for our Soap Queen readers as well. It’s a simple melt and pour project using soft and natural colorants with a refreshing scent to match.
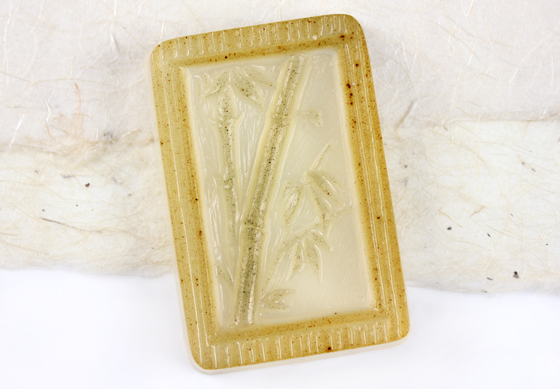
Tools and Ingredients:
13 oz. Olive Oil Melt and Pour
1/2 oz Fresh Bamboo Fragrance
3 mini scoops Olive Leaf Powder
5 mini scoops Sea Clay
4 Teaspoons Bamboo Extract
Framed Bamboo Mold
(NOTE: This mold has been discontinued. It has been substituted with the 12 Cavity Rectangle Silicone Mold.)
Mini Scoops
Injector Tool
![]() Get Everything you need in the click of a button!
Get Everything you need in the click of a button!
ONE: Melt 13 ounces of Olive Oil Melt and Pour Soap Base in the microwave on 30 second intervals until fully melted. Mix in ½ oz of Fresh Bamboo Fragrance Oil.
TWO: Into a separate small, heat safe container, pour out 1 oz of the melted soap and mix in 3 mini scoops of Olive Leaf Powder. Mix until there are very few clumps. Rubbing alcohol will help to break up the clumps. If the soap starts to cool down too quickly and you are unable to stir, just pop it back in the microwave for 10 seconds.
TIP: Cover the remaining soap in the large container with plastic wrap. This will keep the soap warm and prevent a skin from forming on top of the soap.
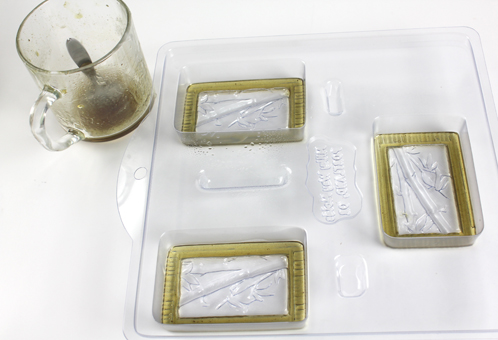
THREE: Use the injector tool to fill in the square borders of each cavity. Keep the fill line low so none of the soap flows into the bamboo part of the design. But if you do get a little overflow, try using the clean-up tool or a toothpick to remove the excess soap once it sets-up.
(NOTE: The Framed Bamboo mold has been discontinued. It has been substituted with the 12 Cavity Rectangle Silicone Mold.)
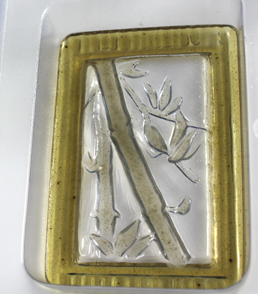
FOUR: Pour out another ounce of the clear soap and add 5 scoops of the Sea Clay. Mix well and reheat if necessary. Then use an injector to fill in the bamboo and leaves parts of each cavity. Let the soap cool. Since it’s such a thin layer it should only take 5-10 minutes.
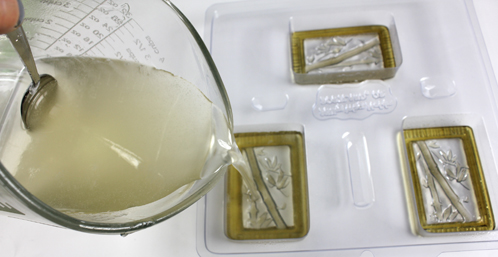
FIVE: Reheat the remaining Olive Oil soap base if necessary and mix in 4 teaspoons of Bamboo Extract Powder. Mix well until there are no clumps. Once the soap has cooled down to 130 degrees, spray the first two layers of soap with rubbing alcohol then fill each cavity to the top.
Special Bonus! Check out some unique blends that you can make with Fresh Bamboo!
1 part Fresh Bamboo
1 part Ginger Ale
1 part Grass Stain
1 part Fresh Bamboo
1 part White Magnolia
1 part Red Apple
3 parts Fresh Bamboo
1 part Grass Stain
1 part Fresh Bamboo
1 part Dragon’s blood
2 parts Fresh Bamboo
2 parts Juniper Breeze
1 part Lime
3 parts Fresh Bamboo
1 part Orange 10x
1/2 part Patchouli EO
Filed Under: Melt & Pour Soap
Yes, there is an easy way to swirl melt and pour soap. All you have to do is get your soap to the sweet spot temperature and it couldn’t be easier. We call it the “Faux Melt and Pour Swirl”. Check out the original melt and pour swirl on Soap Queen TV. If you make this soap (or a variation of it) I want to see it. Post pictures on the BB Facebook Fan Page!

Filed Under: Melt & Pour Soap
Loveable soap is easy to make. In truth, all soap is loveable but this tutorial will teach you how to make the LOVE soap pictured below. If you have never made melt and pour soap before, this project is for you! Check out the fool proof layering tips below and follow the step by step instructions for beautiful results.

Buy everything you need in the click of a button!![]() [Read more…]
[Read more…]
Filed Under: Cold Process Soap
I’m still in love with our new silicone cube mold (I’m sure you can tell from the recent cube mold tutorials: Holiday Cubes and Crazy for Cubes). I even designed a brand new mini heart mold specifically for embedding in the cube mold (now that‘s love). The technique of combining melt and pour with cold process soap is super simple with lovable results. It’s even easy enough for CP beginners!

Filed Under: Soaks & Scrubs
Learn to make your own Clay Masks using a variety of dry clay powders, moisturizing oils and even ingredients you can find in your kitchen! Clay (or mud) is great for soaking up excess oil and removing impurities from your skin. In this episode, Anne-Marie shares 3 unique recipes which you can make for a fraction of the cost of store bought masks.
Ingredients used in this video:
Recipe 1) Just Add Water Mask
![]() Get everything you need to make the ‘Just Add Water Mask’
Get everything you need to make the ‘Just Add Water Mask’
Recipe 2) Rich Mud Mask
![]() Get everything you need to make the ‘Rich Mud Mask’
Get everything you need to make the ‘Rich Mud Mask’
Recipe #3 Fresh Clay Mask
Filed Under: Bath Fizzies
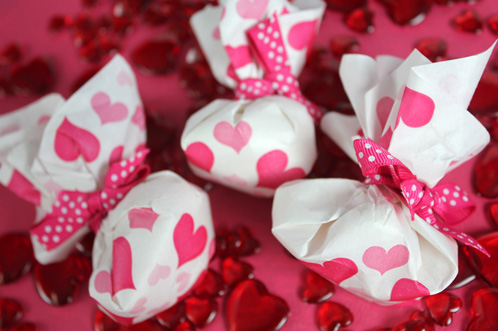
Have you ever had a bath bomb go wrong? (cough cough…no, never, not me!). Well, on the RARE occasion that you have a bath bomb go wrong, we have the fix for you! Just wrap up the crumbled bath bomb pieces in water soluble paper and pop them in the tub! Bonus: They’re so cute no one will know you ever “goofed” up a recipe!
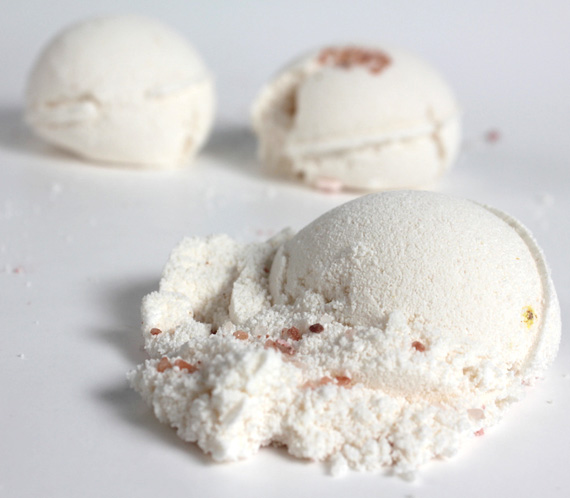
Below are our examples of a bath bomb gone wrong while testing a new recipe. Let’s just say it went a little “flat” (obviously).
PREP: Once you download the PDF, print out the images on water soluble paper, preferably on an inkjet printer (laser printed water soluble paper doesn’t dissolve as well in water). Then cut out the square but cutting on the dotted line.
Printing Tip: We tested the water soluble paper printed from an inkjet printer and a laser printer and found that the colored parts of the paper dissolved way faster with the inkjet printer. If you have a laser printer, we designed a heart pattern with less color just for you.
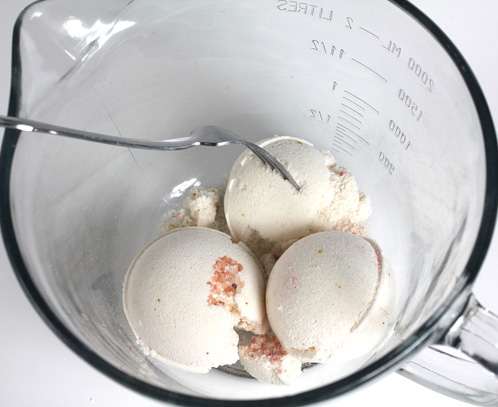
ONE: Crush your old bath bombs with a fork, hammer or rubber mallet. Choose accordingly depending on how hard your fizzies are.
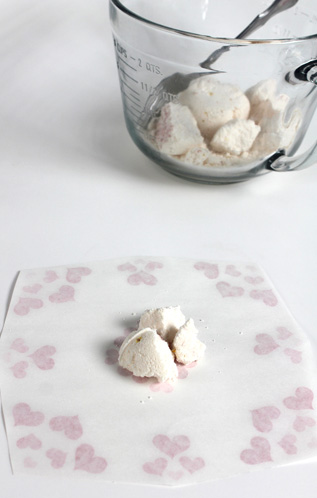
TWO: Put three tablespoons worth of bath bomb chunks into the center of the back of the paper, so you’ll see the hearts when you eventually fold them up.. OR three tablespoons of completely powdered bath bomb mix (depending on how you decide to crumble the delinquents).
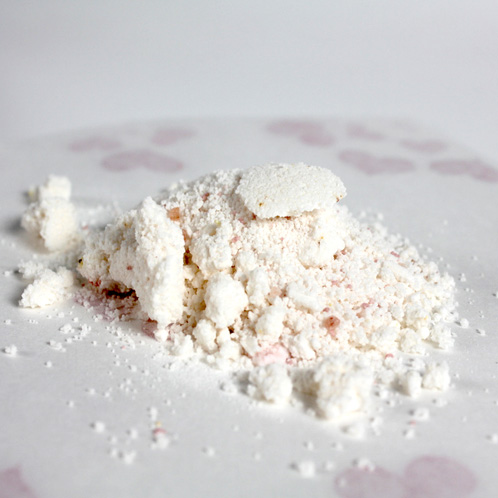 Example Above: Three tablespoons of the crumbled mixture.
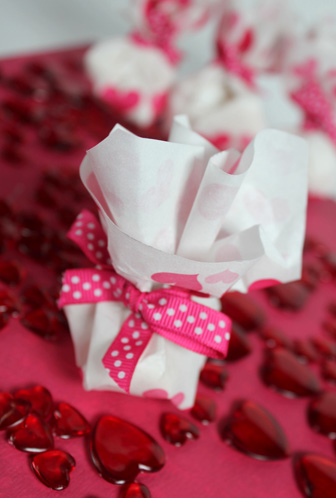
THREE: Carefully pull the side of the paper up and around the bath bomb mixture then secure with a twisty tie or ribbon. Plop it in the bath tub and let the fizzy disperse.
If you want to make bath bombs just for the super cute paper and project, here are some great tutorials: Bath Bombs and Salt, Bath Bomb Cupcakes, Star Bath Fizzies, Bath Bomb Surprise and check out the entire section just for bath bombs on the blog! Do you want more recipes using water soluble paper? Check out these tutorials: Baby Onesie Soaps, Baseball Soap, Water Soluble Paper on Soap Queen TV.
Check out the Bath Bomb Wrapped Surprise in action (video below)!
Filed Under: Soaks & Scrubs
To finish off our winter relief series, treat your little tootsies to a warm, fizzy, epsom salt soak. Epsom Salt has been long known for it’s abilities as a natural remedy for so many ailments. Plus I’ve designed a special “sore muscle” essential oil blend that will diminish your foot cramps, aches and pains from a long day on the mountain. After the salt soak you can lather your feet in our winter body balm recipe and be sure to check out the winter lip balm recipe to complete the winter series!
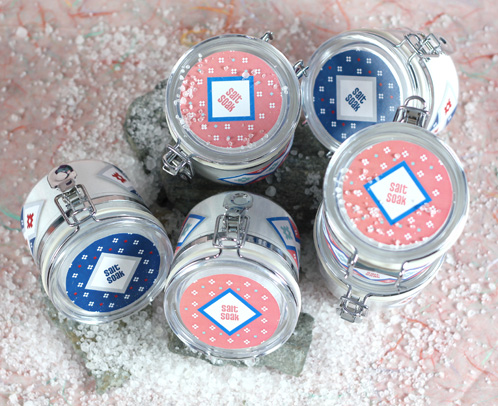
Ingredients
2.5 cups Epsom Salt (super fine)
1 cup Baking Soda (Sodium Bicarbonate)
1/2 cup Citric Acid
12 ml Meadowfoam Oil
Buy everything you need in the click of a button!![]()
PREP: Blend your essential oils together to make the “sore muscle blend”: 4 ml Eucalyptus, 1 ml Black Pepper, 2 ml Litsea.
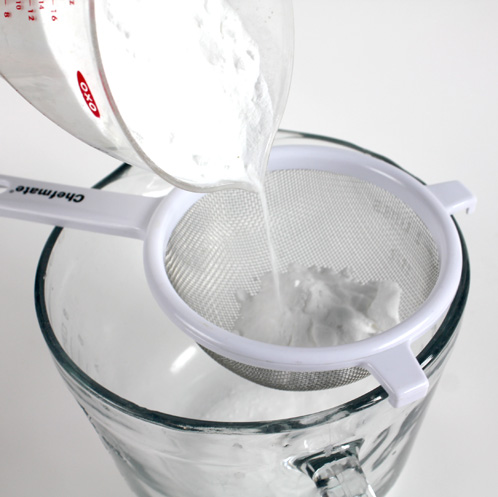
ONE: Combine the Epsom Salt, Baking Soda and Citric Acid in a mixing bowl. Mix with a spatula (or your hands) until all of the clumps are gone and the dry ingredients are mixed together. If you mix with your hands you may want to wear gloves to save your nail polish from the citric acid.
TIP: Sift the baking soda to easily get rid of large clumps.
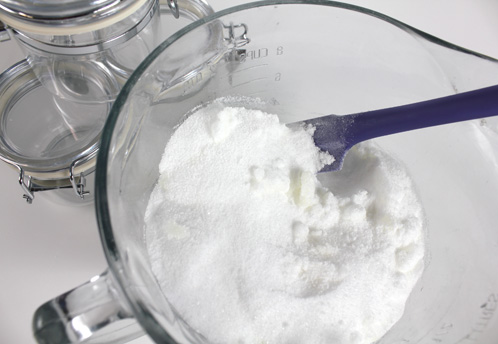
TWO: Mix in 12 ml of Meadowfoam Oil and 7 ml of your essential oil blend. Mix well with a spatula or hands and use a spoon to divide the salt soak between 6 large bail bars.
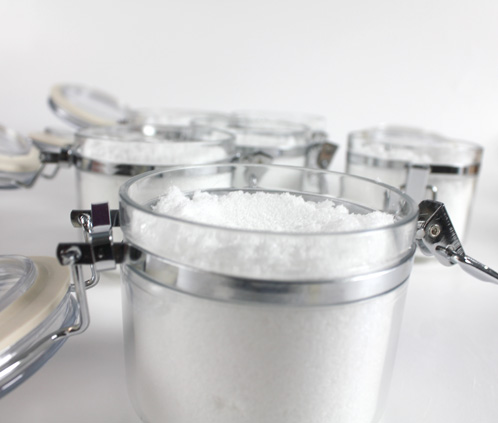
Packaging Tip: Make sure that you package the soak in plastic bail jars or plastic bags. This combination of citric acid, baking soda and moisture causes a release of carbon dioxide which can build up pressure in a container so we don’t recommend glass.
Salt Soak Usage: 4 tablespoons of salt soak per 2 quarts of water. Feel free to add more if you want the scent stronger. This ratio is what we liked the best.
Filed Under: Lip Products
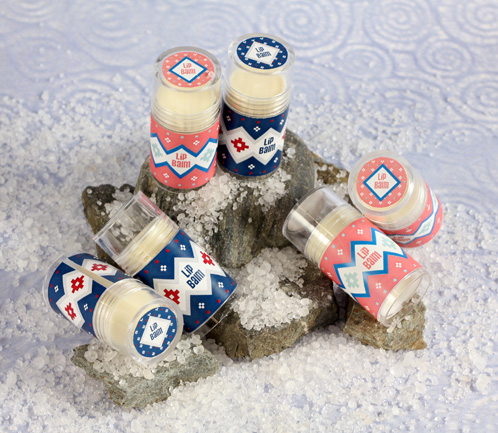
Did you make the Winter Body Balm and have left over ingredients? Just alter the ingredients a little bit to make a lip balm. It’s great for the skier in your life and comes with the same darling, winter themed labels. The giant push tube allows for easy application on the mountain and you don’t even have to take off your gloves! That’s the beauty of using the big push tubes. And if you don’t have any skiers in your life, it’s a great lip balm for your purse (because it’s virtually impossible to lose).
Filed Under: Lotion
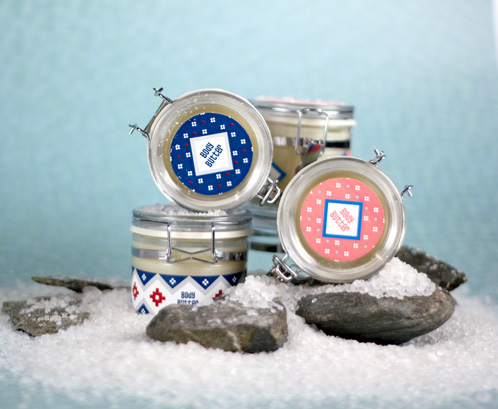
I love making balms because they’re so easy to create and there are so many different ways that you can make them. This Winter Body Balm recipe is designed to comfort and heal your dry, chapped winter skin making a perfect gift for that skier on your Christmas list. It has a creamy consistency for a balm, making it easy to apply to your feet, elbows, knees and hands (or anywhere on your body that is in need of extreme moisture). And if I haven’t sold you on this recipe yet, I’ve designed some winter themed labels that fit our ultra cute bail jars.
Filed Under: Melt & Pour Soap
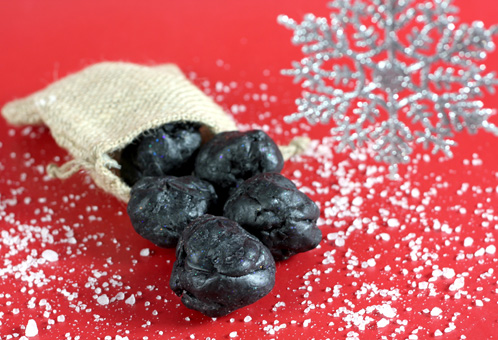
Do you know some one who will be getting a Lump of Coal Soap in their stocking this year (with good humor intended)? This is the perfect soap project to sneak into someone’s stocking. The fragrance oil blend of Cranberry Sweet and Patchouli is a holiday mix that’s musky and tart, perfect for the “sour” people receiving the coal soap (who will actually be getting a very nice gift of handmade soap). And of course I had to add a little bit of glitter, just to make it festive! Why not?
Filed Under: Melt & Pour Soap
I loved what Soapylove did in her latest tutorial (check it out here), I thought I would revisit the technique with a ghoulish twist! I stuck with some basic molds and colors here but the potential to get insanely creative is up to you! I hope I get to see what some of you come up with. Hint. Wink. Nudge. Post pictures on our facebook page!
 Check out what we did for Christmas in 2009 using this same technique with glitter. See the glittery tutorial here.
Filed Under: Cold Process Soap
I was in a Green Tea frame of mood after getting an awesome tea from Adagio Teas called “Hojicha“. It’s a toasty warm green tea flavor and it inspired me to make some Green Tea rebatch soap. I wanted that instant gratification of rebatch! Green Tea has natural antioxidants (called catechins) that help fight damage caused by free radicals. Very preliminary studies show that Green Tea topically may inhibit enzymes whose excessive activity contributes to age-related degradation of the skin matrix – sign me up for that!

Filed Under: Melt & Pour Soap

Recipe
1 Cup Foaming Bath Whip
1 Cup Clear Melt and Pour
1 Tablespoon Liquid Glycerin
3 Tablespoons Meringue Powder
7 ml Clementine Cupcake Fragrance Oil
We tested and tried many recipes before settling on this one. Here are a few key characteristics of this recipe:
Get everything you need for the frosting in the click of a button!![]()