Who could have predicted that the same condiment squeeze bottles that hold mustard and ketchup could actually turn out to be indispensable soapmaking tools? We got our 12 oz. Squeeze Bottles in at the beginning of November, and have been soaping up a storm with them.
Rainbow Squirty Swirls – The Most Popular Soap Ever?
We hope that everyone had a fantastic holiday yesterday — we sure did, and today we’ve got a very special cold process recipe for you. If Instagram ‘likes’ equal popularity, this Rainbow Squirty Swirls soap may be our most popular soap yet (see for yourself — more than 120 ‘likes,’ wow)! This tutorial uses the same technique as the Squirty Swirls recipe in the Soap Crafting book, and it’s an easy process that results in beautiful soap every time.
One thing to note about this recipe is that it can take 10 – 15 minutes to squirt all the soap into the mold, so it’s important to use a slow-moving recipe and a fragrance you know won’t accelerate trace. In this case, we used our new Amazon Lily & Rain Fragrance Oil, which performed beautifully and gave our rainbow soap a little tropical flair.

Guest Tutorial: Marbled Beer Soap
Anne-Marie note: Elham sent me a baby care package months ago with a wonderful bar of beer soap. I couldn’t get over how nice it was in the shower with luxurious, soft lather that felt silky on the skin and rinsed away cleanly. She has graciously agreed to do a tutorial on this wonderful soap. Thank you Elham!
Hi, I’m Elham from SkinChakra® and I am so excited to be here for a guest post.
I have been a cosmetic chemist for almost half of my life, and I’ve had my own line of hand-crafted soap and skin care products for the past two years (in addition to my consulting activities in the cosmetic industry). I live in Bavaria in Germany, and so I have had the opportunity to experiment with countless beer soap variations. I am surrounded by small, handcrafted breweries, and I consider myself a specialist in beer soap. Not surprisingly, beer soap is one of my best selling products!
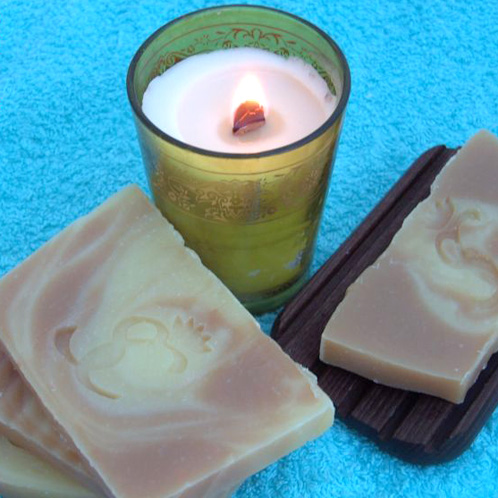
French Curl Cold Process Tutorial
We are so excited about our new swirl tools that we went on a bit of a soaping spree with them (and by ‘spree‘, I mean I made well over 90 pounds of soap in three weeks with them just to try out new techniques). We started with the Frog Foot, continued with the Butterfly Swirl and now we’re bringing you this fabulous French Curl. Inspired by a paper marbling technique, this pattern translates beautifully in soap. This soap also has scent blend reminiscent of a gourmet meal: a savory blend of Litsea, Black Pepper and Basil essential oil is a sprightly, uplifting somewhat masculine scent.

Holly Berry Cold Process Soap
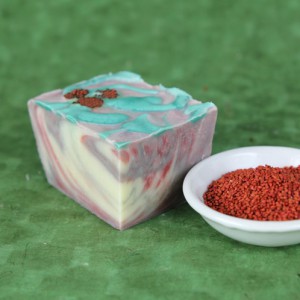
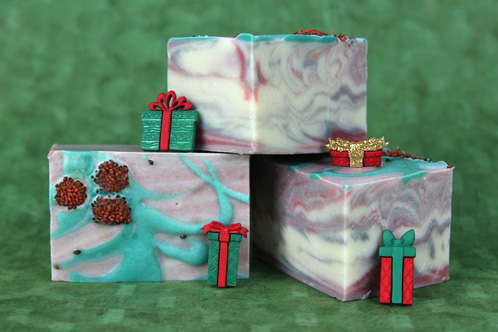
We’re continuing our Christmas-y cold process kick because of the 4-6 week cure time required for cold process recipes. On Tuesday we showed you the absolutely delectable Holiday Cookie Bar recipe and today we’re introducing the festive Holly Berry design. For this project we used squirt bottles to make fun holly leaf designs on top of a two color in-the-pot-swirl, and then we garnished it with real cranberry seeds to mimic plump holly berries. We fragranced with Fresh Snow Fragrance Oil, which performed beautifully in our recipe and smells airy and clean — just like freshly fallen snow!
What You’ll Need:
Silicone Square Tray Mold
2 oz. Avocado Butter
8 oz. Coconut Oil
10 oz. Olive Oil
8 oz. Palm Oil
2 oz. Palm Kernel Flakes
6 oz. Rice Bran Oil
4 oz. Sweet Almond Oil
5.5 oz. Sodium Hydroxide
13.2 oz. distilled water
Cranberry Seeds
Hydrated Chrome Green
Titanium Dioxide
Merlot Sparkle Mica
Electric Bubblegum
Super Pearly White
Activated Charcoal
1.8 oz. Fresh Snow Fragrance Oil
Click here to add everything you need for this project to your Bramble Berry shopping cart!
If you’ve never made Cold Process soap before, stop here! I highly recommend checking out our FREE four part SoapQueen.tv series on Cold Process Soapmaking, especially the episode on lye safety. And if you’d rather do some reading, Bramble Berry carries a wide range of books on the topic, including my newest book, Soap Crafting. You can also checkout the digital downloads for that instant gratification factor.
SAFETY FIRST: Suit up for safe handling practices! That means goggles, gloves and long sleeves. Make sure kids, pets, and other distractions and tripping hazards are out of the house or don’t have access to your soaping space. Always soap in a well-ventilated area.
COLOR PREP: To ensure that the Titanium Dioxide blends smoothly into the soap batter, we recommend micronizing it before dispersing it in oil. Please note this is an optional tip but it does help with the titanium dioxide clumping in the soap =) To micronize colorant, simply use a coffee grinder to blend the colorant to break up any clumps of color and prevent streaks of white from showing in the final soap. We like to use a coffee grinder that has a removable, stainless steel mixing area for easy cleaning. Disperse 1 teaspoon all colorants except the Super Pearly White into 1 tablespoon of liquid oil (we like Sweet Almond or Sunflower). Make a double batch of the Super Pearly White by mixing two teaspoons of colorant into 2 tablespoons of oil. Prepping your colors in the beginning will allow you to work quickly and give you more time to work with your soap. Use the mini mixer to get all those clumps worked out smoothly.
ONE: Slowly and carefully add the lye to the water, and stir until clear. Set aside to cool. If you’d like a harder bar of soap that lasts longer in the shower, you can add Sodium Lactate to the cooled lye water. Use 1 teaspoon of Sodium Lactate per pound of oils in the recipe.
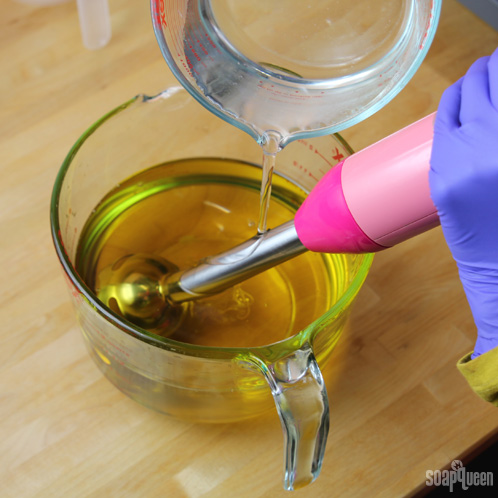
TWO: Begin by melting down the Palm Kernel Flakes in the microwave on 30 second bursts. Then, combine the melted Palm Kernel Flakes with the melted Avocado Butter, Coconut Oil, Olive Oil, Palm Oil, Rice Bran Oil and Sweet Almond Oil in a large glass container. Once the lye water and the oils have cooled to 130 degrees or below (and are ideally within 10 degrees of each other), add the lye water to the oils and stick blend until thin trace.
 THREE: Pour approximately 2 – 3 oz. of soap batter into a condiment bottle and color with 1 teaspoon of dispersed Hydrated Chrome Green. Plug the tip with your finger and then shake vigorously. Release your finger with the tip pointing away from your face and then set aside.
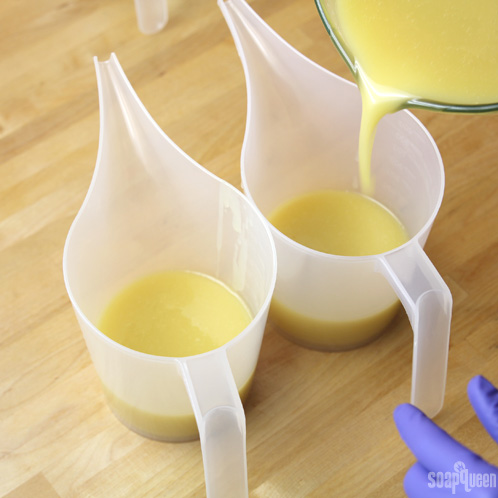
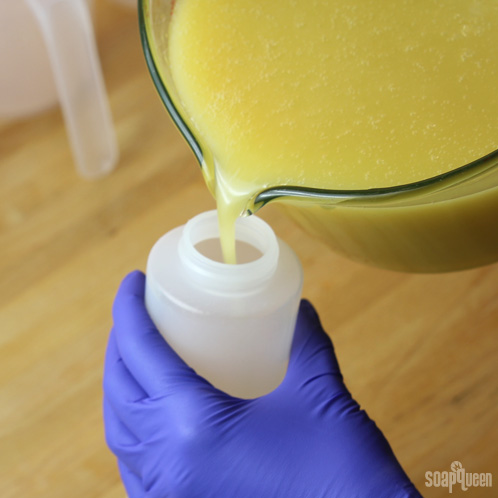 FOUR: In two additional containers, pour off about 2 cups each. You should have about 4 cups left in the original container.
 FIVE: Add the following colorants to the three containers:
- 2 teaspoons dispersed Super Pearly White in the original container.
- 3 teaspoons dispersed Merlot Sparkle Mica and 1/2 teaspoon Electric Bubblegum in one of the 2-cup containers.
- 3 teaspoons dispersed Super Pearly White and 1/4 teaspoon dispersed Activated Charcoal in the remaining 2-cup container.
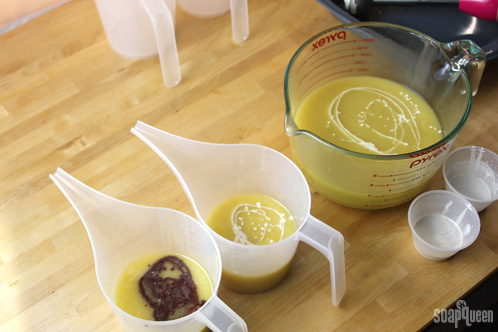
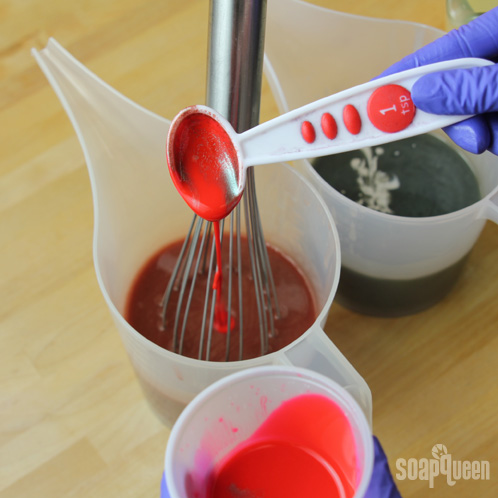 SIX: Using a wire whisk or spoon, split the fragrance equally among the 3 containers.
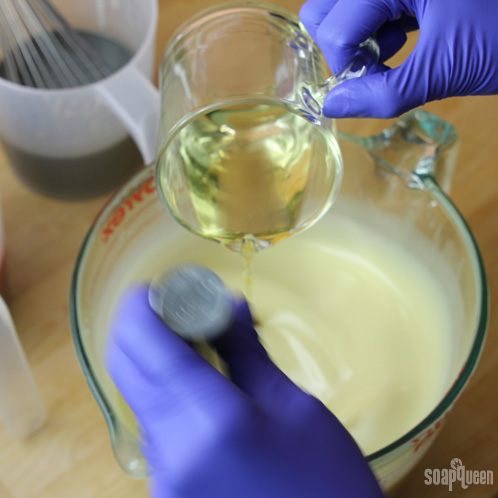 SEVEN:For the in-the-pot swirl, start by pouring the grey colored soap into the Titanium Dioxide colored soap in 4 places: 12:00 o’clock, 4:00 o’clock, 8:00 o’clock, and center. Repeat with the Merlot Sparkle Mica. Pour from a high point so that the soap penetrates the entire depth of the soap in the pot, which will create a swirl throughout the soap.
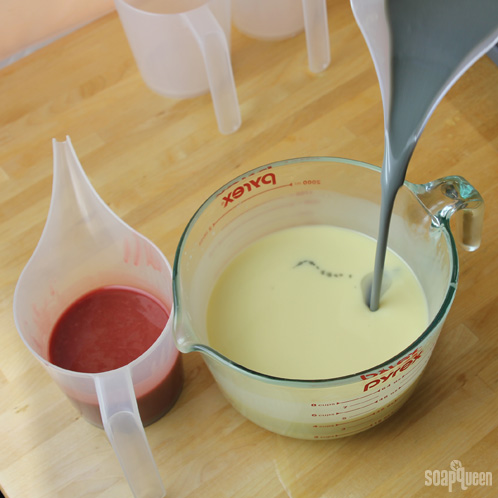 EIGHT: Using a spatula, chopstick or dowel, swirl the soap by running the tool through each of the entry points once. Only once! You want to swirl but not mix the soap.
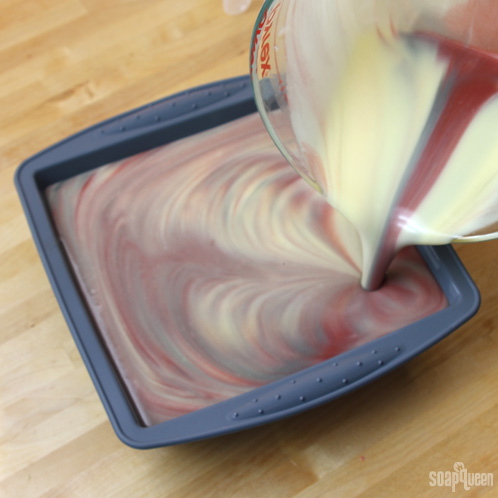
 NINE: After you’ve swirled the soap, slowly pour the batter into the mold. We started pouring in the upper left hand corner and moved diagonally to the bottom right hand corner.

We’ve even got a video of this pour too!
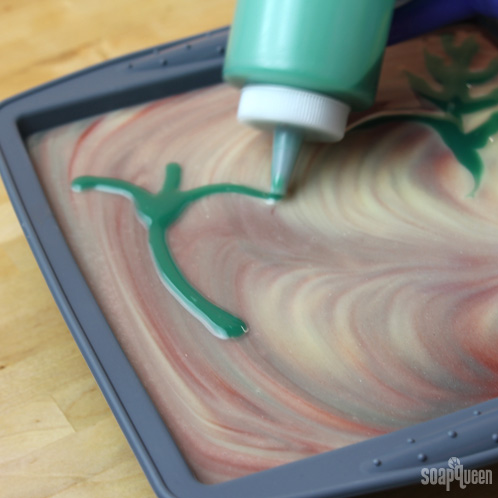
 TEN: Now use the condiment bottle to “draw” holly leaf designs on the surface of the soap. We free-handed our designs, so have fun with this part!
 ELEVEN: Once you’re satisfied with your leaves, pour the Cranberry Seeds as berries. In order to get little round berries that were relatively the same shape, we poured the seeds through an 8 oz. Funnel.
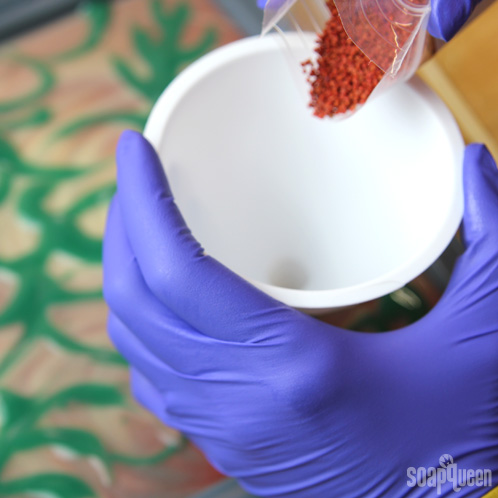
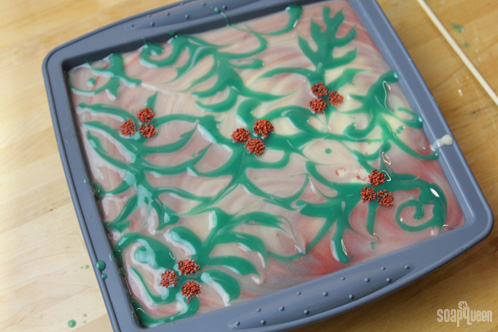 TWELVE: We recommend keeping a chopstick or pair of tweezers on hand to clean up any stray seeds. That will help you keep your “berries” looking like berries and not scattered bunches of seeds!
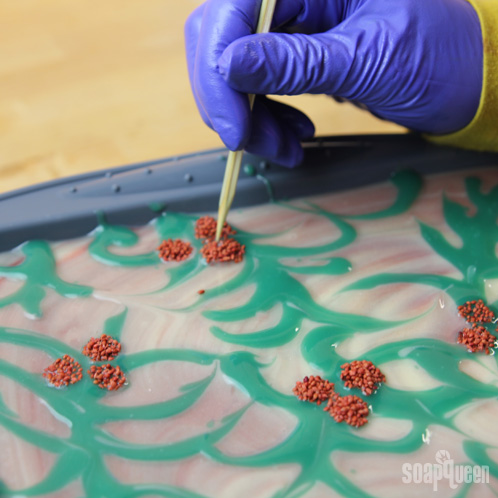
Spray the entire top with 91% Isopropyl Alcohol to help prevent soda ash. Cover and insulate for 24 hours and unmold after 3-4 days. Allow to cure for 4-6 weeks and enjoy!
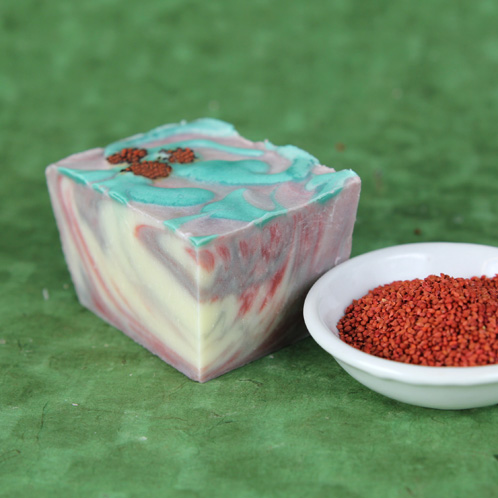 Bonus: Check out the cut of this soap below!
- Silicone Square Tray Mold
- 2 oz. Avocado Butter
- 8 oz. Coconut Oil
- 10 oz. Olive Oil
- 8 oz. Palm Oil
- 2 oz. Palm Kernel Flakes
- 6 oz. Rice Bran Oil
- 4 oz. Sweet Almond Oil
- 5.5 oz. Sodium Hydroxide
- 13.2 oz. distilled water
- Cranberry Seeds
- Hydrated Chrome Green
- Titanium Dioxide
- Merlot Sparkle Mica.
- Electric Bubblegum
- Super Pearly White
- Activated Charcoal
- 1.8 oz. Fresh Snow Fragrance Oil
- SAFETY FIRST: Suit up for safe handling practices! That means goggles, gloves and long sleeves. Make sure kids, pets, and other distractions and tripping hazards are out of the house or don’t have access to your soaping space. Always soap in a well-ventilated area.
- COLOR PREP: To ensure that the Titanium Dioxide blends smoothly into the soap batter, we recommend micronizing it before dispersing it in oil. Please note this is an optional tip but it does help with the titanium dioxide clumping in the soap =) To micronize colorant, simply use a coffee grinder to blend the colorant to break up any clumps of color and prevent streaks of white from showing in the final soap. We like to use a coffee grinder that has a removable, stainless steel mixing area for easy cleaning. Disperse 1 teaspoon all colorants except the Super Pearly White into 1 tablespoon of liquid oil (we like Sweet Almond or Sunflower). Make a double batch of the Super Pearly White by mixing two teaspoons of colorant into 2 tablespoons of oil. Prepping your colors in the beginning will allow you to work quickly and give you more time to work with your soap. Use the mini mixer to get all those clumps worked out smoothly.
- Slowly and carefully add the lye to the water, and stir until clear. Set aside to cool. If you’d like a harder bar of soap that lasts longer in the shower, you can add Sodium Lactate to the cooled lye water. Use 1 teaspoon of Sodium Lactate per pound of oils in the recipe.
- Begin by melting down the Palm Kernel Flakes in the microwave on 30 second bursts. Then, combine the melted Palm Kernel Flakes with the melted Avocado Butter, Coconut Oil, Olive Oil, Palm Oil, Rice Bran Oil and Sweet Almond Oil in a large glass container. Once the lye water and the oils have cooled to 130 degrees or below (and are ideally within 10 degrees of each other), add the lye water to the oils and stick blend until thin trace.
- Pour approximately 2 – 3 oz. of soap batter into a condiment bottle and color with 1 teaspoon of dispersed Hydrated Chrome Green. Plug the tip with your finger and then shake vigorously. Release your finger with the tip pointing away from your face and then set aside.
- In two additional containers, pour off about 2 cups each. You should have about 4 cups left in the original container.
- Add the following colorants to the three containers:
2 teaspoons dispersed Super Pearly White in the original container.
3 teaspoons dispersed Merlot Sparkle Mica and ½ teaspoon Electric Bubblegum in one of the 2-cup containers.
3 teaspoons dispersed Super Pearly White and ¼ teaspoon dispersed Activated Charcoal in the remaining 2-cup container. - Using a wire whisk or spoon, split the fragrance equally among the 3 containers.
- For the in-the-pot swirl, start by pouring the grey colored soap into the Titanium Dioxide colored soap in 4 places: 12:00 o’clock, 4:00 o’clock, 8:00 o’clock, and center. Repeat with the Merlot Sparkle Mica. Pour from a high point so that the soap penetrates the entire depth of the soap in the pot, which will create a swirl throughout the soap.
- Using a spatula, chopstick or dowel, swirl the soap by running the tool through each of the entry points once. Only once! You want to swirl but not mix the soap.
- After you’ve swirled the soap, slowly pour the batter into the mold. We started pouring in the upper left hand corner and moved diagonally to the bottom right hand corner.
- Now use the condiment bottle to “draw” holly leaf designs on the surface of the soap. We free-handed our designs, so have fun with this part!
- Once you’re satisfied with your leaves, pour the Cranberry Seeds as berries. In order to get little round berries that were relatively the same shape, we poured the seeds through an 8 oz. Funnel.
- We recommend keeping a chopstick or pair of tweezers on hand to clean up any stray seeds. That will help you keep your “berries” looking like berries and not scattered bunches of seeds!
Frog Foot Swirl
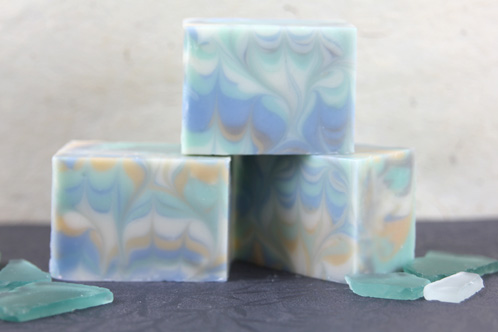
Lately, I’ve been obsessed with swirling because of these new swirl tools — they make achieving techniques like the Peacock Swirl a breeze! For this tutorial we tried our hand at the Peacock Swirl’s counterpart, the Frog Foot! Simply drag the Easy Swirl Tool in a different way (basically, the opposite way) to achieve this beautiful, striking design.
What You’ll Need:
16 oz. Coconut Oil
16 oz. Canola Oil
24 oz. Palm Oil
3.2 oz. Castor Oil
4.8 oz. Hazelnut Oil
8 oz. Rice Bran Oil
8 oz. Sunflower Oil
11 oz. Sodium Hydroxide
26.4 oz. distilled water
18 Bar Birchwood Mold with Silicone Liner
Fragrance blend of:
3.4 oz. Cedarwood Essential Oil and 1.6 oz. Peppermint 2nd Distilled Essential Oil
Click here to add everything you need for this project to your Bramble Berry shopping cart!
If you’ve never made Cold Process soap before, stop here! I highly recommend checking out our FREE four part SoapQueen.tv series on Cold Process Soapmaking, especially the episode on lye safety. And if you’d rather do some reading, Bramble Berry carries a wide range of books on the topic, including my newest book, Soap Crafting. You can also checkout the digital downloads for that instant gratification factor. This is an advanced technique and should not be attempted without a few recipes under your belt.
SAFETY FIRST: Suit up for safe handling practices! That means goggles, gloves and long sleeves. Make sure kids, pets, and other distractions and tripping hazards are out of the house or don’t have access to your soaping space. Always soap in a well-ventilated area.
COLOR PREP: Disperse 1 teaspoon of each pigment into 1 tablespoon of liquid oil (we like Sweet Almond or Sunflower oils). Prepping your colors in the beginning will allow you to work quickly and give you more time to work with your soap. Use the mini mixer to get all those clumps worked out smoothly.
FRAGRANCE PREP: In a glass container, combine the Cedarwood and Peppermint Essential Oils. Give the mixture a good stir, and then set it aside.
TOOLS: This is a tutorial that uses two brand new soaping tools: the Comb Swirl Tool and the Easy Swirl Tool. You’ll use them in steps seven and eight to create the beautiful Frog Foot Swirl in just two motions. If you decide to order the new tools, please note that they will arrive fully assembled and ready for use in our 18 Bar Birchwood Mold. If you’d like to use them in a smaller mold, or rearrange the screws to create a different pattern, you can easily disassemble the whole tool and configure it to your specifications. Each tool is lovingly handcrafted in our Bellingham, Wash. warehouse, and just like all handmade items, variations between products are normal.
ONE: Slowly and carefully add the lye to the water, and stir until clear. Set aside to cool. If you’d like a harder bar of soap that lasts longer in the shower, you can add Sodium Lactate to the cooled lye water. Use 1 teaspoon of Sodium Lactate per pound of oils in the recipe.
TWO: Melt and combine the Coconut, Canola, Palm, Castor, Hazelnut, Rice Bran and Sunflower oils in a large glass container. Once the lye water and the oils have cooled to 130 degrees or below (and are ideally within 10 degrees of each other), add the lye water to the oils and stick blend until thin trace.


THREE: Split the batter equally into five containers, and then add one colorant per container. We added:
- 1.5 teaspoons of dispersed Super Pearly White in container 1.
- 3/4 teaspoons of dispersed Super Pearly White and 1/3 dispersed Activated Charcoal in container 2.
- 1.5 teaspoons dispersed Aqua Pearl in container 3.
- 1.5 teaspoons Apricot Blush in container 4.
- 1 teaspoon 1982 Blue in container 5.
Using a spatula or whisk, mix the colorant into the batter.
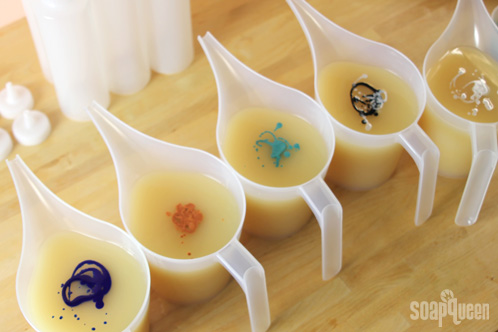
FOUR: Once you’ve fully mixed in the colorant, divide the fragrance oil blend equally between the 5 containers and mix.
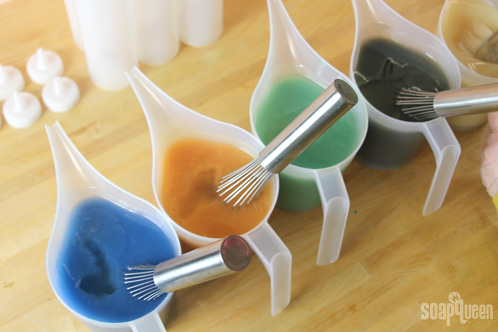
FIVE: Once the fragrance has been fully incorporated, pour each color into its own condiment bottle. Fill each bottle about halfway (6 oz.) full.

SIX: Using the remaining soap in the containers, pour one color at a time down the middle of the mold. Layer each color on top of the other in the same order to create a unique pattern that will spread outward. Repeat this process until you’ve emptied all 5 soap containers.
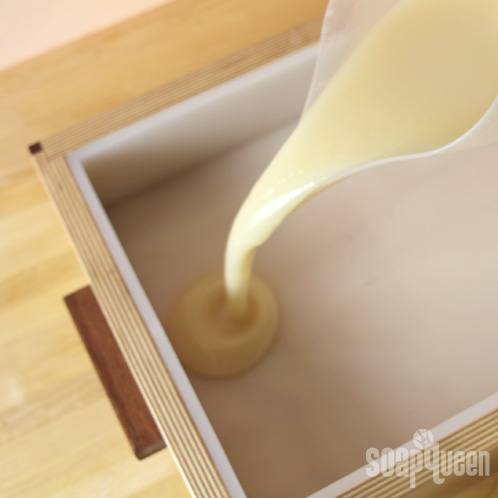

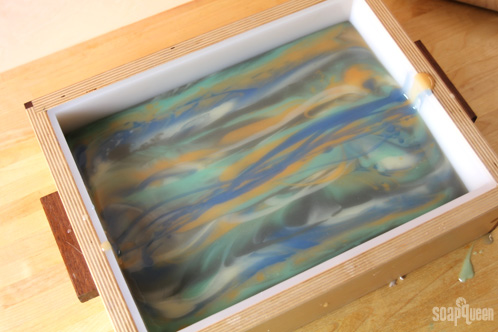
SEVEN:Once you’ve emptied all 5 containers, use your condiment bottles to squirt horizontal lines of soap across the mold. Repeat this process with all 5 colors, layering one on top of the other in the same order, until you’ve emptied all the bottles.

EIGHT: Insert the Comb Swirl Tool at the top of the mold and slowly and smoothly drag it straight down to create a non-pareil pattern.
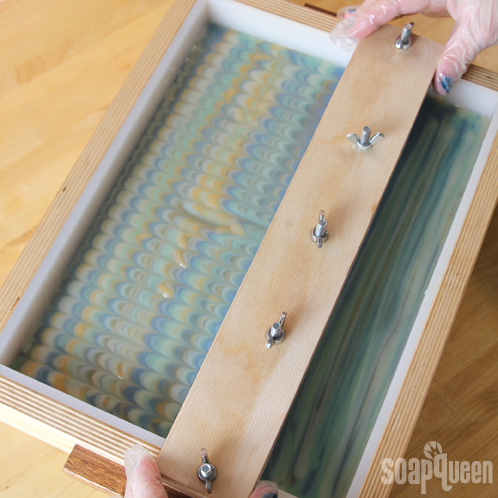
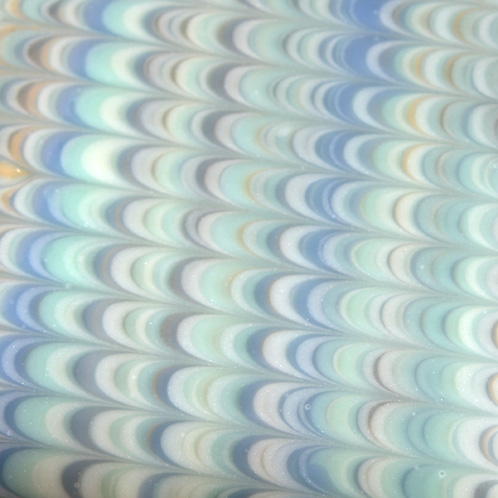
NINE: Pay close attention, because this is where the Frog Foot differs from the Peacock Swirl. Instead of dragging the Easy Swirl Tool in the same direction you drug the Comb Swirl Tool, drag it in the opposite direction. So, if you drug the comb tool down from the top of the mold, start with the swirl tool at the bottom and drag it up in slowly undulating ‘S’ curves. The resulting design will create the same S-curves, but they will have points instead of soft bubbly plumes like the Peacock.
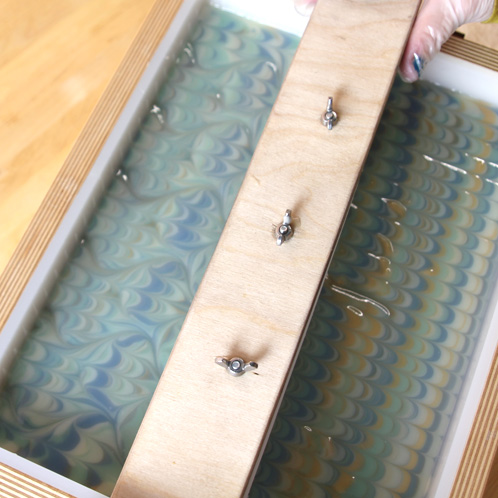
Spray the entire top with 91 or 99% Isopropyl Alcohol to reduce soda ash. Cover and insulate for 24 hours and unmold after 3-4 days, and allow to cure for 4-6 weeks. Below you can really see the difference between the Frog Foot (top) and the traditional Peacock (bottom).

Have you used either of our new swirl tools to create either the Frog Foot or the Peacock Swirl? We’d love to hear how they’ve worked out for you!

Hawaiian Shirt Cold Process Tutorial
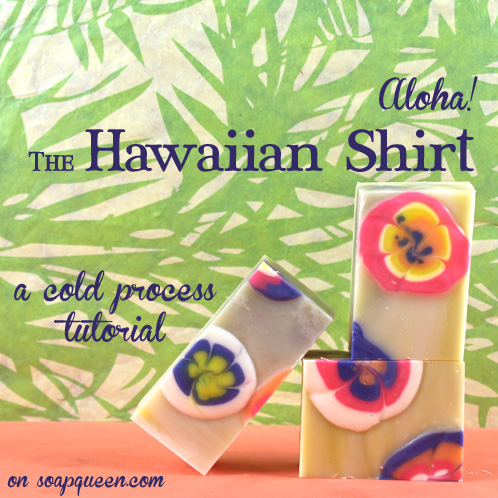
If you didn’t get to take a tropical vacation this summer, making this Hawaiian shirt-themed soap might be the next best thing. Big, bright flowers of color give this soap a special pop, and it’s scented with our brand new Shave and a Haircut Fragrance Oil, which was a favorite of our 2013 S.O.A.P. Panel. The powdered coconut milk in this recipe gives the finished soap a thick, conditioning lather, and the milk won’t discolor in the final product. Surf’s up!
What You’ll Need:
16 oz. Coconut Oil
16 oz. Olive Oil
16 oz. Palm Oil
16 oz. Canola Oil
12 oz. Sweet Almond Oil
4 oz. Hemp seed Oil
10.9 oz. Sodium Hydroxide
26.4 oz. distilled water
4.9 oz. Shave and a Haircut Fragrance Oil
18 Bar Unfinished Birchwood Mold with Silicone Liner
1 oz. Coconut Milk Powder
Click here to add everything you need for this project to your Bramble Berry shopping cart! And remember, you can always remove anything you don’t need. If you want to use one of Bramble Berry’s Quick Mix oils instead of doing a recipe from scratch, I’d go with the Swirl Mix.
If you’ve never made Cold Process soap before, stop here! I highly recommend checking out our FREE four part SoapQueen.tv series on Cold Process Soapmaking, especially the episode on lye safety. And if you’d rather do some reading, Bramble Berry carries a wide range of books on the topic, including my newest book, Soap Crafting. You can also checkout the digital downloads for that instant gratification factor.
COLOR PREP: Disperse 1 teaspoon of each pigment into 1 tablespoon of Sunflower or Sweet Almond Oil. Be careful to saturate all the colorant under the oil before mixing or you’ll end up with a messy poof of color. Use a mini mixer to disperse clumps of colorant.
ADDITIVE PREP: Mix 1 oz. Powdered Coconut Milk in 2 oz. of distilled water. Saturate the powder with water before using a mini mixer to blend the two together.
SAFETY FIRST: Suit up for safe handling practices! That means goggles, gloves and long sleeves. Make sure kids, pets, and other distractions and tripping hazards are out of the house or don’t have access to your soaping space. Always soap in a well-ventilated area.
ONE: Slowly and carefully add the lye to the water, and stir until clear. Set aside to cool. If you’d like a harder bar of soap that releases more quickly from the mold, you can add Sodium Lactate to the cooled lye water. Use 1 teaspoon of Sodium Lactate per pound of oils in the recipe.
TWO: Melt and combine the Coconut, Palm, Olive, Canola, Hempseed and Sweet Almond oils in a large glass container. Once the lye water and the oils have cooled to 130 degrees or below (and are ideally within 10 degrees of each other), add the lye water to the oils and stick blend until thin trace.
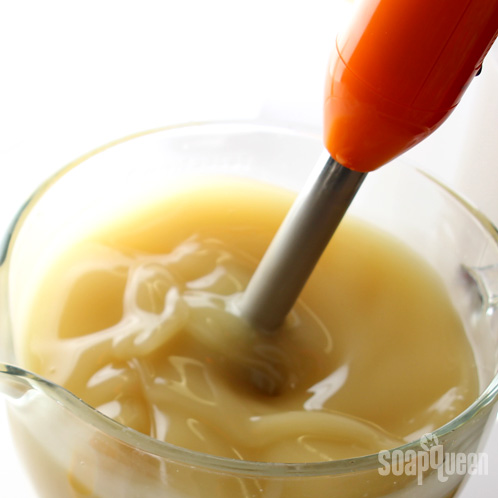
THREE: Using a whisk or spatula, mix in the powdered coconut milk.
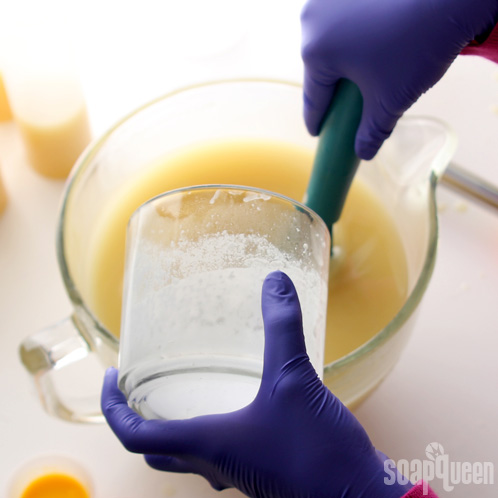
FOUR: Fill five 12 oz. condiment bottles halfway full (about 6 oz.) with soap batter.
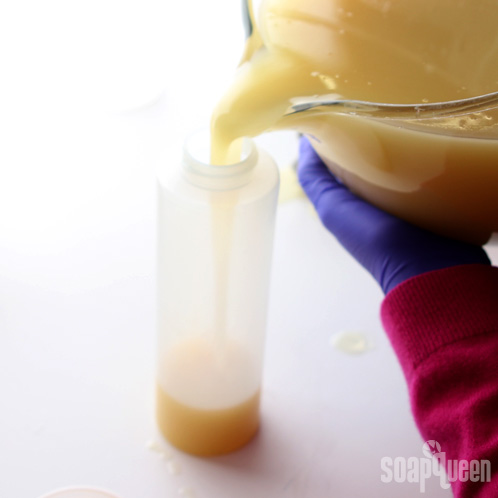
FIVE: In the remaining batter, whisk in the entire container of fragrance oil.
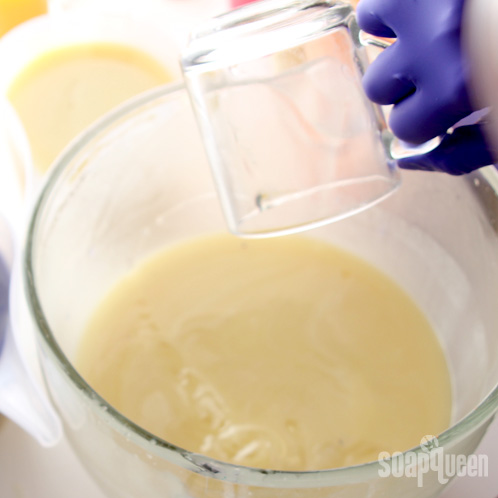
SIX: Split the large batch of soap batter again, this time into two separate containers. Fill each container with approximately 2.5 cups of soap batter, and add 1/2 teaspoon of Ultraviolet Blue to one, 1 teaspoon of Fizzy Lemonade to another and 1 teaspoon of Titanium Dioxide to the third.
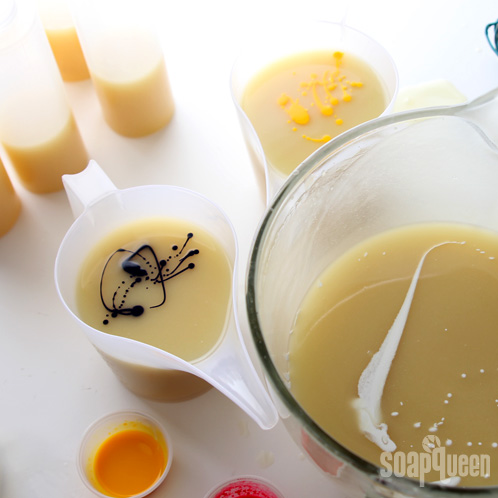
SEVEN: Add one color per condiment bottle. We added 1 teaspoon of Fired Up Fuchsia, Tangerine Wow and Titanium Dioxide to three separate bottles. Add 1/2 teaspoon Ultraviolet Blue to the fourth bottle and 1.5 teaspoons Fizzy Lemonade to the last bottle. Cover the tip of the bottle and shake vigorously to disperse the colorants. Release your finger with the tip pointing away from your face. A little bit of soap always comes out the top and that’s the last thing you want on your skin.
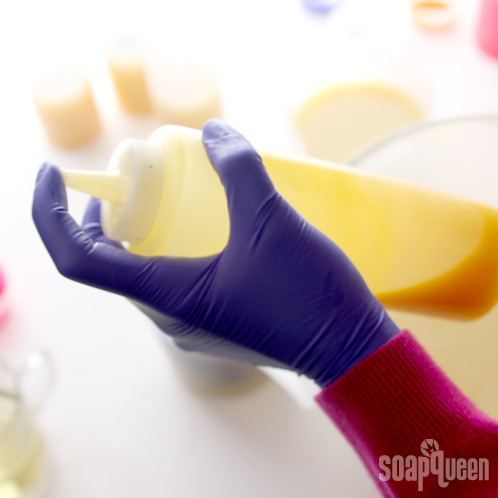
EIGHT: To create the in-the-pot swirl in the base of the soap, start by pouring the yellow colored soap into the white soap in 4 places: 12:00 o’clock, 4:00 o’clock, 8:00 o’clock, and center. Pour from a high point so the soap penetrates the entire depth of the soap in the pot, which will create a swirl throughout the mixture. Use the same technique when pouring the blue soap. To complete the swirl, use a spatula, chopstick or dowel and swirl the soap by running the tool through the entry points once. It is important to swirl only once because you do not want the colors to completely blend together.
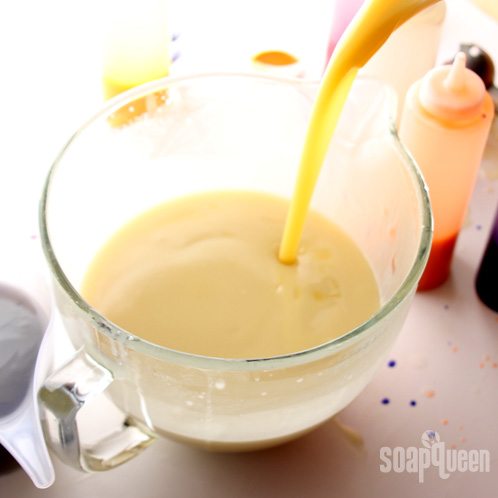
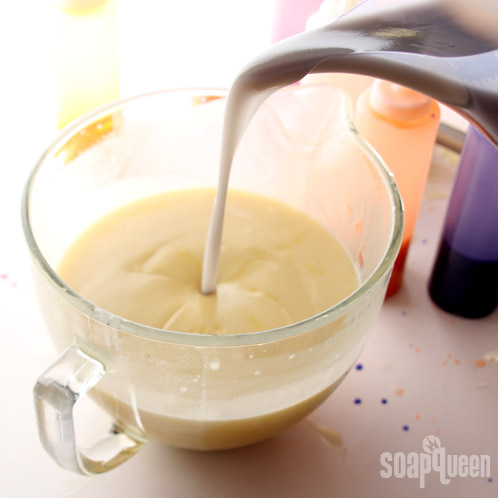
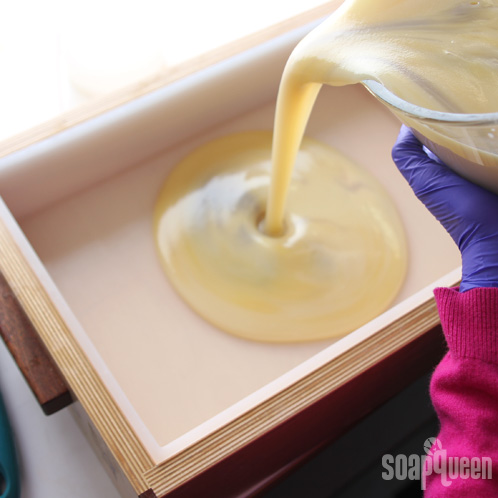
NINE: Pour the freshly swirled soap into the silicone mold. Tamp the mold on the table after you are finished pouring to ensure even coverage and disperse bubbles, but be careful to not over-agitate the swirl.
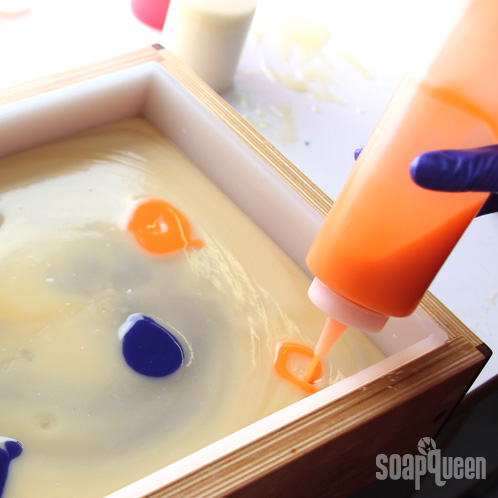
TEN: Add color by squirting golf ball-sized pools of color on the top of the soap. Layer up to four colors on top of each other to create a “flower” look.
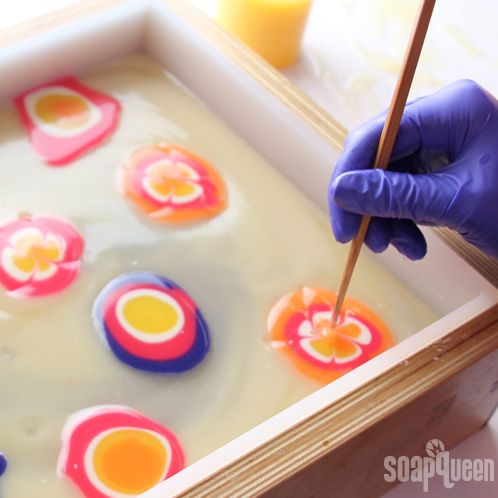
ELEVEN: With a chopstick or dowel, start at the outer edge of the color pools and drag the tool into the center. Do this 4 to 5 around the pools to create the “petals”. Be sure to wipe your tool off between drags. Repeat with all the pools of color in the mold.
TWELVE: Spray the entire top with 91 or 99% Isopropyl Alcohol to reduce soda ash. Cover and insulate for 24 hours and unmold after 3-4 days, and allow to cure for 4-6 weeks and enjoy.
Tip: Highlight the design by cutting the bars horizontally around the flowers. You may not end up with equal-sized bars, but you will have an awesome design!

Bonus video: Want to watch us cut this soap? Check out the Instagram video!
Soap Challenge: Mantra Swirl
We love a good challenge — especially if it’s a soapy challenge! The Great Cakes Soapworks Soap Challenge is a great way to experiment with new techniques and learn from other soapers, and we had such a great time participating in the Elemental Swirl and Leopard Spots challenges that we didn’t hesitate to enter the Mantra Swirl challenge. For this technique we chose a bold color scheme and a luxurious blend of oils — the Cocoa Butter, Hemp Seed and Argan Oils make this a truly pampering bar of soap.

What You’ll Need:
2.7 oz. Argan Oil
2.75 oz. Deodorized Cocoa Butter
8.25 oz. Coconut Oil
5.5 oz. Hemp Seed Oil
16.5 oz. Olive Oil
11 oz. Palm Oil
8.25 oz. Rice Bran Oil
7.5 oz. Sodium Hydroxide
18.1 oz. distilled water
3.5 oz. Cucumber Oak Fragrance Oil
5 lb. Wood Mold with Sliding Bottom and Silicone Liner
Condiment bottles
Click here to add everything you need for this project to your Bramble Berry shopping cart! And remember, you can always remove anything you don’t need.
If you’ve never made Cold Process soap before, stop here! I highly recommend checking out our FREE four part SoapQueen.tv series on Cold Process Soapmaking, especially the episode on lye safety. And if you’d rather do some reading, Bramble Berry carries a wide range of books on the topic, including my newest book, Soap Crafting. You can also checkout the digital downloads for that instant gratification factor.
SAFETY FIRST: Suit up for safe handling practices! That means goggles, gloves and long sleeves. Make sure kids, pets, and other distractions and tripping hazards are out of the house or don’t have access to your soaping space. Always soap in a well-ventilated area.
COLOR PREP: Disperse 1 teaspoon of Black Oxide colorant into 1 tablespoon of Sunflower or Sweet Almond Oil (or any other liquid oil), 1 teaspoon Fizzy Lemonade Colorant into 1 tablespoon liquid oil and 2 teaspoons of Titanium Dioxide into 2 tablespoons of liquid oil. Use a mini mixer to get clumps worked out smoothly.
Then, add one color to three separate condiment bottles. We added 3/4 teaspoon dispersed Titanium Dioxide to one, 1 teaspoon dispersed Fizzy Lemonade to another and 1/2 teaspoon Black Oxide to the last. Set the bottles aside.
MOLD PREP: Using cardboard, cut one divider that fits snugly down the center (lengthwise) of the mold. Cardboard brackets on either end can help with stability.
SAFETY FIRST: Suit up for safe handling practices! That means goggles, gloves and long sleeves. Make sure kids, pets, and other distractions and tripping hazards are out of the house or don’t have access to your soaping space. Always soap in a well-ventilated area.
ONE: Slowly and carefully add the lye to the water and gently stir until the lye has fully dissolved and the liquid is clear. Set aside to cool.
TWO: Combine the Argan, Cocoa Butter, Coconut, Hemp Seed, Olive, Rice Bran and Palm Oils (remember to fully melt then mix your entire container of Palm Oil before portioning). Once the lye water and the oils have cooled to 130 degrees or below (and are ideally within 10 degrees of each other), add the lye water to the oils and stick blend until thin trace. If you’d like a harder bar of soap that lasts longer in the shower and releases faster from the mold, you can add Sodium Lactate to the cooled lye water. Use 1 teaspoon of Sodium Lactate per pound of oils in the recipe.

THREE: Grab your condiment bottles and fill them about 1/4 of the way full with batter. Screw on the tops, plug the hole with your finger, and shake vigorously to mix the colorant and batter. Release your finger with the tip pointing away from your face.

FOUR: Once you’ve filled all three condiment bottles, split the remaining batter in half. Each container should hold about 4 cups of batter.
FIVE: To one container, add 1/2 teaspoon of dispersed Black Oxide. To the other container, add 3 teapsoons dispersed Titanium Dioxide. Mix in the colorant with a whisk or spatula so as not to accelerate trace.


SIX: After the colorant has been incorporated, split the fragrance between the two containers. Eyeballing it is okay! Mix in the fragrance oil with a whisk or spatula.

SEVEN: For this part you may need to grab a friend. Make sure your center piece of cardboard is stable, and then get someone to help you simultaneously pour the black and white soap on either side. Tamp the mold on the table several times once all the soap has been poured, and then slowly lift the cardboard straight up and out of the mold.

EIGHT: Now use the squirt bottles to make vertical stripes down the length of the mold. We started with a yellow stripe down the center with black and white stripes on the opposing sides (remember, the base of this soap is a black and white split — pour the opposite color over the top for a cool checkered effect!).


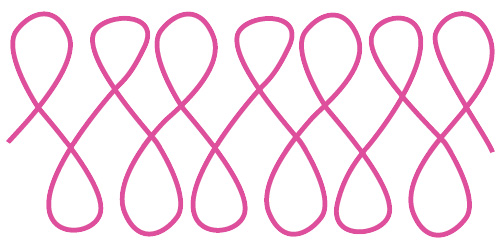
NINE: Using a chopstick or dowel inserted all the way into the soap, swirl the soap in a figure 8 pattern. The tops and bottoms of the “8″s should touch the sides of the soap mold. Here’s a quick illustration of the swirl without soap:

TEN: Allow the soap to sit in the mold for 24-48 hours. For this soap, try cutting a few bars horizontally to emphasize the beautiful swirl on top. Cure for 4-6 weeks and enjoy!
Silicone Column Oatmeal Milk and Honey
Phew! I’m sorry this blog post is a day late. We had our big Soap Crafting Book release party last night where we announced our special Soap Crafting Club. The celebration went late! =) Stay tuned to hear more about that and see photos of the cupcake laden event.
The rain has really picked up around here, and we’re once again starting to live up to our nickname as ‘Evergreen State’. But cooler temperatures and a wetter climate doesn’t have to be a bad thing — in fact, for this soap we took a cue from all the evergreen trees around here that give us our lush reputation. I love the way the brown, white and black colors swirl to look like tree rings, and the gold mica dusting on the outside mimics bark. For this technique, we used our fabulous Silicone Column Mold, which seals so tightly you can fill it with water and not worry about spilling a drop. We scented this soap with our ever popular Oatmeal Milk and Honey Fragrance Oil for a warm, comforting touch.
![]()
What You’ll Need:
3.6 oz. Canola Oil
.69 oz. Castor Oil
7.5 oz. Coconut Oil
3.4 oz. Olive Oil
7.5 oz. Palm Oil
3.3 oz. Sodium Hydroxide
7.5 oz. distilled water
1.5 oz. Oatmeal Milk and Honey Fragrance Oil
Titanium Dioxide
Brown Oxide
Black Oxide
Silicone Column Mold
Click here to add everything you need for this project to your Bramble Berry shopping cart!
Side note: This soap stayed pretty soft for a while. I wish I would have used 1 tsp of Sodium Lactate per pound of oils (added to my lye water).
If you’ve never made Cold Process soap before, stop here! I highly recommend checking out our FREE four part SoapQueen.tv series on Cold Process Soapmaking, especially the episode on lye safety. And if you’d rather do some reading, Bramble Berry carries a wide range of books on the topic, including my newest book, Soap Crafting. You can also checkout the digital downloads for that instant gratification factor.
COLOR PREP: Disperse 1 teaspoon of each colorant into 1 tablespoon of Sunflower or Sweet Almond Oil (or any other liquid oil). Use a mini mixer to get clumps worked out smoothly.
MOLD PREP: This mold is absolutely water and soap tight but you need to make sure it is FULLY CLICKED in the seam area. Run your fingers over those seams extra times just to be on the extra safe side.
SAFETY FIRST: Suit up for safe handling practices! That means goggles, gloves and long sleeves. Make sure kids, pets, and other distractions and tripping hazards are out of the house or don’t have access to your soaping space. Always soap in a well-ventilated area.
ONE: Slowly and carefully add the lye to the water and gently stir until the lye has fully dissolved and the liquid is clear. Set aside to cool.
TWO: Combine the Canola, Castor, Coconut, Olive and Palm Oils (remember to fully melt then mix your entire container of Palm Oil before portioning). Once the lye water and the oils have cooled to 130 degrees or below (and are ideally within 10 degrees of each other), add the lye water to the oils and stick blend until thin trace. If you’d like a harder bar of soap that lasts longer in the shower and releases faster from the mold, you can add Sodium Lactate to the cooled lye water. Use 1 teaspoon of Sodium Lactate per pound of oils in the recipe.
![]()
![]()
THREE: Once the batter has reached thin trace, divide it into three equal portions (each container should hold approx. 4 cups of batter). Side note: How awesomely amazing are these containers? They can even hold lye water and their long pouring spouts make for easy design work.
![]()
FOUR: Now add the dispersed colorants. We added 3 teaspoons of dispersed Titanium Dioxide to one cup, 1 teaspoon disperse Black Oxide to the second and 1 teaspoon dispersed Brown Oxide to the third. Whisk the colorant into the batter so as to not accelerate trace.
![]()
FIVE: Divide the fragrance evenly between the three cups. Use a spatula or spoon to incorporate the fragrance into the batter.
![]()
SIX: Once the fragrance and colorant have been fully mixed into the batter, pour off about 1/4 cup of one color into the mold. In between pours, use a Powder Duster to dust a thin layer of Sparkle Gold Mica directly over the opening of the silicone column mold.
![]()
You can see from the above photo how thin of a trace I’m working with. I really wanted to have the colors swirl beautifully together, rather than be a traditional faux-funnel pour (which works with slightly thicker trace to suspend the design).
![]()
SEVEN: Continue alternating between pouring each color and dusting a mica vein. Continue the pattern until the soap fills the mold. I count to ‘three’ to know when to stop with each color. It’s more accurate for me than eyeballing the pour.
![]()
![]()
To unmold the soap:
Because this is a particularly soft soap, we recommend waiting 1-2 weeks before unmolding it and then another week after that to cut it. Really, I said “weeks”. You can freeze the soap and it will come out sooner but we just were super patient. The recipe combined with the nature of silicone molds to not release and evaporate water makes this a longer release and cutting period that most soaps.
ONE: Stand the mold up on its end and pull apart the seam on one side. If you find that the mold is pulling soap off the loaf, it is still too soft and needs to be left in the mold for a few more days. Once the seam has been opened on one side, gently pull apart the seam on the other side.
![]()
TWO: Even though you’ve unmolded the soap, it may still be soft enough to show finger prints if you touch it directly. To eliminate this, roll the loaf onto a piece of wax paper (shine-y side up!). Using a sharp knife, cut the soap between 1 – 1.5 inches thick. Place on a cookie cooling rack to dry.
![]()
Allow the soaps to dry for another 1 – 2 weeks, then enjoy!
![]()
Defying the Rules of Soapmaking: 100% Coconut Oil Soap with Aloe Vera and a Mantra Swirl
Today’s tutorials comes to you from one of my favorite soapmakers, Kenna from Modern Soapmaking. Her soaps always have unique designs, ingredients and colors. She is consistently pushing the soaping envelope. This recipe is particularly intriguing because it breaks a few conventional soaping “rules.”
There are a lot of “rules” of soap making that get spread around like wildfire, and for the most part, they are true…
But not always! 100% coconut oil soap defies not one, not two, but THREE of the soapmaking rules I’ve heard from other soap makers in the past:
- Single oil soaps do not perform as well as synergistic formulas with multiple oils.
- Using over 30-40% coconut oil in a soap recipe is too drying for the skin.
- Superfatting above 10% will leave too many free oils and cause the soap to spoil or develop DOS.
What’s the magic soap recipe?
I hit the workshop to make a 100% coconut oil soap with a 20% superfat, an amazingly luxurious formula that is one of my all time favorites. Plus, I power-packed it with goodies, too, like coconut flour and aloe vera juice, and pulled out a mantra swirl with an embed.
Coconut oil has great shelf life and stability, so it’s the perfect oil for extreme superfatting. This coconut oil soap formula results in a rock hard bar, with luscious lather, without drying the skin out. Ready to give it a shot? Let’s do this thing.
Recipe
36 oz Coconut Oil
5.18 oz Lye (Sodium Hydroxide)
10.53 oz chilled Aloe Vera Liquid
1.5 oz Fragrance Oil (optional)
2 tsp Coconut Flour (optional)
Soap balls for embeds (optional)
2 teaspoons of Mica (optional)
Silicone Loaf Mold
a 5 quart bucket
a 2-cup measuring cup with spout
three 4-cup measuring cups with spouts
a piece of cardboard cut to fit in the mold
Bamboo Skewer
Spatula
Stick Blender
Get Down to Business:
This tutorial assumes you are an experienced soap maker. If you’ve never made Cold Process soap before, stop here! I highly recommend checking out our FREE four part SoapQueen.tv series on Cold Process Soapmaking, especially the episode on lye safety. And if you’d rather do some reading, Bramble Berry carries a wide range of books on the topic, including my newest book, Soap Crafting. You can also checkout the digital downloads for that instant gratification factor.
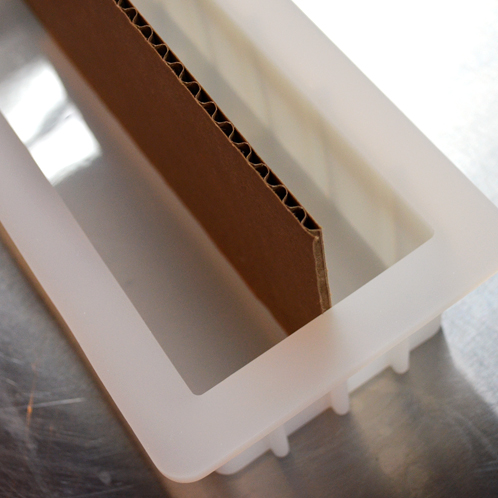
ONE: Prepare your mold by lining it, if necessary. Cut out a piece of cardboard that fits length and height-wise into your mold snugly. Place the piece of cardboard down the center of the mold to divide the mold in half lengthwise.
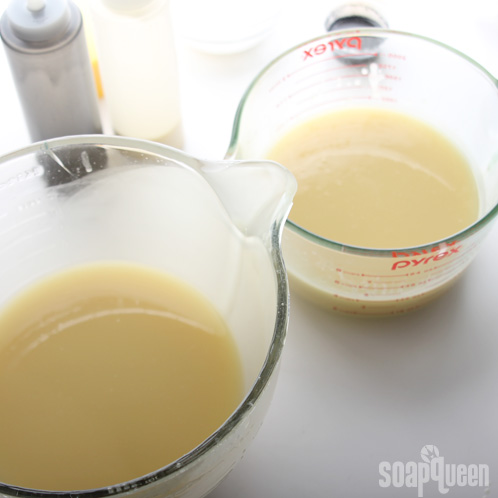
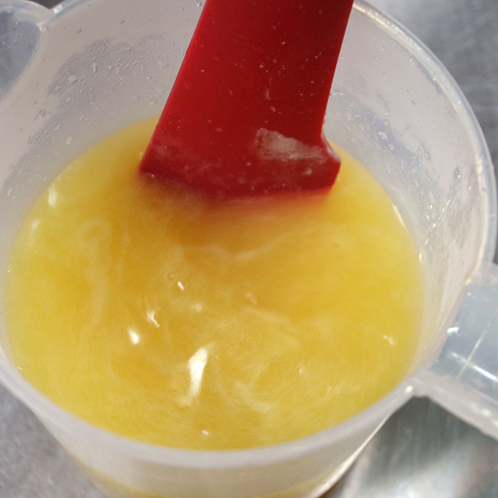
TWO: Prepare your lye solution by slowly pouring the sodium hydroxide into the chilled aloe vera juice, stirring until the lye has dissolved. The aloe vera will turn a mustard yellow color, like pictured to the right. Allow to cool.
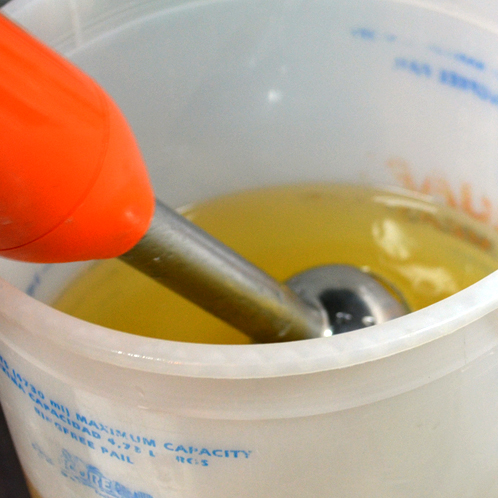
THREE: Heat your coconut oil to about 120° to 130° F. You want to soap this formula hot (I usually soap at room temperature), soaping coconut oil at too low of a temperature will increase your chances of false trace. I add my fragrance to my oils before my lye solution so I don’t forget it later on.
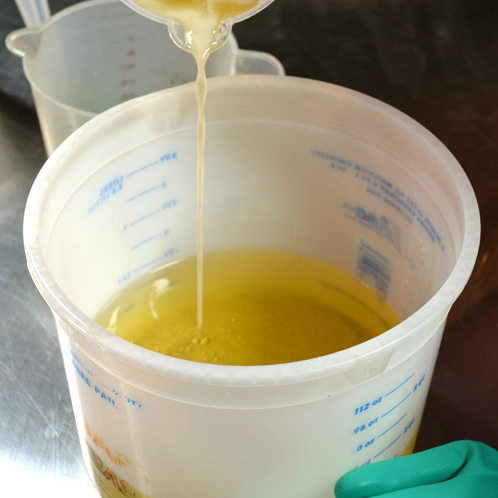
FOUR: Prepare two containers with mica for coloring the soap halves. I use 1 tsp of mica and 1 tsp of coconut flour per container, with 2 tsp of base oils for each container from my main soaping pot. Using a frother, I thoroughly mix the mica and coconut flour with the oils.
FIVE: Combine half of your lye solution with your coconut oil, and stick blend thoroughly. Add the remaining half of your lye solution, and stick blend only until emulsified. I always refrain from over-mixing – bringing your soap to an emulsion first, and then adding anything extra allows you more time to focus on what is happening with the soap.
SIX: Split the batch of coconut oil soap between your two containers and thoroughly mix with a spatula. If you are still at a barely emulsified or very light trace, bring the coconut oil soap in each container to a medium trace using your stick blender. A medium trace is my favorite pour viscosity for a mantra.
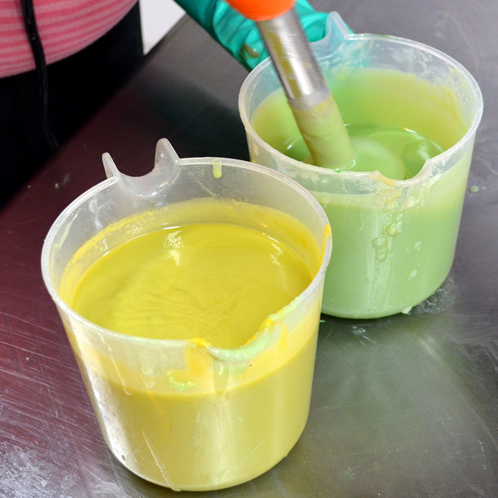
SEVEN: When your mica and coconut flour are thoroughly mixed into each part, begin your pour. I pour both halves at the same time so that there is equal force and weight on each side of the cardboard divider. You can also use two more pieces of cardboard on the ends of your mold with notches cutout to hold the divider in place.
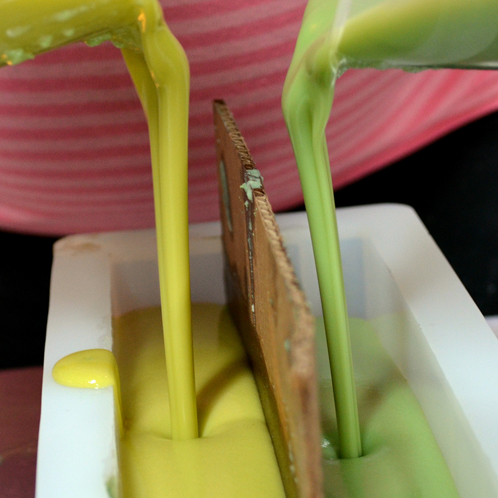
EIGHT: Once both halves are poured, carefully and slowly pull your cardboard divider straight up out of the mold. If you are embedding soap balls, use a bamboo skewer to push them down into the soap. Or place them mid-way through pouring.
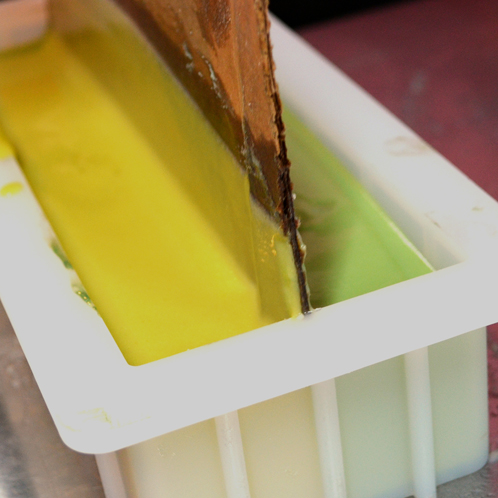
NINE: Using a bamboo skewer (or chopstick, or your personal weapon of choice!), swirl the mantra. Pushing the skewer down into the mold all the way to the bottom will swirl both sides of your soap. If you only put the end of the skewer into the soap, you can swirl just the top, leaving a crisp line between the two halves in the bars.
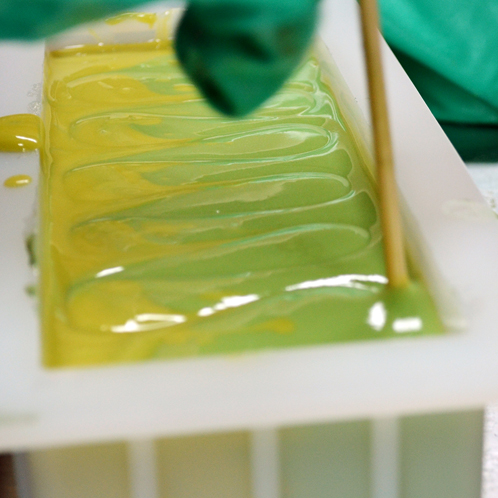
TEN: Put the pretty soap to sleep. I do not insulate coconut oil soap, but you can if you want to (same with CPOPing.) Unmold and cut the coconut oil soap as soon as it has hardened up. It sets up real hard, and real quick! You’ll want to clean up the bars of coconut oil soap straight out of the mold, such as beveling or planing – this soap will be a brick in 24 hours flat. The lather is really creamy and luscious straight out of the mold, and just gets better and better as it ages.
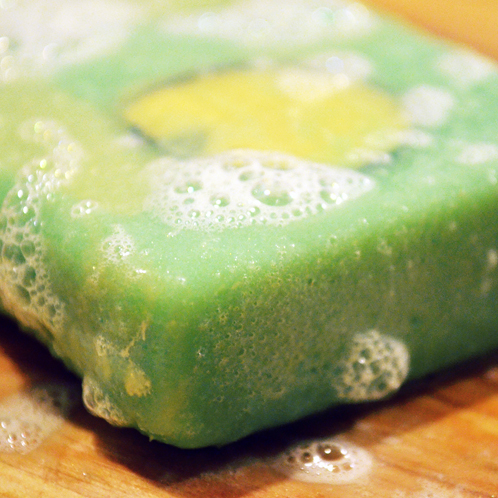
All photos courtesy of Amathia Soapworks.
Spooky Eyeball Cold Process Soap Tutorial
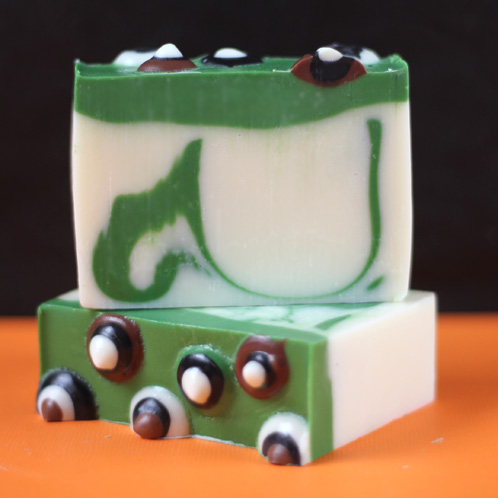
Sure it’s August, but with a 4-6 week cure time, it’s not too early to start prepping for the holiday season. If the holiday of ghouls, ghosts and things that go bump in the night is your thing, this whimsically creepy eyeball-inspired soap may be right up your (dark) alley. This soap incorporates a simple swirl technique, as well as the use of condiment bottles to create the cutely creepy “eyes” on top. We fragranced this soap with the Tart Apple Fragrance Oil, which was chosen by our 2013 S.O.A.P. Panel for its distinctive tart, fruity notes. In this soap, it brightened up the darker Fall color scheme, which is one more reason this soap is perfectly festive for Fall!

What You’ll Need:
2.2 oz. Avocado Oil
1.1 oz. Castor Oil
5.5 oz. Coconut Oil
5.5 oz. Palm Oil
7.7 oz. Rice Bran Oil
3 oz. Sodium Hydroxide
7.2 oz. distilled water
1.4 oz. Tart Apple Fragrance Oil
2 lb. Wood Log Mold with Silicone Liner
Click here to add everything you need for this project to your Bramble Berry shopping cart!
Extra equipment that you need: empty (clean!) condiment bottles plus all the normal things like bowls, spoons, spatulas, stick blenders and a whisk.
If you’ve never made Cold Process soap before, stop here! I highly recommend checking out our FREE four part SoapQueen.tv series on Cold Process Soapmaking, especially the episode on lye safety. And if you’d rather do some reading, Bramble Berry carries a wide range of books on the topic, including my newest book, Soap Crafting. You can also checkout the digital downloads for that instant gratification factor.
COLOR PREP: Disperse 1 teaspoon of Brown Oxide into 1 tablespoon of Sunflower or Sweet Almond Oil (or any other liquid oil), 1 teaspoon Black Oxide into 1 tablespoon of liquid oil, 1 teaspoon Titanium Dioxide into 1 tablespoon of liquid oil and 1 teaspoon Green Chrome Oxide in 1 tablespoon of liquid oil. Use a mini mixer to get clumps worked out smoothly.
SAFETY FIRST: Suit up for safe handling practices! That means goggles, gloves and long sleeves. Make sure kids, pets, and other distractions and tripping hazards are out of the house or don’t have access to your soaping space. Always soap in a well-ventilated area.
ONE: Slowly and carefully add the lye to the water and gently stir until the lye has fully dissolved and the liquid is clear. Set aside to cool.
TWO: Combine the Avocado, Castor, Coconut, Rice Bran and Palm Oils (remember to fully melt then mix your entire container of Palm Oil before portioning). Once the lye water and the oils have cooled to 130 degrees or below (and are ideally within 10 degrees of each other), add the lye water to the oils and stick blend until thin trace. If you’d like a harder bar of soap that lasts longer in the shower and releases faster from the mold, you can add Sodium Lactate to the cooled lye water. Use 1 teaspoon of Sodium Lactate per pound of oils in the recipe.
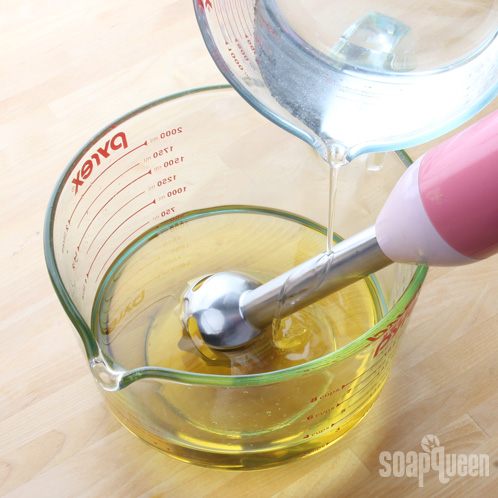

THREE: Reserve some soap to make the “eyes” by pouring off about 1 oz. of batter each into three condiment containers.
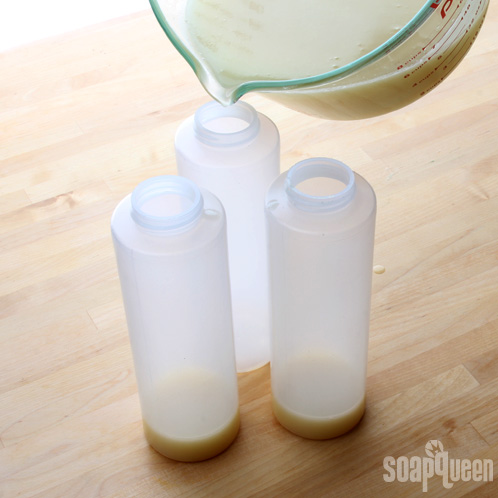
FOUR: Add 1/4 teaspoon of dispersed colorant to a single bottle. Only add one colorant per bottle. With gloved hands, screw the cap on and plug the hole with your finger and shake the bottle to fully disperse the colorant into the batter. Release your finger with the tip **pointing away from your face.** Set the bottles aside for now.
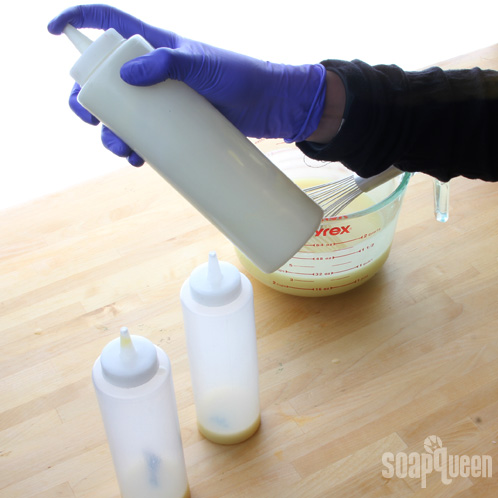
FIVE: Pour off about 1 cup of batter from the main batch.
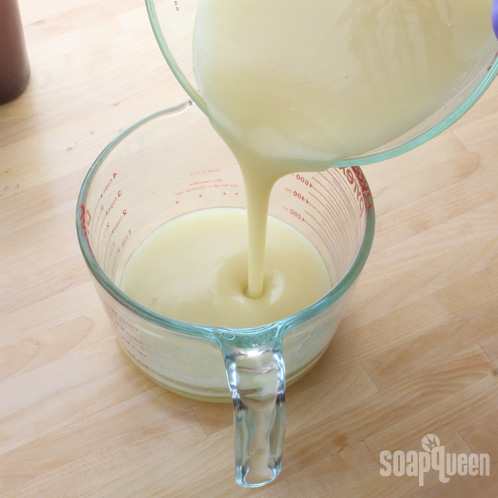
SIX: In your newly poured container, whisk in 1 teaspoon of dispersed green colorant. In the original container, whisk in 2 teaspoons of dispersed white colorant. The white helps to provide fantastic contrast to the deep green.
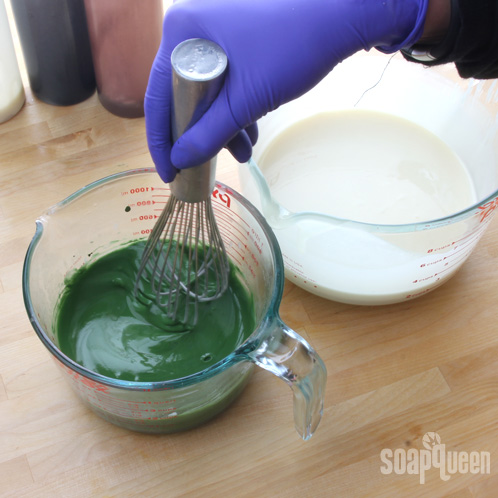
SEVEN: Add roughly half the fragrance oil (.7 oz.) to the green batter and the remaining fragrance oil to the white batter. To avoid accelerating trace, use a whisk or a spoon to combine the fragrance oil and batter. Do NOT fragrance the condiment bottle soap. You want this soap to be as fluid as long as possible.
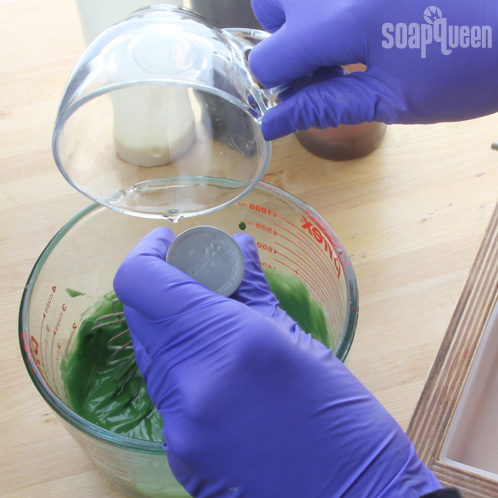
EIGHT: Pour roughly 3/4 of the white soap into the mold. Tamp the mold on the table several times to disperse air bubbles. 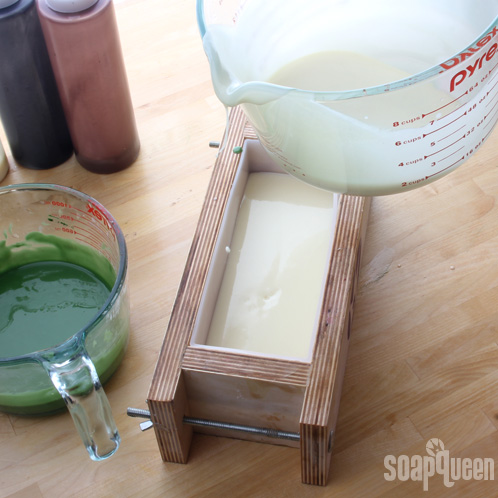
NINE: From a high point, pour about 1/3 of the green soap into the center of the mold. Pouring from high up will create the streaks of green color you see in the final soap.
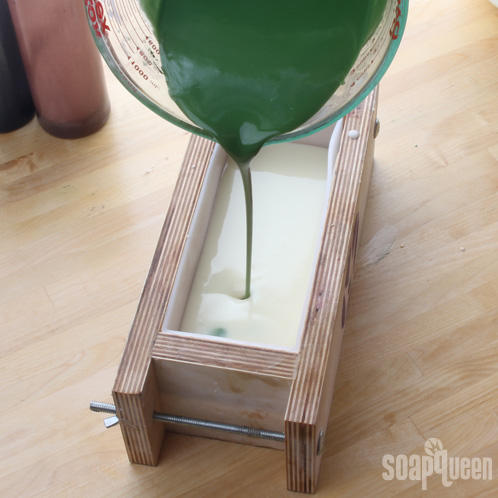
TEN: Use a spatula to scrape the last remaining white soap from the container into the mold. (Bonus tip: We’re using one of our brand new Bramble Berry exclusive silicone tools. Pick one up for yourself here.)
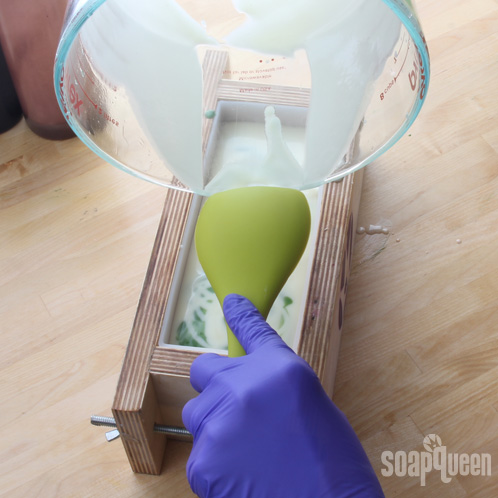
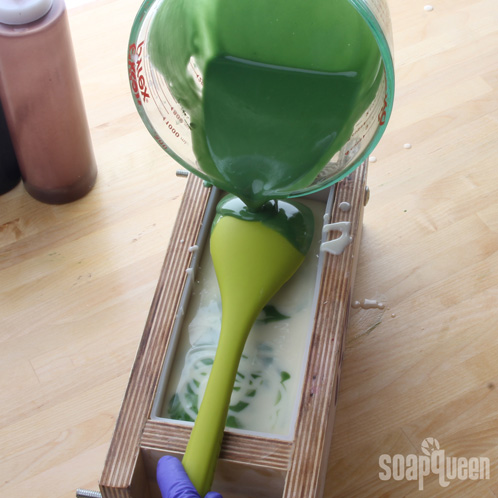
ELEVEN: Pour the remaining green soap over a spatula (or the nifty amazing square spoon spatula thing pictured below) so as not to disturb the white soap below. Smooth the green soap in the mold to get a nice, even layer.
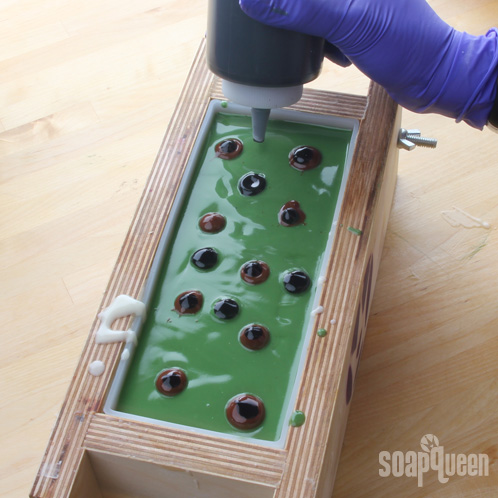
TWELVE: Take your colored condiment bottles and make small, dime-sized dots of color on the surface of the soap. We layered the colors on top of each other in a random order to get a fun assortment of “eyes.”
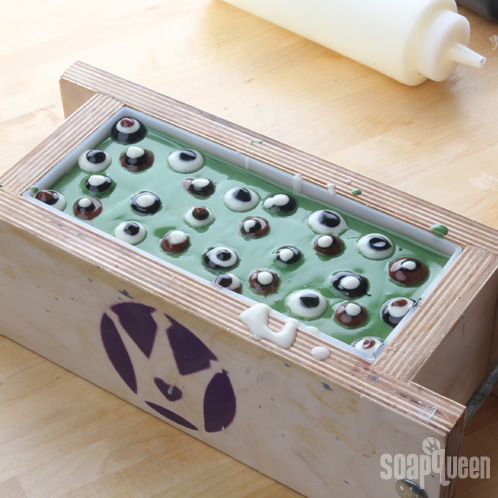
THIRTEEN: Spray the entire top with 91% Isopropyl Alcohol to reduce soda ash. Cover and insulate for 24 hours and unmold after 3-4 days. Allow to cure for 4-6 weeks and enjoy this spooky soapy delight.
Sudsy Shampoo Bars
We’ve reached the end of our Soap Crafting-inspired tutorial extravaganza week. In case you missed it, we started out with an awesome beer soap, got fruity with a strawberries and cream recipe and yesterday we introduced a beeswax soap using a fun spoon-plop technique. And below, find our final recipe — Sudsy Shampoo Bars! These shampoo bars are a biodegradable, packaging-free alternative to traditional liquid shampoos, and contain a mixture of several hair nourishing oils. Keep in mind — the nature of soap is to clean, and these bars have a pH of around 7 (slightly less than regular cold process soap). These bars will leave your hair feeling nice and refreshed and in my experience, I needed to load on the conditioner to really make my hair soft and lovely. 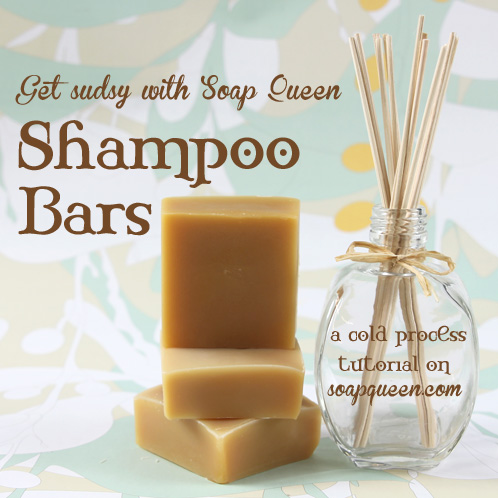 [Read more…]
Busy Beeswax Soap Tutorial
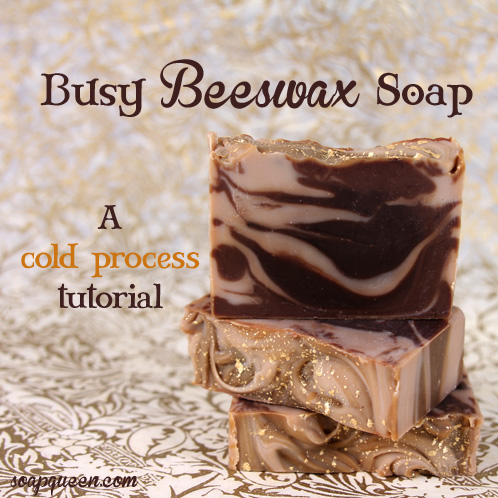
This is day three of our Soap Crafting-inspired tutorials, and I’m particularly excited about this one because the result is visually stunning. This soap incorporates real Yellow Beeswax, which gives the finished soap a translucent and shiny texture. It also utilizes a fun spoon plop technique, which is easy to do and results in something that almost looks like an In-The-Pot-Swirl. The fragrance combo of our best-selling Oatmeal, Milk and Honey Fragrance Oil and Black Cherry Fragrance Oil is dessert-like and sweet, and topping this soap off with a little gold mica gives it an elegant look. This is an advanced tutorial because of the beeswax addition so don’t soap this one until you’ve got a few recipes under your belt. It’s worth the wait =)
What You’ll Need:
3.5 oz. Sweet Almond Oil
2.8 oz. Yellow Beeswax
.7 oz. Cocoa Butter
7 oz. Coconut Oil
3.5 oz. Hazelnut Oil
8.75 oz. Olive Oil
8.75 oz. Canola Oil
4.5 oz. Sodium Hydroxide
11.5 oz. distilled water
2 teaspoons Cocoa Powder
Fragrance blend of: 1.5 Oatmeal, Milk and Honey Fragrance Oil and .6 oz. Black Cherry Fragrance Oil
Click here to add everything you need for this project to your Bramble Berry shopping cart! I didn’t put this awesome silicone spoon/spatula combo into the kit but that’s what I used in this tutorial. I highly recommend it.
If you have never made cold process soap before, I highly recommend you get a couple of basic and intermediate recipes under your belt before attempting this advanced recipe. Check out this (free!) 4-part series on cold process soap making, especially the episode on lye safety. Bramble Berry carries quite a few books on the topic as well, including my brand new book Soap Crafting in which you’ll find a ton of great info for new soapers and veterans alike.
FRAGRANCE PREP: In a glass container, combine 1.5 oz. Oatmeal, Milk and Honey Fragrance Oil and .6 oz. Black Cherry Fragrance Oil. Set aside.
SAFETY FIRST: Suit up for safe handling practices! That means goggles, gloves and long sleeves. Make sure kids, pets, and other distractions and tripping hazards are out of the house or don’t have access to your soaping space. Always soap in a well-ventilated area.
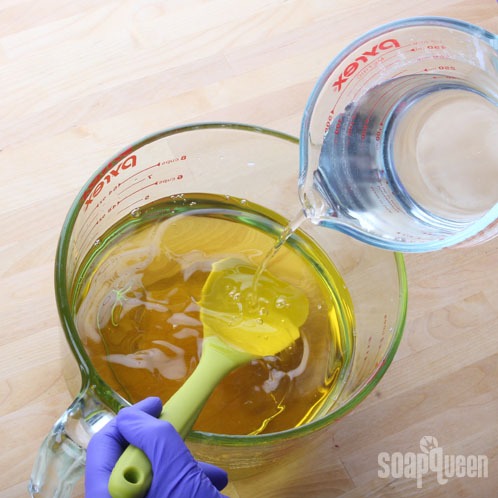
ONE: Slowly and carefully add the lye to the water and gently stir until the lye has fully dissolved and the liquid is clear. Set aside to cool. If you’d like a harder bar of soap that lasts longer in the shower and releases faster from the mold, you can add Sodium Lactate to the cooled lye water. Use 1 teaspoon of Sodium Lactate per pound of oils in the recipe.
TWO: Melt and combine the Coconut Oil and Cocoa Butter. Add the Sweet Almond, Hazelnut, Olive, and Canola Oils and the Yellow Beeswax. Heat the mixture until the Beeswax has melted entirely. Melting the Beeswax in the oils facilitates even distribution of heat for optimum melting. This oil wax mixture is very hot – above 160 degrees to keep the wax melted. Be careful removing it from the microwave or stove.
Note: Beeswax has a high melting point and tends to harden very quickly. This is an expert-level cold process recipe, and you’ll need to keep your oils above 170 degrees and work quickly to prevent the mixture from clumping.
THREE: Pour the lye into the oils and stir gently with a spatula or spoon. Switch to a stick blender and gently pulse until thin trace.
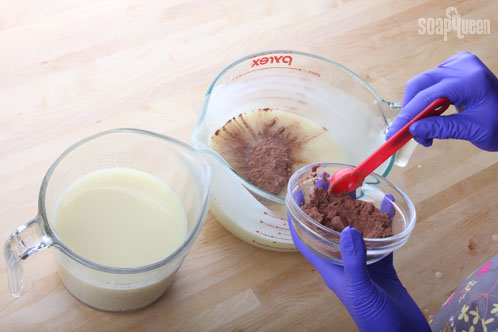
FOUR: Split the batch in half. In the first container, add two teaspoons of Cocoa Powder for color. Mix using a spoon or spatula. Leave the other portion uncolored.
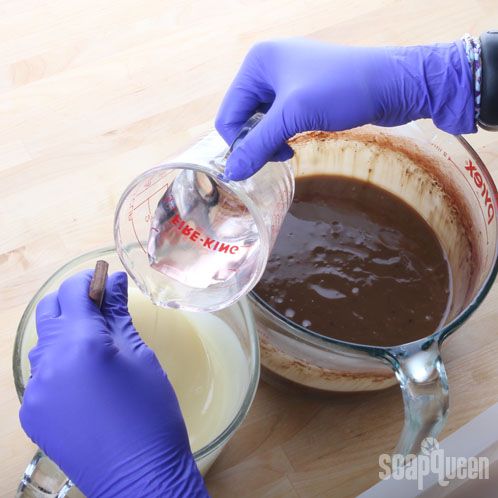
FIVE: Add half of the fragrance oil to each of the portions, and mix well using a spoon or spatula.
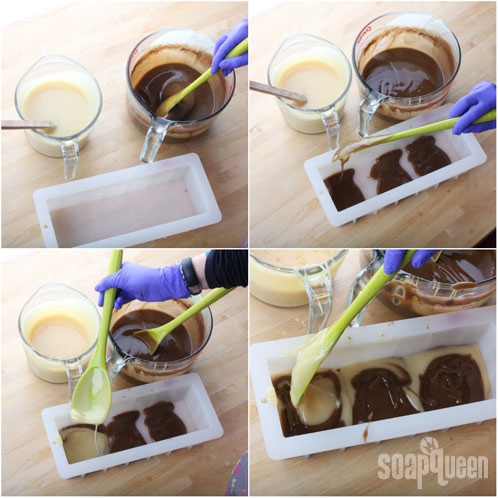
SIX: Starting with the brown soap, use a spoon to plop three mounds of brown soap across the mold. Follow with three plops of uncolored soap, directly on top of the brown soap. Repeat this process, layering mounds of brown soap on top of uncolored soap, until you fill the mold. Tamp the mold intermittently on the table to eliminate any air bubbles. The Square Silicone Spoon/Spatula combo is ideal for this project.
SEVEN: Once all the batter has been plopped into the mold use a spoon or mini spatula to gently form two small ridges running from end to end in the middle of the mold.
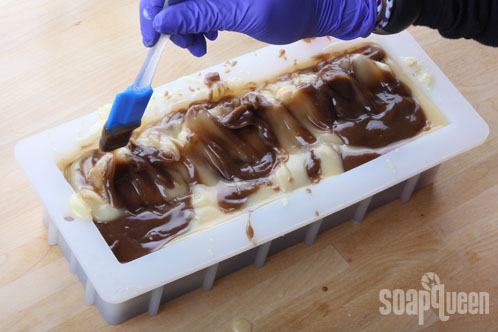
EIGHT: Using a chopstick or dowel (or, in my case a dropper!), make tiny looping swirls on the top of both of the ridges. This will created a nice, swirled texture on the top of the soap.
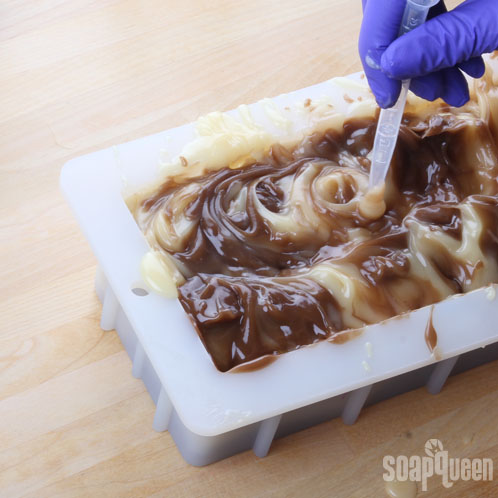
NINE: To put the finishing touches on this soap, use your gloved hands or a powder duster to sprinkle Sparkle Gold Mica across the top of the mold. Then, gently blow on the mica to press it into the soap batter. Be careful because this part can get messy! Be sure to have 99% Isopropyl Alcohol on hand to clean up any mica spills.
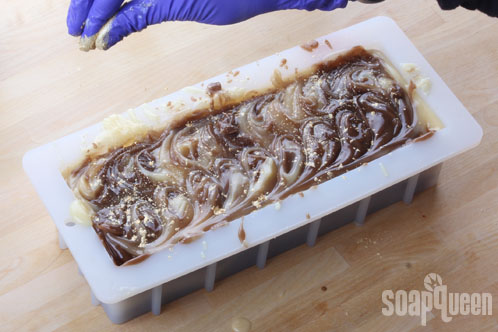
Unmold the soap after 4 -7 days and then allow to cure for 4-6 weeks. Enjoy your busy bee soap!

Strawberries & Cream Soap: A cold process tutorial
In celebration of the release of Soap Crafting, we’re continuing our special series of cold process tutorials inspired by the book. If you missed it, check out yesterday’s awesome beer soap (yes, we said beer) and then get ready for today’s recipe filled with another fun additive.
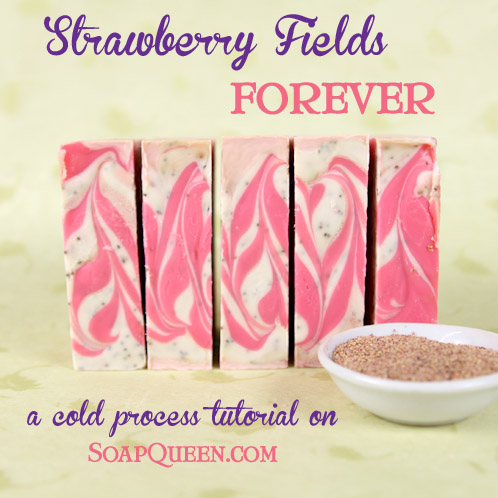
Sweet, juicy and perfect for a picnic, strawberries are one fantastic fruit to eat. They also happen to be wonderful in soap as well. This recipe includes fresh strawberry puree, real cream and strawberry seeds. If you haven’t experimented with additives in cold process soap yet, this is an excellent place to start. One thing to keep in mind: because this soap has so many natural additives, it has a shelf life of about 6 months.
What You’ll Need:
1. 05 oz. Cocoa Butter
8.75 oz. Coconut Oil
17.5 oz. Olive Oil
3.5 oz. Palm Oil
1.75 oz. Palm Kernel Flakes
2.45 oz. Sweet Almond Oil
4.9 oz. Sodium Hydroxide
10.4 oz. distilled water
1 tablespoon Strawberry Seeds
1.2 oz. cream
3 oz. strawberry puree
Fragrance blend of:
.8 oz. Strawberry Fragrance Oil
.8 oz. Sun Ripened Raspberry Fragrance Oil
.5 oz. Summer Fling Fragrance Oil
Click here to add everything you need for this project to your Bramble Berry shopping cart!
If you have never made cold process soap before, I highly recommend you get a couple of basic recipes under your belt. This is not a recipe to make on your first try at soapmaking. Check out this (free!) 4-part series on cold process soap making, especially the episode on lye safety. Bramble Berry carries quite a few books on the topic as well, including this downloadable book on making cold process soap.
COLOR PREP: Disperse 1 teaspoon of the Fired Up Fuchsia into 1 tablespoon of Sunflower or Sweet Almond Oil (or any other liquid oil) and 2 teaspoons Titanium Dioxide into 2 tablespoon of liquid oil. Use a mini mixer to get clumps worked out smoothly.
ADDITIVE PREP: Using a food processor, grind up about a dozen fresh strawberries to yield 3 oz of puree. Then, portion out 1.2 oz. cream into a second container. Set both containers aside.
FRAGRANCE PREP: Create the fragrance blend by combining the Strawberry, Sun Ripened Raspberry and Summer Fling Fragrance Oils in a glass bowl. Mix well and then set aside.
SAFETY FIRST: Suit up for safe handling practices! That means goggles, gloves and long sleeves. Make sure kids, pets, and other distractions and tripping hazards are out of the house or don’t have access to your soaping space. Always soap in a well-ventilated area.
ONE: Once the oils and lye water mixture are under 120 degrees F (and ideally within 10 degrees of each other), slowly and carefully add the lye water mixture to the oils and stick blend to light trace. Set aside to cool. If you’d like a harder bar of soap that lasts longer in the shower and releases faster from the mold, you can add Sodium Lactate to the cooled lye water. Use 1 teaspoon of Sodium Lactate per pound of oils in the recipe.

TWO: After the lye and oils have been thoroughly stick blended together (think thin trace – not thick), split the batter into two cups: one with about 1.5 cups of batter and the second with about 2 cups of batter.
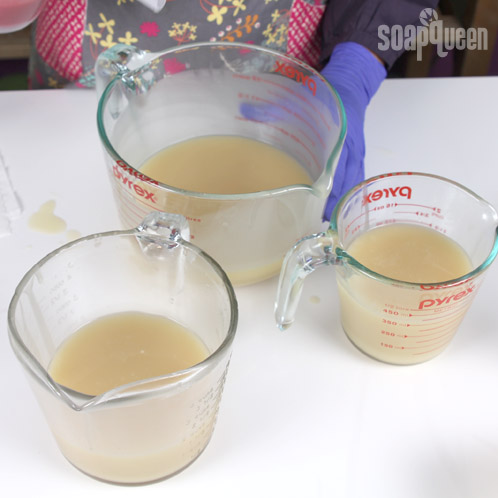
THREE: In the original container, add the strawberry puree and 1 tsp. of the dispersed Fired Up Fuchsia Colorant.
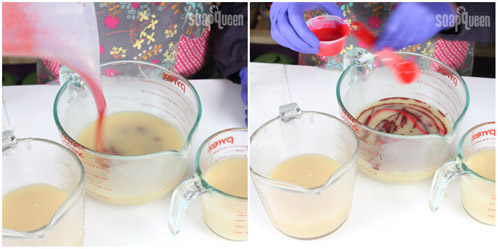
FOUR: In the second 2-cup container, add 2 teaspoons of dispersed Fired Up Fuchsia.
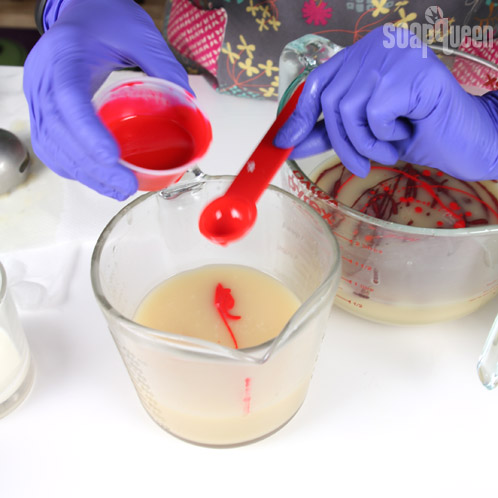
FIVE: In the remaining 1.5 cup container, add the Strawberry Seeds.
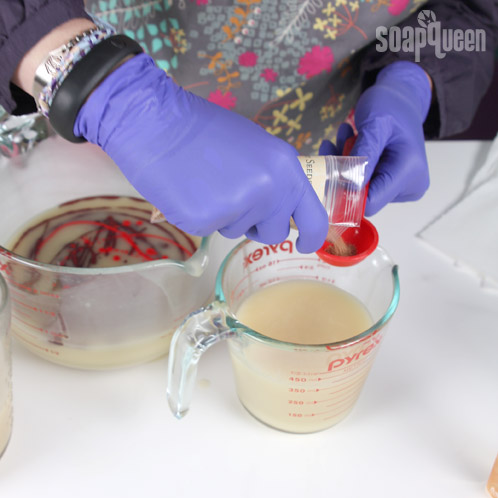
SIX: Add 1 tablespoon of Titanium Dioxide to the cup with the Strawberry Seed batter. Add another tablespoon of Titanium Dioxide to the cup with the strawberry puree to lighten this color up. It’s quite a dark, almost brown color, without it. Using a wire whisk, thoroughly mix the colorants and additives into each cup of soap batter.
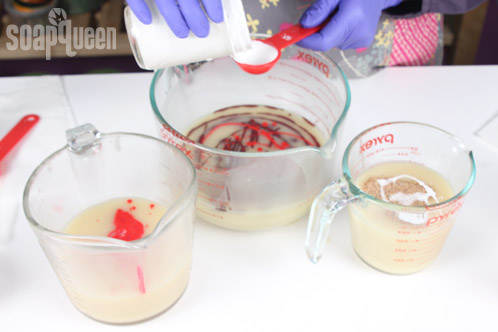
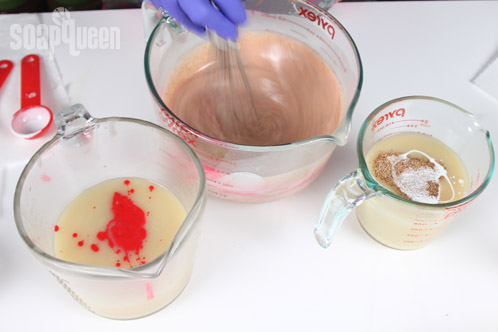
SEVEN: When the batter has reached a thin trace, pour about half the container of cream (.6 oz.) in the container with the Strawberry Seeds. Pour the remaining half (.6 oz.) into the container with the strawberry puree. Using a wire whisk or a stick blender, mix the cream into the batters.
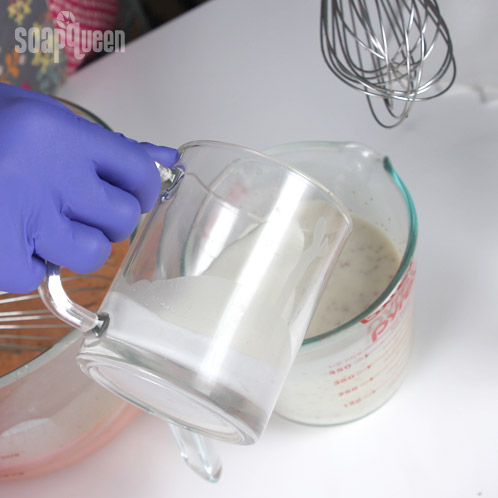
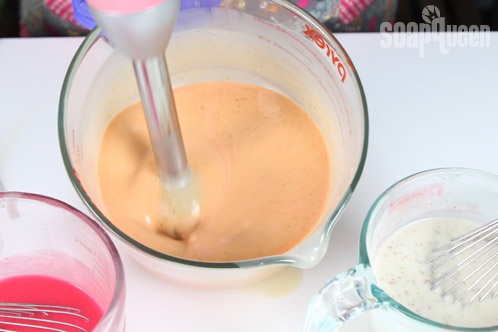
EIGHT: Split the fragrance blend in thirds, pouring approximately .7 oz. of the oil into each cup of batter.
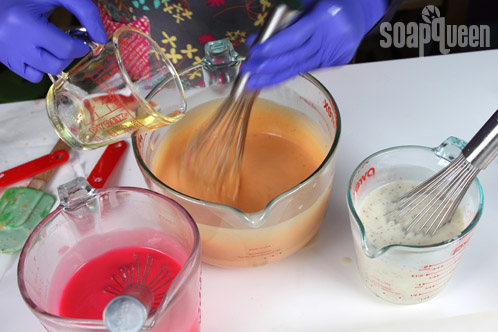
NINE: Pour approximately one-third of the strawberry puree batter into the silicone mold.
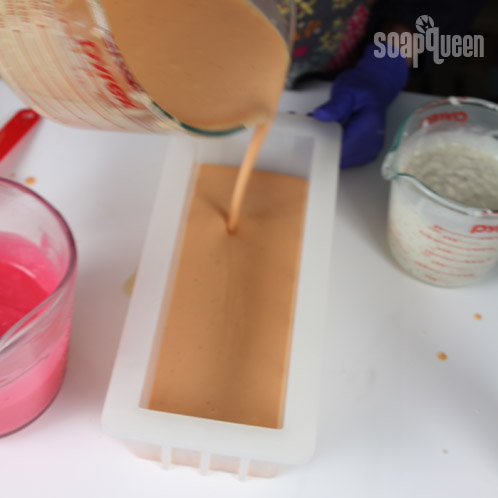
TEN: Starting at one end of the mold, pour about half of the pink-colored batter in a wave pattern until you reach the other end of the mold. Do the same with half of the white-colored batter.
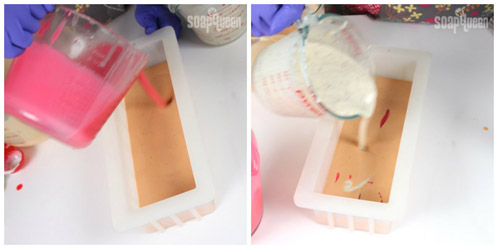
ELEVEN: Pour almost all of the remaining puree soap into the mold. Save about a half cup to complete the final top design.
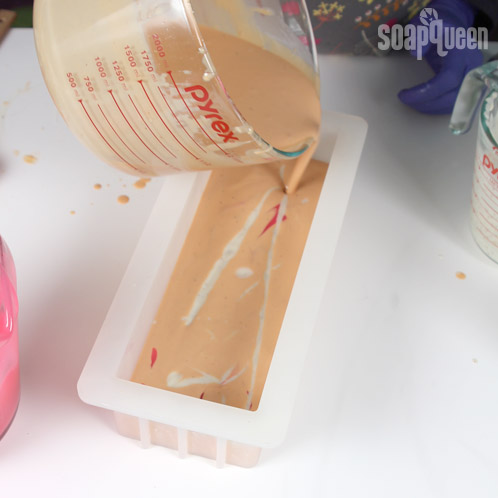
TWELVE: While pouring over a spatula, pour two-thirds of the remaining pink soap over the top of puree soap. Tamp the mold on the table to release bubbles and smooth out the surface, and then use the same spatula technique to pour two-thirds of the remaining white soap. Tamp the mold again to release bubbles.
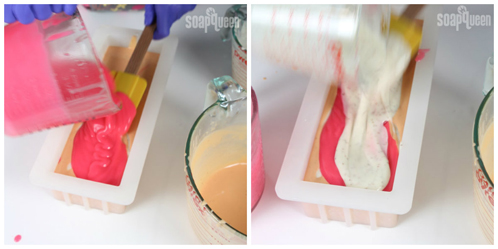
THIRTEEN: Pour the remaining puree soap on top of the mold in a loop-de-loop pattern, from one end of the mold to the other (far right). Then, pour the remaining white soap over it, making a stretched out, horizontal zig-zag from right to left (center). Finally, pour the pink soap in an opposite zig-zag to fill in the space left by the white soap (far right).

FOURTEEN: Insert a chopstick of dowel about 1/4 of an inch into the soap. Start in the bottom left-hand corner and drag the tool up and down through the soap, slowly making your way to the far end of the mold.
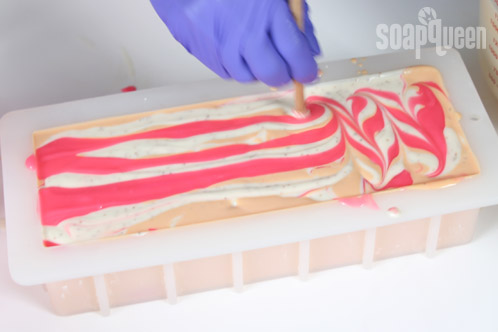
Spray the entire top with 91% – 99% Isopropyl Alcohol to reduce soda ash. Cover and insulate for 24 hours and unmold after 3-4 days. Allow to cure for 4-6 weeks and enjoy!


