Scrub into Spring: Solid Exfoliating Scrub Tutorial
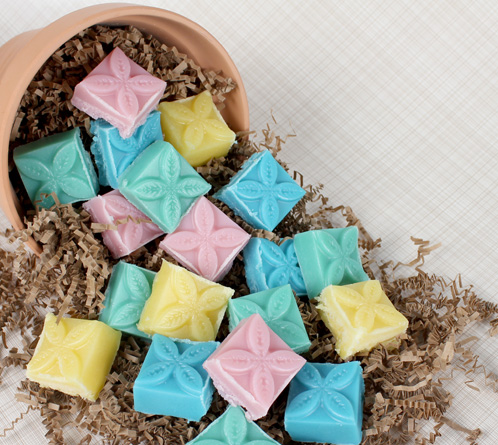
Make your own solid sugar scrubs jam packed with skin-loving ingredients. No more mixing the liquid oils and the sugar before you shower – which can be a bit of a mess! Just grab one of these adorable solid sugar scrub cubes for an easy, mess free, luxurious shower.
Happy Easter Everybunny!
Dyeing for that Marbled Look
Easter is this Sunday. Have you dyed your eggs yet? Check out how you can use your soapmaking LabColors to dye your eggs, too! I got the marbled idea from the fabulous and creative Martha Stewart (I heart her). What are your great egg dying techniques?
Soapylove Jewelry Box Colorant Set
(LabColors or food coloring will work too)
12 eggs
Sweet Almond Oil
Vinegar
Skewers, spoons and forks
Small mixing bowls
Plenty of paper towels (trust me)
One: Hard boil your eggs anyway you like. I put my eggs in a pot, cover them with cold water and turn the heat to high. Once the water starts to a boil, I let the eggs cook for about 10 minutes. Then I immediately submerge the cooked eggs into cold water to stop the cooking. Set your eggs aside while you make your dye.
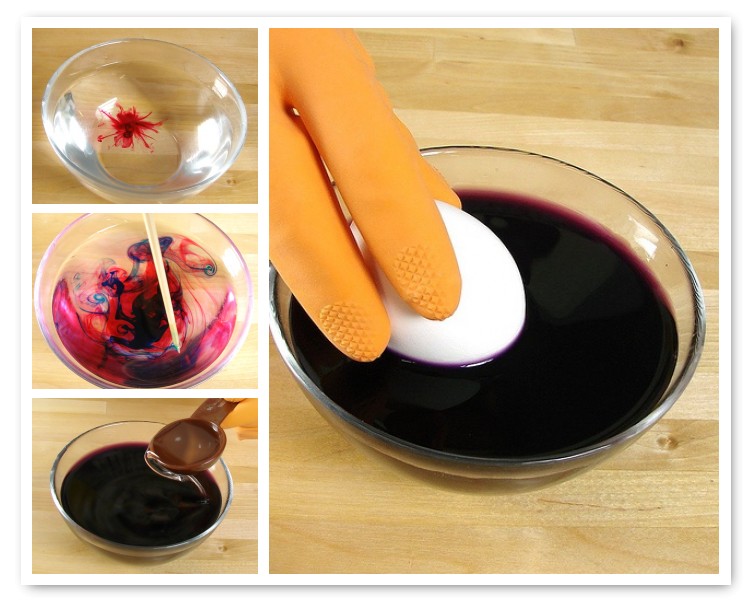
Two: In a small bowl, use your Soapylove Jewelry Box Colorant set to make your egg dyes. In 8 ounces of water add your Jewelry Box Colorants and 1 tablespoon of Vinegar. Mix well and pop your egg(s) into the dye for 1-2 minutes, until you get a nice solid base color.
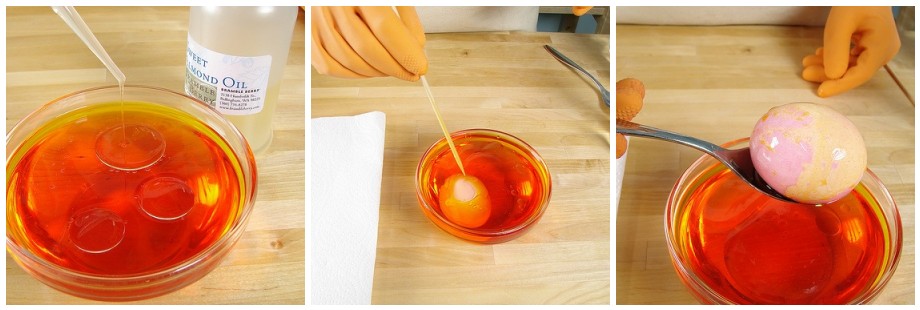
Three: After all of your eggs are colored, it’s time to create the marbled look. Add 1 tablespoon of Sweet Almond Oil to the remaining colors and give it a whisk with a fork. Carefully drop your egg in the mixture and use your skewer to roll the egg around in the bowl (the egg will only need to be in the colorant for about 10-15 seconds).
Four: Remove the egg from the dye with a spoon and let it dry on a paper towel (or in your old egg carton). Pat it dry with a paper towel.
Tip: Remember to pick colors are going to pair well together. I love how my pink and orange combination turned out. The white and blue looks great too because it’s such a dramatic contrast.
“Eggcellent” Colorant Recipes
Yellow
25 ml Sunshine Yellow
8 ounce of water
1 Tablespoon of Vinegar
Orange
9 ml Sunshine Yellow
2 drops of Ruby Red
8 ounce of water
1 Tablespoon of Vinegar
Purple
4 ml Fiery Fuchsia
5 drops of Turquoise Blue
8 ounce of water
1 Tablespoon of Vinegar
Neon Green
3 ml of Sunshine Yellow
1 drop of Turquoise Blue
8 ounce of water
1 Tablespoon of Vinegar
Red
4 ml of Ruby Red
8 ounce of water
1 Tablespoon of Vinegar
Blue
5 ml of Turquoise Blue
8 ounce of water
1 Tablespoon of Vinegar
Easter Mash Up
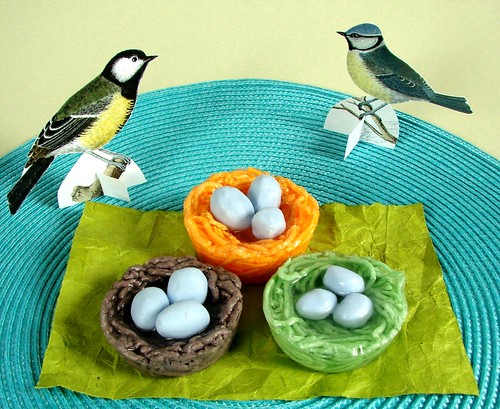
Soapy Nesting – Easter Soaps Part 2
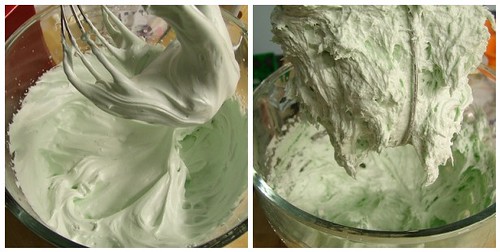
ONE: In your mixing bowl, combine 8 oz of clear soap base, 2 tbsp of natural Castile liquid soap base and your colorant of choice. Mix on high until the mixture has fluffy peaks and it looks like frosting. Ooh and ahh over how great the fluffy peaks look, then mix a little bit more until it looks grainy and less appealing. The picture to the right is a perfect consistency to work with.
TWO: Press the mixture into your play dough spaghetti maker and pull the lever down to make the “spaghetti strings” come out the other side. Let your strings sit in the open air for about 30-45 minutes; they will be easier to work with if they can cool and dry.
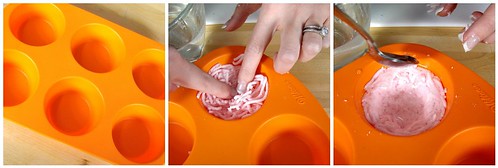
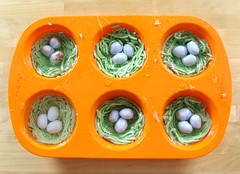
THREE: Melt 4 ounces of clear soap base and (if neccessary) cool to about 130°F. In one cavity of your cupcake mold, pour 1/4″ of clear soap and layer in a handful of your spaghetti soap. Fill up the mold about half way and press down the middle with your fingers to make room for the eggs. If necessary, drizzle some soap around the edges to ensure all of the pieces stick together.
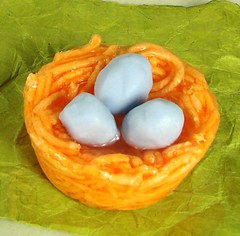
FOUR: Pour another thin layer of clear soap in the middle of your nest and place 3 eggs into the soap. Repeat this process for all 6 cavities.
FIVE: Let the soaps cool, pop them out of the mold and smooth the edges with your finger.
Easter Brunch Bird Nest Tutorial – Part 1
Ingredients
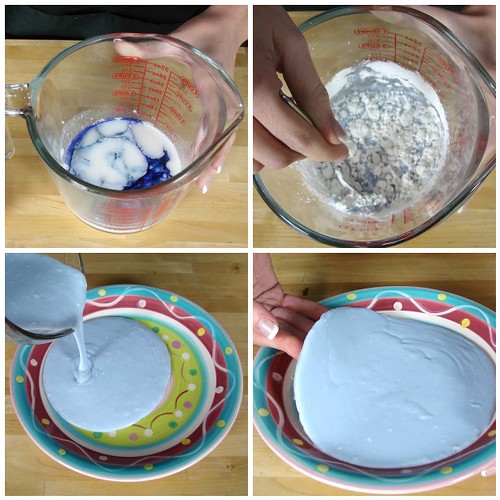
ONE: Melt 6 ounces of white soap base in a heat safe container in the microwave (on 30 second intervals). Once melted, mix in 1 ml of Blue Mix Labcolors. Mix well until you have a baby (egg) blue.
TWO:Add 4 tbsp of corn starch to the soap and mix, mix, mix. It will be a little chunky at first but keep mixing to get rid of the clumps. Once the soap seems to be nearly clump free, (it’s o.k. if there are some lumps) pour a 1/8″ thin layer on to a plate.
THREE: Once the mixture has cooled a little bit and can be handled like play dough (2-3 minutes), roll into little balls, smooth out the texture with your finger and create an egg shape. Roll out 24 balls to have 3 eggs in each nest.
TIP: If the soap gets too hard to work with, just pop it back in the microwave and start the process over.
Optional: Do you want to speckle your eggs? Try the toothbrush technique. Mix your mica with a little bit of rubbing alcohol. Dip your toothbrush into the colorant and run your thumb along the bristles to splatter the color. Warning: you will have shiny, shimmery mica fingers afterwards.
Yes, I’m making you wait…but it will be worth it, promise!
Swirling Update + Sneak Peak
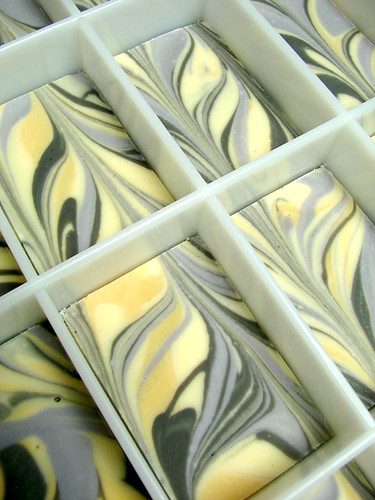
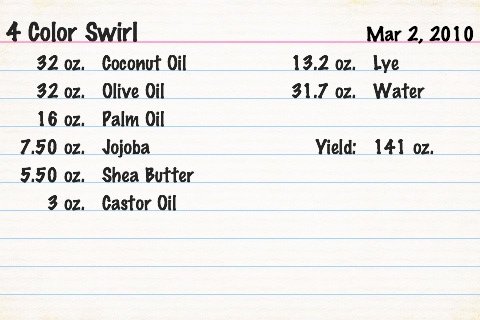
I was so excited to get to work today to see the swirls I made up last night. The batch did not go through gel phase (my soap studio was kind of cool last night) so you can see that the colors have diminished in intensity and hue. But, I still am excited about them and love the look. I am a bit impatient so I think I’ll freeze the batch solid to see if I can get the soap out a day or two earlier than if I let it air dry naturally.
This is the recipe I used (screenshot from the iPhone Soapmaking App):
PS: See the little soaps off to the right hand side of the big loaf? That’s the project I’m working on for tomorrow’s blog post. It’s down to the wire to create the cutest soap project I can for your Easter soaps! =)
Simple Easter Scrub
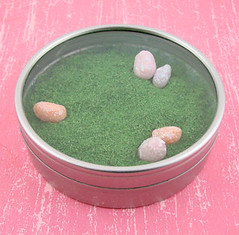
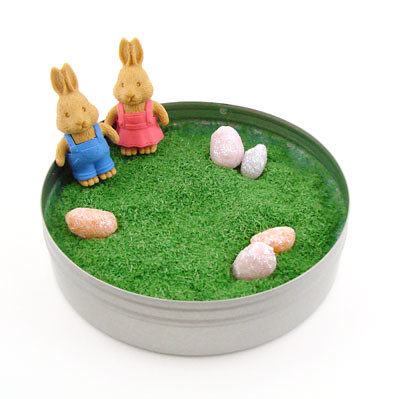 Need a special little gift to give your Easter dinner hostess or for a special friend? I’ve created this adorable salt scrub with an Easter twist. Best of all? It’s fast and easy to make.
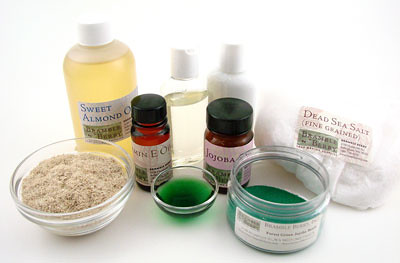
2 cups fine grain dead sea salt
3 tablespoons lotion base
3 tablespoons soap concentrate base
1 1/2 tablespoons Vitamin E oil
1 ounce Jojoba oil
2 ounce Sweet Almond oil
3 teaspoons Jojoba beads
1/4 oz. lettuce fragrance oil
Shredded loofah and Emerald Green labcolor to sprinkle on the top.
4 ounce tin container with clear top
Instructions:
So easy! Just mix everything except the loofah and Emerald Green labcolor together.
Spoon into your container.
To make the grass green loofah: Put some diluted labcolor (suggest 10 ml of Labcolor in 3 ounces of water) and the loofah in a seal top baggie and then mush them around until they are as green as you like. Ideally, you’ll want just enough liquid to color the loofah without making it sopping wet.
For an extra special touch, make some of our play dough soap and roll into little egg shapes. Next roll the little eggs in some iridescent shredded glitter and scatter across the top of the scrub.
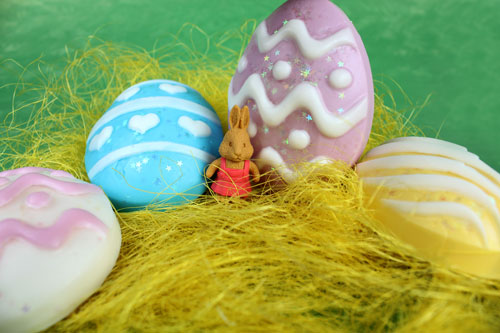
 PS – Did you recognize our little happy erasers in the scrub up top? Get your own Easter Bunnies here.
Easter Ducky Soap – Redux

In case you missed this adorable (adorable, adorable!) Easter soap project last year, the instructions are here.
Happy Easter!
These soaps were made with the Milky Way Chick’n’Egg mold, White Melt and Pour, Non-Bleeding Pink Liquid Color, Non-Bleeding Yellow Liquid color and Non-Bleeding Red Liquid Color.
Happy Easter Soaps!

Tutorial for making these happy soaps is here.
Easter Soap Project
 Tomorrow is the earliest Easter in 95 years. You can buy the scrapbook page on the left from CiaDesigns here. If you are casting about for some soap ideas to hide for the kiddies, or have on display to amaze and delight your guests, Soap Queen has just the thing for you.
This project will take about 30 minutes of total soaping time, broken up into two sessions.
First, gather your supplies. For this project, I used:
White Melt and Pour
Non-Bleeding (Pink & Blue) Colorant
Clear Soap
Lilac Fragrance
Labcolor Aqua
Milky Way Square mold
You’ll need the following equipment:
Spoon
Pyrex or heat safe melting glass
Cheese Grater
Plastic Dropper
Step One: Make the Shreds
Melt 4 ounces of white melt and pour in the microwave. Carefully drop in 1 to 3 drops of non bleeding color. I used Non-Bleeding Pink but you can use any color, so long as it is non-bleeding. Scent this 4 ounces of shred base heavily with fragrance. A “heavy” dose of fragrance is .2 ounces in 4 ounces of soap.
Step Two: Wait & Shred
Once the Shred Soap has set up fully, using the small end of the cheese grater, grate the soap into small, little shreds.
 Step Three: Anchor the happy chick or plastic egg or Easter Themed item
World Market carries the little chick I used. They have a World Market in almost every state so you can rush out and buy some little cheep cheeps for your soap project. If you don’t have a cute little furry animal, it’s okay. A nicely decorated plastic egg would look equally fetching in your mound of soapy shreds.
Melt clear soap in the microwave, scent it and color it. I used Labcolor Aqua in the back soap and Non-Bleeding Blue in the front soap. Pour the mold half full. Anchor your item in the melted soap.

Step Four: Shower Object with Soap Shreds
Carefully sprinkle shredded soap around your object. The curls will soften and sink. Continue piling the soapy curls until you’re happy with the height of curls.
If you get too carried away building the mound of curls, take a dropperfull of clear, melted soap and make trails of clear soap into and on top of your curls. This will help glue the curls down into the soap.
One small obvious safety note, when you are showering with your Easter soap, consider pulling the plastic, sharp-edged objects out of your soap. The little feet in the bird will scratch you and your loved ones in a rather unattractive manner.
This entire project is very simple and could easily be done with children above the age of 4 with adult supervision.
Cut Out Soaps – Embedding
Day Two – Making Daisy Cut Outs
Day Three – Marbeling Option
Embedding soaps is best done with fresh soap. The more moist and glycerin laden that the soap is, the easier the embedded soap sticks in the soap without separating.
Embedding the Daisies
Step One: Melt clear melt and pour soap in the microwave on short bursts. Stir to ensure all the pieces are evenly melted.
Step Two: Fragrance the soap. Remember, yellow or orange fragrances are fine to use but may make greens and blue colors not show up as clearly as you want.

Step Three: Pour a thin layer of soap into the bottom of your basic shape mold. Make sure that the soap is not steaming. If you cannot easily put your finger in the soap without burning your finger, it’s not ready to be poured for embedding. This is what happens if you pour the clear soap too warm.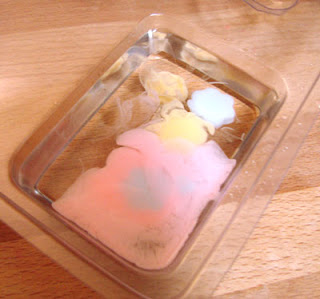
Step Four: Spray the surface of the clear soap with alcohol. Insert the daisy flower at an angle. If you place your flower down flat, air bubbles can easily be caught under the flower, marring the beautiful look of the soap. The angle allows the air bubbles to flow up the side of the flower.
Step Five: You can pour clear soap over the back of the embedded daisies and have a clear, see-through bar. Or, you can wait for the clear soap to harden (about 10 minutes) and move onto Step Six.
Step Six: After the clear soap layer is thick enough to support a second layer, spritz the clear soap with rubbing alcohol. Then, pour a contrasting color. Opaque soap backs are particularly nice to show contrasting spring colors.

Step Seven: Finish your second layer off with a final spritz of alcohol.
Check back tomorrow for final photos showing color and option variations.


