Have you ever been to the Bramble Berry Facebook fan page? If not, head over there right now and join the helpful, inspirational and soap enthused community. It’s a really fun place to share projects, troubleshoot recipes and get feedback on your soap related projects (from soaping fanatics). I’m on Facebook every single day as part of my job. How lucky am I? I get to connect with Bramble Berry’s customers and drool over beautiful soap projects every day. Life is good!
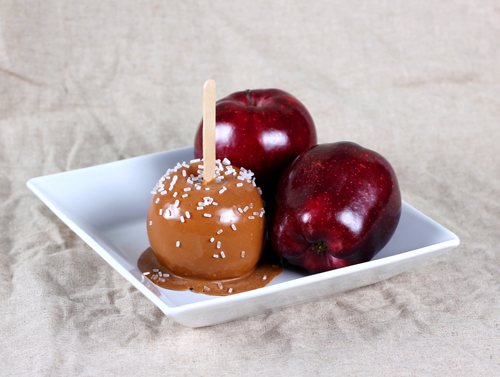
Caramel Apple Soap Tutorial
With Halloween “creeping” up on us, I’ve been thinking I should get a head start on my Halloween gifts. These Caramel Apple Soaps look and smell delicious. I felt like I was making real caramel apples! Let these be your Fall hostess gifts this year whether it be a Halloween Party or just a fun get together with your friends. I think these would be really adorable molded from little crab apples to make mini guest-size caramel apple soaps, too.
Back to School Mash-Up
As summer comes to an end, it’s time to get the kids ready for school (“Already?!” Awwwww Mo-oom!“) Make a good impression on the teacher with the gift of handmade soap! Or just have fun making soap with the kids. Here are some favorite back to school projects compiled from the Soap Queen Blog. Enjoy!
See the bottle of glue in the upper left picture? You guess it. It’s really soap!
Shout Out and Fall S.O.A.P. Reminder
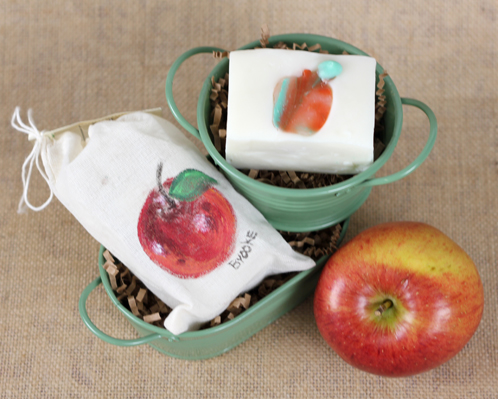
Soap Shout Out! These darling and detailed apple soaps were sent in for the last Bramble Berry Soap Swap. They were scented with a yummy apple fragrance and packaged in a hand painted muslin bags. And keep in mind that she sent in 24 of these soaps…that’s 24 hand painted bags and 24 super detailed apple soaps. Now that’s what I call attention to detail. Get your own Garden of Eden Apple Soap at Her Best Apple. P.S. We’ll be doing another Bramble Berry Soap Swap after the holiday season so you have time to start brainstorming your next project!
Foaming Bath Whip Frosting
Recipe
1 Cup Foaming Bath Whip
1 Cup Clear Melt and Pour
1 Tablespoon Liquid Glycerin
3 Tablespoons Meringue Powder
7 ml Clementine Cupcake Fragrance Oil
We tested and tried many recipes before settling on this one. Here are a few key characteristics of this recipe:
- Hardens up and could easily be packaged.
- Easy to frost the cupcakes.
- Have roughly 5 minutes to work with it
Get everything you need for the frosting in the click of a button!
DIY Soapy Confetti: Soapylove E-Zine
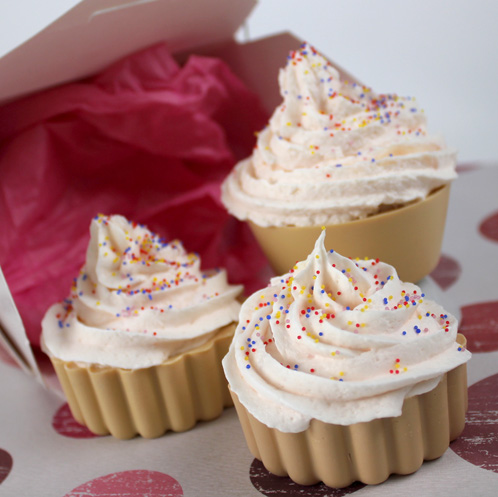
Feast your eyes on a few of the projects in the new Soapylove E-Zine for Spring 2011.
Get the newest edition here!
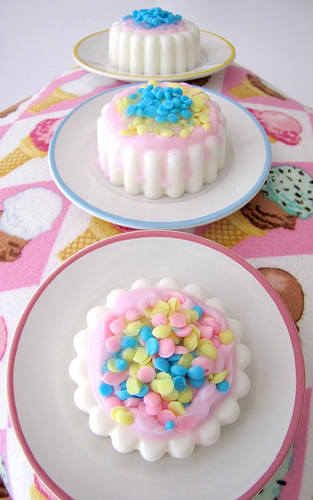
Soap Sprinkles: Make your own!
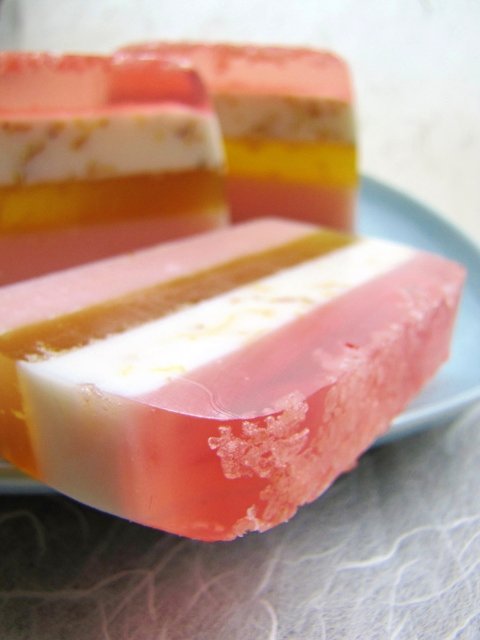
Salty Stripes: Using salt in melt and pour.
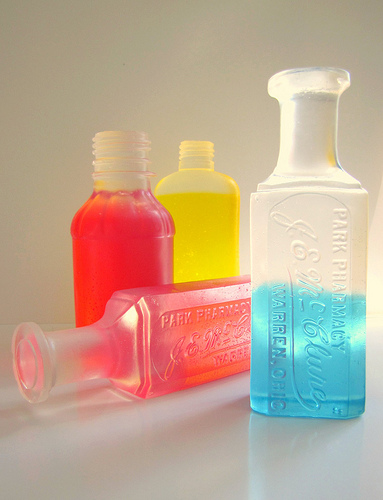
Bottle Soaps: You won’t believe how Debbie created this technique!
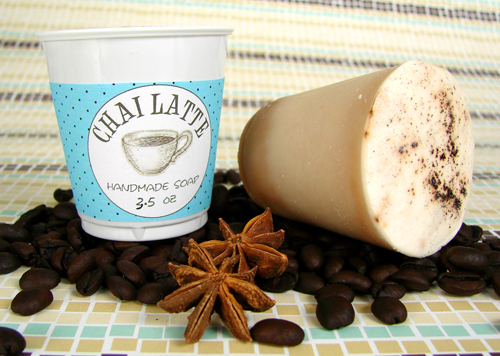
In other (off topic yet amazing) news, check the Bella Lucce Blog to win a trip to Miami to attend the Handcrafted Soapmakers Guild Conference! Yes, you read that correctly. Lela from Bella Lucce is throwing one heck of a contest to win some sunny skies and soapy inspiration. Read the contest details here!
Chai Latte Love (CP Soap Tutorial)
Peppermint Bark Soap for the Holidays
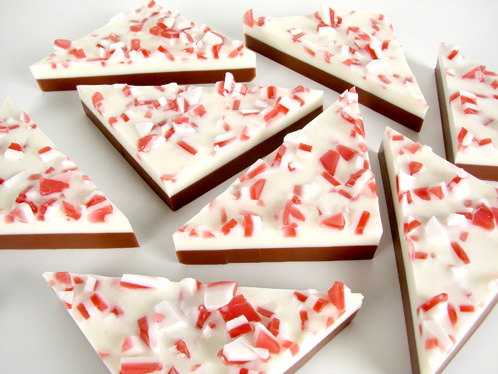
It’s time to officially kick off the holiday season with our first Christmas tutorial of the year! Keep it clean this holiday with delicious smelling and realistic looking Peppermint Bark Soap.
- White Melt and Pour
- Clear Melt and Pour
- Goat Milk Melt and Pour
- Dark Rich Chocolate Fragrance Oil
- Peppermint 2nd Distillation Essential Oil
- Perfect Red Color Block
- Brick Red Oxide
- Liquid Brown Oxide
- Liquid Black Oxide
- Melt 5 ounces of white soap base and pour it into the silicone tray mold and let cool. Then melt 5 ounces of clear soap base and mix in Perfect Red Color Block and Brick Red Oxide (2 parts Perfect Red and 1 part Brick Red Oxide makes a perfect candy cane red). Pour the red soap on top of the white soap and let cool. Make a slurry with your red oxide by mixing it with a little rubbing alcohol before adding it to your soap. This will eliminate speckles.
- Unmold the soap and cut into small, irregular pieces. These are going to be the peppermint crumbles on top so uneven cuts make them look super realistic.
- Melt 16 ounces of clear soap and mix in ½ ounce of (delicious) Dark Rich Chocolate Fragrance Oil. To make the realistic chocolaty color, combine Liquid Brown Oxide with a skosh of Liquid Black Oxide. Let cool.
- Melt 16 ounces of white Goat Milk soap base and mix in ½ ounce of Peppermint 2nd Distillation Essential Oil. Let cool to 130 degrees, spritz the “chocolate” layer with rubbing alcohol and pour about 12-13 ounces of the goat milk soap, saving 3-4 ounces (you can totally eyeball the amount, just make sure to save a little bit).
- Once the soap has cooled, remelt the remaining 3-4 ounces of goat milk soap base to 130 degrees. Start spritzing your “peppermint” pieces with rubbing alcohol and get ready to sprinkle them on top of the final layer of soap. Spritz the top layer of soap and pour the remaining 3-4 ounces of goat milk soap then sprinkle on your “crushed candy cane” garnish.
- Once the soap has cooled, cut the soap into triangles and trick your friends into taking a bite of delicious Chocolate Peppermint Bark.
My Kitchen to Yours
Our Kitchen Is Your Kitchen is a local cupcake shop located in Barkley Village in Bellingham, Washington. They heard the word on the street that I adore cupcakes (so true). So they hand delivered some samples to our retail store, Otion. That is some smart marketing, folks! We just placed an order for our all staff meeting last week. They were moist, delicious and gone in 30 seconds! Aren’t they cute? They were also pink for Breast Cancer Awareness Month.
Strawberry Pie Soap Tutorial
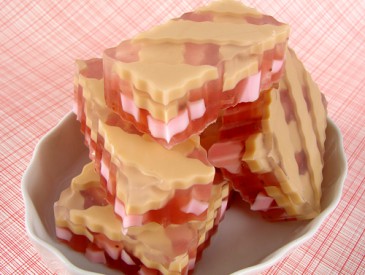
For those of you who missed Soap Weekend Intensive 2010, here’s an exclusive peek at one of the creative projects that was taught by Erin Pikor, of Naiad Soap Arts – Summer Strawberry Pie!
Ingredients
FIVE: With your remaining 12 ounces of clear soap add Merlot Mica and Strawberry Seeds. Mix well then scent with a blend of Strawberry and Almond Biscotti fragrance (we used 4 parts Strawberry and 1 part Almond Biscotti but get creative and use any ratio that you want).
A big thank you to Erin for teaching this fabulous class and allowing us to blog her fabulously delicious project!
- White Melt & Pour Soap Base
- Clear Melt & Pour Soap Base
- Perfect Red Color Block
- Merlot Mica
- Liquid Yellow Oxide
- Liquid Brown Oxide
- Strawberry Seeds
- Strawberry Fragrance oil
- Almond Biscotti Fragrance oil
- Tools
- Silicone Brownie Pan
- Crinkle Cutter
- Daisy Cookie Cutter
- To create the “strawberries” for our pie, make a deep pink color with 8 oz white m&p soap base and the Perfect Red Color Block. Mix well and pour the soap into the silicone tray mold. Once the soap is set-up, remove from the mold and cut the soap into small, irregular chunks with the crinkle cutter. Set the pink soap chunks aside for use later.
- Now it’s time to make our “pie crust”. For a warm toasty crust color, melt 8 oz. white m&p soap base and mix in 6 to 8 drops liquid yellow oxide, and 2 to 3 drops liquid brown oxide. Mix well and pour the soap into the silicone tray mold. Let cool and remove the soap from the tray mold. Use your crinkle cutter to cut the soap into diagonal strips and set aside.
- Before we start embedding, lay out your strips (on a clean cutting surface) in a criss cross lattice pattern. This is is how we’re going to embed them in the soap.
- Melt 16 ounces clear m&p soap and cool to 120 degrees. Pour a shallow layer into the brownie pan and work quickly to layer in your first layer of toasty strips, being sure to spray frequently with rubbing alcohol. Pour another thin layer of clear soap and add the rest of your strips in the opposite direction, making a criss-cross pattern. You only end up using about 4 ounces of the soap.
- With your remaining 12 ounces of clear soap add Merlot Mica and Strawberry Seeds. Mix well then scent with a blend of Strawberry and Almond Biscotti fragrance (we used 4 parts Strawberry and 1 part Almond Biscotti but get creative and use any ratio that you want).
- Spray the lattice with rubbing alcohol and pour half of your Strawberry soap. Then generously sprinkle your pink soap chunks in (spraying everything furiously with rubbing alcohol). Then pour the remaining strawberry soap over the top. It’s o.k. if a few pieces are sticking out.
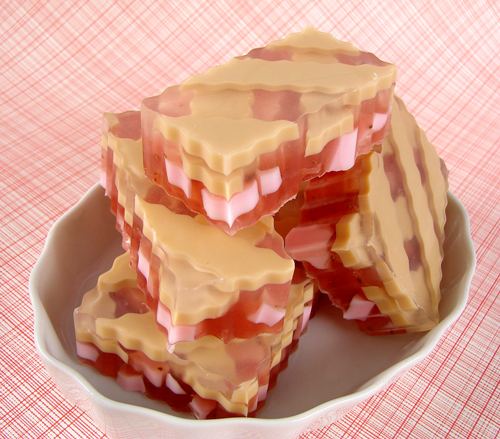
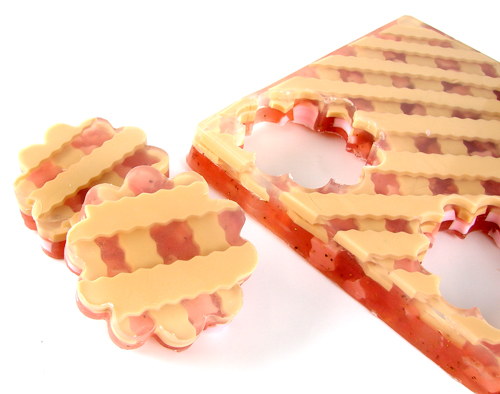
- Once your soap is completely set-up, pop out of the mold and cut into little pieces with the daisy cutter. Or use your crinkle cutter to cut into rectangles like the picture at the top. Hurrah! Cute soap!
Don’t Miss Out!
Learn to make this adorable soap project (designed by Erin Pikor of Naiad Soap Arts) in our email Newsletter that is going out in waves tomorrow morning and will send throughout the day. Do you want to get a sneak peak of how to make this soapy fruit tart concoction? Make sure you’re signed up for the newsletter, your spam filter is set to love all things soap, and get ready to be excited by how easy the project is to make (once you know the secret!).
If you’re not signed up, you can (dare I say ‘should’?) sign up now it ships out first thing tomorrow. Sign up on the middle right of the Bramble Berry Home Page.
We had lots of great new molds and erasers show in the warehouse today. I can hardly wait to get them photographed and set up to sell. You are going to flip with how cute they are.
Epic Epicurean Eats
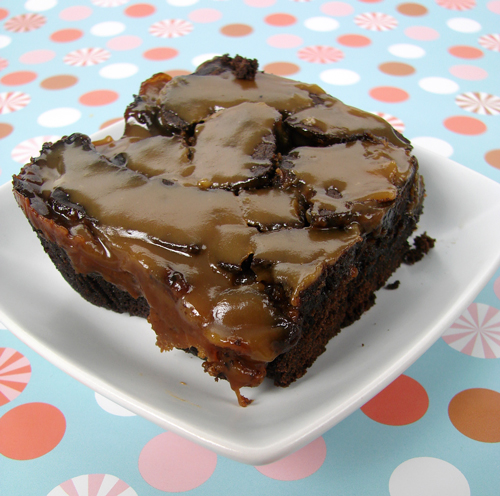
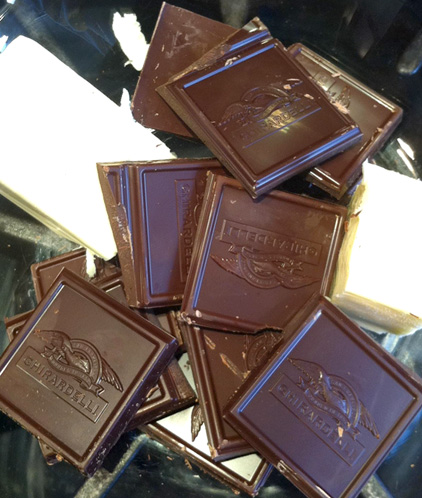
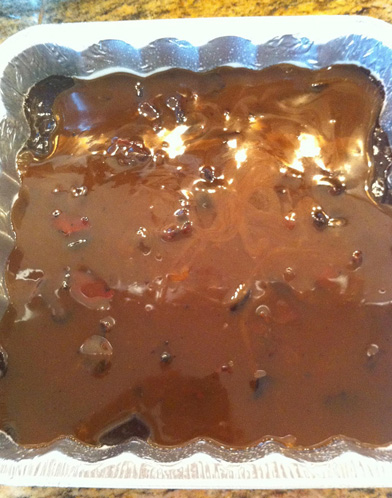
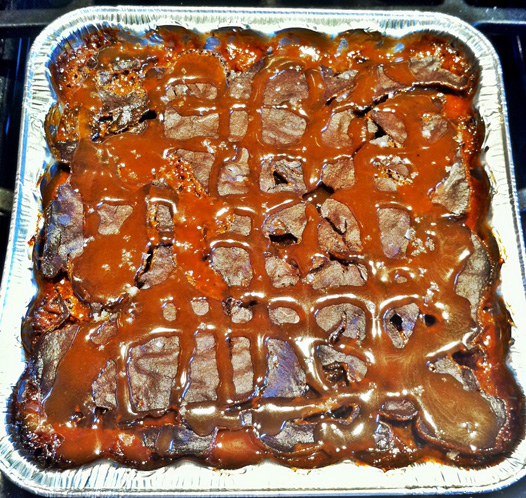
It’s another Bramble’versary. Amber, our resident marketing genius, designs our rotating home page photos, our newsletter, lays out our e-books and takes the best photographs of anyone on the team. She started out as my part time assistant five years ago but didn’t stay there long; it was apparent she had skills that exceeded what I needed in an assistant. I’ve never replaced that assistant position and Amber’s never looked back. We’re lucky to have her. And, for her five year Bramble’versary, I wanted to make something that was befitting of how complicated and multi-faceted her job is. Behold, the Salted Caramel Bacon Brownie.
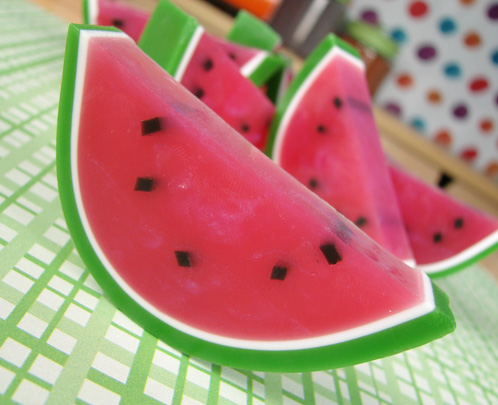
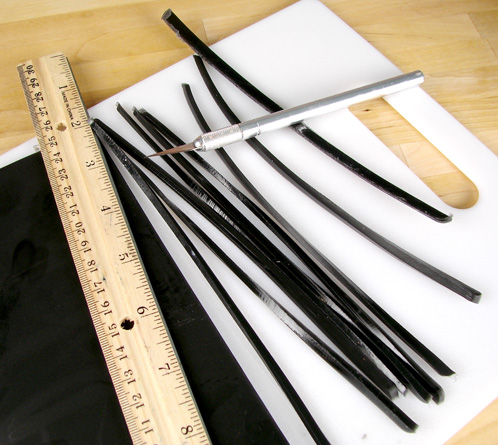
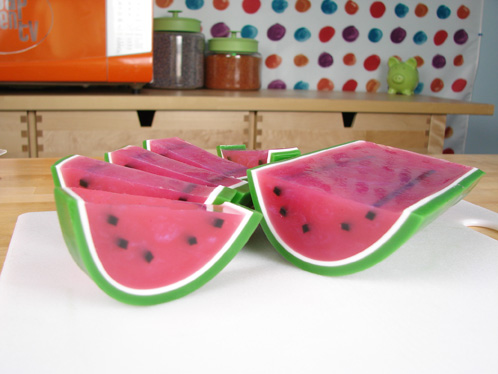
Juicy Watermelon Melt & Pour Soap Tutorial
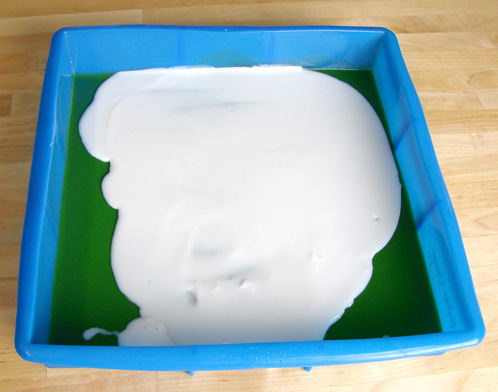
TWO: Now it’s time to make the “rind.” Melt 7 ounce of clear soap base and mix in .7 ounces of liquid glycerin and 6-7 drops of liquid green colorant. Mix well and pour the soap into the tray mold. Spritz with rubbing alcohol to eliminate air bubbles. Let cool.
Hint: The liquid glycerin adds some pliability to the soap so we can bend it with out breaking.
THREE: For the white layer of the rind, melt 3 ounces of white soap base and mix in .3 ounces of liquid glycerin. Let the white soap cool to 125-130 degrees, spritz the cooled green layer of soap and pour the white soap down the middle of your mold.
Tip: I wanted the white section of the rind to be super thin. Three ounces of soap isn’t quite enough to cover the entire bottom of the mold so make sure you pour the soap down the middle of the mold. It’s ok if the sides are not covered in white.
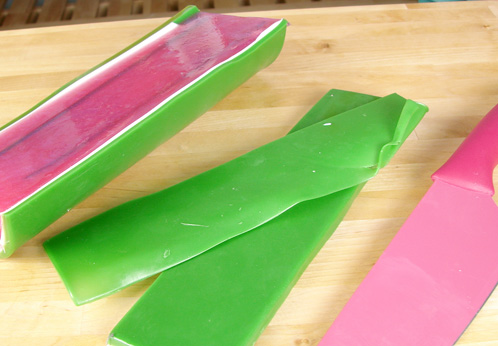
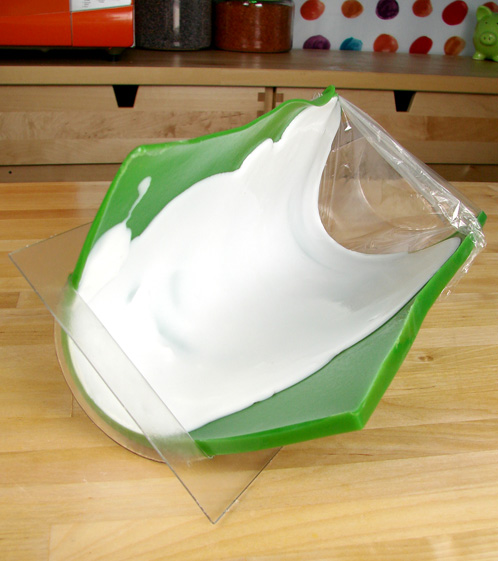
FOUR: It’s show time. Release the green and white soap from the mold, bend it down the middle and place it into the half round log mold. Make sure that the white soap is even on both sides. Scoot the soap to one end of the mold and press it down firmly. Seal the other end with plastic wrap. You can wrap some of the plastic underneath the soap if needed.
Tip: See how my mold is tipping a little bit? You’ll need to find something to prop up the mold. I used two small matching bowls.
Soapylove Tutorial: Sweet and Pretty Parfait Soaps!
There’s no doubt that desserts are enjoying a huge come back. Cupcakes, cookies, chocolate fountains… you name it. We love watching people make them on TV (thank you, Food Network!) and soaking in the incredible food photography all over the internet. And of course, we excitedly put that sweet tooth excitement into our soap creations, too! What’s better than enjoying a dessert with no calories or guilt?
Well here’s a dessert soap that is just perfect for a summer party favor, a show-stopping craft table display, or a sweet treat for your bathroom counter. Let’s get started, my friends!
Supplies:
1 lb Naturally Clear Soap Base
1 lb Bright White Soap Base
Jewelry Box Colorant Set
Candy Jar Fragrance Oil Set
Scalloped Round Mold
Knife, cutting board, spray bottle with rubbing alcohol
1. Melt 6 ounces of white soap base. Stir in 1 drop of Ruby Red and 5 drops of Sunshine Yellow. Stir well.
2. Pour a thin layer of peach soap into each cavity, about 1/8″ – 1/4″ thick. Allow to harden and unmold (a few minutes in the freezer will speed things up).
3. Cut each round in half, then cut a half circle.
4. Score “segment” lines into soap with tip of knife. Put soap scraps back into your cup and save for later.
5. Melt 12 oz of clear soap base. Color with 5 drops of Sunshine Yellow and 1 drop of Ruby Red. Add 1 teaspoon of any fragrance you like from the kit. I used a combination of Lemon and Tutti Fruity (if you have the Delectable Desserts fragrance set, Orange Sherbet would be an awesome choice as well). Stir well and fill molds 1/2 way with clear orange soap.
6. Let soap cool and get thick in the mold. Spray orange wedges with alcohol and carefully place them, scored sides down, overlapping in the soap. We want the soap to be cool and thick so the wedges don’t sink to the bottom. We’re trying to fake gravity here.
7. Once soap is hardened, spray soap with alcohol and just cover wedges with more clear orange soap. Allow to harden.
8. Reheat leftover opaque peach soap, allow to cool to 120 degrees. Spray set soap in molds with alcohol and top off with opaque soap. Allow to harden overnight and unmold.
TIPS!! Since the bottom layer and the orange wedges are colored with the same mixture as the clear soap, the color bleeding won’t show. In the strawberry version I used Bramble Berry’s non-bleeding red with some Ruby Red. If you make molded fruits like I did, you can “glue” them to the top of your soap with a drop of melted soap.
Have fun!!
Debbie, Soapylove
(Psst! The new Spring issue of Let’s Get Soapy is now available here at Bramble Berry!)