While soap is our first love (and soul mate!) we’re not solely about the soap here at Bramble Berry. This week there were several non-soapy tutorials and recipes, including a Blackberry, Lemon and Basil Sorbet. Full of sweet blackberries, tart lemon and a hint of earthy basil, this sorbet is an excellent way to stay cool during the hot summer months.
How to Make Soap on Soap Queen TV
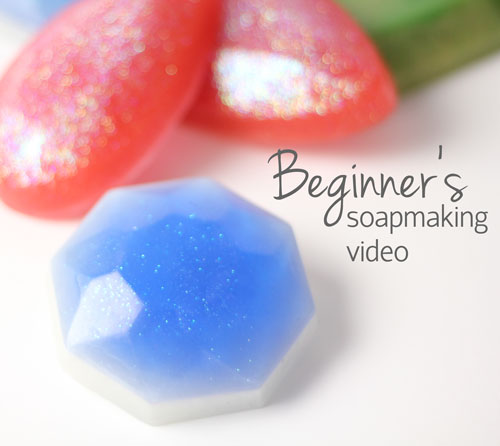
In this episode of Soap Queen TV, I get back to the basics of soap making. Melt & pour soap is the perfect place to start if you are just learning to make your own bath and beauty products. It’s safe, easy and very forgiving; if you make a mistake, just melt the soap and try again. Using the Three Gems Mold to create three different soap, this episode covers embedding, layers and swirling in melt and pour. Want to dive even further into melt and pour techniques? The Basics of Melt and Pour Series has you covered!
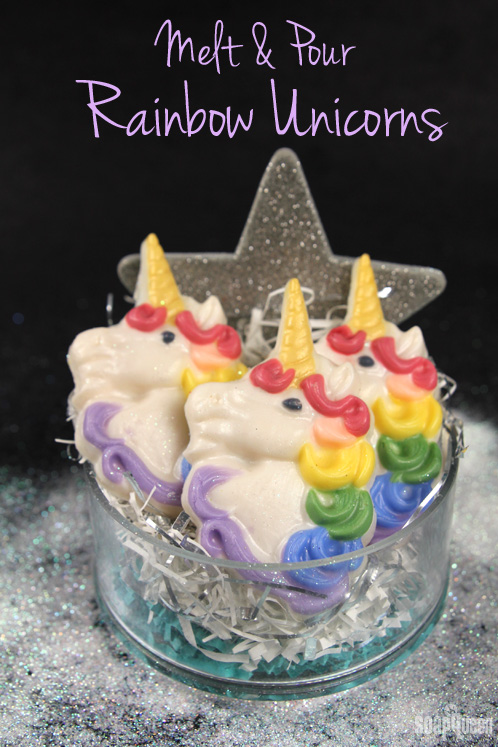
Rainbow Unicorn Melt and Pour
Did you know a group of unicorns is called a blessing? To bring a little magic to your shower or bath, create your own blessing of rainbow-hued unicorns using lots of color and a little sparkle. Because this project involves layers, small details and dispersing glitter, it’s a great project for those who want to test (or improve) their melt and pour soap skills.
Cherry Blossom Glitter Cold Process
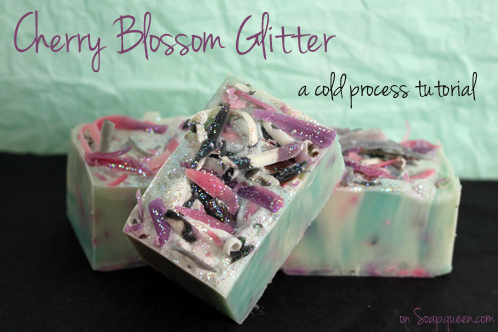
This is quick and easy cold process recipe doubles as a way to recycle scrap cold process bars. Simply shred bars with a cheese grater and you’ve got a great way to embellish freshly made cold process soap. This soap was fragranced with Cherry Blossom Fragrance Oil, which moves quickly (totally worth it); it smells fantastic in finished soap. If you finish with a little glitter, you’ve got one beautiful bar of soap!
Peacock Glitter Nail Polish
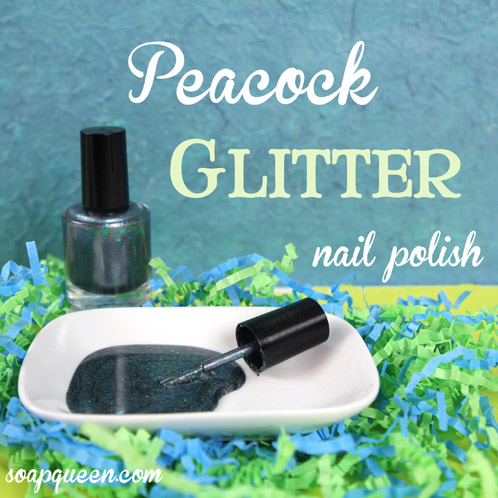
Strut your stuff with this fabulous Peacock Glitter Nail Polish. The polish is super simple to make, and in under a half an hour you can have your nails prepped and ready for a night out! The Vintage Grey Mica adds a touch of sophistication, and the subtlety of the green, blue and aqua-hued glitter make this a versatile polish for any occasion.
What You’ll Need:
3 Nail Polish Bottles (15 mL size)
Click here to add everything you need for this project to your Bramble Berry shopping cart!
Never made nail polish before? It’s easy! Check out this Soap Queen TV Nail Polish tutorial for a quick introduction to making your own polish.
ONE: In a well ventilated space, pour the nail polish base slowly into the bottle. Fill until just below the shoulder of the bottle to allow for mixing room. If you spill, use an old rag to wipe the neck of the bottle. If you forget to do this, your lid may ‘glue’ itself to the bottle. Please note that nail polish is extremely flammable and should never be customized near any open flame or extremely hot heat source (say, a stove or something like that).
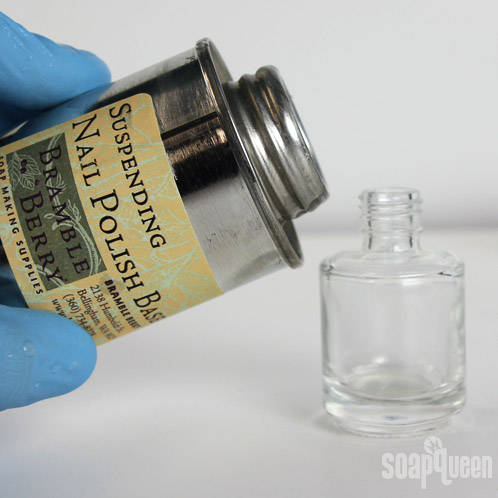
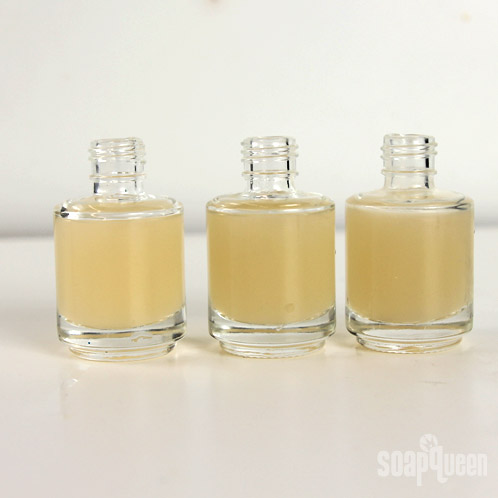
TWO: Drop a mixing ball into each nail polish bottle.
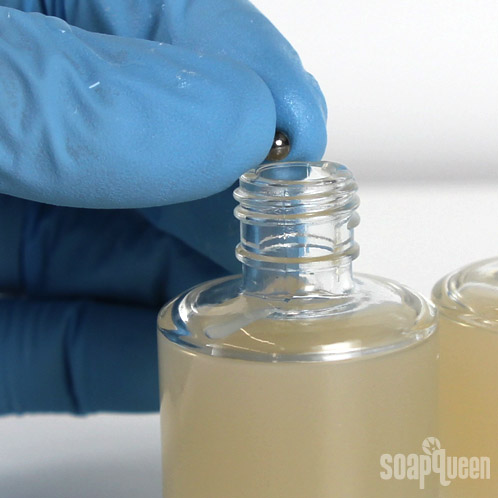
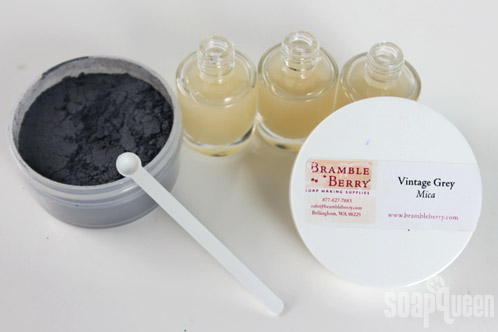
THREE: Using a mini scoop, add 4 – 5 scoops of colorant per bottle. This part can get messy because the mica is so fine, so consider pouring over a garbage can or an easily washable surface.
FOUR: Insert the brush into the bottle and twist the black cap over it until you hear a “click”. Once the cap is securely on the bottle, start shaking! Shake the bottle for 3 – 5 minutes to fully disperse the colorant into the nail polish base.
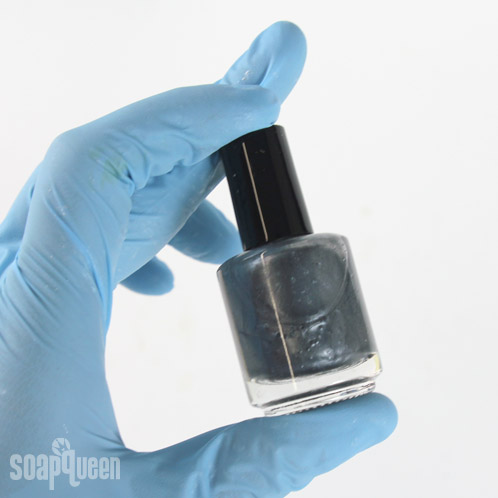
FIVE: When the colorant has been fully dispersed, add the Peacock Glitter. The amount of glitter is completely up to you, but we added about 10 – 12 scoops.
Tip: To avoid spilling glitter everywhere, consider using a Mini Funnel to channel the glitter directly into the bottle!
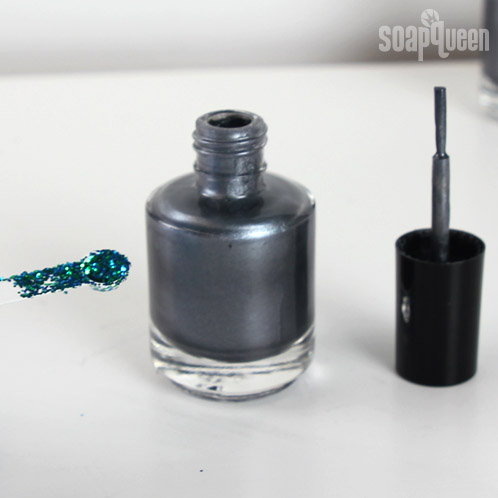
That’s it! You’re ready for a night out with perfectly peacock’ed nails.
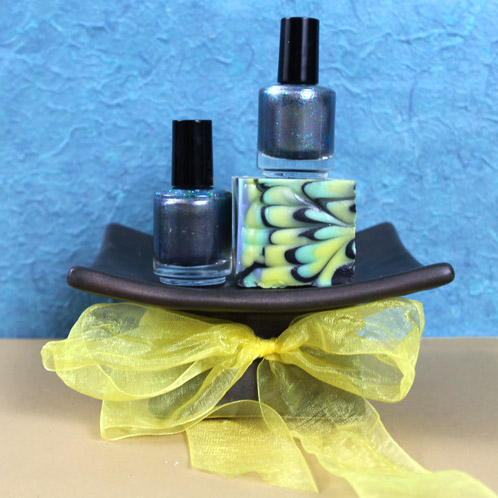
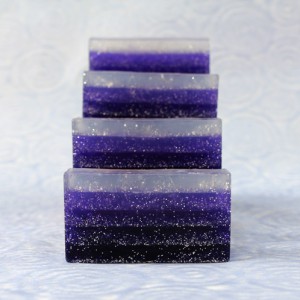
Violet Glitter Gradient Soap Tutorial
Remember how fun jelly sandals used to be? They may have fallen out of fashion for now, but with this glitter gradient tutorial we’re bringing that awesome jelly look back into style! This tutorial is a cross between the Green Machine Melt & Pour project and the Sunset Ombre Cold Process tutorial, with the added bonus of ample glitter (and who doesn’t love glitter?). This project gives a whole new meaning to the phrase “sparkly clean.”

What You’ll Need:
45 oz. Clear Melt & Pour Base
12 mL Easter Purple Lab Color
5 1/4 teaspoons Iridescent Glitter
12 mL Violet Fragrance Oil
2 – 3 Droppers
Click here to add everything you need for this project to your Bramble Berry shopping cart!
ONE: Cut the Clear Melt & Pour Base into small, about-equally-sized chunks and measure out 9 oz. each into five separate containers. Be sure the containers are microwave safe.
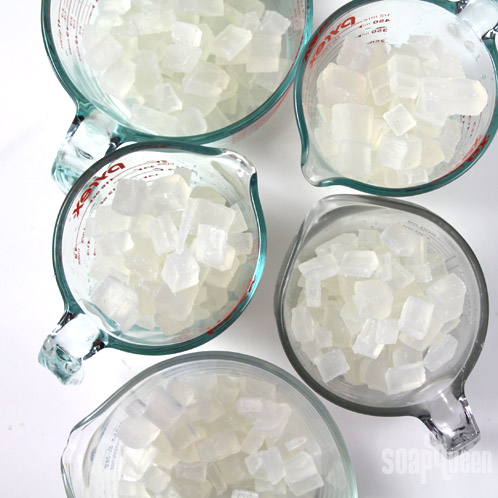
TWO: Melt one of the soap containers in the microwave on 30 second bursts, and then using a dropper, add 3 mL of Violet Fragrance Oil and mix well.
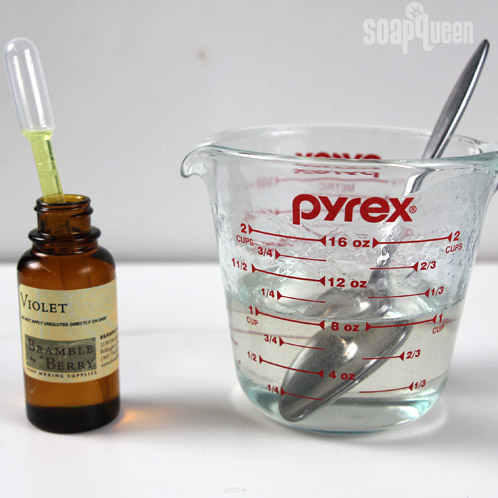
THREE: Using a second dropper, color the layer with 6 mL of diluted Easter Purple Lab Color. If you’ve never diluted Lab Colors before, check out this post before diving in.
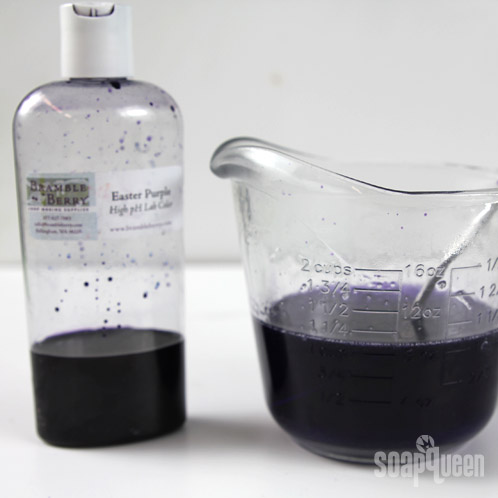
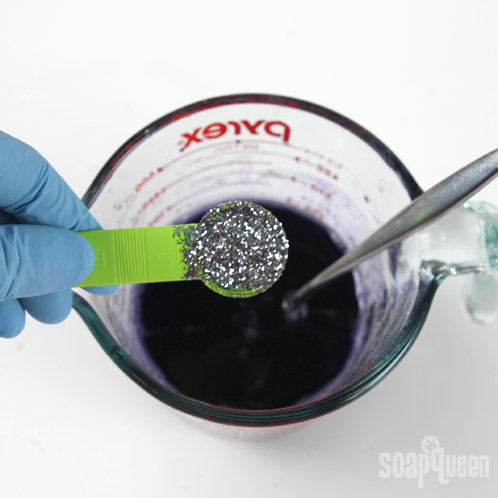
FOUR: Add 2 teaspoons of glitter and mix well, making sure the glitter, fragrance and Lab Color are fully incorporated into the soap.
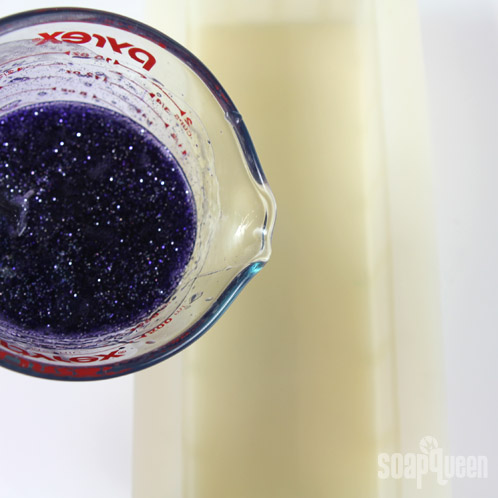
FIVE: Pour the soap into the mold and spray with Isopropyl Alcohol to disperse bubbles.
SIX: Melt a second soap container in the microwave on 30 second bursts. Fragrance with 3 mL of Violet Fragrance Oil and add 3 mL of diluted Easter Purple Lab Color.
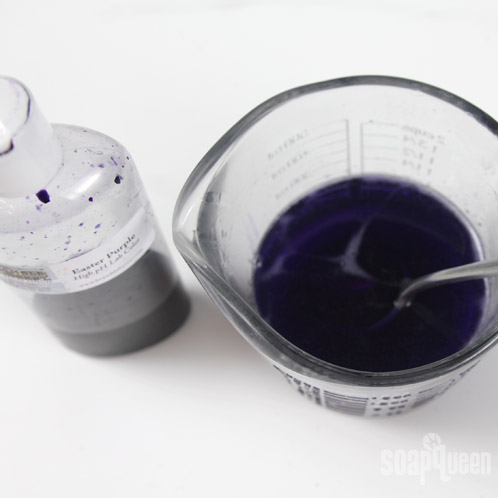
SEVEN: Add 1.5 teaspoons of glitter and mix well, making sure the glitter, fragrance and Lab Color are fully incorporated into the soap.
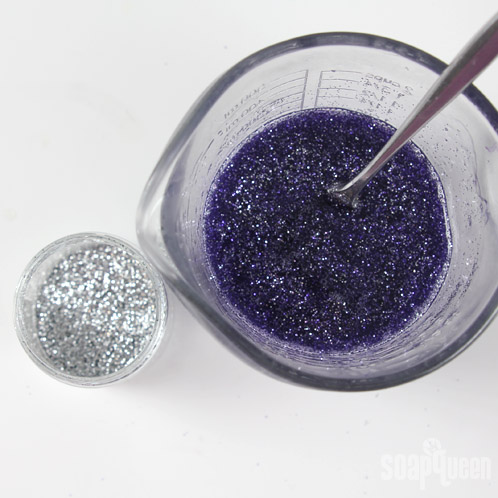
EIGHT: Spray the first layer liberally with Isopropyl Alcohol. This will help the second layer of soap adhere and prevent separation between the layers. When the first layer has formed a thick skin and when the second layer has cooled to 130 degrees or below, pour the second layer into the mold. Spray with Isopropyl Alcohol to disperse bubbles.
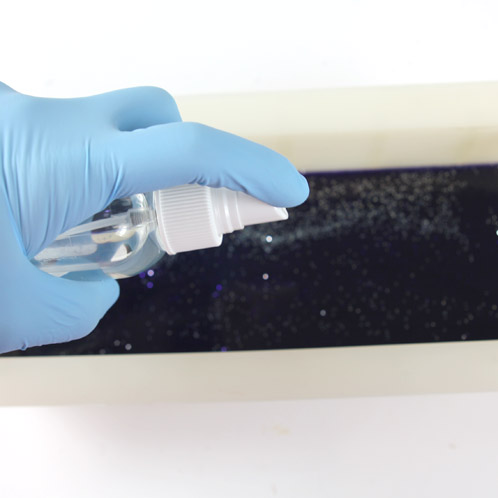
NINE: Melt a third soap container in the microwave on 30 second bursts. Fragrance with 3 mL of Violet Fragrance Oil, color with 2 mL of diluted Easter Purple Lab Color and add 1 teaspoon of glitter.
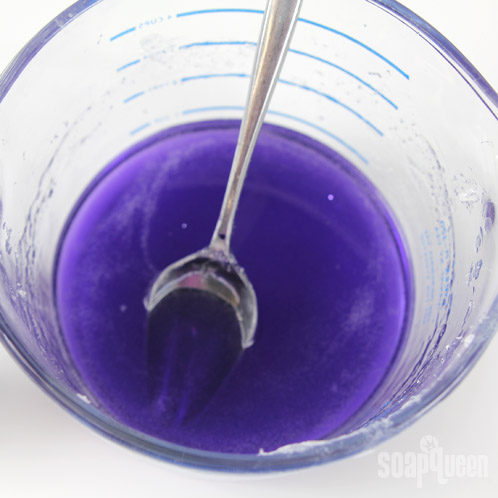
TEN: Spray the second layer liberally with Isopropyl Alcohol. This will help the third layer of soap adhere and prevent separation between the layers. When the second layer has formed a thick skin and when the third layer has cooled to 130 degrees or below, pour the third layer into the mold. Spray with Isopropyl Alcohol to disperse bubbles.
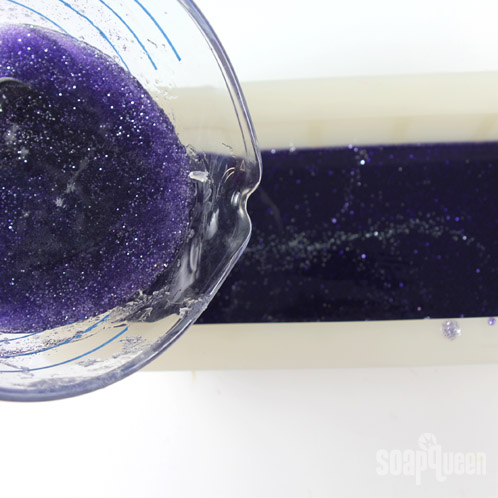
ELEVEN: Melt a fourth soap container in the microwave on 30 second bursts. Fragrance with 3 mL of Violet Fragrance Oil, color with 1 mL of diluted Easter Purple Lab Color and add 1/2 teaspoon of glitter. Spray the third layer liberally with Isopropyl Alcohol. This will help the fourth layer of soap adhere and prevent separation between the layers. When the third layer has formed a thick skin and when the fourth layer has cooled to 130 degrees or below, pour the fourth layer into the mold. Spray with Isopropyl Alcohol to disperse bubbles.
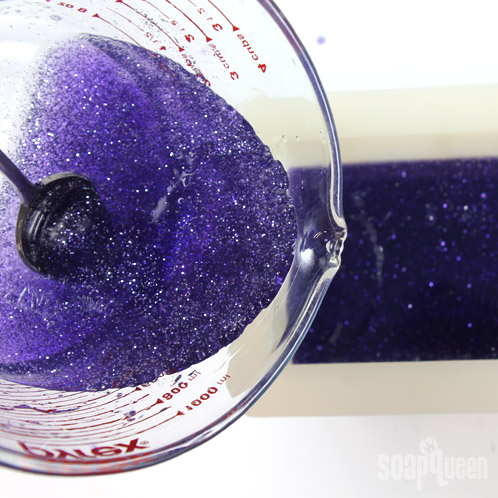
TWELVE: Melt the final soap container in the microwave on 30 second bursts. Because this layer needs to remain clear, do not add any Lab Color or fragrance oil. Add 1/4 teaspoon of glitter. Spray the fourth layer liberally with Isopropyl Alcohol. This will help the final layer of soap adhere and prevent separation between the layers. When the fourth layer has formed a thick skin and when the final layer has cooled to 130 degrees or below, pour the clear layer into the mold. Spray with Isopropyl Alcohol to disperse bubbles.
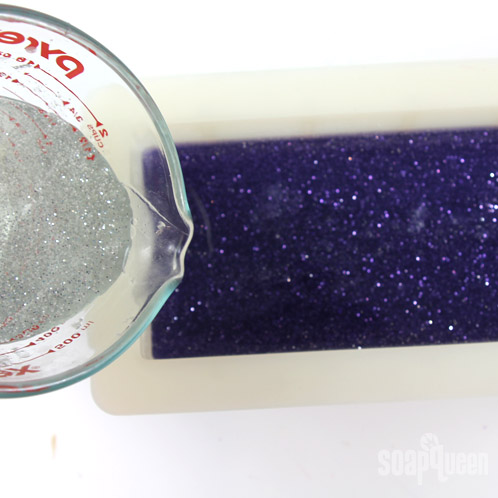
Wait 24 – 48 hours for the soap to harden before enjoying your glitter gradient soap!
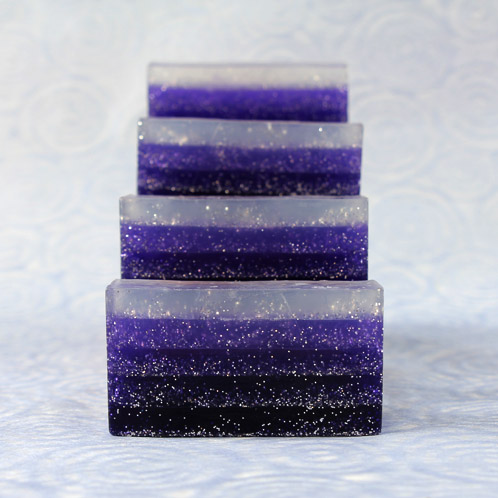
- 45 oz. Clear Melt & Pour Base
- 12 mL Easter Purple Lab Color
- 5¼ teaspoons Iridescent Glitter
- 12 mL Violet Fragrance Oil
- 10" Silicone Loaf Mold
- 2 - 3 Droppers
- Cut the Clear Melt & Pour Base into small, about-equally-sized chunks and measure out 9 oz. each into five separate containers. Be sure the containers are microwave safe.
- Melt one of the soap containers in the microwave on 30 second bursts, and then using a dropper, add 3 mL of Violet Fragrance Oil and mix well.
- Using a second dropper, color the layer with 6 mL of diluted Easter Purple Lab Color. If you’ve never diluted Lab Colors before, check out this post before diving in.
- Add 2 teaspoons of glitter and mix well, making sure the glitter, fragrance and Lab Color are fully incorporated into the soap.
- Pour the soap into the mold and spray with Isopropyl Alcohol to disperse bubbles.
- Melt a second soap container in the microwave on 30 second bursts. Fragrance with 3 mL of Violet Fragrance Oil and add 3 mL of diluted Easter Purple Lab Color.
- Add 1.5 teaspoons of glitter and mix well, making sure the glitter, fragrance and Lab Color are fully incorporated into the soap.
- Spray the first layer liberally with Isopropyl Alcohol. This will help the second layer of soap adhere and prevent separation between the layers. When the first layer has formed a thick skin and when the second layer has cooled to 130 degrees or below, pour the second layer into the mold. Spray with Isopropyl Alcohol to disperse bubbles.
- Melt a third soap container in the microwave on 30 second bursts. Fragrance with 3 mL of Violet Fragrance Oil, color with 2 mL of diluted Easter Purple Lab Color and add 1 teaspoon of glitter.
- Spray the second layer liberally with Isopropyl Alcohol. This will help the third layer of soap adhere and prevent separation between the layers. When the second layer has formed a thick skin and when the third layer has cooled to 130 degrees or below, pour the third layer into the mold. Spray with Isopropyl Alcohol to disperse bubbles.
- Melt a fourth soap container in the microwave on 30 second bursts. Fragrance with 3 mL of Violet Fragrance Oil, color with 1 mL of diluted Easter Purple Lab Color and add ½ teaspoon of glitter. Spray the third layer liberally with Isopropyl Alcohol. This will help the fourth layer of soap adhere and prevent separation between the layers. When the third layer has formed a thick skin and when the fourth layer has cooled to 130 degrees or below, pour the fourth layer into the mold. Spray with Isopropyl Alcohol to disperse bubbles.
- Melt the final soap container in the microwave on 30 second bursts. Because this layer needs to remain clear, do not add any Lab Color or fragrance oil. Add ¼ teaspoon of glitter. Spray the fourth layer liberally with Isopropyl Alcohol. This will help the final layer of soap adhere and prevent separation between the layers. When the fourth layer has formed a thick skin and when the final layer has cooled to 130 degrees or below, pour the clear layer into the mold. Spray with Isopropyl Alcohol to disperse bubbles.
- Wait 24 – 48 hours for the soap to harden before enjoying your glitter gradient soap!
Sunday Night Spotlight: Glitters
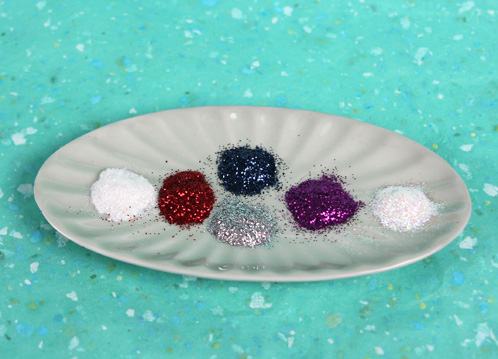
Another week has gone by and I’m getting closer and closer to meeting our little Bramble Girl (I can’t wait, less than three weeks!). In the meantime, I’ve been busy soaping and sewing up a storm and getting as much done as possible before she gets here. I’ve really enjoyed these product spotlights the past few weeks. Get ready to sparkle, because I’m talking glitter! =) Glitter can be used to decorate your M&P soaps, the top of CP soap and will add a sparkle and magic to just about any project. These glitters are not rated for use in eye or lip products (and they would be scratchy as all get-out), so be aware of that before you start a project.
Sparkle Power Bath Bomb Tutorial
Here’s a kid-friendly bath bomb tutorial guaranteed to make bath time tons of fun. It’s a spin off of the recent Hidden Color Bath Bomb tutorial, where a secret stash of super concentrated color appears once the bath bomb is activated in water. This time around, instead of color the secret stash is full of glitter! What a fun and unexpected treat for bath time adventures.

Recipe:
1 Cup Sodium Bicarbonate (Baking Soda)
1/2 Cup Citric Acid
1/2 Cup Corn Starch
1/2 Cup Epsom Salt
1.5 Tablespoons Avocado Oil
Click here to add everything you need for this project to your Bramble Berry shopping cart! [Read more…]
There’s a Sparkle in your Soap
Glittered Sparkle Soap Kit
This Christmas kit came just in time for last minute Christmas presents, hostess gifts or stocking stuffers! For just $29.99, get everything you need to make 8 dazzling and personalized soaps! Grab your kit HERE and check out the easy instructions below! Printing your homemade stencils: Download the PDF file that comes with the kit or choose your own Christmas design. Print the design on sticker labels. Allow the ink to dry then use your craft knife to cut out the design or lay the paper design over contact paper. Keep in mind that you will be able to use both the cut out and the silhouette for your stencil.
 ONE: Prepare your glitter. If you want a colored glitter check out the instructions on How to Color Glitter just by mixing in mica (yes, it’s really that simple).
TWO: Melt 3.5 ounces of clear melt and pour soap and mix in 1 ml of Sleigh Ride Fragrance Oil.
THREE: Stir in a couple drops of liquid colorant (either the red or blue) and pour the soap into 1 cavity of the Slim Rectangle Mold. We love the Slim Rectangle Mold because it holds 3.7 ounces and fits wonderfully into the palm of your hand. Allow the soap to cool for 3-4 hours.
Color Variation: Mix the red and blue together for a fun purple. Or combine the super green and Matte Yellow micas for a bright, lime green color. Don’t be afraid to get creative with this part!
 FOUR: Remove of the backing and adhere the cut-out sticker to your soap. Spray the top of the soap with hair spray to make sure the glitter adheres to the soap.
FIVE: Sprinkle the soap with your colored (or plain) glitter and let dry for at least 5 minutes. Do one solid color or an array of colors.
SIX: Once the glitter has dried onto the soap, dump the extra glitter on the soap into a container to use for your other soaps. Then, carefully peel off the backing and ooh and ahh over the sparkles and clean lines. Give it another finishing spritz with hair spray to make sure the glitter really sticks.
What I love about this project and kit is that it can change with the seasons so easily. Make a heart silhouette and you have Valentine soap, make a bunny silhouette and you have Easter soap. Get creative. This technique will give you holiday after holiday of sophisticated-looking soaps.
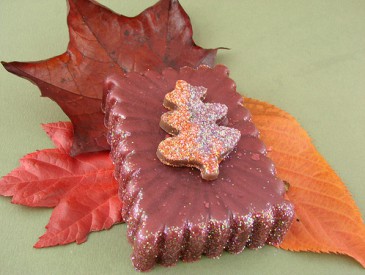
Glitter Cut Out Soap Tutorial
Here’s what you’ll need
Scalloped Rectangle Mold
NOTE: The mold shown in this tutorial has been discontinued. The kit now contains the 12 Cavity Rectangle Silicone Mold.
Wassail Fragrance Oil
Merlot Mica
Liquid Black Colorant
Liquid Brown
Clear Soap Base
Iridescent Glitter
Your Choice of Micas
Leaf PDF OR Leaf Cookie Cutters
Hair Spray
Craft Knife
 ONE: Melt 4 ounces of clear melt and pour soap and mix in 1 ml of Bramble Berry’s favorite new fragrance oil, Wassail. It smells like hot, spiced Christmas Punch and has notes of tangerine, juicy apple and orange zest spiced with ginger, cinnamon stick, nutmeg and clove. Are you drooling yet?
TWO: Stir in a couple drops of liquid black colorant and 1 mini scoop of Merlot Mica and pour the soap into 1 cavity of the scalloped rectangle mold. Allow the soap to cool for 4-6 hours
NOTE: The Scalloped Rectangle Mold has been discontinued. It has been substituted with the 12 Cavity Rectangle Silicone Mold.
Variation: OR stir in a mini scoop of Brick Red Oxide. Try mixing the oxide with a little rubbing alcohol before adding it to the soap. This will eliminate any clumping of the colorant.
 THREE: Melt 6 ounces of clear melt and pour soap and mix in 1.5 ml of Wassail fragrance oil.
FOUR: Stir in a couple drops of liquid brown colorant and pour the soap into the brownie pan tray mold. Allow the soap to cool for 20-30 minutes and pull the soap out of the mold.
FIVE: Now it’s time to make our cut outs and you have a big decision to make. Are you going to use a cookie cutter or a stencil? Below are both variations…
 Using a cookie cutter: Press your cookie cutter into the soap. Pull the cookie cutter out of the soap and pop out the soap piece. Then, smooth the edges with your finger.
 Using a Stencil: You can either use our PDF template or leaves you’ve collected. Cut the paper around the object and place it on the flat square of soap. Lightly cut the paper with your craft knife so it leaves an outline on the soap. Then, remove your paper and follow your original outline and cut all the way through the soap. To see this demonstrated, check out the Soap Queen TV episode on how to make monogram wedding favors.
 SIX: Spritz your cut out piece with hair spray and sprinkle glitter onto the piece of soap. (Did you miss the ‘How to color glitter’ post? Click here to review it and learn how to make all kinds of fun glitter colors.) The hair spray will help the glitter stick to the soap. Dump the excess glitter into a bowl for later use.
 SEVEN: Melt 1 ounce of clear melt and pour. Use a dropper and place a drop or two of melted soap in the center of your scalloped rectangle soap. Then place the glittered cut out on top of the melted soap and let cool (about 5 minutes).
 EIGHT: Give the soap a final spritz with hair spray to make sure your glitter sticks.
- Slim Broad Rectangle Mold
- Wassail Fragrance Oil
- Merlot Mica
- Liquid Black Colorant
- Liquid Brown
- Clear Soap Base
- Iridescent Glitter
- Your Choice of Micas
- Leaf PDF OR Leaf Cookie Cutters
- Hair Spray
- Craft Knife
- Melt 4 ounces of clear melt and pour soap and mix in 1 ml of Bramble Berry’s favorite new fragrance oil, Wassail. It smells like hot, spiced Christmas Punch and has notes of tangerine, juicy apple and orange zest spiced with ginger, cinnamon stick, nutmeg and clove.
- Stir in a couple drops of liquid black colorant and 1 mini scoop of Merlot Mica and pour the soap into 1 cavity of the scalloped rectangle mold. Allow the soap to cool for 4-6 hours. OR stir in a mini scoop of Brick Red Oxide. Try mixing the oxide with a little rubbing alcohol before adding it to the soap. This will eliminate any clumping of the colorant.
- Melt 6 ounces of clear melt and pour soap and mix in 1.5 ml of Wassail fragrance oil.
- Stir in a couple drops of liquid brown colorant and pour the soap into the brownie pan tray mold. Allow the soap to cool for 20-30 minutes and pull the soap out of the mold.
- Now it’s time to make our cut outs and you have a big decision to make. Are you going to use a cookie cutter or a stencil? Below are both variations.
- Using a cookie cutter: Press your cookie cutter into the soap. Pull the cookie cutter out of the soap and pop out the soap piece. Then, smooth the edges with your finger.
- Using a Stencil: You can either use our PDF template or leaves you’ve collected. Cut the paper around the object and place it on the flat square of soap. Lightly cut the paper with your craft knife so it leaves an outline on the soap. Then, remove your paper and follow your original outline and cut all the way through the soap. To see this demonstrated, check out the Soap Queen TV episode on how to make monogram wedding favors.
- Spritz your cut out piece with hair spray and sprinkle glitter onto the piece of soap. (Did you miss the ‘How to color glitter’ post? Click here to review it and learn how to make all kinds of fun glitter colors.) The hair spray will help the glitter stick to the soap. Dump the excess glitter into a bowl for later use.
- Melt 1 ounce of clear melt and pour. Use a dropper and place a drop or two of melted soap in the center of your scalloped rectangle soap. Then place the glittered cut out on top of the melted soap and let cool (about 5 minutes).
- Give the soap a final spritz with hair spray to make sure your glitter sticks.
Stenciled Glitter Soap

Here’s what you’ll need to make this versatile, easy-to-make soap:
Cranberry Fig Fragrance Oil
Merlot Mica
Liquid Black Colorant
Clear Soap Base
Leaf PDF
Hair Spray
Craft Knife
Printing your homemade stencils: Download the PDF file here or choose your own Fall design. Print the design on sticker labels. Allow the ink to dry then use your craft knife to cut out the design or lay the paper design over contact paper. Keep in mind that you will be able to use both the cut out and the silhouette for your stencil.
ONE: Melt 4 ounces of clear melt and pour soap and mix in 1 ml of your favorite fall fragrance oil (we used Cranberry Fig).
TWO: Stir in a couple drops of liquid black colorant and 1 mini scoop of Merlot Mica and pour the soap into 1 cavity of the scalloped rectangle mold. Allow the soap to cool for 3-4 hours. You can use any combination of colors so long as they are dark enough to let the glitter really shine.
(Note: The Scalloped Rectangle Mold has been discontinued. It has been replaced with the 12 Cavity Rectangle Silicone Mold.)
 Color Variation: OR stir in a mini scoop of Brick Red Oxide. Try mixing the oxide with a little rubbing alcohol before adding it to the soap. This will eliminate any clumping of the colorant.
 THREE: Cut out your leaf design with a craft knife. Then remove of the backing and adhere the sticker to your soap.
FOUR: Spray the top of the soap with hair spray to make sure the glitter adheres to the soap.
FIVE: Sprinkle the soap with your colored glitter and let dry for at least 5 minutes. Do one solid color or an array of colors like I did. Get creative with this part.
SIX: Once the glitter has dried onto the soap, dump the extra glitter on the soap into a container to use for another soap or project. Then, carefully peel off the backing and marvel at your creativity. Give it another spritz with hair spray to make sure the glitter really sticks.
Don’t Miss Out – Glitter up Your Soap
Want to learn to make this Autumnal glittery soap? Then sign-up for the Bramble Berry newsletter now!
 This delightful project is the main feature of our soon to be sent email newsletter. To sign-up click on this link and fill out the brief form. Once you sign-up you will receive an email that you must respond to before you are officially subscribed to our newsletter. This is called a ‘double Opt-in’ and all it does is make extra sure that you really do want to receive our email – because we would never want to send our email to someone who didn’t really want it!
Then be dazzled when you open your email tomorrow morning. If you’re already subscribed, look for the email in the wee hours of the morning. Just like presents under the tree, it should be waiting for you when you wake up.
Painted Ornament Project
The first part of this tutorial was how to create glittery Ornament soaps. Now I’m going to show you how to add details with your own homemade soap paint. I wouldn’t recommend trying to paint over the glitter, you should choose one technique or the other.
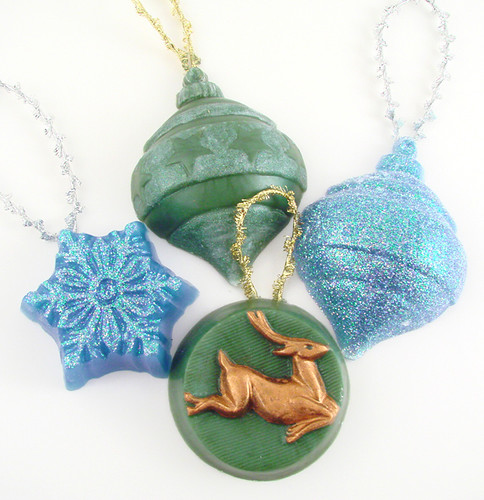 Soap paint recipe:
2 parts Liquid Soap
1 partClear Melt & Pour Base
1 part Rubbing Alcohol
1 part Mica or Oxide
This recipe is in parts so you can make as much or as little as you like. We used 1/2 teaspoon to measure out our paint. So our recipe was 1/2 tsp. Clear M&P, Rubbing alcohol, and colorant and 1 tsp. liquid soap.
tools:
small heat proof container
paint brush
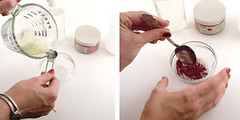 Step 1: Measure out the liquid soap and warm it up briefly in the microwave.
Step 2: Add the rubbing alcohol and colorant and stir to mix well.
Step 3: Add the melted clear melt & pour soap base and stir well.
Hint: If the soap starts to cool down and solidify you can pop it in the microwave to warm it up and make it paintable again. If it gets goopy, mix in a little more rubbing alcohol to help smooth it out.
Step 4: Carefully paint your soap ornament. If you paint an area where you don’t want paint, use the carving tool from our melt and pour tool kit to clean it off.
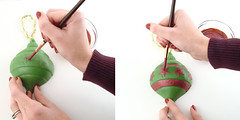 Another Hint: If the paint doesn’t want to stick to your soap, try dusting a little cornstarch over the soap before painting. This gives the soap something to grab onto.
Allow the paint to dry for a day before wrapping in plastic or hanging on your tree. It’s a heavy soap, so pick a sturdy branch. When guests come to visit over the holidays, let them pick their own useful soapy ornament to take home. They’ll think good thoughts about you every time they use their Christmas surprise.

