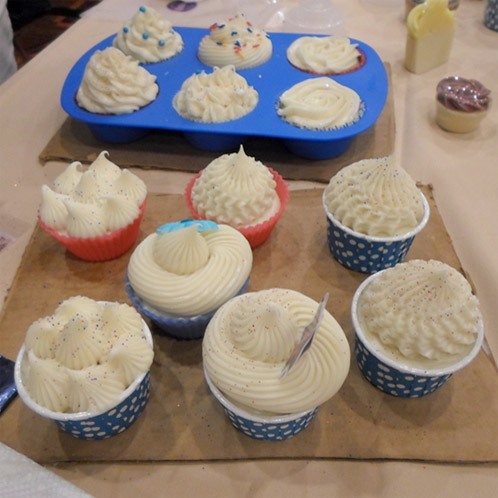
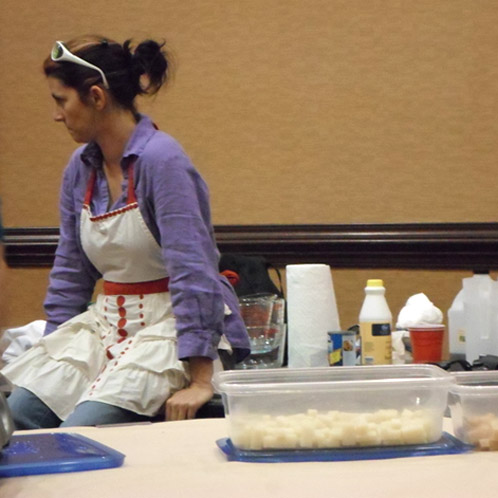
Cupcakes! They are everywhere (and have been for almost a decade, despite many predictions of the “next big thing” dessert being just around the corner). We love the little tasty morsels of sugar, cream and butter too. With the cupcake craze in full swing, of course, soap cupcakes are a hit. Ruth Esteves gave a wonderful presentation demonstrating how to make soap cupcakes at the Handcrafted Soap and Cosmetic Guild Conference. She made it look easy and fun.

To get a great frosting on your cupcake soaps, you need to have a fairly thick soap batter. With that in mind, I would suggest Bramble Berry’s Basic Quick Mix Ruth used about 3 pounds of batter to make 12 cupcakes (with a little left over). If you use the 33 ounce size package of Bramble Berry’s Basic Quick Mix, you should get around 8 cupcakes with a little left over (unless you go sky-high with the frosting, then you may not get as many).
Before I go any further, here’s a picture of Ruth with the newly appointed President of the Handmade Soap and Cosmetic Guild. Her name is Feleciai Favroth. She is going to do a great job!

Before beginning to make soap, be sure to suit up for safety, just like Ruth did. Ruth began by adding her water/lye mixture to the oils. She used twice as much water as lye. Next, she added fragrance oil that she knew wouldn’t discolor the soap. She blended to bring the soap to a medium trace.

Then she poured the bottoms of the cupcakes.

She showed us various molds that can be used for the base of the cupcakes.

I love the idea of using the nut cups. They stand alone, are lined, and make pretty packaging. Ruth colored the remaining soap base that was then used to frost the cupcakes.

While we waited for the frosting to thicken up a bit, Ruth shared lots of fun ideas. She kept her goggles and gloves on. Don’t forget to keep your safety equipment on. Ruth introduced us to various piping equipment, from simple to more complex. She showed us lots of fun embellishments. Included were sugar pearls and sugar cupcake decorations.

Did you know you can get kits that contain coordinated cupcake pretties? Other good decorations include body safe glitters and jojoba beads. She had a star set that had star liners, star sugar sprinkles and star cupcake picks. So cute!
When the frosting was ready, it was time to learn how to pipe designs. First, Ruth showed us how to get the soap batter into the piping bag. Her method was pretty slick. She used disposable pastry bags in a medium size. She cut the end off of the little closed end of the bag. Then she dropped the tip into the bag. When you do this, keep the little ends of both the tip and the bag down. With a little wiggling and positioning, the decorating tip was secured in the bag and ready to go. She folded the tip end of the bag up a bit, so the tip was facing up. Then she placed the bag in a tall container, like a sturdy cup. Once the bag is in the cup, it’s helpful to open the bag as wide as you can. You can even fold the bag over the edges of the cup if the bag is large enough. Next, she poured some soap batter in.

When you do this step, be sure to leave enough room to twist the bag a few times to prevent soap from leaking back out the top when you begin squeezing and decorating. When you think the soap is ready to use, twist the bag closed on top. Then pick the bag up until the tip swings freely down. If soap runs out of the tip, your batter is too thin. Reposition the frosting bag in the cup, tip up. Test it again in a few minutes.
What to do while you’re waiting for the frosting soap to get a bit thicker? Remain suited up, of course. Do 10 jumping jacks. Check the soap. Do an easy Sudoku or Crossword puzzle. Check the soap. Do a few sit-ups. Check the soap. Look at yourself in the mirror. Check out the safety goggles. And the flat abs. Check the soap. Stare at the soap frosting and will it to get thicker more quickly. Check the soap. Do the Macarena one time through. Don’t know it? Wait until after you finish your soap. There are some good videos of it on YouTube. Check the soap. It should be ready. It was probably ready a few activities back. Now that the soap is good and thick, like frosting, you can begin decorating.

Ruth used a Wilton Brand 2D Closed Star (this one from Bramble Berry is pretty close). She made swirls, roses and flowers with this tip. For the swirl, put a dollop of frosting in the center of the cupcake. Then squeeze the bag and move around the outside edge of the cupcake. Remember, we’re talking soap cupcakes and frosting here. Don’t lick your gloved fingers if you happen to spill a little. Continue to spiral in toward the middle of the cupcake. Make a pretty swoop at the top of the center.

The rose looks really complicated, but it’s not. But I suspect it takes a bit of practice. When asked whether she practiced piping frosting before piping real live soap, Ruth said she did, and that it helped her soap piping be better. So if you are the patient type, you might want to practice this rose on frosting before attempting it on soap. After all, if you mess up the frosting, you can eat the evidence.
Still using the 2D tip, start in the middle of the cupcake with a little circle of frosting. Not a blob, but a circle or dollop. Work your way out and around the cupcake. End by gently pulling the tip up where you started the outer circle. Use a stick or pick to poke down any spike that might remain after you pull the tip up.

For the flowers using the 2D tip, make little blobs all over the cupcake. Push the tip down and bring it straight up. Repeat until the flowers are piled as high as you’d like.

Ruth then switched to a different bag with a large round or star tip (similar to this one at Bramble Berry). With this, she made spirals, plops and wiggles.

For the plops, she did the same motion as for the flowers. For the spirals, she did the same motion as for the swirls. For the wiggles, she put the tip onto the cupcake. She began letting some soap out. Then she wiggled back and forth, keeping the tip down. I love the wiggles! So how to do you wash with a cupcake soap? Ruth had a fabulous solution. Cut the cupcake have vertically. Wash with the cut side. The outside will fit nicely in your hand. Genius. I heard attendees talking about pre-cutting the cupcakes for your customers. Anne-Marie Note: I have a cupcake soap in my shower right now and I hold the entire thing, frosting side down, in my hand to shower with. It eventually rounds out to a nice round bar of soap.

Can’t get enough cupcakes? Here are the top Soap Queen cupcake related tutorials:
How to Make Bath Bomb Cupcakes (Video)
Melt and Pour Cupcake (Mold) Tutorial
Bath Bomb Cupcakes, Day 1 and Day 2
Fluffy (Melt and Pour) Frosting Soap Cupcakes
Shea Butter Whipped Frosting Soap (Cold Process) Cupcakes
Foaming Bath Whip Cupcake Frosting
How to Frost the Perfect Bath Fizzy Cupcake (video)

Thanks so much, Ruth, for a fun, interesting and educational session!


