
 If you didn’t see the How-To Tutorial, click here to be taken to the project.
Tutorials on soapmaking, bath fizzies, lotions and more
Filed Under: Melt & Pour Soap


 If you didn’t see the How-To Tutorial, click here to be taken to the project.
Filed Under: Bath & Body Tutorials, Melt & Pour Soap
 School is out for the summer and now is the time for kids’ projects galore! This project is suitable for kids 6 years and older. It’s technically safe for younger kids but usually, their manual dexterity isn’t quite up to doing extreme detail work. But, if you like a more free form, abstract art look, by all means, give your 3 year old a dropper and get to work.
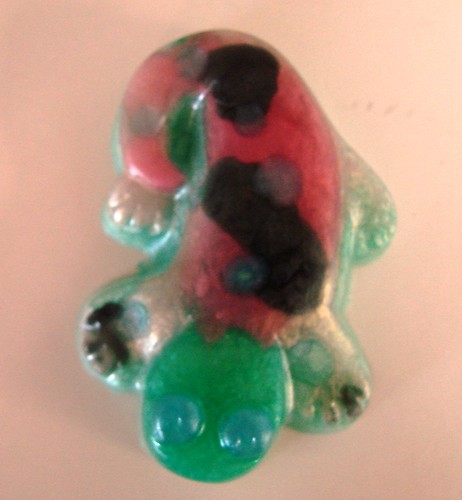
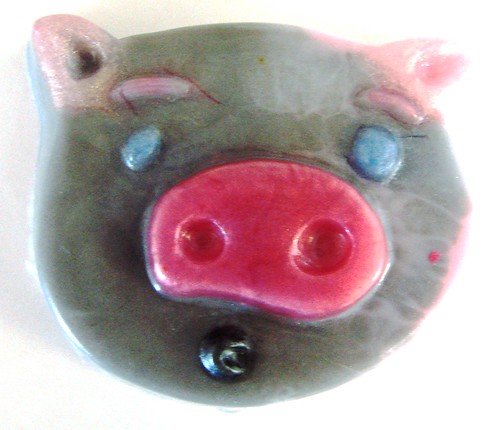
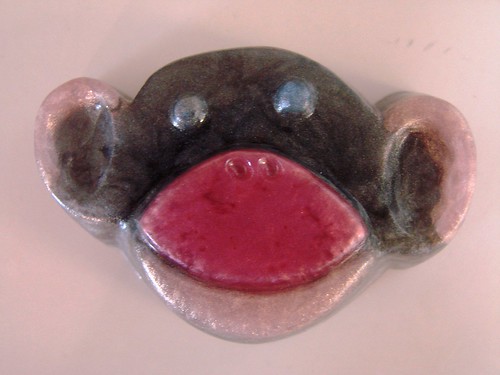
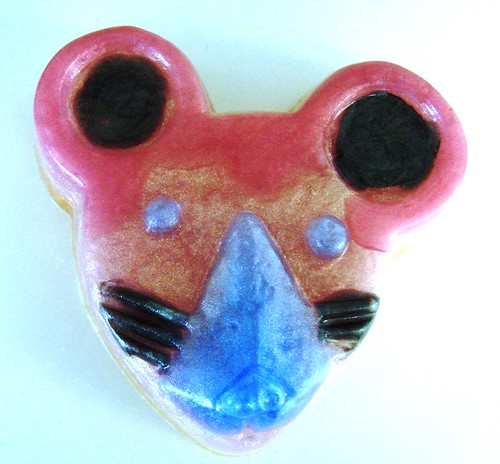
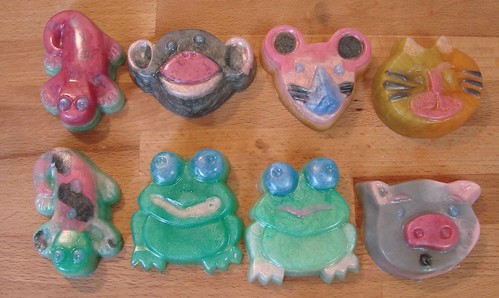
This is all about using a dropper to accentuate the animals. As you can see from the above photo, some of the little critters have quite a few colors and layers to achieve their look.
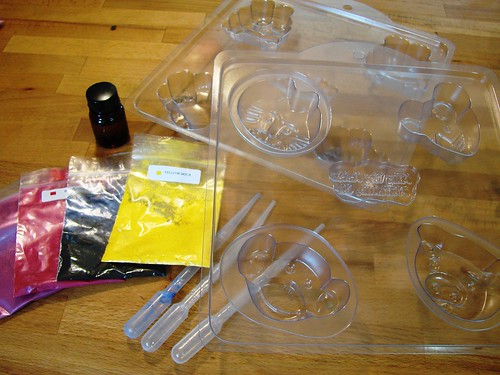 clear melt and pour
white melt and pour (if you want opaque soaps)
non-bleeding colors (I used the Mica Sample packs)
fragrance oil
Milky Way Kids Critters or Amphibians Mold NOTE: These molds have been discontinued, you can use the 6 Cavity Kids Animals Silicone Mold instead.
Droppers
Pyrex container
Spoons
Rubbing Alcohol in a spritzer bottle
The molds hold approximately 2.5 ounces each and there are 4 cavities.
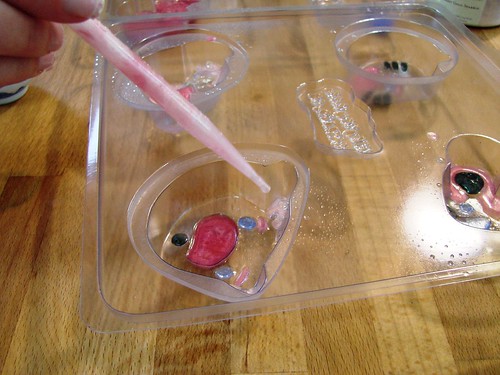 Cut 12 ounces of Clear (or White) Melt and Pour up into chunks and microwave until the soap is fully melted. Pour off one ounce of melted soap into three or four small containers. Fragrance (1 dropperful of 3 mls will be plenty) and color these small containers. You’ll use these to do detail work. Ideally, you want the containers to be microwaveable, just in case your soap hardens up before you can use it.
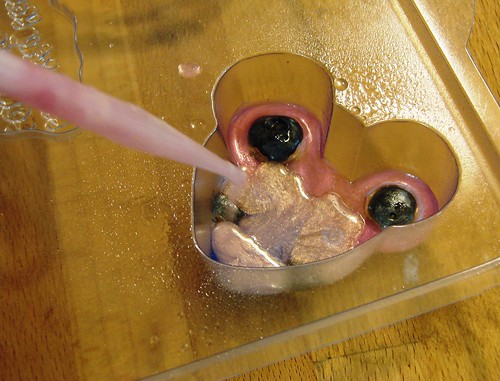 After the color and fragrance have been fully stirred into the soap, draw up the colored soap into your dropper. Be sure to have your alcohol close at hand so you can ensure layer adhesion and no bubbles. Carefully dropper the soap into the detailed crevices in the soap. If there are any bubbles, spritz with alcohol to break the surface tension and remove bubbles. Wait for a thin skin to form and move onto the next color. Continue layering and filling in details until the faces have been filled out. Spray with alcohol liberally between layers.
 Once the detail work has been completed, fill in the rest of the molds with the remainder of the soap. There should be around 8 ounces (or more) left. Be sure to fragrance the overpour. If you are using the Bramble Berry house clear or white soap base, the ideal temperature for pouring the second layer is between 120 and 125. If the soap is steaming or is too hot to put your finger in, it will melt your detail work. Patience is your friend.
Spray the detail work with alcohol and pour the overpour. Wait four hours and gently pop out your fabulous creations.
Great fragrances for kids are Strawberry, Tropical Vacation, Watermelon, Sun Ripened Raspberry & Pearberry.
Filed Under: Melt & Pour Soap
Adding cornstarch to Melt and Pour soap turns your soap into a play dough fantasy land! Let your kids sculpt soap into any shape and let it air dry. These hardened shapes can be used in the bath or embedded for a unique soap look.
Clear Melt and Pour soap base
Corn Starch
Soap Mold (optional, if embedding)
Microwave safe container
Saran Wrap [plastic cling wrap]
Spritzer bottle filled w/ rubbing alcohol
Liquid Pigment soap colorant
Fragrance oil
1. Cut melt and pour into 1” cubes and put into microwave safe container (6oz of soap should be plenty), cover with saran wrap and microwave for 30 second intervals until soap is melted. Add your fragrance oil to the soap and stir.
2. Add the Corn starch to the soap, about 4 tablespoons for 6oz of soap and stir, stir, stir! The cornstarch may not be very willing to mix in, just keep stirring and it will eventually mix in for you. You can scoop out any floating clumps with a spoon if they just refuse to cooperate.
3. Decide how many colors you want and pour the cornstarched soap into individual containers, one per color then add your colorants.
4. Let the soap cool, it is easiest to work with if it is still soft and warm. We have found that pouring a thin layer of the soap out into a mold (not the one you plan on using), or even on your counter is the quickest and easiest way to do this. Once the soap has stiffened it will peel off easily. (For this example we poured little pools of soap onto the counter)
5. Knead the soap in your hand, depending on how cold it is it may take a minute to be moldable – then do this with all of your colors.
6. Start sculpting! Let your sculpted soap sit for about an hour to fully harden
You can use your soap as it is just like this – or you can embed your masterpiece in clear soap to make it last a little longer.
To Embed:
1. Follow step 1 and use clear soap. then pour a thin layer of the soap into the mold and spray with alcohol to pop any bubbles.
2. Let this layer sit until there is a stiff skin on top, spray with alcohol – this helps the next layer stick
3. Get your sculpted soap and spray it on all sides with alcohol then set onto the first layer of soap
4. Fill the mold the rest of the way full with the clear soap and spray with alcohol
5. Let this sit for a few hours before removing (the longer you wait the easier it will be to remove from the mold)
Voila! A crafty, handmade soap with your own molded creation inside!
We originally authored this article for crafty blog, Whip Up.
Filed Under: Business Musings
Thank you to my Dad for finding this educational tool online – Biz Kids$ is a PBS based show about kids who launch businesses, learn about money and want to teach other kids about lifelong financial responsibility.
Click here to learn more about the show. When you’re on the site, check out the Educational Tools button on the bottom right and start a dialogue with your kids about money, saving, and the power of compounding interest.
Filed Under: Melt & Pour Soap

Big thanks to Nicole in Customer Service for coming up with this swell idea. Isn’t she creative?
What you’ll need:
Bramble Berry Ducky Soap Mold (S.W., in MA wrote us to say: “I wanted to tell you how happy I am with my Duck Molds. They made the perfect children’s soap, and the Pearberry the perfect scent. I work with CP soap, the molds were beautiful but not too detailed so that I would worry about air bubbles (no tapping). Made them yesterday and woke up to beautiful pearberry ducks. Everybody wants them.”)
Saran Wrap