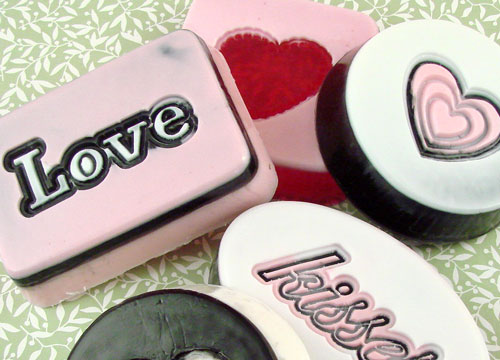
Tutorial to these soaps is here. Or you can come learn it from me at Otiontoday at 3 p.m.
Tutorials on soapmaking, bath fizzies, lotions and more
Filed Under: Melt & Pour Soap

Tutorial to these soaps is here. Or you can come learn it from me at Otiontoday at 3 p.m.
Filed Under: Bramble Berry News
Filed Under: Melt & Pour Soap
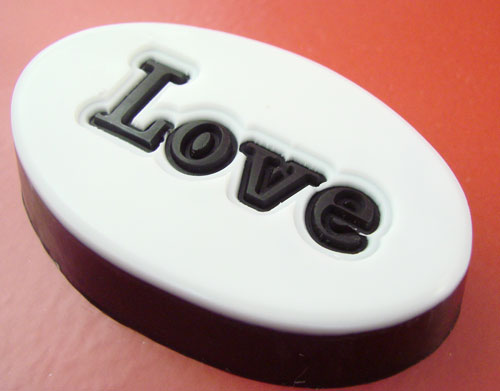
This project was designed exclusively for Martha Stewart Radio. It’s a way to make all of your basic soap molds versatile and season appropriate for pennies.
Basic Soap Mold (Note: this mold has been discontinued, it has been substituted with the 6 Cavity Oval Mold)
Fragrance or Essential Oil
Melt and Pour Soap (white and clear)
Unmounted Rubber Stamps (examples here – I get mine at the Dollar Store)
Optional: Black Oxide, Fuchsia Labcolor & Rose Pearl Mica
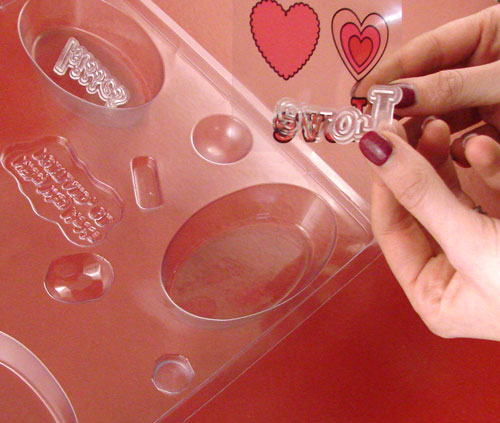
1. Carefully place the unmounted rubber stamp, flat side down. The textured design side should be facing up, towards you.
Note: The Basic Soap Mold pictured above has been discontinued, it has been substituted with the 6 Cavity Oval Mold
2. Cut approximately 4 ounces of white melt and pour into 1″ squares. Melt in the microwave on short bursts for 30 seconds until fully melted (full tutorial on basic, beginning melt and pour soapmaking concept here).
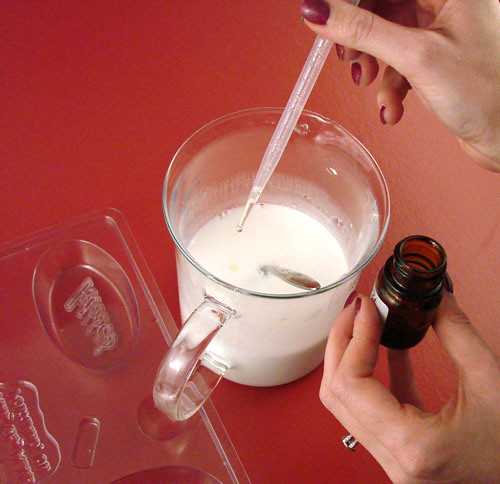
3. Fragrance your soap. For 4 ounces, approximately 3 ml of fragrance or .10 oz of fragrance or essential oil is ideal.
4. You can color this soap or leave it white. We found that white or pale colors provided the best contrast.
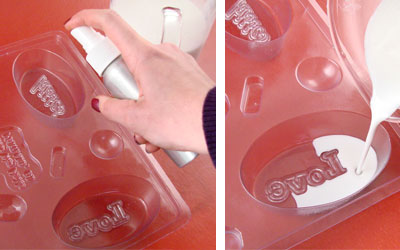
5. Spritz the rubber stamp with rubbing alcohol. Then, start to pour the first layer. Pour this soap carefully. I found that a dropper was ideal for getting the soap into the mold without overflowing onto the rubber stamp. The key to this project is a thin, thin layer that does not submerge the stamp.
6. Allow this layer to harden for approximately three to five minutes. While it is hardening, prepare your second color of soap. Melt, color and fragrance the soap. We used clear soap with black oxide (tips on using black oxide in melt and pour soap are here), fuchsia labcolors and pink rose pearl mica.
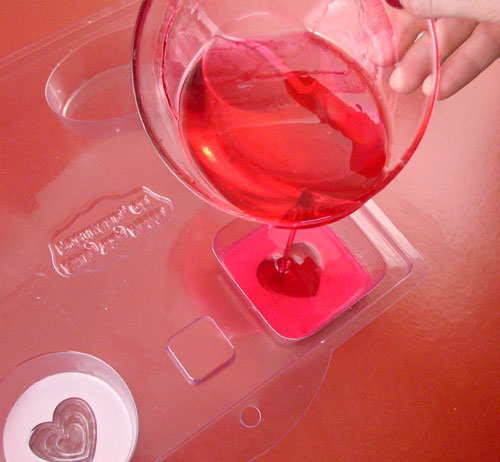
7. Spritz the thin layer of hardened soap with rubbing alcohol. Slowly and carefully pour the second colored layer. Make sure your soap isn’t too hot or else you’ll melt your first layer, try to stick around 120F.
Bonus: Carefully dropper in a third color into any stamp detailing for an incredibly exciting finished soap!
8. Allow the soap to harden for at least 4 hours. Gently pop the soap out of the mold.
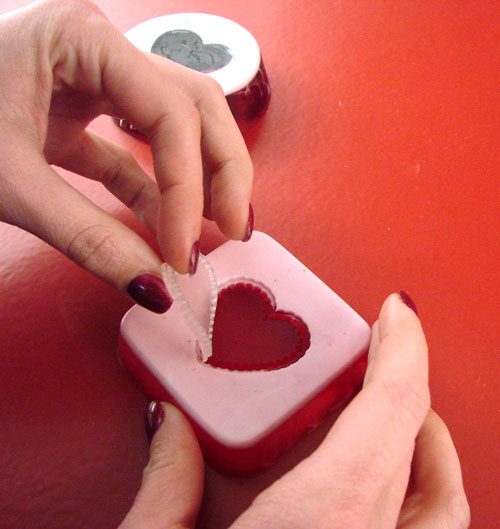
9. Carefully peel back the rubber stamp.
10. Clean up any little soap overhangs with a dental pick (available in the Bramble Berry Melt and Pour Kit), a small paring knife or anything that has a fine pick and scraping tool.
Voila! You’re done! You can do this with any stamp for any holiday – you’re not just limited to the Day o’Love. Think Easter, St. Patrick’s Day and Father’s Day – there are so many cute unmounted stamps out there. Check your local Dollar Store. That’s where we got our stamps and they had a great selection.
I can’t wait to read what you do with this tutorial and the nifty, creative things you find to do with it.
Filed Under: Soaks & Scrubs
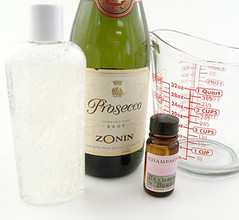 Mix all ingredients together slowly and evenly. You need only a small amount of fragrance oil, approximately 6 ml of fragrance in 12 to 16 ounces of soap. If you’re using the Suspending liquid soap base, now is the time to sprinkle in some glitter. The beauty of the Suspending liquid soap base is that it easily suspends heavier additives, like glitter. Most liquid soap bases won’t suspend glitter but the Suspending liquid soap base will.

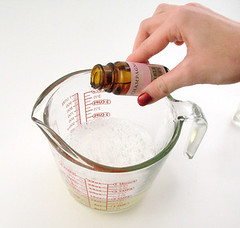 Now that the soap has sat, the bubbles should all be sitting at the top of the soap. Give the soap mixture a spritz with rubbing alcohol to get rid of some of those bubbles.
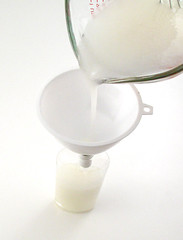 Pour into bottles. If you don’t have a very steady hand, it’s not cheating to use the right tool (a funnel) to complete the job. Lather up with it as a shower gel or use it in the bath for lots of bubbles. Either way, you’ll be bathing in luxury with soap bubbles and champagne bubbles.
Filed Under: Melt & Pour Soap
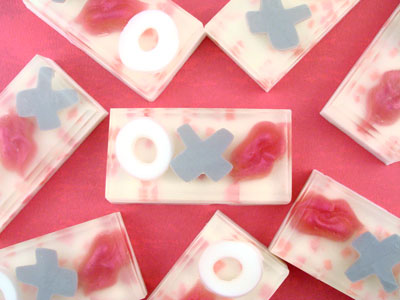 Here is a really easy project that looks so much more complicated than it is. As a plus, it’s very economical. The hugs and kisses mold is only $2.50 and you can use any plain mold for embedding (we used our rectangle tray mold). The materials to make these soaps work out to be just $1.28 per bar (not including the molds) and you can even make them for less if you make more than 8 bars of soap and soap in bulk.
Here are the ingredients we used:
Clear M&P Base and White M&P Base
Violet Fragrance Oil
Luster Black Mica & Merlot Mica
Rectangle Tray Mold (but any plain mold will do)
Hugs & Kisses Mold
You can use scraps from our last Valentine soap project, or you can make them from scratch using:
Non-bleeding liquid colorant
Tools:
microwave safe containers (we like to use a pyrex measuring cup)
Dropper
spray bottle of rubbing alcohol
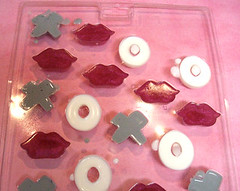 1. Start with your Hugs and Kisses mold and make the embeds. We used white melt and pour for the X and O’s and Clear for the lips. You can use which ever you chose, but remember white melt and pour will make black go gray and reds go pink. Bright vibrant colors need clear soap.
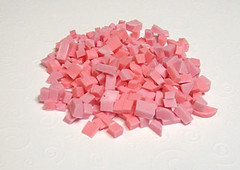 2. Next create the soap confetti for the background. If you have left over scrap melt and pour, preferably in non-bleeding pinks or red this is a perfect chance to use them. If not then mix up a batch or two (depending on how many colors you want) using white melt and pour and a non-bleedig color. Pour these into anything that is flexible that you can release. We will be cutting them up into little chunks, so the mold you use and how pretty the soap is does not matter at all. Let these set and harden. You want the soap fresh and pliable so do not put in fridge/freezer. Cut this soap up into little pieces.
3. Now all the pieces are made and we can start assembling the soaps. Think of how you want the embeds to be laid out. You do not want the X’s and O’s to be cut once the soap is finished. If you’re using the Rectangle Tray Mold, stay inside the score marks of the mold. Once we start putting the embedded soaps in there will not be much time to change or move them around, so pre-planning is essential!
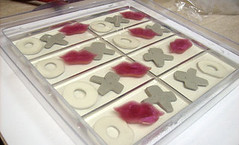 4. Melt 1 pound of clear melt & Pour base and fragrance with 1/4 ounce of fragrance. Pour about half of the scented clear melt & pour soap into the rectangle tray mold. We poured until the soap just reached the top of the indented rectangle marks. Spray with alcohol.
5. Working quickly, spray your embeds generously with the alcohol and place them where you want in the mold. Remember, we want the pretty sides to go face down especially with the lips – the detailed front of the lips need to face down.
6. Let these set a minute or two until the clear has hardened or has a thick skin. Then spray with alcohol and pour the rest of the clear – it should come just high enough to cover the embeds.
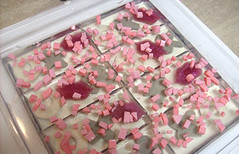 7. Once that layer has set you can get the little scraps of soap that we cut up in the first step. Spray these with alcohol and sprinkle them evenly over the soap. Ignore the score marks this time… spread evenly everywhere.
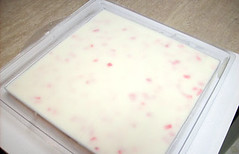 8. Finally melt 1/2 pound white soap base and add 1/8 oz. fragrance. Spray the soap layer in the mold with alcohol again and then immediately pour carefully over the scraps, filling the mold to the top. You need to pour slowly, evenly and close to the soap or the force of the pour will move around your scraps. The ideal temperature to pour with the Bramble Berry house melt and pour bases is around 125 to 130 degrees. If your soap is steaming or is so warm that you can’t put your finger in it, the soap is too hot and will melt the pink little chips. It’s a cute look but won’t get you the soap pictured in the top picture.
9. Wait 4 to 6 hours for the soap to fully harden before carefully popping out and cutting your perfectly lovely Valentine’s inspired bars.
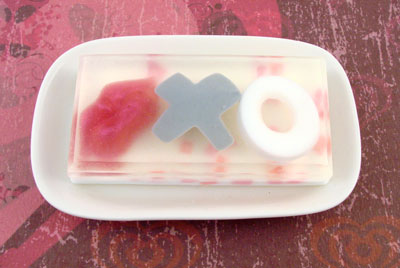 Voila! adorable soaps perfect for Valentine giving.
Filed Under: Melt & Pour Soap

Tweet that you’re reading this post by clicking here and share the rose-colored fun with everyone.
Filed Under: Melt & Pour Soap
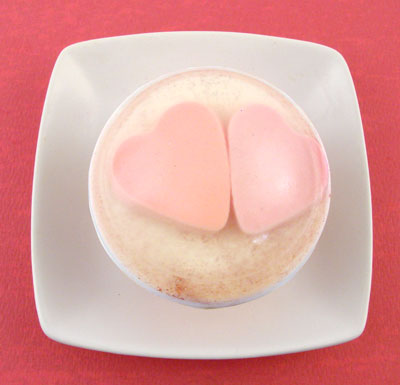
I went to the store to get a birthday card for my Dad today (Happy Birthday, Dad!) and was a little shocked to see Valentine’s Day Cards. Wow! In less than 30 days, Valentine’s Day will be here. We whipped up this quick and simple melt and pour soap to get you in the mind to “Think Pink” and get ready for the romance. If you need a refresher on how to make melt and pour soap, check out the tutorial here.
White Melt and Pour soap base
Clear Melt and Pour soap base
2 Different Non-Bleeding Colorants, Pinks or Reds
Glitter
Rubber Heart Embedding Mold
12 Bar Round Silicone mold
Fragrance
Spray Bottle filled with Rubbing Alcohol
1. Cut up and melt about 5 ounces of the Opaque melt and pour. Separate into 2 containers and color each with one of the 2 colors. We did one with Non-Bleeding Red Liquid and the other with Red/Blue Mica. Note: you do not need to fragrance these. You will have some soap left over and they will work best with other projects if left unscented.
2. Pour this into the Rubber Embedding Heart mold. Doing half the hearts one color and the other half the other color.
3. Set this aside to harden. Do not put into fridge as we want our layers and embeds to adhere well. We also need to slice these and frozen/cold soap does not slice well.
Once you have given the hearts time to harden, you can go to the next step.
4. Disassemble the 3-D mold and lay flat on counter. You can prop the molds if needed to keep flat.
Note: this mold has been discontinued and substituted with out 12 Bar Round Silicone Mold
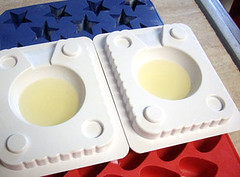
5. Cut up and melt some clear Melt and Pour (this you can and should fragrance) and pour a little into each half of the 3-D mold. Wait for this to thicken and get a nice sturdy skin.
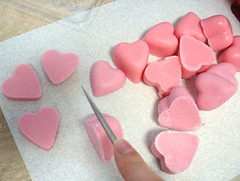
6. While you are waiting you can un-mold the little hearts. These are too thick to fit into the 3-D molds evenly. You will need to slice them up into thinner pieces. Lay them flat on one side to slice. If you put the point down and slice it will get smooshed and not look like a heart. (Note: Updated Instructions on 12/21 to include mold in Supplies List that does not need to be cut down)
7. Once the clear soap pour has hardened, spray it with rubbing alcohol and place a heart or two on top of the clear. Spray again with alcohol.

8. Pour another little layer of clear soap to cover the hearts and “glue” the pink embedding hearts into place. Make sure the molds are not filled all the way to the top though.
9. Once this has hardened, you can give it another squirt with alcohol and sprinkle a little layer of glitter onto the soap if you want to get festive.
10. Assemble the molds and put on the rubber bands. There should be a little gap between the two halves. The two halves should not meet each other.
11. Get the rest of your Opaque soap (remelting if needed) and add your fragrance to this as well.
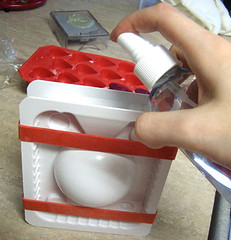
12. Squirt down into the closed mold with alcohol 1 to 2 times then pour in your opaque soap.
Note: this mold has been discontinued and substituted with out 12 Bar Round Silicone Mold
13. Stop when the soap comes just above the top, tip the mold side to side and give it a few good taps on the counter. This helps remove any air bubbles that get trapped in the mold. Then fill the mold up the rest of the way. If you fill it all the way it gives you a nice “stump” that comes in handy for un-molding the soap later.
14. Set soap aside to cool. Again, since these are doing double pours and embedding, you do not want to put the soap in the fridge/freezer.
15. Once the soap has cooled (ideally overnight) you can unmold it. Use the little stump at top to help wriggle the soap out.
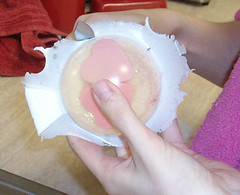
16. The soap will have a little ring around it where the two halves of the mold came together. You can get a small sharp knife and carefully slice this off.
17. Spray with alcohol to get rid of any unwanted fingerprints.
18.You are finished! Give the soap to someone you love or put it into your own shower to make sure you start every day with a smile on your face.
Filed Under: Bramble Berry News
Bramble Berry Clear Melt & Pour Base
Iridescent Sparkle Glitter
Rose Pearl Mica
Lavender Mica with a drop of Non-Bleeding Violet Liquid
Lots of Love Guest Soap Mold
Filed Under: Personal Ramblings
The Manufactured Day of Love is approaching fast! Do you have your present picked out yet? I’ll be the first to admit that I don’t but I’m getting some ideas with all the massage candles I’ve been making this week!
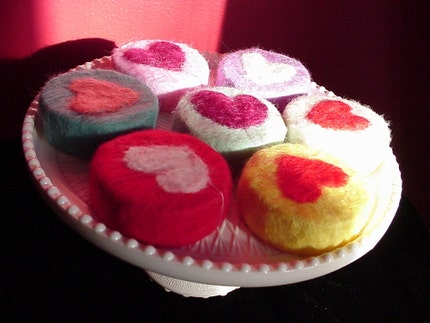
From Etsy, how about some Heart Felted Soap? $6.50 at AmeliaMakesArt in Portland, OR. The wool acts like a wash cloth with gentle exfoliating action.
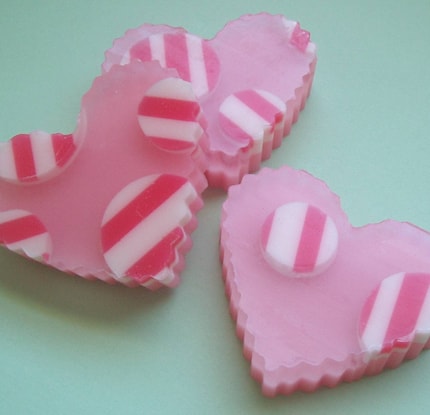
 Soap is always a perfect gift so this Garden Party Soap from SoapyLove tfor $4.00 scened with Tomato Leaf fragrance is certainly Valentine-Worthy.
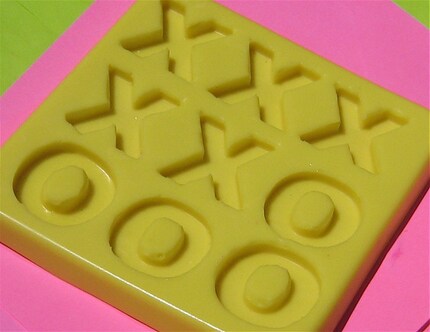
 This is a flexible soap mold for the bargain price of $12.00 (silicone molds normally run pricier).
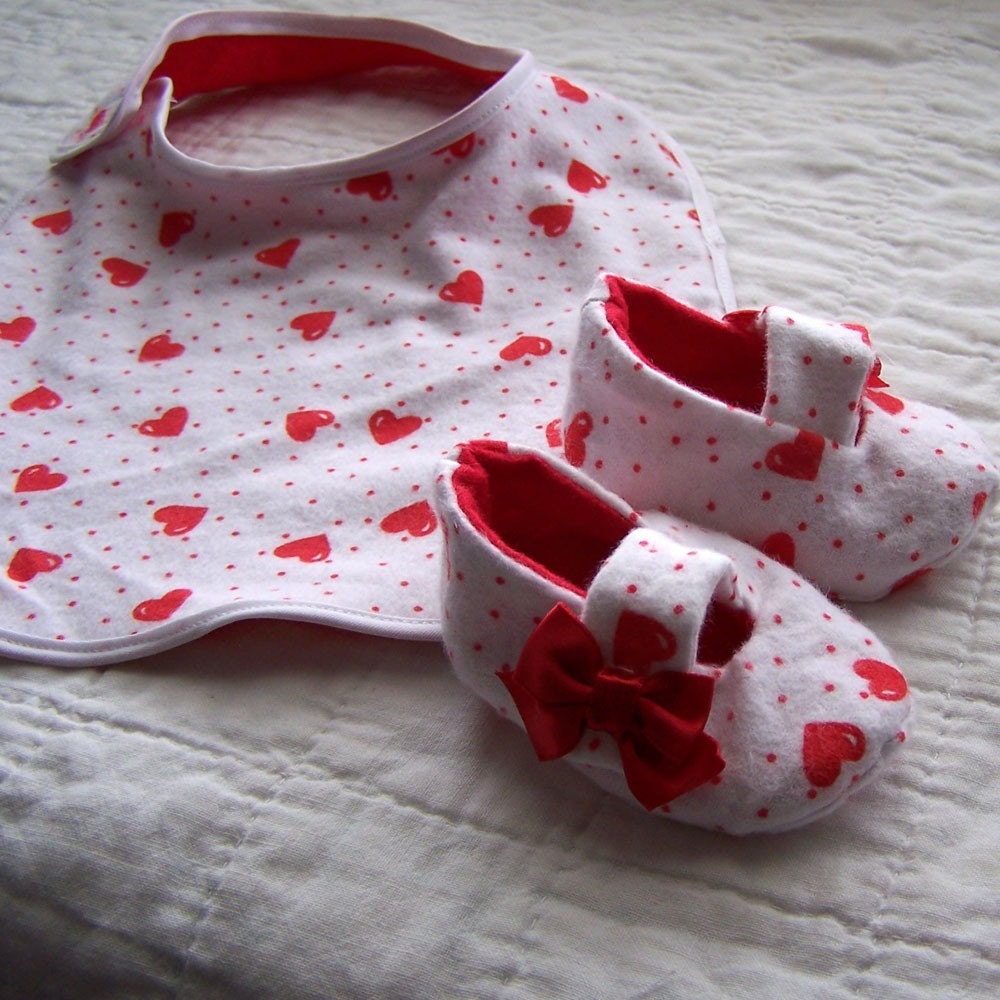
 And, this might not be a gift for your sweetie but awwwww, isn’t it cute? And for $9, it’s a bargain! Get it here for the little munchkin in your life.
Finishing out the Valentine’s Inspriation collection is Conversation Soap Heart Cupcakes! A perfect meld of my favorite treat (cupcakes) plus my favorite art (soap), these topical pieces are just $4 per smile. Get yours here.