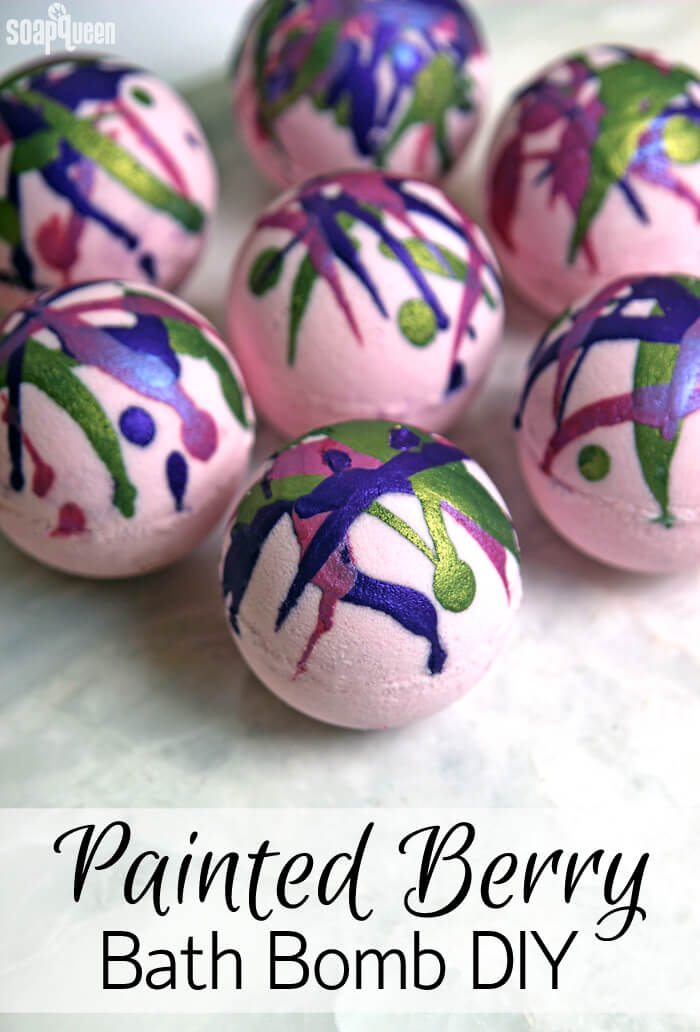
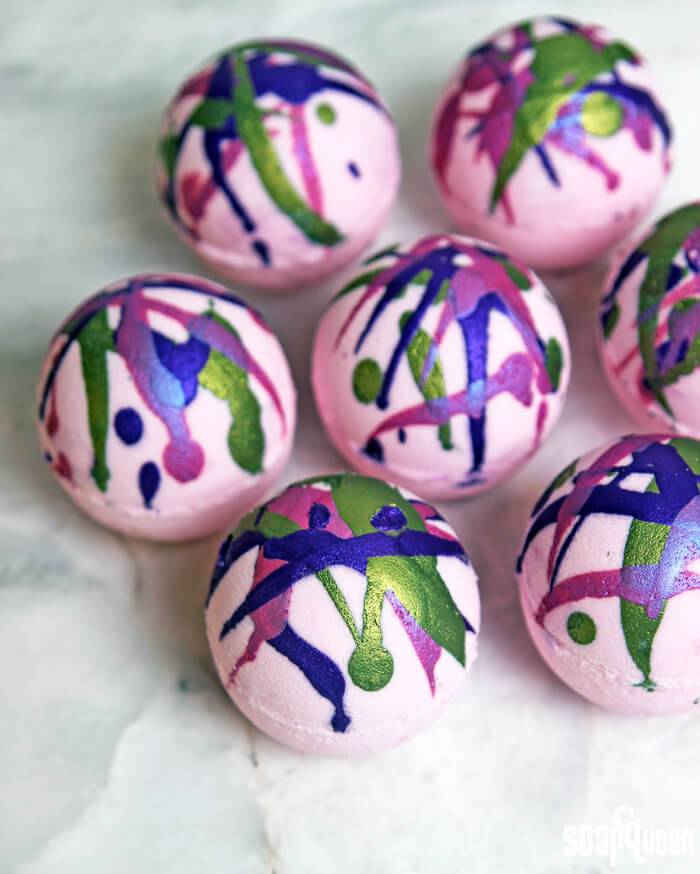
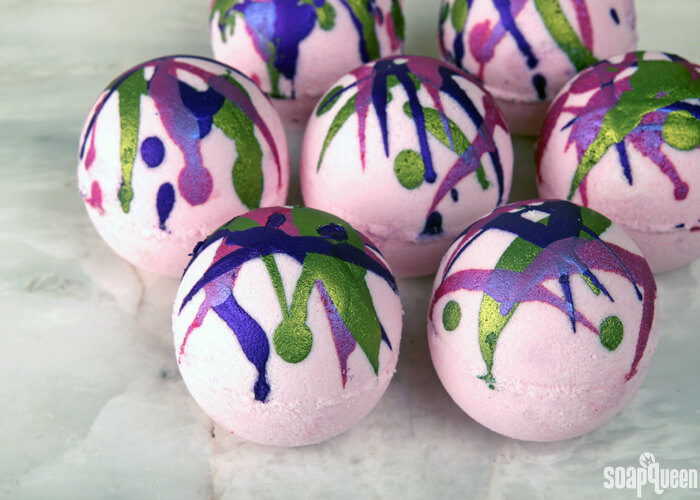
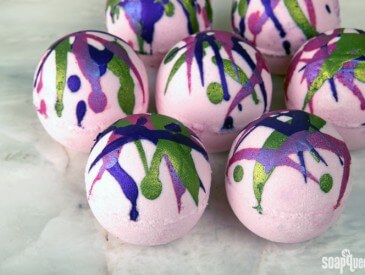
Looking for a way to jazz up your bath bombs? The mica painting technique on these Painted Berry Bath Bombs is the ticket! Once the bath bomb is fully hardened in the mold, mix mica with 99% isopropyl alcohol and start decorating. To create the paint splatter effect, I used a dropper to drizzle the “mica paint” in various directions and layers. There are so many design possibilities with the mica paint technique. Check out the Peppermint Candy Bath Bomb Tutorial to see how mica paint is used to create peppermint candy details.
These bath bombs are scented with the new Blooms and Berries Fragrance Oil. The fragrance is a blend of berry notes such as strawberry and floral notes like jasmine and pink peony. It smells amazing!
In my tests, I found these bath bombs did not leave a ring of color around my tub. But, this will vary depending on the amount of mica you use on each bath fizzy. It may also vary slightly from color to color. For example, if you use Luster Black Mica, you may notice more color on the tub than with a lighter color. The bath bombs in this recipe are colored with Rosy Pink La Bomb Colorant. La Bomb Colorants are specially formulated for bath bombs to not transfer any color onto the tub if using normal usage rates. La Bomb Colorants are extremely pigmented, so just a few drops does the trick for the recipe below.
What You’ll Need:
6-7 Bath Bomb Mold & Package, Plastic
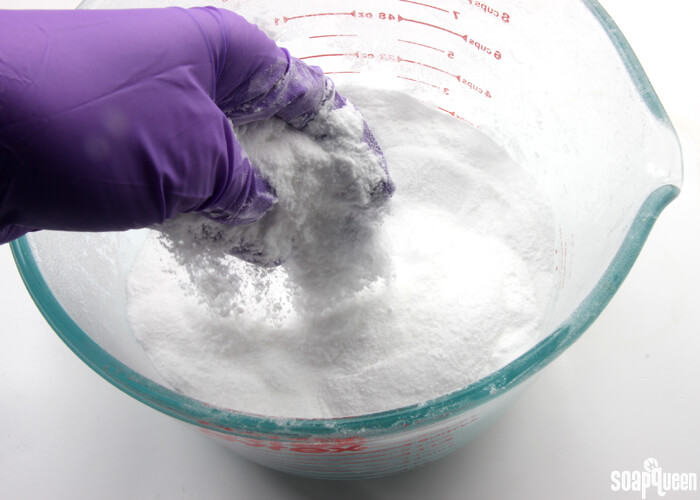
2 cups Sodium Bicarbonate (Baking Soda)
1 cup Citric Acid
1.5 oz. Sweet Almond Oil
.5 oz. Aloe Extract
6 mL Blooms and Berries Fragrance Oil
Rosy Pink La Bomb Colorant
Queen’s Purple Mica
Red Blue Mica
Evergreen Mica
99% Isopropyl Alcohol
Droppers
Optional: Witch Hazel & 8 oz. Bottle (Spray Top)

Click here to add everything you need for this project to your Bramble Berry shopping cart!
ONE: In a bowl, measure out 2 cups of sodium bicarbonate and 1 cup of citric acid. If there are any clumps in the mixture, you can push the powder through a sifter or break up the clumps with your fingers. Citric acid has a tendency to take off nail polish, so wear gloves to protect your manicure. =)
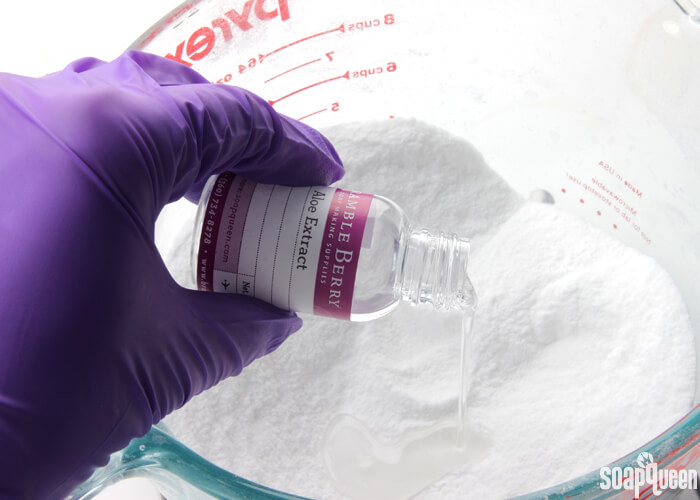
 TWO: Add the aloe extract and use your hands or a spatula to mix in.
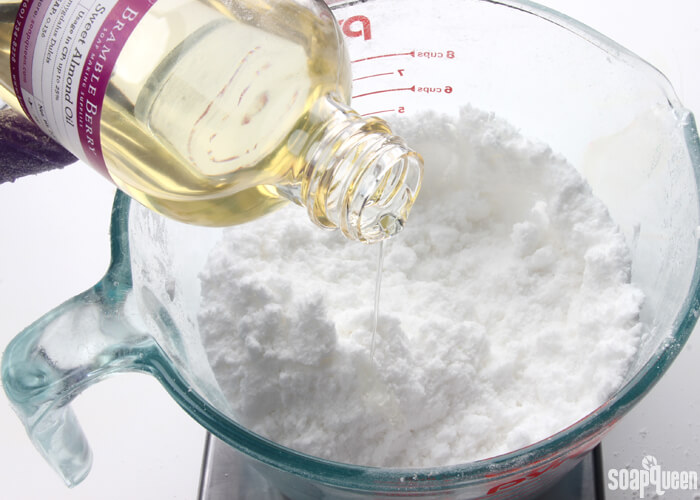
 THREE: Add the sweet almond oil and use your hands to thoroughly work into the powdered ingredients.
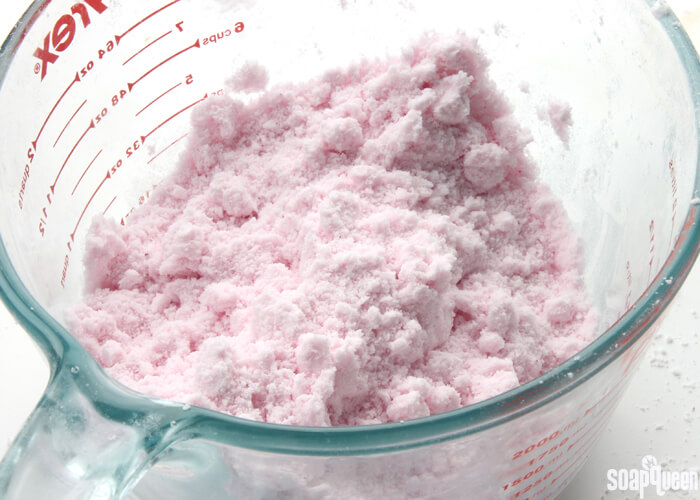
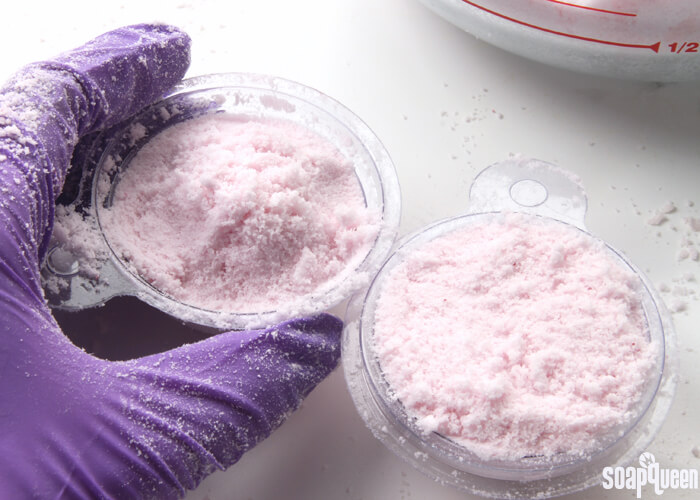
 FOUR: Add 2-3 drops of the Rosy Pink La Bomb Colorant. The colorant is incredibly concentrated, so a little goes a long way! If you’d like a more saturated color, you can add more. Use your hands to thoroughly mix in the color.
 FIVE: Finally, add the Blooms and Berries Fragrance Oil and mix to thoroughly combine.
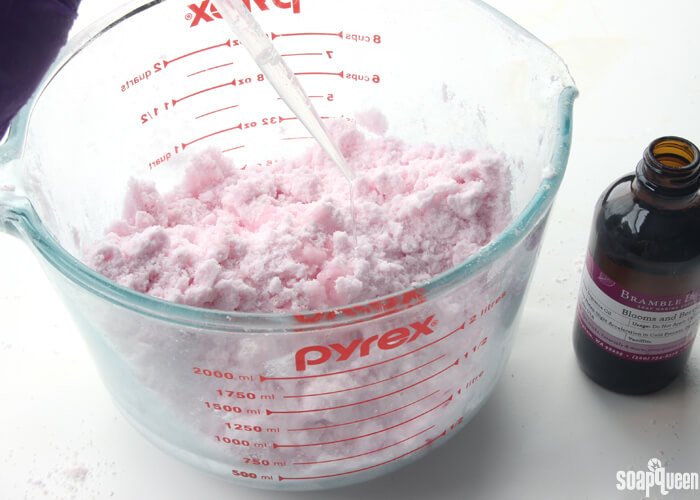 SIX: Check the moisture of your fizzies. When squeezed with your hand, the mixture should hold its shape. If not, add spritzes of witch hazel into each container, mixing between every couple sprays, until each container has a texture similar to wet sand.
SEVEN: Fill two halves of the bath bomb molds, gently pressing the bath bomb mixture in each to make sure they hold their shape. Mound a little extra powder in the center of one half of the mold. Match the eyelets of each side up, and press together. To avoid any imperfections on your bath bomb, make sure to direct pressure to the edges of the mold rather than the center.
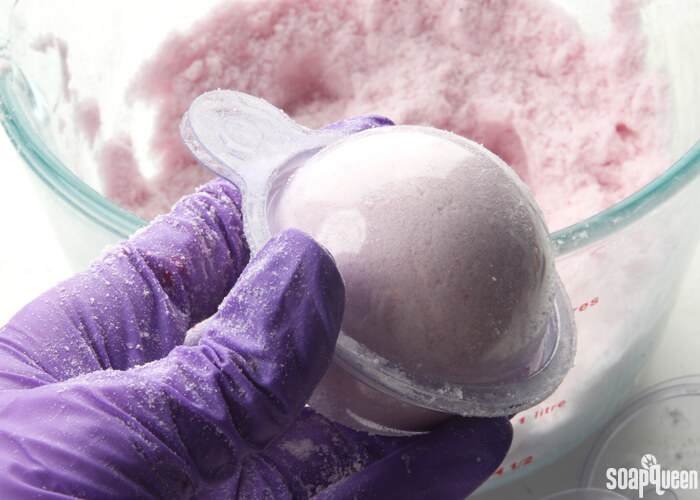
EIGHT: Allow the bath fizzies to harden in the mold for at least 24 hours. Remove the fizzy from the mold to ensure it’s completely hard. Before painting the fizzy, you want to make sure it’s fairly durable. Repackage the fizzy in the mold until ready to paint.
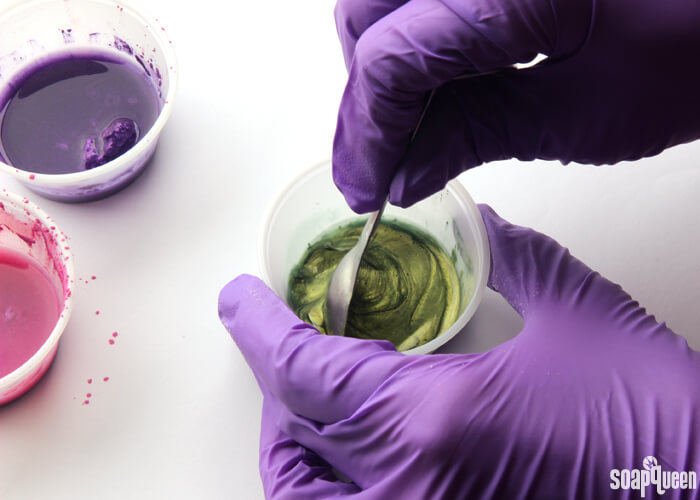
NINE: Mix 1 teaspoon of the Evergreen Mica, Queen’s Purple Mica and Red Blue Lip Safe Mica into 1 Tablespoons isopropyl alcohol. Use a spoon to mix together.
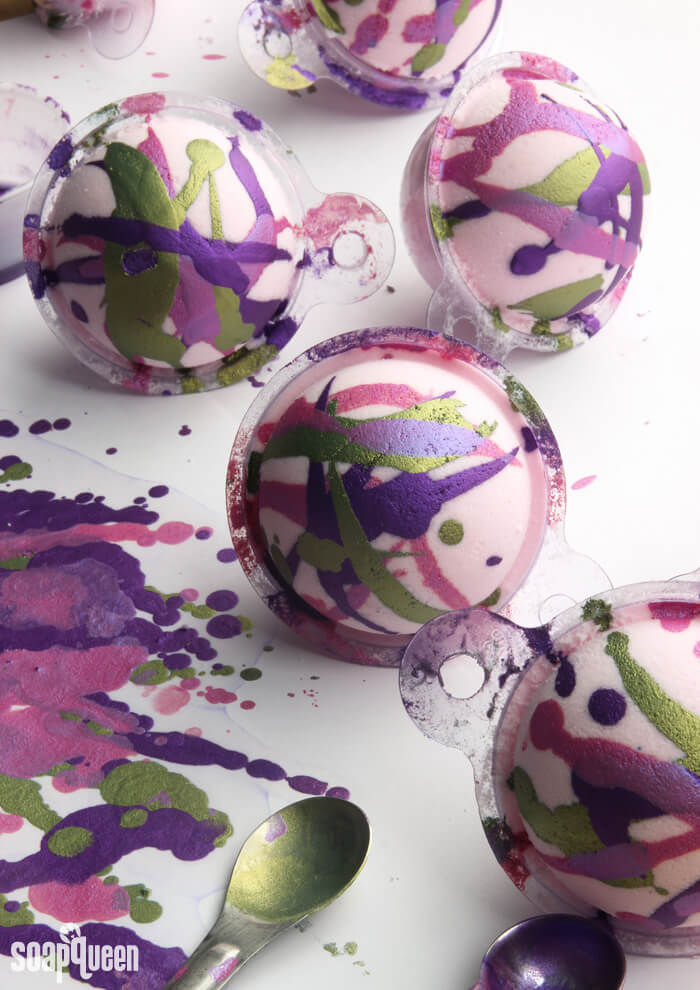
TEN: Use a dropper to drizzle the mica dispersion on top of the bath bombs, layering the colors. I recommend laying down some newspaper or another protective surface to keep your counter clean, because this process will get messy. I would also recommend removing them from the mold and package. This way, you don’t have to clean the package afterwards. Continue until you’re happy with the look. There is no right or wrong way to layer the colors, just have fun with it! Once the bath bombs are painted, let them dry for 30 minutes. Then, pop them back into the packaging.
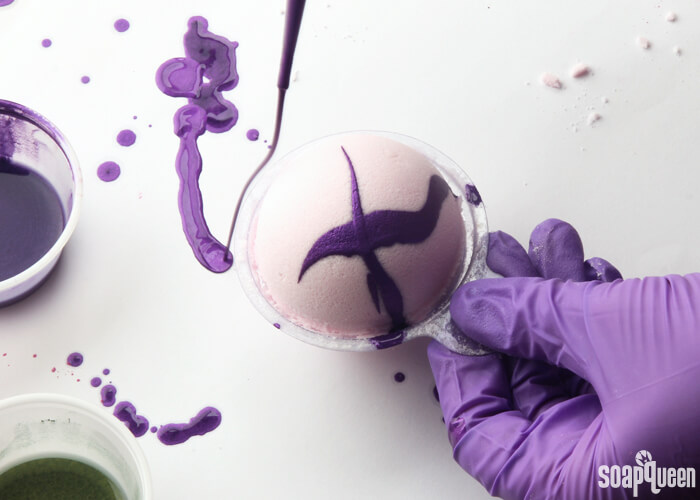
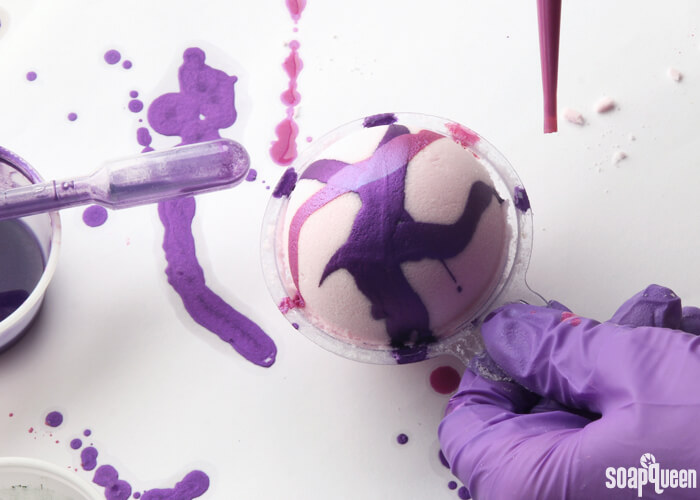
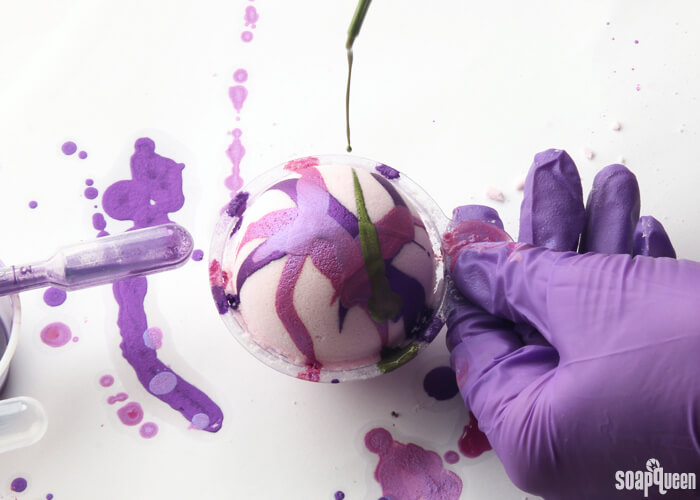

As you can see, the mold and package gets a little colorful during this process. After making these bath bombs, I would recommend removing them from the package before applying the paint! If you don’t, you’ll need to remove from the package to clean afterwards.
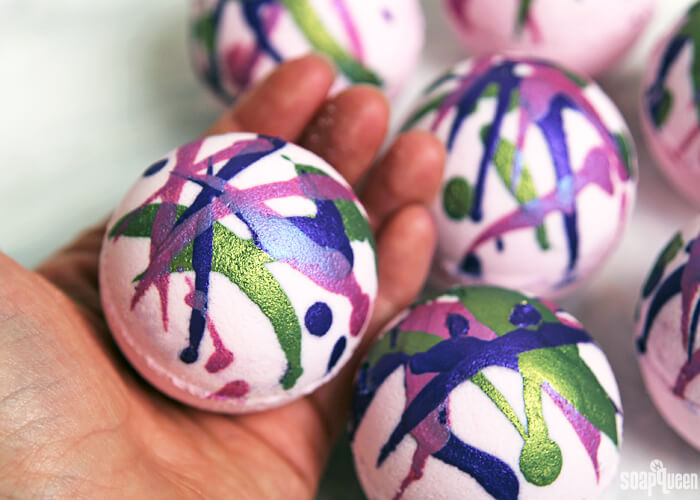
Have you ever used “mica paint” on bath bombs before? It’s so fun!
Painted Berry Bath Bomb DIY
Ingredients
- 6-7 Bath Bomb Mold & Package Plastic
- 2 cups Sodium Bicarbonate Baking Soda
- 1 cup Citric Acid
- 1.5 oz. Sweet Almond Oil
- .5 oz. Aloe Extract
- 6 mL Blooms and Berries Fragrance Oil
- Rosy Pink La Bomb Colorant
- Queen’s Purple Mica
- Red Blue Mica
- Kelly Green Mica
- 99 % Isopropyl Alcohol
- Droppers
- Optional: Witch Hazel & 8 oz. Bottle Spray Top
Instructions
- In a clean dry bowl, measure out 2 cups of sodium bicarbonate and 1 cup of citric acid. If there are any clumps in the mixture, you can push the powder through a sifter or break up the clumps with your fingers. Citric acid has a tendency to take off nail polish, so wear gloves to protect your manicure. =)
- Add the aloe extract and use your hands or a spatula to mix in.
- Add the sweet almond oil and use your hands to thoroughly work into the powdered ingredients.
- Add 2-3 drops of the Rosy Pink La Bomb Colorant. The colorant is incredibly concentrated, so a little goes a long way! If you’d like a darker color, you can add more. Use your hands to thoroughly mix in the color.
- Finally, add the Blooms and Berries Fragrance Oil and mix to thoroughly combine.
- Check the moisture of your fizzies. When squeezed with your hand, the mixture should hold its shape. If not, add spritzes of witch hazel into each container, mixing between every couple sprays, until each container has a texture similar to wet sand.
- Fill two halves of the bath bomb molds, gently pressing the bath bomb mixture in each to make sure they hold their shape. Mound a little extra powder in the center of one half of the mold. Match the eyelets of each side up, and press together. To avoid any imperfections on your bath bomb, make sure to direct pressure to the edges of the mold rather than the center.
- Allow the bath fizzies to harden in the mold for at least 24 hours. Remove the fizzy from the mold to ensure it's completely hard. Before painting the fizzy, you want to make sure it's fairly durable. Repackage the fizzy in the mold until ready to paint.
- Mix 1 teaspoon of the Evergreen Mica, Queen’s Purple Mica and Red Blue Lip Safe Mica into 1 Tablespoons isopropyl alcohol. Use a spoon to mix together.
- Use a dropper to drizzle the mica dispersion on top of the bath bombs, layering the colors. I recommend laying down some newspaper or another protective surface to keep your counter clean, as this process can get a little messy. I would also recommend removing them from the mold and package. This way, you don’t have to clean the package afterwards. Continue until you’re happy with the look. There is no right or wrong way to layer the colors, just have fun with it! The mold and package gets a little colorful during this process. You can either remove the bath bombs prior to applying the mica paint, or remove them after, clean the molds and place them back into the packaging. From experience, I would recommend removing them from the package before applying the paint! Once the bath bombs are painted, let them dry for 30 minutes. Then, pop them back into the packaging. =)
- Once you're happy with the look of your bath bombs, carefully repackage them back into the molds. Enjoy!