
 When I was working on the latest Soap Queen tutorial for the Lucky Star Soaps, I made a batch and ran into a problem. There was a strange bubble trapped over my pretty embedded hearts. See that silvery film over them in the picture above? Well, I’m going to tell you how to avoid that and save you hours of anguish! (okay… make that “a few minutes of puzzlement.”)
 The way you make the Lucky Star Soap is to pour a layer of the main color, let it set, then place an embed on the hardened layer and top off the mold. This way, the embed is floating inside the star.
 The first time I made the soaps I put the embed directly on the hardened layer, then poured soap on top of it. Unfortunately, the heated soap didn’t get all the way underneath the embed, creating an air pocket. That is why there is that silvery air bubble, which is really distracting.
 It’s easy to avoid this. Anytime you are placing an embed into your design, pour some heated soap in first, then place your embed into the soap, and continue to fill your mold. This way, the embed is completely encased in soap with no chance for air pockets. Another way to guarantee a seamless look is to spray your embed with alcohol before placing into the melted soap.
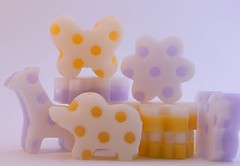
I have included photos of other embedded projects which use this technique. They can all be found in the “Soapylove – Squeaky Clean Projects” book. Have fun!
-Debbie, Soapylove