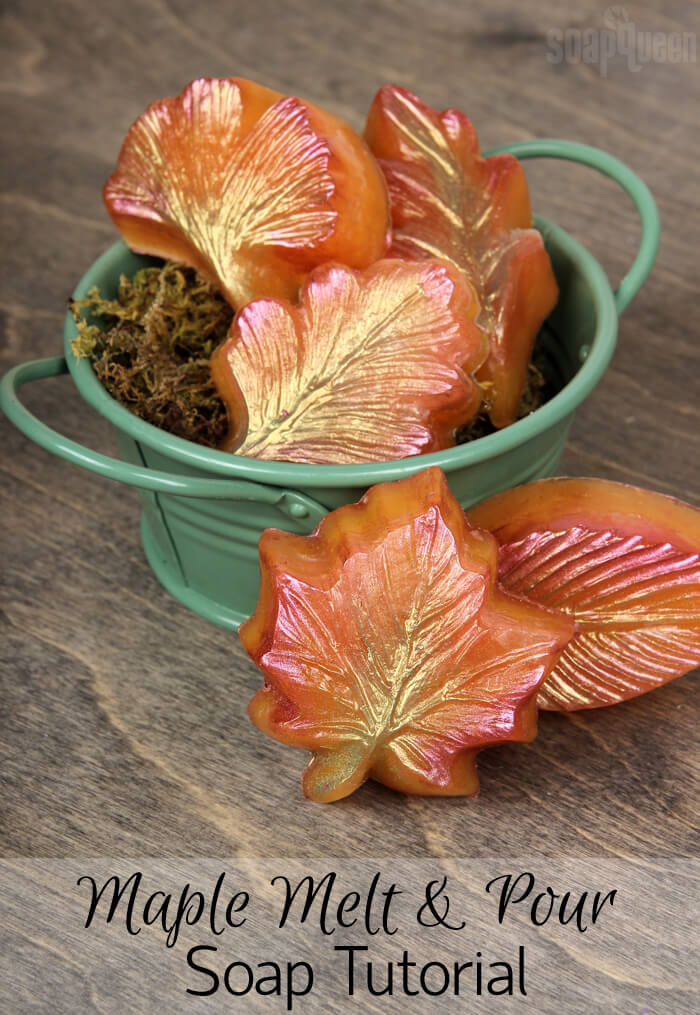
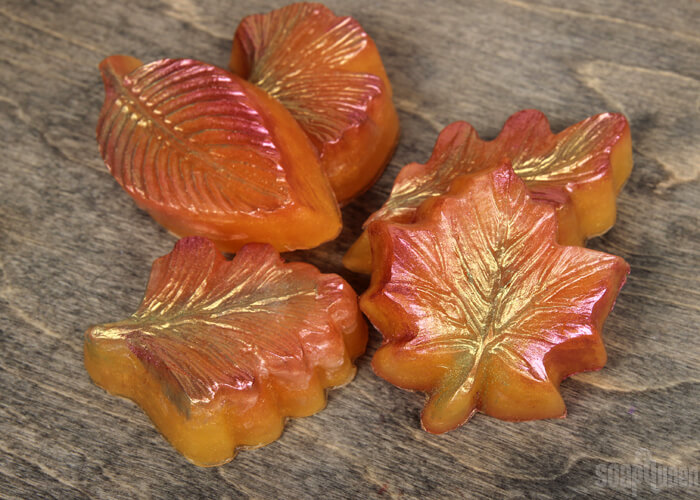
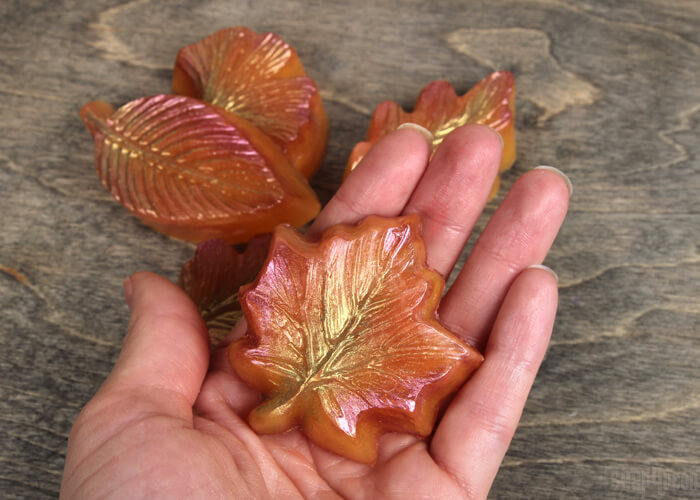
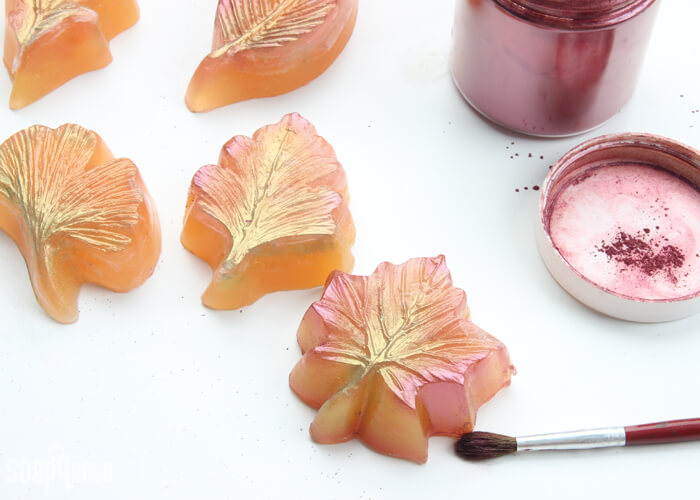
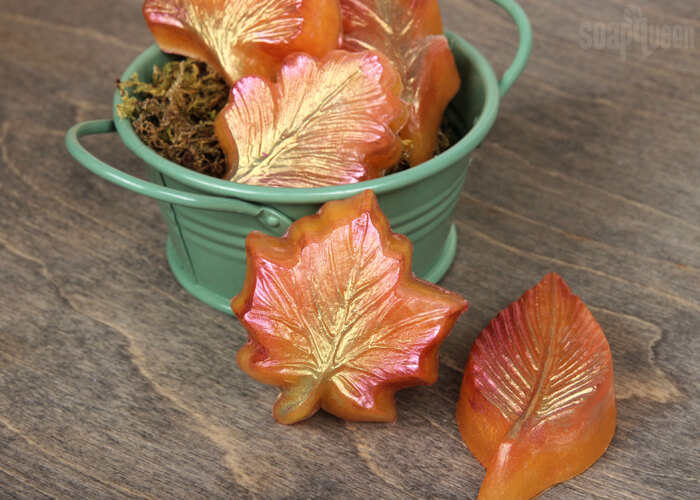
Vibrantly-colored leaves are one of my favorite aspects of autumn. These Vermont Maple Melt & Pour Soaps celebrate the changing foliage with plenty of color. Yellow, orange and red soap is layered into each cavity. Then, the soaps are dusted with mica to really help them pop. The mica will wash off after the first use, but as you continue to wash the layers of colors are revealed.
They are scented with Vermont Maple Fragrance Oil. It features notes of maple, wood, vanilla and coffee for a complex and comforting scent. It does discolor slightly, so don’t forget the Vanilla Color Stabilizer! The Vermont Maple Fragrance Oil is part of the limited edition Autumn Frost Fragrance Collection. It features four new fall and winter fragrance oils, and is only available until September 30th. Don’t wait – you save $10 when buying the kit rather than buying the fragrance oils separately. See the kit here.
What You’ll Need:
Guest Leaves Mold
10 oz. Clear Melt and Pour Soap Base
0.2 oz. Vermont Maple Fragrance Oil
0.2 oz. Vanilla Color Stabilizer
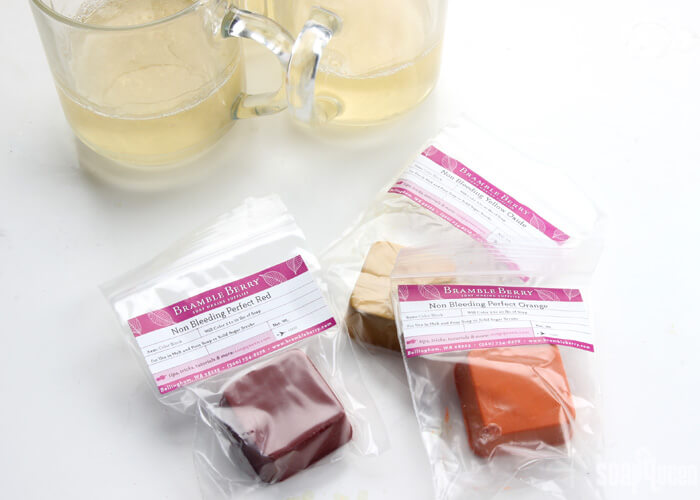
Shimmer Sparkle Gold Color Block
Perfect Red Color Block
Perfect Orange Color Block
Yellow Oxide Color Block
99% Isopropyl Alcohol in Spray Bottle
Evergreen Mica
Merlot Sparkle Mica

Click here to add everything you need for this project to your Bramble Berry shopping cart!
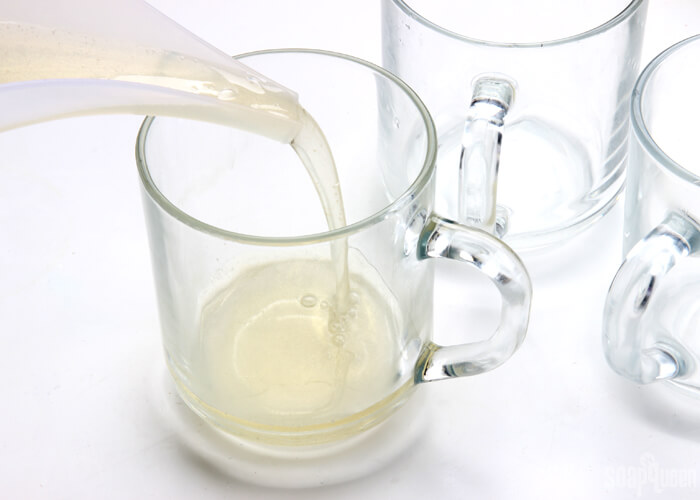
ONE: Chop and melt 10 ounces of Clear Melt and Pour Soap base in the microwave using 15-20 second bursts. Once completely melted, add shavings of the Shimmer Sparkle Gold Color Block. This gives the soap just a bit of extra shimmer. Mix in the Vermont Maple Fragrance Oil and Vanilla Color Stabilizer.
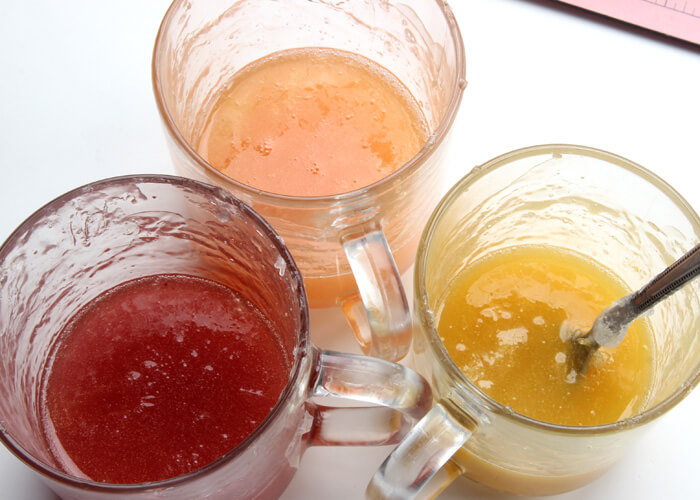
 TWO: Split the soap evenly between three small containers.
 THREE: Add shavings of the Perfect Red Color Block, Perfect Orange Color Block and Yellow Oxide Color Block to the separate containers. Continue adding shavings until you’re happy with the shades. If need be, reheat the soap in the microwave using 5 second bursts to help the color blocks melt. Be careful to not overheat and burn the soap; patience is key. =)
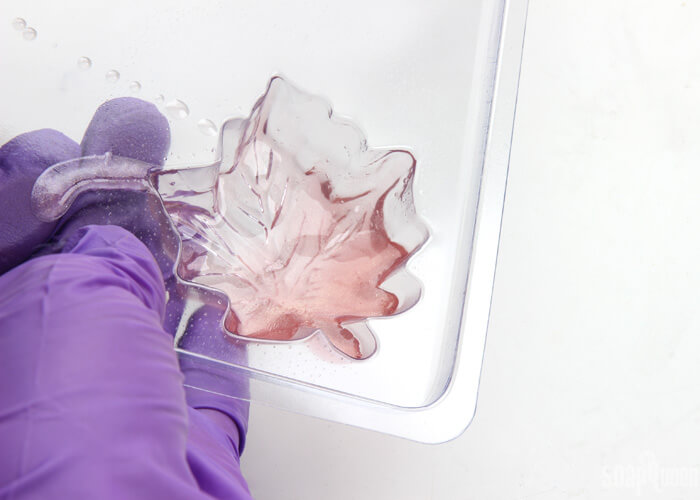
 FOUR: Pour a small amount of the red soap into each cavity, and move the mold around to disperse the red soap in the corners and side of the mold. Continue moving the mold and soap until it cools and hardens. Then, pour a little more red soap into each cavity, concentrating the color on the outside edges. Spritz with alcohol to disperse any bubbles, and allow to cool and harden.
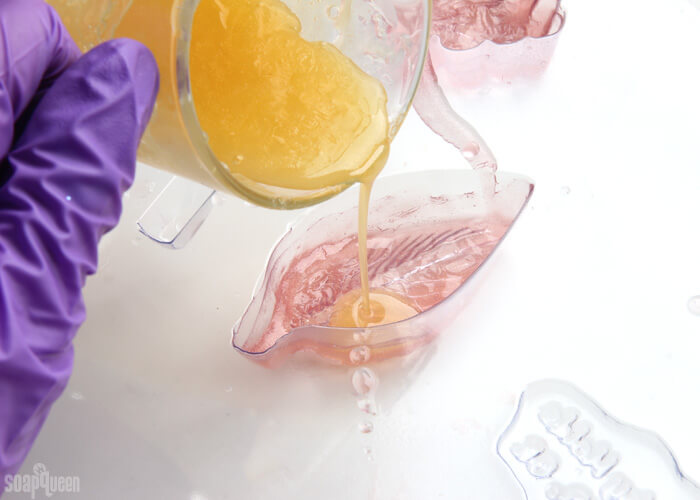
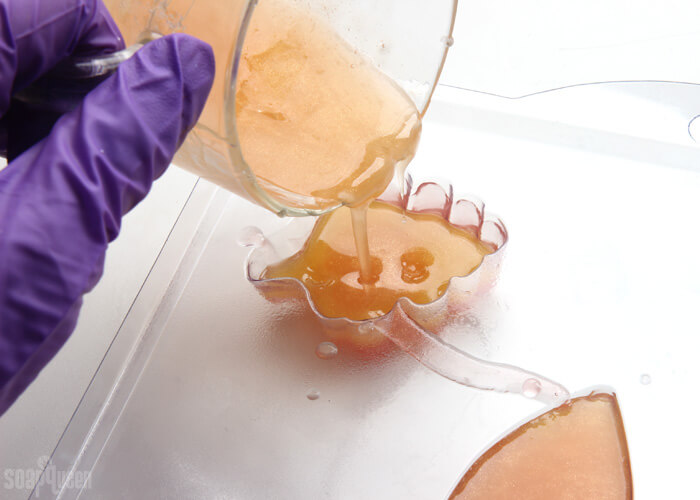
 FIVE: Reheat the yellow and orange soap if necessary using 3-5 second bursts. Because you’re heating such a small amount of soap it’s easy to burn, so short bursts are key. Wait until the soap has reached 125-130 ° F. Then, spritz with 99% isopropyl alcohol to help the layers adhere and begin pouring the yellow and orange soap into the molds, layering and swirling the colors. Spritz with alcohol to get rid of bubbles, and allow the soap to fully cool and harden. If you have some soap leftover, reheat and pour into an extra mold.
SIX: Remove from the molds by pressing the back of the soap firmly with your palm. If it’s having trouble releasing, place the mold in the freezer for about 5-10 minutes and try again. Don’t leave the soap in the freezer too long, or it can cause glycerin dew. Once removed, dust the soap with Evergreen Mica and Merlot Sparkle Mica to give the soaps extra dimension and sparkle. This step is optional, but it really makes the bars pop! The sparkle will wash off after one use.

Vermont Maple Melt & Pour Soap DIY
Ingredients
- Guest Leaves Mold
- 10 oz. Clear Melt and Pour Soap Base
- 0.2 oz. Vermont Maple Fragrance Oil
- 0.2 oz. Vanilla Color Stabilizer
- Shimmer Sparkle Gold Color Block
- Perfect Red Color Block
- Perfect Orange Color Block
- Yellow Oxide Color Block
- 99 % Isopropyl Alcohol in Spray Bottle
- Evergeen Mica
- Merlot Sparkle Mica
Instructions
- Chop and melt 10 ounces of Clear Melt and Pour Soap base in the microwave using 15-20 second bursts. Once completely melted, add shavings of the Shimmer Sparkle Gold Color Block. This gives the soap just a bit of extra shimmer. Mix in the Vermont Maple Fragrance Oil, and Vanilla Color Stabilizer.
- Split the soap evenly between three small containers.
- Add shavings of the Perfect Red Color Block, Perfect Orange Color Block and Yellow Oxide Color Block to the separate containers. Continue adding shavings until you're happy with the shades. If need be, reheat the soap in the microwave using 5 second bursts to help the color blocks melt. Be careful to not overheat and burn the soap; patience is key. =)
- Pour a small amount of the red soap into each cavity, and move the mold around to disperse the red soap in the corners and side of the mold. Continue moving the mold and soap until it cools and hardens. Then, pour a little more red soap into each cavity, concentrating the color on the outside edges. Spritz with alcohol to disperse any bubbles, and allow to cool and harden.
- Reheat the yellow and orange soap if necessary using 3-5 second bursts. Because you're heating such a small amount of soap it's easy to burn, so short bursts are key. Wait until the soap has reached 125-130 ° F. Then, spritz with 99% isopropyl alcohol to help the layers adhere and begin pouring the yellow and orange soap into the molds, layering and swirling the colors. Spritz with alcohol to get rid of bubbles, and allow the soap to fully cool and harden. If you have some soap leftover, reheat and pour into an extra mold.
- Remove the soap from the molds by pressing the back of the soap firmly with your palm. If it’s having trouble releasing, place the mold in the freezer for about 5-10 minutes and try again. Don’t leave the soap in the freezer too long, or it can cause glycerin dew. Once removed, dust the soap with Evergreen Mica and Merlot Sparkle Mica to give the soaps extra dimension and sparkle. This step is optional, but it really makes the bars pop! The sparkle will wash off after one use.