Making cold process soap for the first time can be intimidating. To make the process as easy as possible, we designed the Natural Soap Kit for Beginners with the first-time soaper in mind. The kit comes in three color and fragrance options (orange, lavender and lemongrass) and includes 100% pure essential oils, botanicals, lye, soaping oils, a reusable mold and safety gear. All you really need to provide is distilled water, soaping containers and a stick blender. Plus, it ships for free to anywhere in the lower 48 United States! It’s the perfect gift for that crafty person in your life.
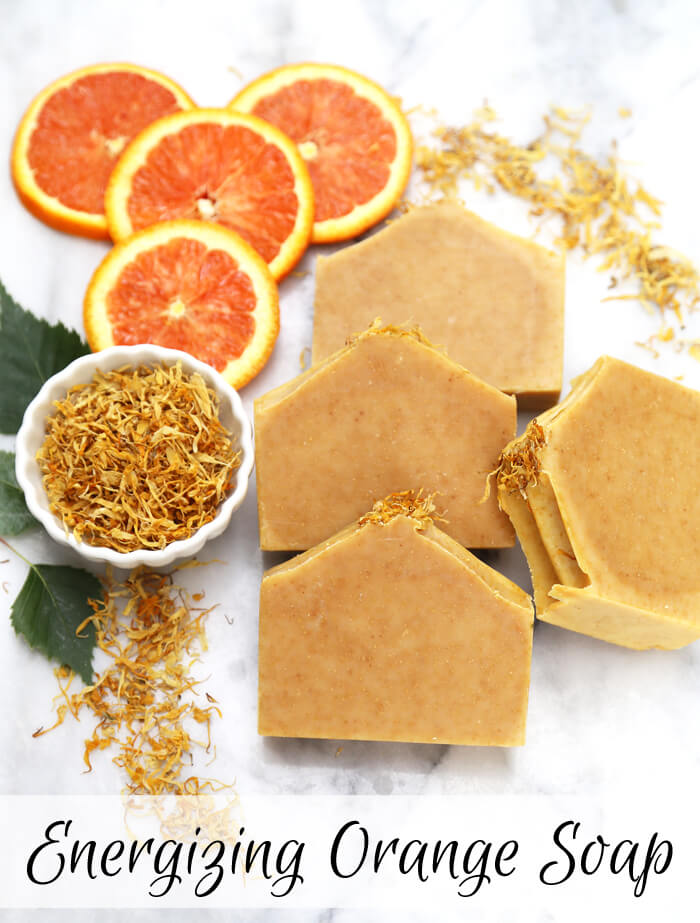
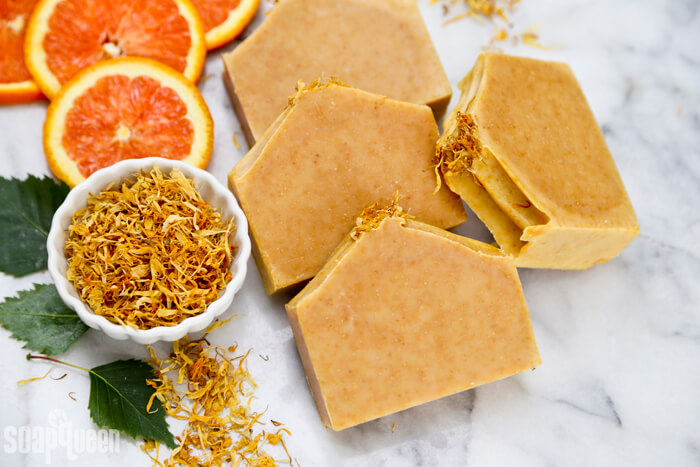
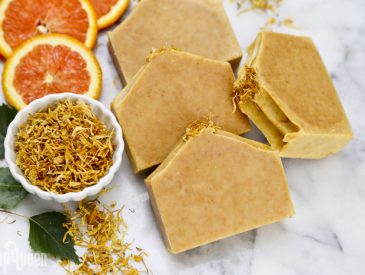
This Energizing Orange soap may be my favorite of the three Natural Soap Kit for Beginners color and fragrance options. The soap is scented with 10X Orange Essential Oil, which gives the bars a bright orange color. Orange peel powder adds extra color and a touch of exfoliation. Marigold petals are added to the top for a finishing touch. The bars smell amazing, and look so bright and cheery. I have yet to meet somebody who didn’t enjoy orange soap. =)
Part of what makes this project so easy is that it requires a nice thick trace. The orange peel powder can be added directly to the soaping oils prior to adding the lye, or it can be added at trace and stick blended. To create the texture on top, continue to stick blend until you achieve a texture of thick pudding. You really don’t need to worry about stick blending this project too much!
Soap Recipe:
Most of the items below (everything but the water!) are supplied in the Natural Beginner Soap Kit. See all contents of the kit here.
10″ Silicone Loaf Mold
33 oz. Lots of Lather Quick Mix
10 oz. Distilled Water
4.7 oz. Sodium Hydroxide Lye
2 tsp. Sodium Lactate
1.7 oz. 10X Orange Essential Oil
3 tsp. Orange Peel Powder
Marigold Petals
99% Isopropyl Alcohol in Spray Bottle

Click here to add everything you need for this project to your Bramble Berry shopping cart and get *free shipping* on this kit!
If you’ve never made cold process soap before, stop here! I highly recommend checking out our FREE four part SoapQueen.tv series on Cold Process Soapmaking, especially the episode on lye safety. And if you’d rather do some reading, Bramble Berry carries a wide range of books on the topic, including my newest book, Pure Soapmaking. You can also checkout the digital downloads for that instant gratification factor.
SAFETY FIRST: Suit up for safe handling practices! That means goggles, gloves and long sleeves. Make sure kids, pets, and other distractions and tripping hazards are out of the house or don’t have access to your soaping space. Always soap in a well-ventilated area.
ESSENTIAL OIL PREP: In a glass fragrance oil safe container, measure 1.7 ounces of 10X Orange Essential Oil. Set aside.
LYE PREP: In a durable, heat-safe, non-metal container, measure out 4.7 ounces of sodium hydroxide lye flakes. In a separate durable, heat-safe, non-metal container, measure out 10 ounces of room temperature distilled water. Slowly and carefully add the lye to the water and gently stir until the lye has fully dissolved. Do not add the water to th?”e lye. As you stir, the mixture will emit fumes; do not breathe them in. The lye mixture will heat to about 180-190 ° F. Label the container “DANGER: LYE” and place in a safe space to cool until about 120-130 ° F. This takes about an hour.
OIL PREP: While the lye solution cools, prep the oils. Fully melt the entire bag of Lots of Lather Quick Mix in the microwave or in a double boiler until there are no chunks or cloudiness. If melting the oils in a double boiler, do not let the bag touch the sides or bottom of the pot, or the plastic bag can melt. Once the oils are completely melted, give the bag a good shake. Measure 33 oz. of oils into a large, non-aluminum bowl capable of holding at least 50 ounces. Set aside.
The ingredients are now prepped! Check the temperature of your lye solution and oils. To soap, the oils and lye should be 110-130 ° F. If you took off your safety goggles and gloves, place them back on. Once your oils and lye are in that temperature range, carefully add 2 teaspoons of sodium lactate to the lye solution and use a spoon to gently stir in. Wash off spoon immediately. Now, let’s soap!
ONE: Slowly and carefully add the lye solution to the oils. Pulse the stick blender on and off to begin emulsifying the oils and lye together. Continue to pulse the stick blender for 15-20 seconds and then use it to stir the mixture.
NOTE: In the instructions for the Natural Beginner Soap Kit, the orange peel powder is added directly to the soaping oils prior to adding lye. Adding the orange peel powder to the oils “disperses” it, which avoids clumps. I forgot to do that in this batch (whoops!) and added the orange peel powder later at trace. Either way works just fine!
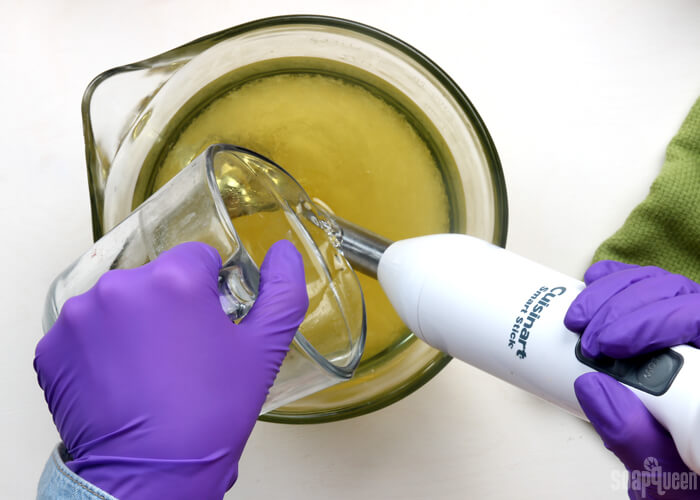
Once you start blending, the mixture will begin to look creamy. After about 1 minute of blending and stirring, the oils and lye will be combined and the soap will be the texture of thin pudding. This is thin trace!
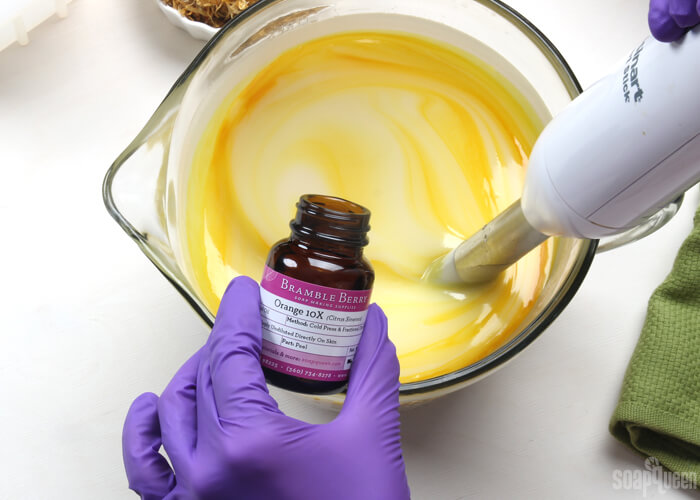
TWO: Add the 10X Orange Essential Oil into the soap. Use the stick blender to completely blend in the essential oil.
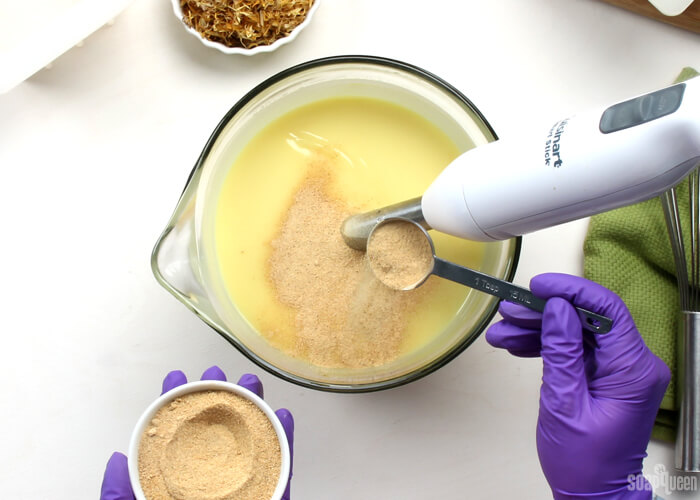
THREE: Add the orange peel powder and stick blend to fully incorporate until there are no clumps.
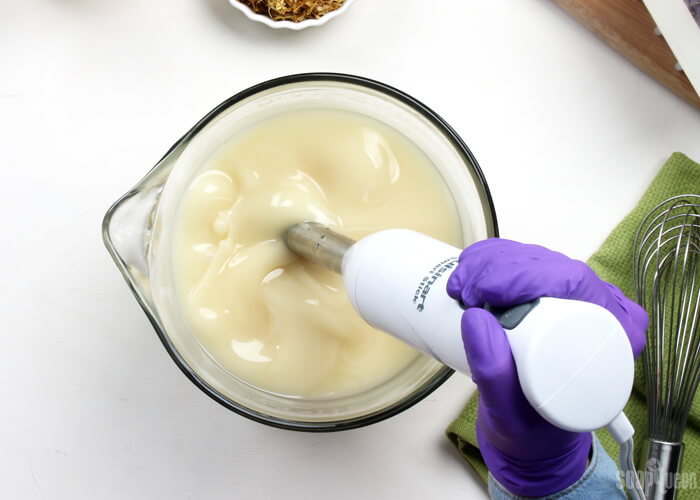
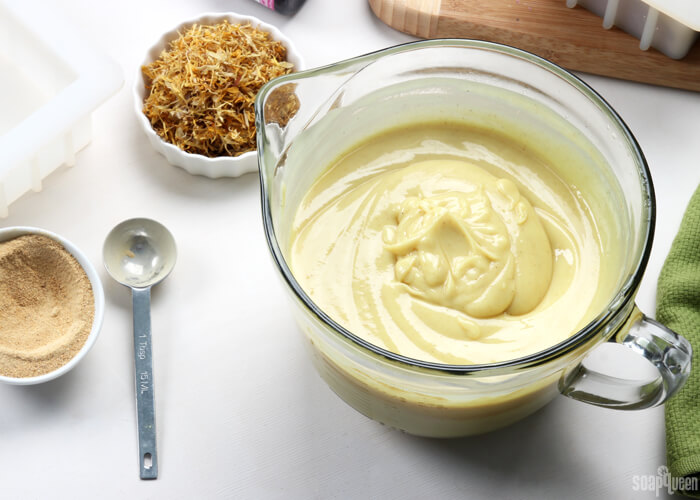
FOUR: At this point, the soap batter will have thickened slightly. As you continue to stick blend, it will become thicker. Continue to stick blend the soap batter until it is the texture of thick pudding and is able to form peaks.
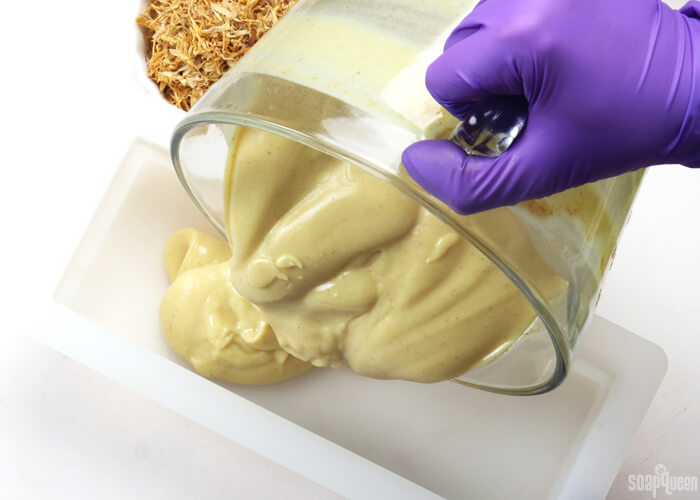
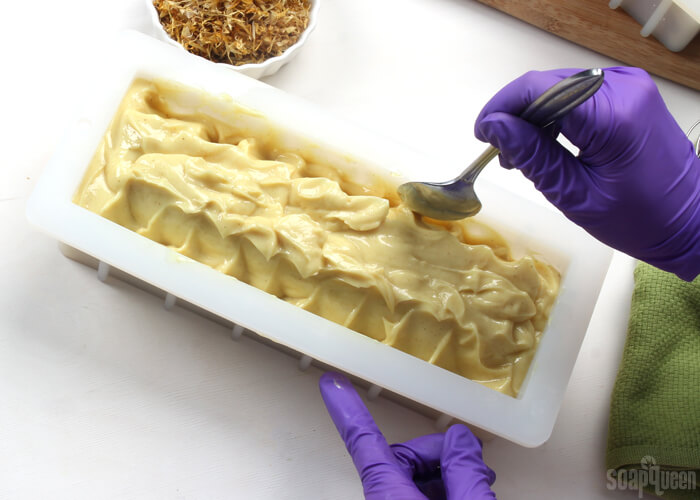
FIVE: Once the soap has thickened, pour the batter into the 10” Silicone Loaf Mold. Tap the mold firmly on the counter to release bubbles. Use a spoon to mound the soap in the center of the mold, forming a peak in the center. If the soap is not holding its shape, allow the soap to sit in the mold for 2-3 minutes, then continue mounding in the center. There is no right or wrong way to create texture on the top of soap, have fun with it!
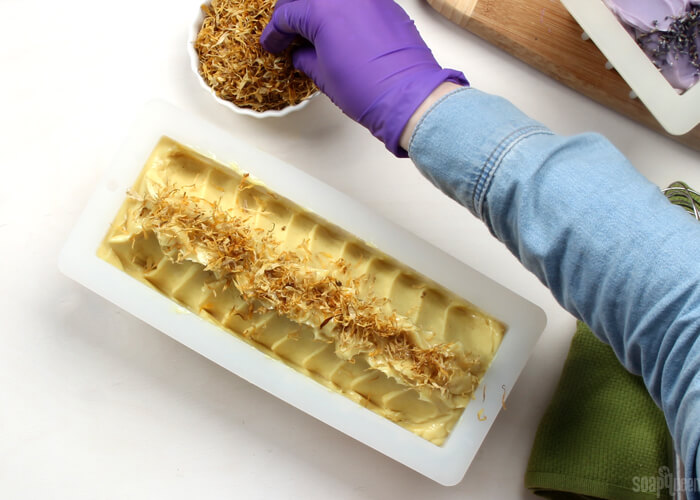
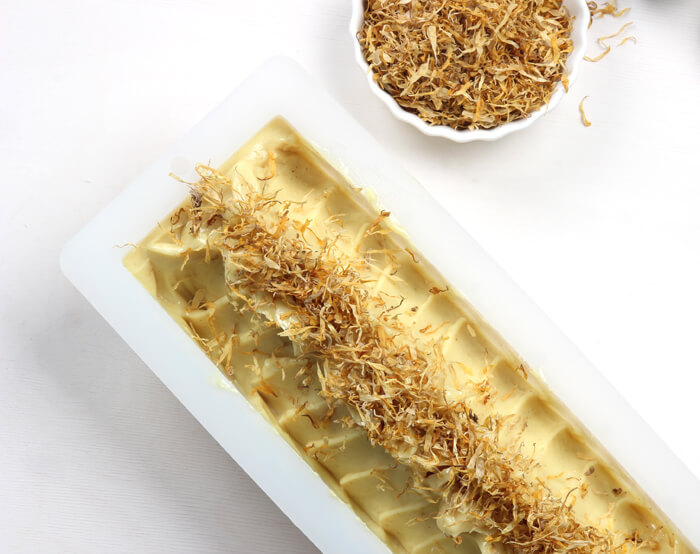
SIX: Once you’re happy with the top of the soap, sprinkle marigold petals on the top of the soap. Spritz the top of the soap with 99% isopropyl alcohol.
SEVEN: The soap needs to sit and harden in the mold for 2-3 days. It can be hard to wait, but it’s worth it! After two days, pull the sides of the mold away from the soap. If it releases easily, pull the other two sides away from the soap and gently press from the bottom to release the airlock. Gently and carefully, remove the soap and place on a cutting board. If the sides of the mold do not easily release, give the soap another day to harden in the mold.
Using a sharp, non-serrated knife, cut the soap into bars. To prevent the marigold petals from creating drag marks, lay the soap on its side and cut the bars. Once the loaf is cut into bars, they need to cure for 4-6 weeks. During this time water evaporates from the bar, which creates a firmer and longer lasting bar of soap. Enjoy!

Natural Orange Cold Process Soap Tutorial
Ingredients
- 10 ″ Silicone Loaf Mold
- 33 oz. Lots of Lather Quick Mix
- 10 oz. Distilled Water
- 4.7 oz. Sodium Hydroxide Lye
- 2 tsp. Sodium Lactate
- 1.7 oz. 10X Orange Essential Oil
- 3 tsp. Orange Peel Powder
- Marigold Petals
- 99 % Isopropyl Alcohol in Spray Bottle
Instructions
If you’ve never made Cold Process soap before, stop here! I highly recommend checking out our FREE four part SoapQueen.tv series on Cold Process Soapmaking, especially the episode on lye safety. And if you’d rather do some reading, Bramble Berry carries a wide range of books on the topic, including my newest book, Pure Soapmaking. You can also checkout the digital downloads for that instant gratification factor.
SAFETY FIRST: Suit up for safe handling practices! That means goggles, gloves and long sleeves. Make sure kids, pets, and other distractions and tripping hazards are out of the house or don’t have access to your soaping space. Always soap in a well-ventilated area.
- In a durable, heat-safe, non-metal container, measure out 4.7 ounces of sodium hydroxide lye flakes. In a separate durable, heat-safe, non-metal container, measure out 10 ounces of room temperature distilled water. Slowly and carefully add the lye to the water and gently stir until the lye has fully dissolved. Do not add the water to the lye. As you stir, the mixture will emit fumes; do not breathe them in. The lye mixture will heat to about 180-190 ° F. Label the container “DANGER: LYE” and place in a safe space to cool until about 120-130 ° F. This takes about an hour.
- While the lye solution cools, prep the oils. Fully melt the entire bag of Lots of Lather Quick Mix in the microwave or in a double boiler until there are no chunks or cloudiness. If melting the oils in a double boiler, do not let the bag touch the sides or bottom of the pot, or the plastic bag can melt. Once the oils are completely melted, give the bag a good shake. Measure 33 oz. of oils into a large, non-aluminum bowl capable of holding at least 50 ounces. Set aside.
- Measure 1.7 ounces of the 10X Orange Essential Oil into a glass, fragrance oil safe container. Set aside.
- The ingredients are now prepped! Check the temperature of your lye solution and oils. To soap, the oils and lye should be 110-130 ° F. If you took off your safety goggles and gloves, place them back on. Once your oils and lye are in that temperature range, carefully add 2 teaspoons of sodium lactate to the lye solution and use a spoon to gently stir in. Wash off spoon immediately. Now, let’s soap!
- Slowly and carefully add the lye solution to the oils. Pulse the stick blender on and off to begin emulsifying the oils and lye together. Continue to pulse the stick blender for 15-20 seconds and then use it to stir the mixture. Once you start blending, the mixture will begin to look creamy. After about 1 minute of blending and stirring, the oils and lye will be combined and the soap will be the texture of thin pudding. This is thin trace!
- Add the 10X Orange Essential Oil into the soap. Use the stick blender to completely blend in the essential oil.
- Add the orange peel powder and stick blend to fully incorporate until there are no clumps.
- At this point, the soap batter will have thickened slightly. As you continue to stick blend, it will become thicker. Continue to stick blend the soap batter until it is the texture of thick pudding and is able to form peaks.
- Once the soap has thickened, pour the batter into the 10” Silicone Loaf Mold. Tap the mold firmly on the counter to release bubbles. Use a spoon to mound the soap in the center of the mold, forming a peak in the center. If the soap is not holding its shape, allow the soap to sit in the mold for 2-3 minutes, then continue mounding in the center. There is no right or wrong way to create texture on the top of soap, have fun with it!
- Once you’re happy with the top of the soap, sprinkle marigold petals on the top of the soap. Spritz the top of the soap with 99% isopropyl alcohol.
- The soap needs to sit and harden in the mold for 2-3 days. It can be hard to wait, but it’s worth it! After two days, pull the sides of the mold away from the soap. If it releases easily, pull the other two sides away from the soap and gently press from the bottom to release the airlock. Gently and carefully, remove the soap and place on a cutting board. If the sides of the mold do not easily release, give the soap another day to harden in the mold.
- Using a sharp, non-serrated knife, cut the soap into bars. To prevent the marigold petals from creating drag marks, lay the soap on its side and cut the bars. Once the loaf is cut into bars, they need to cure for 4-6 weeks. During this time water evaporates from the bar, which creates a firmer and longer lasting bar of soap. Enjoy!